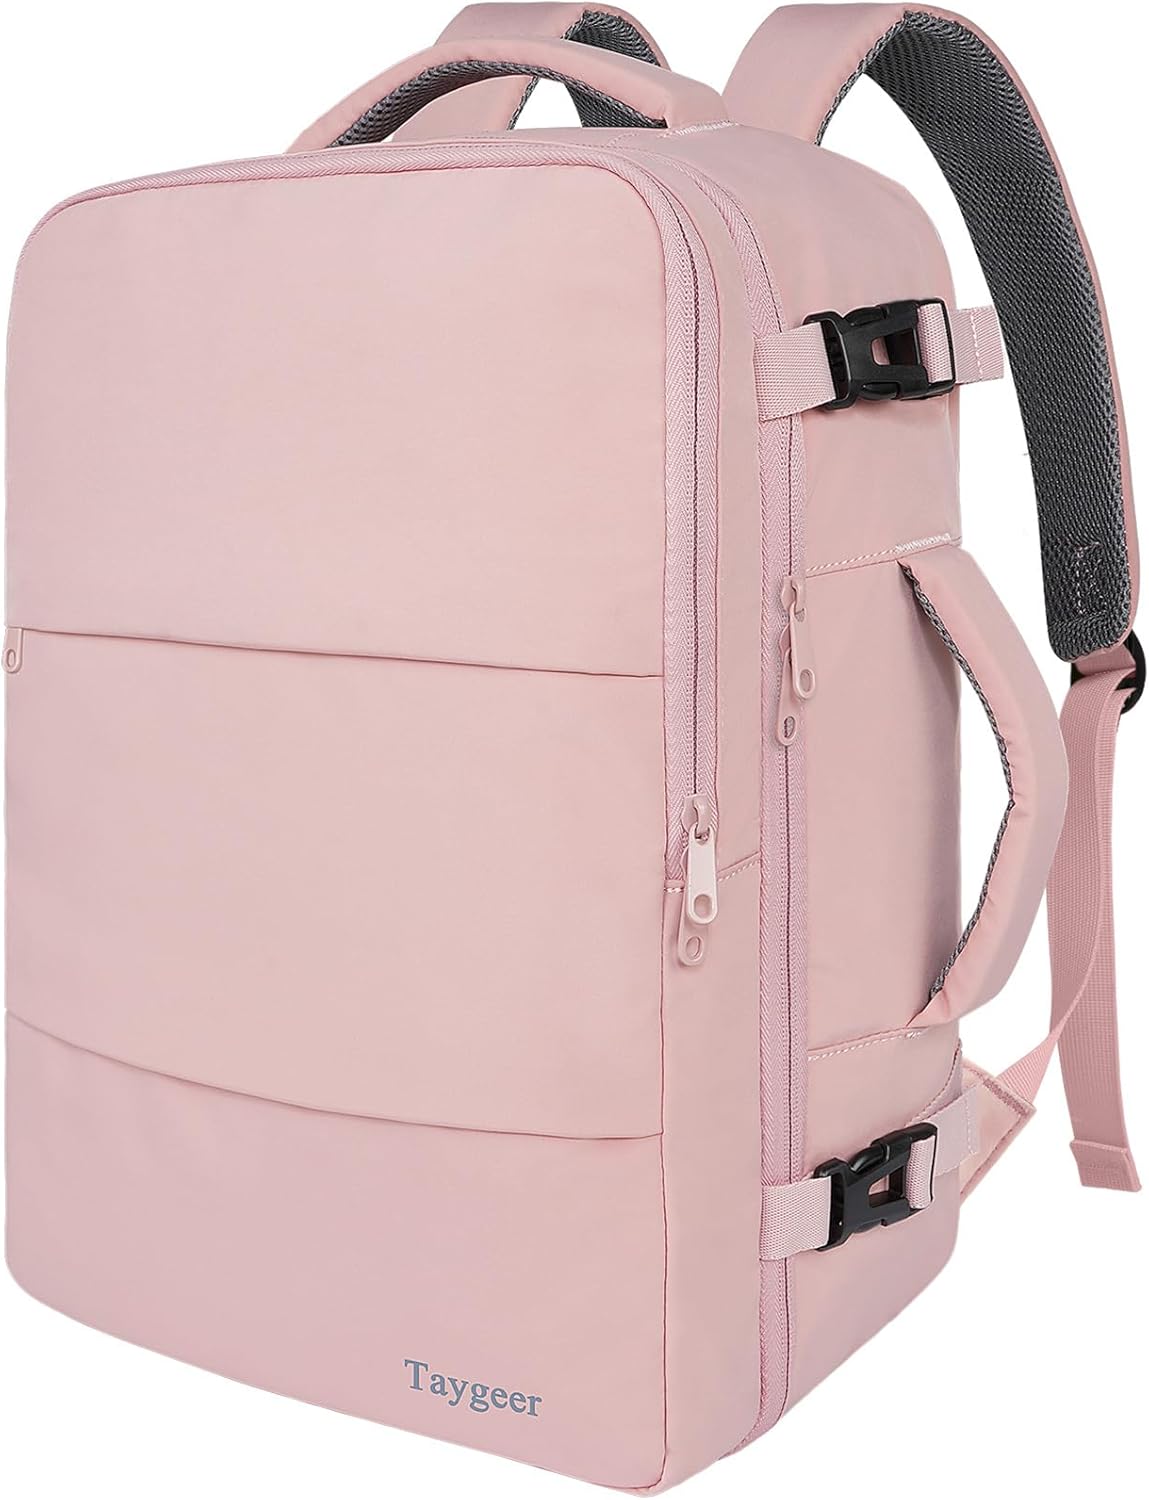
Last Updated on July 30, 2026 by Caleb Warren
Packing a laptop backpack for travel is easier when every item has a purpose and a safe place. The goal is to protect your computer, keep airport-screening items easy to reach, balance the load, and avoid carrying duplicates. A careful setup also helps you respond quickly if an airline asks you to gate-check your bag.
Quick Answer
Place your laptop in a padded sleeve inside a dedicated compartment, pack chargers in a small tech pouch, and keep documents in a protected pocket. Put heavy items close to your back, leave screening items easy to reach, carry power banks in the cabin, and check your airline’s bag limits before leaving.
Key Takeaways
- Choose a backpack whose laptop compartment matches your computer’s actual width, depth, and thickness.
- Keep the laptop against your back and place other heavy items close to the backpack’s center.
- Use one tech pouch for chargers, cables, adapters, storage drives, and small accessories.
- Pack the laptop and liquids so they are easy to remove when checkpoint instructions require it.
- Power banks and spare lithium batteries must remain in the aircraft cabin and cannot stay in a gate-checked bag.
- Check the baggage rules of every airline operating your trip because carry-on and personal-item limits vary.
At a Glance
| Time Required | 15–25 minutes |
| Difficulty | Easy |
| Tools Needed | Laptop sleeve, tech pouch, cable ties, document pouch, and optional packing cubes |
| Cost | $0 with supplies you already own; about $10–$40 for optional organizers |
Disclosure: As an Amazon Associate I earn from qualifying purchases. Some links on this page are affiliate links, at no extra cost to you.
Check Your Trip and Make a Packing List
Before placing anything in your backpack, decide how the bag will be used. It may be your personal item, your main carry-on, or a smaller work bag placed inside another piece of luggage. This choice affects how much clothing, food, and personal gear you can add after packing the laptop.
Check the size, weight, and bag-count rules for every airline operating your trip. The U.S. Department of Transportation notes that there is no single federal carry-on size standard. A backpack accepted on one airline or aircraft may be too large or heavy on another.
There is no universal U.S. carry-on size. Measure the loaded backpack and check the operating airline’s current rules before each trip.
Lay out your equipment before packing. A typical list may include:
- Laptop and protective sleeve
- Laptop charger
- Phone charger and charging cable
- Power bank, if needed
- Headphones or earbuds
- Travel adapter for the destination
- Mouse, USB drive, or external storage
- Passport, identification, tickets, and itinerary
- Medication and essential personal items
- Empty water bottle and solid snacks
Remove duplicate cables, full-size containers, and accessories you are unlikely to use. Fewer loose items make the backpack easier to screen, carry, and repack.
Choosing the Right Laptop Backpack

Choose a laptop backpack with a dedicated padded compartment that fits your computer’s actual measurements. A “15-inch” label usually refers to screen size and does not guarantee that every 15-inch laptop will fit. Compare the compartment’s internal width, height, and depth with the laptop or sleeve.
A suspended or false-bottom compartment provides extra protection because the computer does not rest directly on the floor when you set the bag down. The compartment should hold the laptop firmly without bending it or pressing hard against its corners.
For a soft backpack, practical materials include high-denier polyester, nylon, or ballistic nylon with reinforced seams. Coated fabric, covered zippers, and a rain flap improve weather resistance, but do not assume the entire bag is waterproof. Use a protective sleeve, dry pouch, or rain cover when heavy rain is possible.
Comfort also matters. Look for padded shoulder straps, a breathable back panel, and an adjustable sternum strap. A luggage pass-through can help when you are also pulling a suitcase. Load lifters and a hip belt are useful on larger or heavier travel packs.
Note: Water-resistant fabric can handle light moisture, but water may still enter through zippers, seams, or an open bottle. Keep the laptop in a separate padded sleeve even when the backpack is advertised as weather-resistant.
Organizing Your Laptop and Accessories

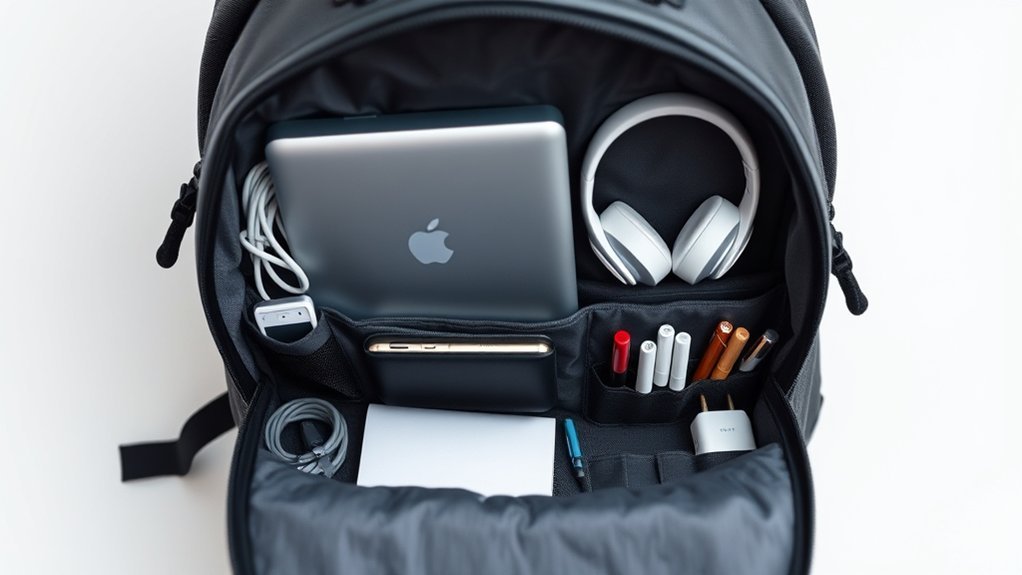
Place the laptop in a padded sleeve, then slide it into the dedicated compartment with the screen facing the padded back panel. Keep pens, keys, plugs, metal adapters, and other hard objects out of this compartment so they cannot press against or scratch the computer.
Position the laptop and other heavy items close to your back. This keeps the load nearer your center of gravity and reduces the backward pull on your shoulders. Lighter and softer items, such as a sweater or travel blanket, can sit farther from your back.
Use separate storage zones:
- Laptop compartment: Laptop and, if space permits without pressure, a flat tablet or document folder.
- Tech pouch: Chargers, cables, adapters, USB drives, and small electronics.
- Quick-access pocket: Boarding pass, headphones, phone cable, and other items needed during the trip.
- Protected document pocket: Passport, identification, insurance details, and reservations.
- Side pocket: An empty water bottle that cannot leak onto the laptop.
Do not place a full bottle, open drink, damp umbrella, or liquid container in the same compartment as the laptop. Keep liquids upright in a separate pocket or sealed pouch.
Pack Your Laptop Backpack in the Right Order
- Empty and inspect the backpack. Remove old receipts, loose coins, forgotten batteries, and items from earlier trips.
- Pack the laptop first. Let it cool, shut it down when appropriate, place it in its sleeve, and secure it in the laptop compartment.
- Add heavy accessories near your back. Place the charger, power bank, and dense tech pouch near the center of the bag rather than at the outer edge.
- Add clothing or packing cubes. Use soft items to fill gaps without pressing against the laptop screen.
- Store documents in a protected pocket. Keep them reachable without placing them in an exposed outer pocket.
- Add comfort items and snacks. Place lightweight items near the top and keep food away from electronics.
- Prepare the screening zone. Make the laptop and liquids bag easy to remove if checkpoint instructions require it.
- Test the load. Close every zipper, lift the bag, adjust the straps, and walk around for several minutes.
- Make a gate-check plan. Know which items must be removed if the airline takes the backpack at the gate.
Pro Tip: Place your passport, medication, phone, power bank, charging cable, and other must-keep items in one small pouch. You can remove the pouch quickly if an airline unexpectedly gate-checks your backpack.
Packing Chargers and Cables
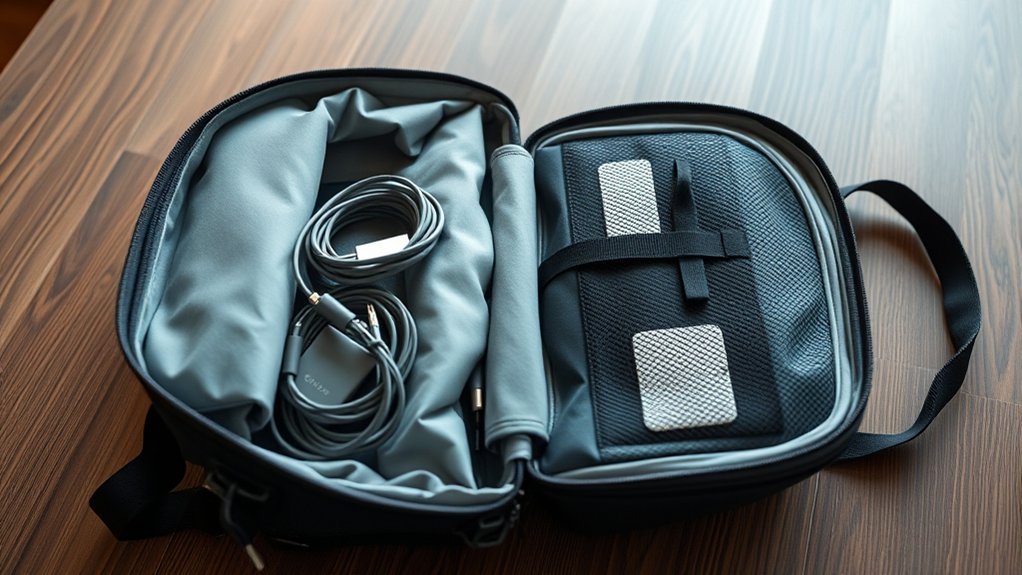
Pack chargers and cables in one dedicated tech pouch instead of scattering them among several pockets. This keeps plugs away from the laptop and makes it easier to confirm that you have everything before leaving a hotel, airport lounge, or workspace.
Organize With Cable Ties
Coil each cable loosely and secure it with a reusable hook-and-loop tie. Avoid sharp bends near the connector because repeated stress can damage the cable. Do not wrap a cable tightly around its charger or power adapter.
Pack the shortest cable that comfortably reaches the outlets you expect to use. A longer cable may still be useful when hotel or airport outlets are in awkward locations, so choose based on the trip rather than length alone.
Use Pouches for Storage
A padded or structured tech pouch protects chargers, power banks, adapters, and storage drives from pressure. Choose one that opens wide enough to show its contents without unloading the entire pouch.
Group accessories by purpose. For example, place work equipment in one section and phone or entertainment accessories in another. Keep memory cards and USB drives in a small zippered pocket so they cannot fall out when the pouch opens.
Label Each Charger Clearly
Labels help when several chargers look alike or when people are sharing outlets. Use a small tag or piece of durable tape to identify each charger by device or owner. Color coding can make identification even faster.
| Device Type | Example Label Color |
|---|---|
| Laptop Charger | Blue |
| Phone Charger | Green |
| Tablet Charger | Yellow |
Consider packing one spare cable that can charge your most important device. For international travel, check the input rating printed on each charger and bring the correct plug adapter. A plug adapter changes the plug shape; it does not automatically convert electrical voltage.
Follow Power Bank and Battery Rules
Portable chargers are useful during long travel days, but lithium batteries require special care. The Federal Aviation Administration’s PackSafe guidance states that spare lithium batteries and power banks must be carried in the aircraft cabin. They cannot remain in checked baggage.
Warning: Remove every power bank and spare lithium battery before a backpack is gate-checked. Protect exposed battery terminals from contact with metal, and do not fly with a battery that is damaged, swollen, overheating, leaking, smoking, or subject to a safety recall.
- Most personal lithium-ion batteries rated at no more than 100 watt-hours are permitted under the general FAA limit.
- Batteries rated from 101 to 160 watt-hours normally require airline approval, and no more than two larger spare batteries are generally permitted.
- Lithium-ion batteries over 160 watt-hours are not permitted on passenger aircraft.
- Airlines may apply stricter limits on power-bank capacity or quantity.
- Keep batteries protected from crushing, punctures, water, and accidental activation.
The watt-hour rating is often printed as “Wh” on the power bank or battery. When only voltage and amp-hours are shown, watt-hours can be calculated by multiplying volts by amp-hours. Check the airline’s current battery policy before traveling, especially on an international itinerary.
Storing Important Documents
Designate one secure compartment for your passport, identification, itinerary, travel insurance, and other important papers. It should be easy for you to reach but difficult for someone standing behind you to open unnoticed.
Place documents in a waterproof pouch or protective sleeve. Organize them in the order you expect to use them, such as identification first, boarding documents second, and lodging or transportation details afterward.
Keep digital copies of critical documents in encrypted or access-controlled storage. Protect the account with a strong password and multifactor authentication. Avoid leaving unprotected passport scans in a shared photo folder or on a public computer.
A small travel wallet can keep papers together, but do not overload it with every card and document you own. Carry only what the trip requires, and store backup payment methods separately when practical.
Prepare for Airport Security
Pack the laptop near the opening of its compartment so it can be removed without disturbing the rest of the bag. The TSA screening process may require travelers in standard lanes to remove laptops and other electronics larger than a phone and place them separately for X-ray screening.
TSA PreCheck travelers can often leave laptops and compliant liquids in their bags, but checkpoint equipment and officer instructions can vary. Always follow the signs and directions at the specific lane you enter.
Keep your compliant liquids bag where it can be removed quickly. Under the TSA 3-1-1 liquids rule, ordinary carry-on liquids, gels, creams, aerosols, and pastes are generally limited to containers of 3.4 ounces or 100 milliliters inside one quart-sized bag. Medical and other listed exceptions may follow different procedures.
Note: TSA guidance applies to U.S. checkpoints. Other countries may use different screening procedures, liquid limits, or battery rules. Check the departure airport and operating airline before an international trip.
Adding Comfort Items
After packing the laptop, chargers, and documents, use the remaining space for comfort items. A lightweight travel blanket or shawl can provide warmth without adding much bulk. A small neck pillow may improve rest, but it can take up valuable bag space. Attach it outside the backpack only when the airline permits attached items.
Noise-canceling headphones or compact earbuds can reduce distractions. Store them in a protective case rather than pressing them against the laptop. Keep the device you expect to use during the trip in a quick-access pocket.
A book or e-reader can provide entertainment during delays. Place heavier books close to your back, and avoid stacking a rigid book directly against the laptop screen.
Do not pack a laptop immediately after demanding use if it feels hot. Allow it to cool, close active programs, and shut it down before leaving it tightly enclosed for a long period. Never operate the computer while its cooling vents are blocked inside the backpack.
Keeping Snacks and Hydration Handy
Carry an empty refillable water bottle through the airport checkpoint and fill it afterward. Store it in an external pocket or another area separated from the laptop. Confirm that the cap is secure before placing a filled bottle near electronics.
Pack compact solid snacks such as nuts, crackers, protein bars, or dried fruit. The TSA generally permits solid food in carry-on baggage, although officers may ask travelers to separate food that obstructs the X-ray image.
Liquid and gel foods are treated differently. Yogurt, dips, sauces, nut butter, and similar foods may be subject to the 3.4-ounce liquid limit. Place snacks in resealable bags or rigid containers so crumbs, grease, and spills cannot reach the laptop.
Single-serve electrolyte powder may be convenient, but keep powders in labeled packaging. Larger quantities may receive additional screening. Do not place unmarked powders in a loose plastic bag.
Tips for Efficient Packing and Travel
Prioritize Essential Items
Carry the items you would struggle to replace during the trip: laptop, medication, identification, essential documents, chargers, and work files. Remove accessories that serve the same purpose and choose one charging setup that supports several devices when possible.
Use multifunctional clothing that can be layered if the laptop backpack is also carrying clothes. Keep one lightweight layer near the top for cold aircraft cabins or buses.
Use Packing Cubes
Packing cubes can separate clothing from electronics and prevent loose fabric from filling every pocket. Use smaller cubes that fit the backpack’s shape rather than forcing a suitcase-sized cube into the main compartment.
Do not compress a cube until it becomes a hard block that presses against the laptop. Leave enough room for the backpack to close without bending the computer or putting strain on the zipper.
Organize Electronics Efficiently
Keep the laptop in its dedicated compartment and consolidate the remaining electronics in one or two pouches. Store fragile storage drives or cameras in padded cases. Keep liquids, food, and sharp objects in separate zones.
Download important files before leaving and confirm that you can access them without an internet connection. Back up irreplaceable work to a secure second location. Lock the laptop with a strong password or biometric sign-in and enable device-location or remote-lock features when supported.
Balance and Adjust the Backpack
After packing, lift the backpack by its handle and check whether it leans sharply to one side. Move dense items toward the center and remove anything that is not necessary.
Loosen the shoulder straps before putting the backpack on, then tighten them evenly until the bag sits close to your back. Fasten the sternum strap if the backpack has one. The bag should not hang low or swing while you walk.
If your shoulders hurt after a few minutes, reduce the load rather than tightening the straps until they dig into your body. A second small bag may not solve the problem if your airline limits the number of cabin items.
Protect Your Laptop From Damage and Theft
Keep the backpack within your control in airports, stations, cafés, and shared transportation. Place it between your feet or under the seat in front of you instead of hanging it over a chair where someone can reach an outer pocket.
Lockable zipper pulls can slow casual opening, but they do not make a fabric backpack theft-proof. Do not rely on a small lock as the main protection for an expensive laptop. Use discreet luggage, avoid displaying valuable equipment unnecessarily, and keep the bag with you.
Do not place the backpack under heavy luggage or force it into a crowded overhead bin. If the bag must go overhead, position it so another passenger’s suitcase is not likely to crush the laptop compartment.
Before leaving a seat, hotel room, workspace, or vehicle, use a simple touch check:
- Laptop
- Phone
- Passport or identification
- Wallet
- Tech pouch
- Power bank
- Water bottle
Final Laptop Backpack Checklist
- The loaded backpack meets the airline’s current size, weight, and bag-count rules.
- The laptop fits without pressure and is protected by padding.
- The laptop is cool and securely shut down when it will remain packed for a long period.
- Plugs, keys, pens, and hard objects cannot press against the computer.
- Chargers and cables are organized in a tech pouch.
- Power-bank capacity is within the airline’s limits.
- Power banks and spare batteries are in the cabin, not checked baggage.
- Battery terminals are protected from short circuits.
- Liquids are sealed, compliant, and separated from electronics.
- The water bottle is empty before entering the checkpoint.
- Documents are protected but easy to reach.
- The laptop and liquids bag can be removed for screening.
- Heavy items are close to your back and centered.
- The backpack is comfortable during a short test walk.
- A small must-keep pouch is ready in case of gate checking.
Troubleshooting Common Packing Problems
The Backpack Will Not Close
Do not force the zipper over the laptop. Remove duplicate clothing, bulky packaging, full-size toiletries, or low-priority accessories. Move soft items around the laptop compartment without creating pressure on the screen.
The Backpack Feels Too Heavy
Weigh the bag and compare it with the airline’s limit. Remove extra chargers, books, shoes, and liquids first. Move dense items closer to your back and tighten the straps evenly.
Security Screening Takes Too Long
Move the laptop and liquids bag to easier-to-reach positions. Remove loose cables, coins, and clutter that make the X-ray image harder to read. Follow the officer’s instructions rather than assuming every checkpoint uses the same process.
The Airline Wants to Gate-Check the Backpack
Remove the laptop when possible, along with the passport, medication, valuables, power bank, and all spare lithium batteries. Keep those items with you in the cabin. Confirm that the remaining bag is securely closed and identified.
Frequently Asked Questions
Can I bring my laptop backpack as a carry-on?
Usually, but acceptance depends on the airline’s size, weight, bag-count, fare, and aircraft rules. Measure the loaded backpack and check whether the airline classifies it as a personal item or full-size carry-on. Check every operating carrier when the itinerary includes more than one airline.
What size backpack is suitable for a 15-inch laptop?
Choose a compartment whose internal measurements exceed the laptop’s actual width, height, and thickness without leaving excessive movement. Do not rely only on a “15-inch” label because computers with the same screen size can have different body dimensions.
Do I have to remove my laptop at airport security?
At many standard U.S. screening lanes, laptops and electronics larger than a phone must be removed and placed separately. TSA PreCheck procedures and checkpoints using different scanning equipment may vary. Follow the signs and officer instructions at your lane.
How do I prevent my laptop from overheating during travel?
Allow the laptop to cool after heavy use, close active programs, and shut it down before leaving it tightly packed for a long time. Keep it out of direct sun, never operate it with blocked vents inside the backpack, and do not pack it beside a heat source.
Can I pack a power bank in my laptop backpack?
Yes, when it meets the airline’s capacity and quantity limits, but it must remain in the aircraft cabin. Remove it before the backpack is gate-checked. Protect it from damage and short circuits, and do not travel with a swollen, damaged, overheating, or recalled battery.
Are there security concerns with packing tech in my backpack?
Yes. Keep the backpack under your control, avoid exposed outer pockets for valuables, and do not leave it unattended. Lockable zippers can discourage casual access but are not a substitute for supervision, device passwords, backups, and remote-lock features.
What materials are best for a durable laptop backpack?
High-denier polyester, nylon, and ballistic nylon are common durable choices. Also check the seams, zipper quality, handle attachment, base reinforcement, and laptop padding. Coated fabric improves water resistance, but a separate sleeve or dry pouch provides better protection from leaks.
Conclusion
A well-packed laptop backpack protects your computer while keeping the items you need close at hand. Start with a properly fitted padded compartment, place heavy equipment near your back, organize chargers in one pouch, and isolate food and liquids from electronics.
Before flying, check your airline’s baggage limits and battery policy. Keep power banks, spare batteries, documents, medication, and valuables in the cabin, and arrange the bag so the laptop is easy to remove when screening instructions require it. A final test walk and checklist can catch most packing problems before you leave.
Sources
- Transportation Security Administration — Security Screening — backs laptop and large-electronics screening guidance.
- Transportation Security Administration — Liquids, Aerosols and Gels Rule — backs carry-on liquid limits.
- Transportation Security Administration — Food — backs solid-food and liquid-food screening guidance.
- Federal Aviation Administration — PackSafe: Lithium Batteries — backs power-bank, spare-battery, watt-hour, and gate-check rules.
- U.S. Department of Transportation — Tips on Avoiding Baggage Problems — backs airline-specific carry-on limits and advice to keep valuable or critical items in the cabin.