
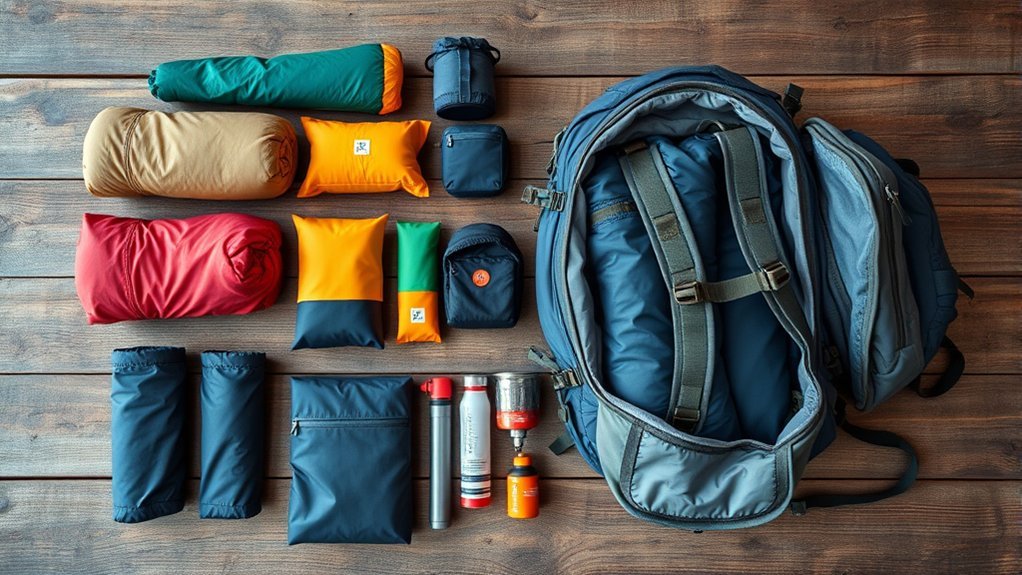
Last Updated on July 30, 2026 by Caleb Warren
Learning how to pack a backpack well can make a day hike or multi-day trip feel safer, steadier, and less tiring. The basic method is simple: keep soft camp gear low, dense items close to the middle of your back, and frequently used essentials within easy reach. Then tighten the load and test the fit before you leave.
Quick Answer
Pack soft, light camp items at the bottom; dense, heavy gear in the middle and close to your back; and trail essentials near the top or in pockets. Load a hydration reservoir first, balance both sides, tighten compression straps, and test the pack before leaving. Carry bear spray on your body, not inside the pack.
Key Takeaways
- Choose pack capacity by trip length, but prioritize torso fit and hip-belt comfort over the liter number alone.
- Put your sleeping bag and other soft camp items at the bottom, not heavy gear.
- Center dense items near your spine between your shoulder blades and hips.
- Keep rain gear, first aid, navigation, snacks, and water treatment easy to reach.
- Protect critical gear with a pack liner or dry bags, even when you use a rain cover.
- Check local rules for food storage, fires, human waste, and bear spray before every trip.
At a Glance
| Time Required | 15–25 minutes for a full backpacking load |
| Difficulty | Easy |
| Tools Needed | Backpack, gear checklist, stuff sacks or dry bags, and a scale if you want to track total weight |
| Cost | $0 when using gear you already own |
Disclosure: As an Amazon Associate I earn from qualifying purchases. Some links on this page are affiliate links, at no extra cost to you.
Understanding the Importance of Proper Packing
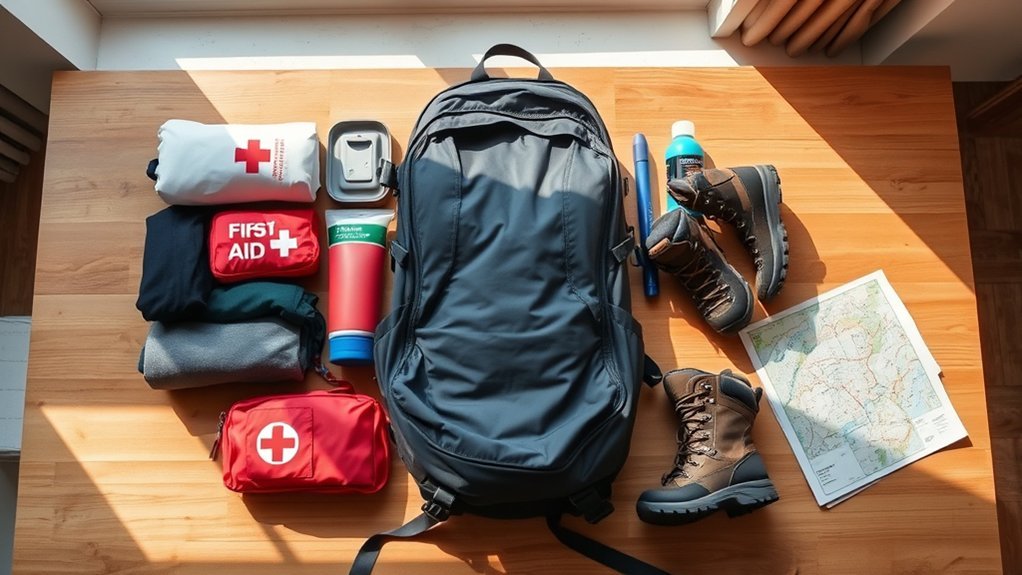
A well-packed backpack should feel balanced on your hips and stay close to your body instead of pulling backward or swaying from side to side. Good placement also makes it easier to reach safety gear without emptying the whole pack. The goal is not to create one perfect layout. It is to build a stable starting point that you can adjust for your body, pack design, terrain, and weather.
The most reliable system divides the pack into four areas:
- Bottom zone: soft, bulky items you will not need until camp.
- Core zone: dense and heavy items placed close to your back.
- Top zone: bulky trail items you may need during the day.
- Pockets and attachment points: small essentials and unusually long gear.
This zone method matches the guidance in REI’s backpack-loading guide. Fill empty spaces with soft clothing so the load becomes one compact unit, and keep the left and right sides as even as possible.
Pro Tip: Lay every item on the floor before packing. Group gear by sleep, shelter, cooking, clothing, water, safety, and hygiene. This makes duplicates and forgotten essentials easier to spot.
Selecting the Right Backpack for Your Needs

Backpack capacity depends on trip length, season, gear bulk, and how much group equipment you carry. Capacity is only part of the decision. A smaller pack that fits poorly can be more uncomfortable than a larger pack with the correct torso length and hip belt.
Backpack Size Matters
Use these ranges as starting points rather than strict rules. Efficient warm-weather packers may use less space, while winter trips, family trips, and trips with required bear canisters often need more.
| Trip Type | Typical Capacity | Best For |
|---|---|---|
| Day hike | About 20–30 liters | Layers, food, water, and the Ten Essentials |
| Weekend, 1–3 nights | About 30–50 liters | Compact warm-weather gear |
| Multi-day, 3–5 nights | About 50–80 liters | More food, clothing, or shared equipment |
| Extended or winter trip | About 70 liters or more | Bulky insulation, winter shelter, and extra supplies |
These ranges are consistent with REI’s backpack capacity and fit guide. Measure your torso rather than choosing a pack from your height alone, and try the pack with realistic weight inside it.
Features for Comfort
Look for a hip belt that wraps your hip bones, shoulder straps that follow your shoulders without gaps, and an adjustable or correctly sized torso. Load lifters, a sternum strap, compression straps, and a supportive frame can improve stability when the load is heavier. Pockets and panel access help with organization, but every zipper and feature adds some weight.
Also consider weather resistance, fabric strength, ventilation, hydration compatibility, and whether the pack has attachment points for the equipment you actually use. High-denier nylon and polyester are common durable materials, but fabric denier alone does not prove that the stitching, zippers, coating, or frame will last.
Fit the Pack Before Loading It
- Loosen the hip belt, shoulder straps, sternum strap, and load lifters.
- Add enough gear to give the pack a realistic shape and weight.
- Center the hip-belt padding over your hip bones and tighten it first.
- Tighten the shoulder straps until they sit comfortably without carrying all the weight.
- Snug the load lifters and sternum strap without restricting breathing.
- Walk, bend, and step up and down to check for gaps, rubbing, or bouncing.
Pack models adjust differently, so follow the manufacturer’s instructions. Osprey’s fitting guide provides a useful example of how to position the hip belt, shoulder harness, load lifters, and sternum strap.
Packing the Bottom: Creating a Comfortable Base

Place soft, bulky items that you will not need before camp at the bottom. A sleeping bag is the usual first item. A compact sleeping pad, sleep clothes, down booties, or camp shoes can fill the remaining space. These items create a soft base and help protect the pack when you set it down.
| Item | Why It Works Low in the Pack |
|---|---|
| Sleeping bag | Soft, compressible, and normally not needed until camp |
| Compact sleeping pad | Fills the base without creating a dense low weight |
| Sleep clothes | Stay grouped with sleep gear and fill gaps |
| Camp shoes or down booties | Lightweight items that are usually used only at camp |
Do not place your densest food, water, fuel, or cookware at the very bottom. A bottom-heavy pack can sag and pull away from your body. Protect a down sleeping bag with a waterproof stuff sack or pack liner because a wet down bag may lose much of its insulating performance.
Balancing Weight in the Middle Section
The core of the pack is the best place for dense gear that you will not need while walking. Keep the heaviest items close to your spine, generally between the top of your hips and your shoulder blades. This position reduces backward pull and keeps the center of gravity controlled.
Optimal Gear Placement
Typical core-zone items include a bear canister, main food bag, stove, cooking pot, and water reservoir. Put the reservoir in its sleeve first, before the rest of the pack makes the sleeve difficult to reach. Keep fuel upright, tightly closed, and separated from food.
- Place the densest item against the back panel rather than at the outer face of the pack.
- Keep hard edges from pressing into your back by wrapping them with clothing or tent fabric.
- Balance side-to-side weight, especially when using water bottles.
- Do not place a stove fuel bottle above food where a leak could contaminate it.
Weight Distribution Techniques
The best exact position can change with terrain. On ordinary trails, keep dense items centered and close to your back. On rough or off-trail terrain, a slightly lower center of gravity may feel steadier. Avoid extreme changes: heavy gear placed too high can make you feel top-heavy, while heavy gear placed too low can make the pack sag.
| Packing Technique | Benefit |
|---|---|
| Keep dense items close to the back | Reduces backward leverage |
| Balance left and right sides | Reduces leaning and uneven shoulder pressure |
| Fill gaps with soft gear | Limits movement and protects hard edges |
| Tighten compression straps | Pulls the load into a compact shape |
Securing Items Effectively
Once the core is loaded, press soft gear into open spaces around the dense items. Use internal straps if the pack has them, close all compression straps, and shake the pack gently. A loud rattle or a clear shift means something still needs to be tightened or padded.
- Bear canister or food storage system required for the destination
- Cook kit and stove
- Filled hydration reservoir in its dedicated sleeve
- Extra clothing used to cushion gaps
Note: Food-storage rules vary by park and wilderness area. Some destinations require an approved bear-resistant canister, while others allow different methods. Check the land manager’s current rules before packing.
Quick Access Essentials at the Top
Use the top zone for bulky items you may need during the hiking day. Good choices include a rain shell, insulated layer, first-aid kit, water filter, toilet kit, and a small bag of daytime food. These items should be reachable without removing the sleeping system or main food supply.
A tent may go near the top when storms are likely and you expect to pitch it quickly. That is an option, not a universal rule. Many hikers place the tent body, footprint, and rainfly around dense core items, while tent poles ride in a side pocket or approved external attachment. Keep wet tent fabric separate from dry insulation.
Utilizing External Pockets for Convenience
External pockets are for items you use often or need quickly. Their exact layout depends on the pack, but a practical setup is:
- Side pockets: water bottles, water filter, or tent poles.
- Hip-belt pockets: snacks, lip balm, sunscreen, phone, or a small navigation aid.
- Top lid: first-aid kit, headlamp, map, gloves, and other small safety items.
- Front shove-it pocket: rain gear, damp shelter fabric, or an extra layer.
- Tool loops: trekking poles, ice axe, or other equipment the pack was designed to hold.
Minimize loose items on the outside. They can snag branches, scrape rocks, swing off balance, or fall unnoticed. Do not hang a heavy water bottle or shoe from only one side unless the opposite side has similar weight.
Warning: In bear country, carry bear spray in a belt or chest holster where you can reach it immediately. The National Park Service advises hikers not to keep bear spray inside a backpack. Check destination rules because possession may be restricted in some parks.
Organizing Your Gear for Efficiency
Organize gear by both weight and timing. A light item needed in an emergency may deserve a more accessible spot than a heavier item used only at camp. Use a small number of color-coded or clearly labeled sacks rather than many tiny bags that are hard to identify.
| Location | Typical Items | Purpose |
|---|---|---|
| Bottom | Sleeping bag, sleep clothes, compact pad | Creates a soft base with camp-only gear |
| Middle, close to back | Food, bear canister, cookware, reservoir | Controls dense weight and pack balance |
| Top | Rainwear, warm layer, first aid, water treatment | Provides fast access during the day |
| External pockets | Water bottle, snacks, map, headlamp | Keeps small, frequent-use items reachable |
| On your body | Bear spray where required, whistle, critical medication | Allows immediate access |
Do not let organization add unnecessary bulk. One clothing sack, one sleep-system sack, one hygiene bag, and one small safety pouch are often easier to manage than a separate container for every item.
Tips for Securing and Minimizing Movement
A stable load behaves like one object rather than a pile of objects. Use these steps:
- Close every internal divider and compression strap.
- Fill empty spaces with clothing, shelter fabric, or other soft gear.
- Keep the load evenly balanced from side to side.
- Use the pack’s intended attachment points instead of improvised dangling straps.
- Secure strap ends so they do not whip in the wind or catch brush.
- Recheck the load after drinking water, eating food, or removing clothing.
If the pack leans, sways, or creates a pressure point, stop and fix it early. A two-minute adjustment is better than hiking for hours with an unstable load.
Protecting Your Pack and Gear From Rain
Most hiking backpacks are water-resistant, not fully waterproof. Seams, zippers, lid openings, and stretch pockets can allow water inside. A rain cover helps shield the exterior, but wind-driven rain and water running down the back panel can still reach the contents.
Use a pack liner or waterproof sacks for your sleeping bag, sleep clothes, electronics, medication, and other critical items. REI’s wet-weather backpacking guidance recommends added internal protection even when a rain cover is used. Keep wet shelter fabric in an outer pocket or separate bag so it does not soak dry clothing.
Packing Safety Essentials, Food, and Hygiene Gear
Your packing system should support emergency readiness, not just comfort. The National Park Service Ten Essentials include navigation, sun protection, extra clothing, illumination, first aid, fire supplies where permitted, repair tools, extra food, extra water or water treatment, and emergency shelter. Place each item where you can reach it when conditions change.
Store all food, trash, toiletries, and other scented items according to local wildlife rules. The National Park Service explains that requirements vary by destination and may include approved bear-resistant containers. Review the current rules for the exact park, forest, or wilderness area before leaving home.
Keep a toilet kit together and easy to reach. It may include a trowel, toilet paper or wipes, hand sanitizer, and sealable waste bags. Follow local regulations; some areas require all solid human waste to be packed out. Where catholes are allowed, Leave No Trace provides general disposal guidance, but destination-specific rules take priority.
Pack for the emergency you may face, not only for the ideal day you hope to have.
Personalizing Your Packing Strategy
Your best layout depends on your body, pack design, hiking style, and destination. A photographer may need quick camera access. A person managing a medical condition may need medication in a protected pocket. A winter traveler may prioritize gloves and insulation, while a desert hiker may devote more core space to water.
Use this table to fine-tune the system:
| Packing Tip | How to Apply It |
|---|---|
| Prioritize access | Put snacks, navigation, medication, and weather layers where you can reach them quickly. |
| Experiment with layout | Move dense items slightly until the pack feels stable without creating pressure points. |
| Organize by category | Group sleep, clothing, cooking, hygiene, and safety items in a few recognizable sacks. |
| Record what worked | After the trip, note items you never used, items you could not reach, and areas that felt unbalanced. |
How to Hoist and Adjust a Loaded Backpack
Do not yank a loaded pack from the ground by one shoulder strap. That can damage the harness and twist your body. Instead:
- Loosen the shoulder straps enough to put the pack on.
- Stand beside the back panel with your feet apart and knees bent.
- Use the haul loop to lift the pack onto one thigh.
- Slide one arm into a shoulder strap, then rotate the pack onto your back.
- Insert the other arm and stand upright without jerking.
- Tighten the hip belt first, then the shoulder straps, load lifters, and sternum strap.
Walk for several minutes with the finished load. If your shoulders carry most of the pressure, the hip belt may be too loose or the torso length may be wrong. If the pack pulls backward, move dense gear closer to your back and tighten the compression straps.
Final Checks Before Hitting the Trail
Complete one final check at home or at the trailhead. It is much easier to correct a bad fit, leaking reservoir, missing rain shell, or loose tent pole before you begin walking.
Verify Gear Organization
- Confirm that the sleeping system is dry and protected at the bottom.
- Check that the reservoir is full, sealed, and routed through the correct port.
- Make sure food, toiletries, and trash fit the required storage system.
- Secure trekking poles, tent poles, and other external equipment.
- Confirm that first aid, navigation, headlamp, and weather layers are easy to reach.
- Remove duplicate or nonessential items that add weight without serving the trip plan.
Check Weight Distribution
Put the pack on and tighten it in the correct order. Walk, turn, step over an object, and lean gently from side to side. The pack should stay close without a noticeable side shift. Check for hard objects pressing through the back panel and for a hip belt that slips below your hip bones.
Reassess during the hike. Water and food become lighter as you use them, wet gear may become heavier, and removed clothing can change the balance. Repack when the load starts to lean or bounce.
Confirm Accessibility of Essentials
- Water: reachable without unpacking the main compartment.
- First aid and headlamp: in a known top pocket or lid.
- Rain shell and warm layer: near the top or in the front pocket.
- Map, phone, and snacks: in hip-belt, shoulder, or top pockets.
- Bear spray where required: secured in an on-body holster, not inside the pack.
- Critical medication: protected, labeled, and immediately accessible.
Frequently Asked Questions
How do I choose the right size backpack for my trip?
Start with trip length and gear bulk. About 20–30 liters often works for a day hike, 30–50 liters for an efficient weekend load, 50–80 liters for many multi-day trips, and 70 liters or more for extended or winter trips. Fit matters more than capacity alone, so measure your torso and test the pack with weight.
What items should I avoid packing in my backpack?
Avoid unnecessary duplicates, heavy packaging, fragile containers, and gadgets that do not support the trip plan. Do not carry leaking fuel near food, and do not keep bear spray inside the pack while hiking in bear country. Check prohibited-item and food-storage rules for your destination.
How can I prevent my backpack from getting wet?
Use a rain cover to reduce exterior exposure and a pack liner or dry bags to protect critical contents. Put the sleeping bag, sleep clothes, electronics, medication, and paper navigation in waterproof protection. Keep wet shelter fabric separate from dry insulation.
What are the best materials for backpack durability?
High-denier nylon and polyester are common choices, but durability also depends on weave, coating, seam construction, zippers, buckles, and how the pack is used. Inspect high-wear areas and compare the manufacturer’s repair policy rather than judging the pack by fabric denier alone.
How can I pack my backpack for a multi-day hike?
Protect the sleeping system at the bottom, place food and cookware in the middle close to your back, and keep layers, first aid, water treatment, and daytime food near the top. Load the water reservoir first, follow local food-storage rules, tighten compression straps, and test the full load before the trip.
Where should a hydration reservoir go in a backpack?
Place it in the dedicated hydration sleeve, usually against the back panel in the core zone. Fill and install it before packing the main compartment because it can be difficult to slide a full reservoir into a tightly loaded pack. Check the cap and hose connection for leaks.
Conclusion
Pack soft camp gear low, dense gear close to the middle of your back, and trail essentials where you can reach them. Protect critical items from water, follow local safety and food-storage rules, and keep bear spray on your body when it is required. After tightening the pack, walk with it and make small adjustments. A stable, accessible load lets you spend less time fighting your gear and more time enjoying the trail.
Sources
- REI Co-op: How to Pack and Hoist a Backpack — backpack zones, load placement, external attachments, and hoisting technique
- REI Co-op: How to Choose a Backpack — capacity ranges, fit, frame types, and pack features
- National Park Service: Ten Essentials — emergency and safety equipment for outdoor trips
- National Park Service: Staying Safe in Bear Country — bear-spray access, use, and destination restrictions
- Osprey: Backpack Sizing and Fit — torso, hip-belt, harness, and strap adjustment
- Leave No Trace: Dispose of Waste Properly — general backcountry waste guidance

