
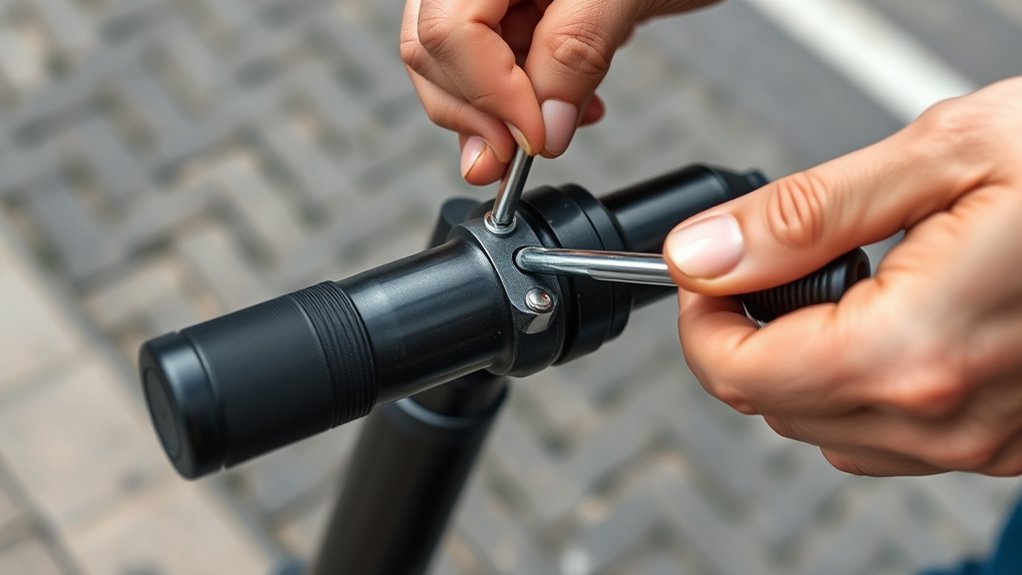
Last Updated on September 10, 2026 by Daniel Globe
To loosen an electric scooter clamp safely, first identify the exact folding mechanism and scooter model. Some stuck latches release when gentle forward pressure on the stem removes tension, but adjustment screws, tool sizes, tightening directions, safety locks, and torque values vary by model. Never loosen an unidentified bolt just because the latch feels tight. Inspect the joint, check the manufacturer’s manual and current recalls, and do not ride if the folding mechanism has cracks, damage, or persistent play.
Quick Answer
A stuck scooter folding clamp may release when you support the stem and gently push it in the direction that unloads the latch while opening the safety lock and lever. If adjustment is needed, use only the fastener, tool size, direction, and torque specified for your exact scooter model. Never guess at the tension screw.
Key Takeaways
- Identify your scooter model and folding mechanism before touching any adjustment bolt.
- Check the owner’s manual, service instructions, and any active recall before riding or adjusting the joint.
- Gentle stem pressure can release binding on some designs, but excessive force can damage the latch or create a pinch injury.
- Do not assume every scooter uses a 3 mm or 4 mm Allen key or a counter-clockwise tension adjustment.
- After any work, confirm the main latch and every secondary safety lock are engaged and that the stem has no abnormal play.
At a Glance
| Time Required | About 5–15 minutes for inspection and a simple model-approved adjustment |
| Difficulty | Easy for inspection; model-specific adjustment may be moderate or service-only |
| Tools Needed | Owner’s manual, correct metric hex keys or other specified tools, soft brush or cloth, and a torque wrench if the manufacturer gives a torque value |
| Cost | Usually $0 with existing tools; worn or recalled hardware may require manufacturer service or replacement parts |
Warning: A folding joint is a steering-safety component. Stop riding if you find a crack, bent or worn latch, damaged weld, stripped fastener, missing safety pin, abnormal movement, or an unresolved recall. Do not loosen an unidentified fastener simply to make the lever easier to operate.
Disclosure: As an Amazon Associate I earn from qualifying purchases. Some links on this page are affiliate links, at no extra cost to you.
Loosen a Stuck Scooter Clamp Fast
To loosen a stuck scooter clamp, turn the scooter off and place it on a stable, level surface. Support the stem with one hand so it cannot fall when the latch releases. Disengage any safety button, locking ring, strap, pin, or secondary latch exactly as the manufacturer instructs.
On some folding mechanisms, the latch binds because the upright stem is loading the locking surfaces. In that situation, gently pushing the handlebars or stem in the direction specified by the manufacturer can relieve the pressure while you open the latch. Do not jerk the handlebars or force a lever that is bending, twisting, or refusing to move.
If the latch remains tight, inspect it rather than immediately reaching for an Allen wrench. Dirt, a partially engaged safety lock, misalignment, damaged hardware, excessive adjustment, or a model-specific mechanical problem can all make a folding mechanism difficult to release.
Pro Tip: Take a clear photo of the folding joint before making any approved adjustment. It gives you a reference for the original fastener positions, safety-lock orientation, and hardware arrangement.
Check Which Scooter Clamp You Have
Before you adjust anything, identify what you are actually calling the electric scooter clamp. Electric scooters use several different locking systems, and the correct procedure depends on the hardware fitted to your model.
- Folding latch or quick-release lever: Locks the main stem in the riding position.
- Secondary safety button, hook, ring, strap, or pin: Helps prevent the primary latch from releasing accidentally.
- Sliding collar: Moves over part of the folding joint on some designs.
- Handlebar clamp: Secures the handlebar at the top of the stem and is different from the folding joint at the deck.
- Adjustment bolt or tension adjuster: Exists on some folding mechanisms but not all.
Do not assume that a front-facing lever has a hidden 3 mm or 4 mm tension screw or that a sliding mechanism needs lubricant. For example, current Apollo folding-mechanism instructions show different tools and procedures for different scooter models. Segway models also use several combinations of quick-release levers, folding latches, and safety buttons.
Check Your Exact Model and Manual
Find the scooter’s model name and, if needed, its serial number. Then open the owner’s manual or manufacturer service guide and locate the folding or unfolding section. The manual should show how the latch opens, which safety device must be disengaged, whether the mechanism is user-adjustable, and any required torque specification.
Note: Tool size is model-specific. Current Apollo instructions, for example, call for 3 mm and 6 mm Allen keys on one mechanism and two 5 mm Allen keys plus additional tools on others. A generic “3 mm or 4 mm” rule is not reliable.
Check for Recalls Before Adjusting the Joint
A folding mechanism that feels unusually tight, loose, or unstable may have a known safety issue. Check the manufacturer’s recall page and the U.S. Consumer Product Safety Commission micromobility information center before riding.
For example, CPSC announced a March 20, 2025 recall of Segway Ninebot Max G30P and G30LP scooters because the folding mechanism could fail and allow the stem or handlebars to fold during use. CPSC also announced an April 30, 2026 recall of Acer AES015 scooters involving a loose folding-area screw.
If your model is affected by a recall, follow the recall remedy instead of improvising an adjustment.
Locate the Scooter Clamp Tension Screw
Some scooters have a clamp tension screw or folding-mechanism adjuster, while others use completely different hardware. Do not remove covers, loosen bolts, or turn a fastener until your manual or manufacturer support information identifies it as the adjustment point.
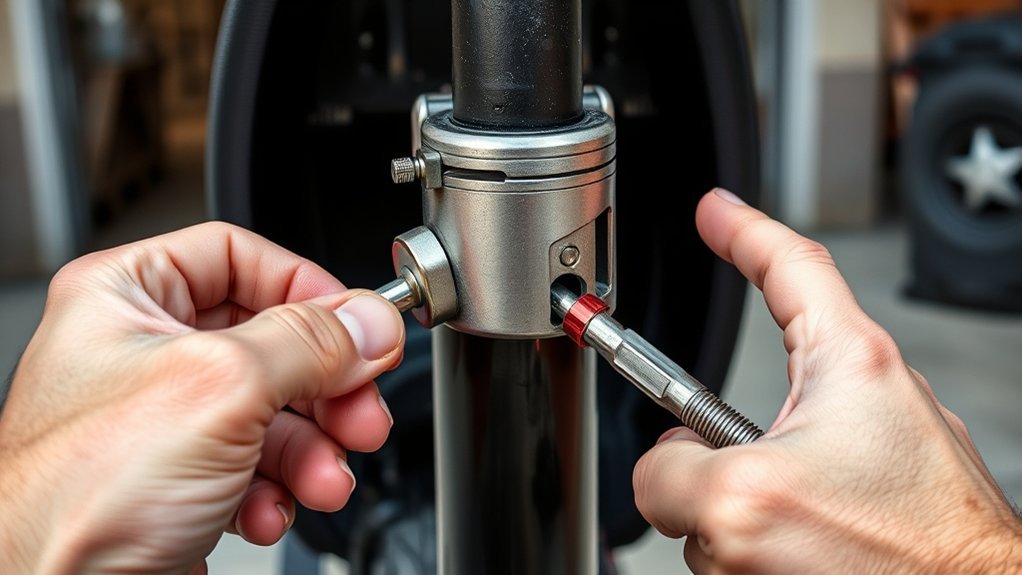
Find Tension Screw
If the manufacturer confirms that your scooter has a user-adjustable tension screw, compare the hardware with the diagram in the service instructions. The adjuster may be located in or near the hinge base, but its position, tool size, and adjustment direction vary.
- Expose only the parts the manufacturer says are serviceable.
- Confirm the exact adjustment fastener and required tool.
- Check whether nearby grub screws, locknuts, pins, or retaining clips must be loosened or left untouched.
- Record the original position before making a small adjustment.
- Never back a structural bolt out completely unless the service procedure specifically requires removal.
Some models need only a very small adjustment, while others require a different sequence. The goal is not simply to make the clamp easy to open; it must also lock the stem securely in the riding position.
Check Hinge Base
Inspect the hinge base where the folding stem meets the scooter frame. Look for dirt, foreign objects, abnormal gaps, rubbing marks, deformation, missing hardware, stripped fastener heads, worn pins, or cracks.
Pay particular attention to welded areas and the contact surfaces around the locking mechanism. A cosmetic scratch is different from a crack or a part that is visibly shifting under light hand pressure. If you are unsure whether damage is structural, do not ride until the scooter has been inspected by the manufacturer or a qualified technician.
If the manual gives a torque specification for folding-mechanism bolts, use a suitable torque wrench rather than estimating tightness by feel. For example, Segway publishes model-specific folding-mechanism torque values in some product manuals; those values should not be transferred to a different scooter.
Make Small Adjustments
If your manufacturer specifically permits folding-mechanism adjustment, make the smallest practical change and retest before continuing.
- Use the correct tool: The hex key or other tool should fit fully without play.
- Follow the specified direction: Do not assume counter-clockwise is always the correct loosening direction for the part you are adjusting.
- Move in small increments: Large changes can turn a stiff latch into an unsafe loose joint.
- Retest the latch: It should engage securely without excessive force.
- Stop if the stem develops play: Do not continue riding with movement at the folding joint.
Do not repeatedly loosen the mechanism every time it feels tight without finding the cause. Recurring stiffness can indicate dirt, wear, misalignment, damaged hardware, incorrect previous adjustment, or another service issue.
Loosen the Scooter Clamp in Small Turns
On a scooter whose manufacturer identifies a user-adjustable folding tension bolt, loosen the approved adjuster only in the small increments specified by that manufacturer. A quarter-turn is appropriate for some mechanisms, while others call for a smaller movement or a completely different process.
Quarter-Turn Adjustments
If your model’s instructions specifically call for quarter-turn or similar micro-adjustments, use that method rather than making full rotations.
- Mark or photograph the starting position.
- Make one small adjustment using the correct tool and direction.
- Close the folding mechanism completely.
- Engage the secondary safety device.
- Check for unwanted movement at the joint.
- Repeat only if the manufacturer’s procedure allows another adjustment.
Do not automatically lubricate the adjustment threads. Some fasteners depend on a specified torque, thread-locking compound, locking nut, or dry thread condition. Lubricant can change the relationship between applied torque and clamping force.
Check Clamp Tension
The correct clamp tension allows the folding mechanism to close and lock securely without abnormal force. A basic wobble check is useful, but it is only one part of the inspection.
With the scooter turned off and stationary, hold the front brake if appropriate for your model and gently load the handlebars forward, backward, and side to side. Watch the folding joint rather than just the grips. There should be no abnormal clicking, visible separation, or movement at the locked joint.
Then confirm:
- The primary latch is fully seated.
- The safety button, ring, hook, strap, or pin is engaged if your scooter has one.
- No fastener appears backed out or damaged.
- No crack, bent part, or damaged weld is visible.
- The stem is aligned correctly.
- Any manufacturer-specified torque check has been completed.
If the stem still moves after a permitted adjustment, stop riding and have the mechanism inspected.
Troubleshoot a Stubborn Scooter Clamp
If your scooter clamp will not release smoothly, work through the cause instead of applying more force.
- Stabilize the scooter: Turn it off, use the kickstand if stable, and support the stem so it cannot drop unexpectedly.
- Check every safety lock: A button, ring, strap, hook, pin, or collar may still be engaged.
- Relieve mechanical tension if your design calls for it: Some folding systems release more easily when the stem is pushed gently forward or otherwise unloaded.
- Brush away visible debris: Use a soft, dry brush or cloth around accessible surfaces.
- Check alignment: A latch that no longer lines up with its mating surface may need service rather than extra force.
- Check the manual for an approved adjuster: Use only the specified tool, direction, and procedure.
If the lever begins to bend, the pin will not seat, the mechanism remains seized, or the stem has abnormal play, stop. Seek professional or manufacturer-authorized help rather than forcing the joint.
If repeated problems are caused by worn or unsuitable hardware, use manufacturer-approved replacement parts. If the scooter’s folding design is not robust enough for your intended use, choosing a more suitable scooter can be safer than continually readjusting a problematic joint.
Know When Not to Ride
Do not ride the scooter if:
- The folding mechanism is subject to an unresolved safety recall.
- The main latch does not fully engage.
- A secondary safety lock is missing or will not engage.
- The stem moves at the folding joint after locking.
- You see a crack, damaged weld, bent latch, damaged pin, or stripped structural fastener.
- The mechanism unexpectedly releases during testing.
- The manufacturer specifies service or replacement rather than user adjustment.
Clean and Lubricate the Scooter Clamp
Once you have confirmed the mechanism is structurally sound, clean accessible areas with a soft, dry toothbrush or cloth to remove grit and dust. Avoid flooding the joint with water or cleaner. If you use a damp cloth on an exterior surface, follow the manufacturer’s cleaning guidance and dry the area thoroughly.
| Action | Result |
|---|---|
| Brush accessible hinge areas | Removes loose grit and debris |
| Inspect contact surfaces | Reveals wear, cracks, or abnormal rubbing |
| Apply approved lubricant only where specified | Reduces friction at approved lubrication points |
| Work the latch through several cycles | Confirms smooth engagement and release |
| Recheck fasteners and locks | Confirms nothing shifted during maintenance |
Dry PTFE or silicone products are sometimes used on mechanical pivots, but they are not automatically correct for every scooter or every part of a folding joint. Apply lubricant only if the manufacturer recommends it and only to the specified surface. Keep lubricant away from brake components and from locking or friction surfaces that the manual says should remain dry.
Likewise, do not add synthetic grease simply because the stem creaks. A creak can come from dry contact surfaces, movement, damaged hardware, loose fasteners, or structural wear. Identify the cause before lubricating it.
Test the Scooter Clamp for Safe Riding
Before riding, perform a complete folding-mechanism check rather than relying on a single safety wobble test. CPSC advises riders to check micromobility products for damage, including the handlebars and frame, and to follow the manufacturer’s directions before use.
- Cycle the mechanism: Fold and unfold it several times while supporting the stem.
- Check the main latch: Confirm it reaches the fully locked position.
- Engage the secondary lock: Confirm any safety button, ring, strap, hook, or pin is correctly seated.
- Check for play: Gently load the handlebars in several directions and watch the joint.
- Inspect the hardware: Look for cracks, deformation, abnormal rubbing, missing hardware, or backed-out fasteners.
- Confirm alignment: The stem and folding surfaces should sit as the manufacturer shows in the manual.
- Recheck model-specific torque: Do this if the service procedure specifies torque values.
A tight-feeling clamp does not by itself prove that the scooter is safe. Likewise, a smooth or quiet latch does not guarantee correct tension. The important signs are positive locking, correctly engaged safety hardware, no abnormal movement, and undamaged components.
If you hear grinding, clicking, or creaking after adjustment, stop and inspect the source before riding at speed. New noise combined with movement or visible damage requires service rather than more lubrication.
Frequently Asked Questions
How to Get a Scooter Clamp Off?
Turn the scooter off, stabilize it, disengage every safety lock, and follow the folding sequence in the manual. On some models, gently pushing the stem forward relieves pressure on the latch. If an adjustment is required, use only the manufacturer-identified fastener and tool. Do not force a bending lever or loosen unidentified bolts.
How to Loosen Suspension on E-Scooter?
Suspension adjustment is separate from the folding clamp. Some scooters have adjustable spring preload or damping, while others have no user adjustment. There is no universal 2 mm rule or counter-clockwise procedure. Check the manual for the correct preload collar, adjuster, tool, starting setting, and allowable adjustment range for your model.
How to Get Scooter Grips Off?
Grip removal depends on whether the grip is friction-fit, glued, clamped, or integrated with a throttle or control assembly. Check for a retaining screw or clamp first. For a simple non-electronic friction grip, a small amount of isopropyl alcohol under the edge may help release it. Avoid sharp prying tools, excessive heat, and liquids near throttles, switches, wiring, or displays.
What Is a Clamp on a Scooter?
“Clamp” can describe different parts of a scooter. A folding latch secures the lower stem joint in the riding position, while a handlebar clamp secures the handlebar higher on the stem. Some folding systems also use safety buttons, locking rings, pins, straps, collars, or hooks. Identifying the exact part matters before making an adjustment.
Why Is My Electric Scooter Folding Clamp So Tight?
Possible causes include normal stem load on the latch, an engaged safety lock, dirt, an overtightened model-specific adjuster, misalignment, corrosion, damaged hardware, or wear. Start with inspection and the manufacturer’s folding procedure rather than immediately loosening a bolt.
Can I Use WD-40 on an Electric Scooter Folding Clamp?
Do not treat WD-40 or any other spray as a universal fix. The correct lubricant and lubrication points depend on the mechanism. Some surfaces should remain dry, and lubricant must be kept away from brakes. Follow the scooter manufacturer’s maintenance instructions before applying anything to the folding joint.
Is It Safe to Ride With a Wobbly Scooter Stem?
No. Stop riding until the cause is identified and corrected. Stem movement can come from an incorrectly adjusted folding mechanism, loose fasteners, worn pins, damaged locking components, structural damage, or another defect. Confirm the repair using the manufacturer’s instructions before riding again.
How Tight Should an Electric Scooter Folding Latch Be?
It should lock positively and hold the stem without abnormal play while still operating as the manufacturer intends. There is no universal hand-force or torque value for the latch itself. Use the model-specific adjustment procedure and any published fastener torque specifications.
When Should I Take the Scooter to a Repair Shop?
Seek professional or manufacturer service if the latch remains seized, the stem still moves after an approved adjustment, a structural fastener is stripped, a pin or spring is damaged, the lever is bending, a crack or damaged weld is visible, or the service procedure requires disassembly you are not equipped to perform.
Sources
- U.S. Consumer Product Safety Commission — Micromobility Information Center — pre-ride inspection and manufacturer-guidance safety recommendations.
- CPSC — Segway Ninebot Max G30P/G30LP Recall — folding-mechanism failure and repair information.
- CPSC — Acer AES015 Electric Scooter Recall — folding-area screw hazard and repair guidance.
- Apollo — How to Adjust the Folding Mechanism — demonstrates model-specific tools, adjusters, and testing procedures.
- Segway F3 Series User Manual — manufacturer folding, quick-release, and latch procedure.
- Segway Ninebot F65 Product Manual — example of model-specific folding-mechanism inspection and fastener torque guidance.
Conclusion
After loosening or servicing an electric scooter clamp, do not rush the final check. Confirm that the main folding latch closes completely, every secondary safety lock is engaged, the stem has no abnormal play, and the hardware shows no cracks, bending, or damage. If the mechanism is still too tight, loose, noisy, or difficult to lock, stop rather than repeatedly turning an unidentified screw.
A dirty joint may need cleaning, and some manufacturer-approved pivots may need lubrication, but stiffness can also signal wear, misalignment, structural damage, or a recall issue. The safest approach is simple: match every adjustment to the exact scooter model, make only approved small changes, and test the entire locking system before riding.
