
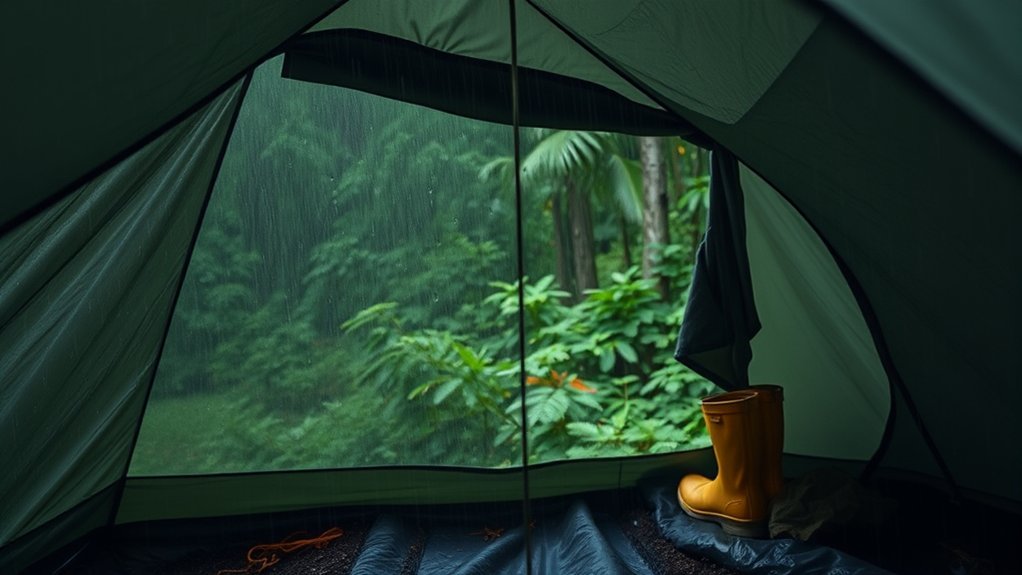
Last Updated on July 30, 2026 by Mason Reed
Heavy rain does not automatically mean a wet night, but your tent must be prepared, pitched, and managed correctly. The most important steps are choosing naturally drained ground, installing the rainfly exactly as designed, keeping the fly taut, protecting the floor, maintaining ventilation, and moving wet clothing and gear out of the sleeping area.
Quick Answer
To keep a tent dry in heavy rain, camp above surrounding low spots, avoid drainage channels, tuck the footprint fully beneath the floor, attach the complete rainfly, and tension every designated guyline. Keep vents open, store wet gear outside the sleeping area, and repair damaged seams or coatings before the trip.
Key Takeaways
- Check the forecast and inspect the tent before leaving home.
- Choose naturally drained ground outside dry washes, gullies, stream channels, and low depressions.
- Use the full rainfly, stake the tent securely, and keep the fly separated from the inner tent.
- Keep the footprint under the tent rather than letting its edges collect rain.
- Ventilate the tent and keep wet clothing, boots, and packs outside the sleeping area.
- Pack a wet tent only when necessary for transport, then unpack and dry it as soon as practical.
At a Glance
| Time Required | About 20–40 minutes for inspection and a careful pitch |
| Difficulty | Easy to moderate |
| Tools Needed | Tent, full rainfly, stakes, guylines, footprint, dry bags, absorbent cloth, and optional overhead tarp |
| Cost | Low to moderate; no additional purchase may be needed if you already have the rainfly, stakes, and footprint |
Disclosure: As an Amazon Associate I earn from qualifying purchases. Some links on this page are affiliate links, at no extra cost to you.
Prepare Before Heavy Rain
Wet-weather performance starts before you reach the campsite. Check the current forecast, thunderstorm risk, flood watches, and campground alerts. Do not rely only on the forecast for your exact campsite because heavy rain upstream can produce flooding even when little rain falls directly over you.
Pitch the tent at home if it has been stored for a long time or has not been used in rain. Confirm that you have the correct poles, stakes, rainfly, footprint, guylines, and tensioners. Inspect the floor and fly for pinholes, tears, peeling seam tape, damaged zipper flaps, worn coatings, and missing attachment points.
If water no longer beads on the rainfly or moisture is entering through seams, follow the tent manufacturer’s instructions. A suitable seam sealer or waterproofing treatment can restore performance, but the product must be compatible with the tent’s fabric and coating. Silicone-coated and polyurethane-coated fabrics may require different products. The REI tent-waterproofing guide explains how seam sealing, coating repair, and water-repellent treatments address different problems.
Pro Tip: Test the assembled tent with a garden hose before an important trip. Use a gentle shower pattern rather than a concentrated jet, and leave someone inside to check seams, corners, zippers, and floor edges.
Find the Right Site

Choose a legal or established campsite on firm, durable ground that sits slightly above nearby low spots. The ideal surface is reasonably level for sleeping but shaped so rainfall continues past the site instead of collecting beneath the tent.
Avoid Flood Paths and Low Ground
Do not pitch in a depression, dry wash, gully, stream channel, narrow canyon, or area marked by flattened vegetation and deposited debris. These features can carry fast-moving water during a storm. The National Weather Service advises campers not to camp along streams or washes during threatening conditions and to move to higher ground if water begins rising.
Keep a safe distance from rivers, creeks, lakeshores, and reservoir edges. Water can rise faster than expected, especially after rain upstream. Identify a route to higher ground before dark and keep shoes, lights, essential medication, and vehicle keys where they can be reached quickly.
Warning: Never remain in a tent when floodwater is entering the campsite or a flash-flood warning tells you to move. Go to higher ground immediately and do not walk or drive through flowing floodwater.
Check Trees and Overhead Hazards
Trees may provide some wind protection, but inspect the entire area above and around the tent. Avoid dead trees, leaning trunks, broken limbs, hanging branches, damaged root systems, and trees that could fall across the site. A “widowmaker” is an unstable dead or broken limb or tree—not simply any large tree.
Also consider lightning. An isolated tall tree, exposed ridge, open summit, or open field is a poor place to remain during a thunderstorm.
Warning: A tent is not a safe lightning shelter. If you hear thunder, move to a substantial building or hard-topped vehicle when one is available. Follow National Weather Service lightning guidance and wait at least 30 minutes after the last thunder before returning.
Pitch Your Tent Properly
A waterproof tent can still leak or collect condensation when it is pitched loosely. Assemble it according to the manufacturer’s instructions, stake every required point, attach the complete rainfly, and create a clear air gap between the fly and inner tent.
Choose Elevated Ground
Place the tent on naturally drained ground rather than trying to reshape the campsite. Avoid steep hillsides, which can be uncomfortable and may channel water, and avoid low areas where cool air and rainwater settle. Clear only loose sticks, cones, and sharp debris that could puncture the floor. Do not remove live vegetation or alter the site.
Angle the Tent Opening
Point the main entrance away from the direction of wind-driven rain when the tent design and campsite permit it. This reduces the amount of rain that can blow through the door while people enter or leave. Position vestibule openings so runoff does not drain toward the sleeping area.
Use the terrain rather than tilting the tent sharply. A nearly level sleeping surface with a slight natural drainage advantage is better than pitching across a steep slope.
Here is a quick reference for effective tent orientation:
| Action | Benefit |
|---|---|
| Point the entrance away from wind-driven rain | Reduces rain entering through the door |
| Use naturally drained, nearly level ground | Reduces pooling without creating an uncomfortable sleeping slope |
| Keep vestibule runoff downhill from the tent | Keeps water away from doors and stored gear |
Secure and Tension the Guylines
Stake the tent corners evenly before tightening the rainfly. Attach every manufacturer-designated fly buckle, hook, pole wrap, and guyline. Guylines help stabilize the structure, shed water, and keep the rainfly from lying against the inner tent.
Pull guylines in the direction intended by the tent design rather than choosing random opposing angles. Use stakes suited to the soil. Longer or wider stakes may hold better in rain-softened ground, but they still need to be checked as the soil loosens.
Tension the fly until it is smooth and stable without overstressing seams, poles, or attachment points. Rain and temperature changes can cause some fabrics to sag, so inspect the pitch periodically. Manufacturer guidance from Big Agnes recommends using the tent’s guy points to maintain a taut fly, improve ventilation, and prevent water from pooling.
A dry tent depends on four layers of protection working together: safe terrain, an intact floor, a correctly installed rainfly, and enough airflow to control condensation.
Use a Groundsheet or Footprint
A footprint is helpful for protecting the tent floor from abrasion, sharp debris, mud, and prolonged contact with wet ground. It adds protection, but it does not replace an intact waterproof floor or correct seam maintenance.
Protect the Tent Floor From Moisture and Abrasion
Place the footprint directly beneath the tent floor and smooth out folds that could hold water. Remove sharp sticks, stones, or cones before positioning it. Avoid placing a second loose sheet between the footprint and the floor because wrinkles can create pressure points and collect moisture.
An old tarp can serve as a temporary groundsheet when it is durable and free from holes. Fold or tuck every edge beneath the tent. Any material extending beyond the floor can catch roof runoff and funnel it underneath.
Select the Proper Groundsheet Size
A fitted manufacturer footprint is usually cut to match the tent floor and attachment points. A homemade groundsheet should be slightly smaller than the floor or folded so no edge is exposed. Secure it only through appropriate loops or stakes; do not create tension that distorts the tent body.
A footprint may provide a small amount of insulation and moisture protection, but its main job is protecting the floor. If water enters through damaged floor seams, peeling coatings, or holes, those areas still need repair.
Note: Do not dig a trench around the tent. National Park Service Leave No Trace guidance says not to clear soil, remove vegetation, or dig tent trenches. Relocate to a naturally drained site instead.
Utilize a Tarp

A tarp can provide an additional roof over the tent entrance, create a dry transition area, or protect gear. It works best as a separately supported shelter rather than as material laid directly on the tent.
- Pitch the tarp with a clear slope so water runs away from the tent, entrance, and walking area.
- Use suitable trees, dedicated tarp poles, or hiking poles for support when the tarp is designed for that setup.
- Keep the tarp clear of the tent rainfly so the tent can ventilate and the tarp does not transfer force to lightweight tent poles.
- Use secure knots, appropriate anchors, and enough tension to prevent large pools from forming.
- Place the lower edge toward the strongest expected wind, while maintaining enough open space for safe airflow.
- Inspect the anchors as rain softens the soil and move the tarp if runoff begins flowing toward the tent.
A regular tarp is not a perfect substitute for the tent’s fitted rainfly. A fitted fly is shaped to maintain ventilation, cover seams and doors, connect to the frame, and resist wind. Use the original rainfly whenever possible and treat a tarp as supplemental or emergency protection.
Warning: Never use a fuel-burning stove, heater, grill, lantern, or charcoal inside a tent. If you cook near a tarp, keep the area genuinely open, maintain the appliance manufacturer’s required clearance, and keep flames and hot surfaces away from fabric. The U.S. Consumer Product Safety Commission warns that camping equipment can produce deadly carbon monoxide in enclosed spaces.
Protect the Inside Without Trapping Moisture
Do not cover the tent’s interior walls or vents with loose plastic. A full plastic lining can restrict airflow, collect condensation, shift onto bedding, and make it harder to identify the true source of water.
For limited emergency floor protection, place a waterproof blanket, spare groundsheet, or closed-cell sleeping mat beneath—not over—your sleeping gear. Keep the material flat and away from doors and vents. This may protect bedding from a small floor leak, but it is not a substitute for repairing the tent.
Move sleeping bags, clothing, and packs away from the tent walls. Contact with a wet inner wall can transfer condensation to the gear. Store sensitive items in dry bags or sealed stuff sacks and place them on a sleeping mat, pack liner, or other raised surface if the floor is damp.
Bring Plenty of Dry Bags
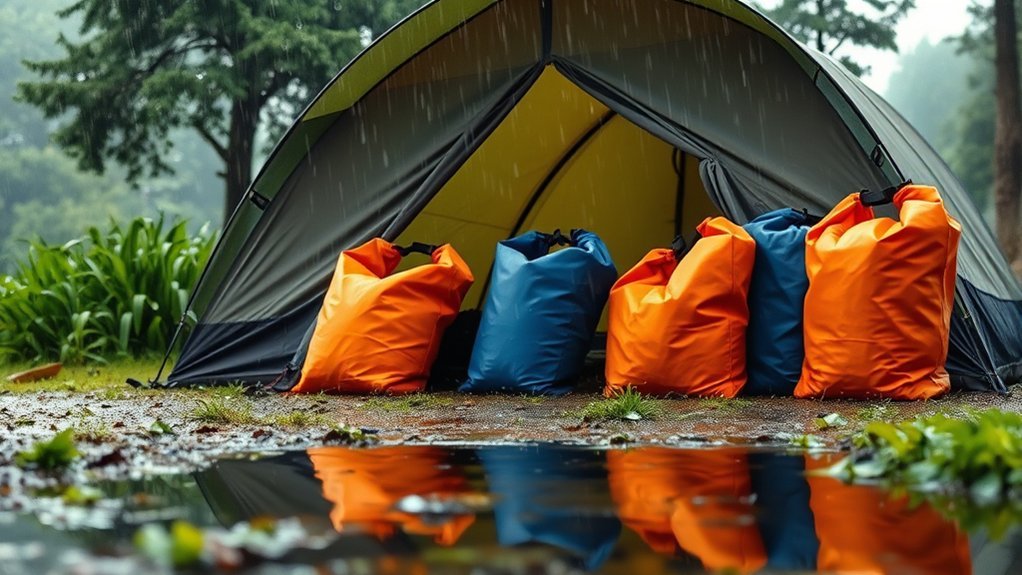
Dry bags and waterproof pack liners provide a second layer of protection when rain reaches the campsite. Organize them by purpose so you do not expose every dry item each time one bag is opened.
- Large dry bags or pack liners: Sleeping bags, insulated jackets, and spare bedding.
- Medium dry bags: Clothing, sleepwear, towels, and personal items.
- Small dry bags: Phones, cameras, batteries, maps, and first-aid supplies.
- Compression dry bags: Bulky soft gear when the product is designed for compression.
Close each roll-top bag according to its instructions, usually by pressing out excess air, aligning the opening, completing the required number of rolls, and securing the buckle. “Waterproof” performance varies, and many lightweight dry bags are intended for rain protection rather than full submersion.
Place wet boots, rainwear, and packs in the vestibule or another protected outside area without blocking the exit or pressing them against the inner tent. Do not bring dripping equipment into the sleeping area unless conditions make outside storage unsafe.
Manage Tent Moisture and Condensation
Water on the inside of a tent is not always a leak. Breathing, damp ground, wet clothing, cooking moisture, humidity, and falling temperatures can all create condensation. Rain striking the fly may shake accumulated condensation from the inner surface and make it appear that rain is passing through the fabric.
Open protected vents, upper vent struts, and mesh panels whenever the tent design allows. Maintain space between the fly and inner wall, and keep wet gear out of the sleeping area. Current manufacturer guidance emphasizes airflow as the main way to reduce condensation, although no tent can eliminate it under every condition.
Here is a quick guide to moisture management:
| Action | Purpose | Benefit |
|---|---|---|
| Open protected vents | Release warm, moist air | Reduces condensation |
| Stake and guy out the fly | Maintain fly-to-body separation | Improves airflow and reduces moisture transfer |
| Remove shoes before entry | Limit tracked-in water and mud | Keeps the floor and bedding cleaner |
| Store wet items outside the sleeping area | Reduce indoor humidity | Slows condensation buildup |
| Use an entrance tarp or vestibule | Create a protected transition area | Reduces water carried through the door |
Note: Condensation is usually widespread across a cool inner surface. A true leak is more likely to appear repeatedly at one seam, zipper, tear, corner, or damaged coating. Mark the suspected location after the storm so it can be inspected when the tent is dry.
Keep the Tent Clean Inside
Simple campsite habits prevent rainwater, mud, and grit from spreading through the tent:
- Remove shoes: Take off muddy footwear before entering the sleeping area.
- Use an entry mat: Place a small waterproof mat in the vestibule or immediately outside the door.
- Store wet items separately: Keep wet rainwear and packs in the vestibule, under an open tarp, or in a suitable bag.
- Sweep regularly: Use a small brush or cloth to remove grit that could abrade the floor coating.
- Protect the door: Open one side at a time when practical and close it promptly after entering.
- Keep gear off walls: Leave a small gap between bedding, packs, and the tent fabric.
Troubleshoot Water Inside the Tent
If water appears during the storm, first decide whether the source is condensation, rain entering through an open door, contact between the fly and inner tent, a floor problem, or a specific leak.
- Check the rainfly: Confirm that every buckle, hook, pole wrap, vent, and corner is attached correctly.
- Retension the fly: Remove sagging areas where water is pooling or the fly is touching the inner tent.
- Inspect stakes: Reset loose stakes without moving into a drainage path or unsafe exposed area.
- Move gear: Pull bedding and packs away from walls and wet floor edges.
- Absorb water: Use a towel, sponge, or cloth to remove puddles and wipe condensation.
- Protect essential gear: Place the sleeping bag, dry clothing, electronics, medication, and insulation in waterproof bags.
- Add an overhead tarp: Use one only when it can be pitched safely without exposing anyone to lightning, falling branches, or dangerous wind.
- Relocate when necessary: Leave immediately if water is rising, stakes will not hold, trees or limbs are failing, or weather warnings direct you to safer ground.
Do not attempt permanent seam or coating repairs on soaked fabric unless the repair product specifically allows wet application. Most repairs work better after the tent has been cleaned and dried.
Pack Up and Store the Tent Dry
Dry the tent, rainfly, and footprint as much as conditions allow before packing. Shake off water, wipe accessible surfaces, and briefly drape components over a safe, smooth support when the rain stops. Do not hang the fabric on sharp branches or abrasive surfaces.
If you must leave during rain, packing the tent wet for transport is better than remaining in an unsafe campsite. Separate the wet fly and footprint from dry gear when possible. Do not assume that folding or rolling tightly removes the moisture.
As soon as practical, unpack every component and hang or pitch it in a shaded, well-ventilated place until completely dry. Remove dirt and debris, inspect for damage, and make any repairs before long-term storage. Store the tent loosely in a breathable bag in a cool, dry location rather than leaving it compressed in a hot vehicle, attic, or sealed plastic container.
Frequently Asked Questions
Should I pitch my tent under a tree canopy?
Healthy trees can provide some protection from wind and may reduce condensation, but inspect the entire canopy first. Avoid dead or damaged trees, leaning trunks, broken limbs, hanging branches, and exposed isolated trees. During thunder, leave the tent for a substantial building or hard-topped vehicle when available.
What materials are best for waterproofing a tent?
Use products approved for the tent’s fabric and coating. Seam sealer treats vulnerable stitching, coating products repair worn waterproof layers, and durable water repellent treatments help the outer fabric shed water. Check whether the tent uses silicone, polyurethane, polyether urethane, or another treatment before choosing a product.
Can I use a regular tarp instead of a tent rainfly?
Use the fitted rainfly whenever possible. A tarp can serve as a separate emergency roof, but it may not match the tent’s doors, vents, frame, or guy points. Pitch it above the tent with its own supports and slope it so runoff moves away from the shelter.
How do I prevent water from pooling around my tent?
Choose naturally drained ground above nearby depressions, keep the footprint completely beneath the tent, and slope tarp runoff away from the site. Do not camp in washes or drainage channels, and do not dig trenches. If water starts collecting, move to safer ground before conditions worsen.
What should I do if my tent still gets wet inside?
Retension the rainfly, separate it from the inner tent, open protected vents, move gear away from the walls, and absorb standing water. Check for a repeated drip at a seam, zipper, tear, or corner. Protect bedding in dry bags and leave the campsite if water is rising or the shelter is becoming unstable.
Why is the inside wet when I cannot find a leak?
The moisture is probably condensation. Warm, humid air from breathing, wet gear, and damp ground condenses on cold tent surfaces. Open protected vents, maintain an air gap beneath the rainfly, and keep wet items outside the sleeping compartment.
How often should I waterproof my tent?
Use condition rather than a fixed calendar interval. Inspect the tent before important trips and treat it when seam tape peels, coatings become sticky or flaky, pinholes appear, or the outer fabric stops shedding water. Follow the manufacturer’s care instructions and avoid applying incompatible chemicals.
Conclusion
Keeping a tent dry in heavy rain depends less on one accessory than on a complete system. Check the weather, avoid flood paths and overhead hazards, pitch the rainfly taut, tuck the footprint under the floor, maintain ventilation, and protect essential gear in waterproof bags. When conditions become unsafe, leave the tent and move to appropriate shelter or higher ground.
After the storm, dry every tent component completely before storage and repair any damaged seams, coatings, or fabric. These steps protect both your comfort during the next trip and the long-term condition of the shelter.
Sources
- National Weather Service — Flooding Safety — campsite placement, streams, washes, rising water, and higher-ground guidance.
- National Weather Service — Outdoor Lightning Safety — safe lightning shelter and the 30-minute waiting rule.
- National Park Service — Leave No Trace — minimizing site damage and avoiding trenches around tents.
- Big Agnes — Tent Setup, Ventilation, and Rain Tips — fly tension, guylines, ventilation, and condensation management.
- REI — How to Waterproof a Tent — seam sealing, coating repair, and water-repellent treatment.
- U.S. Consumer Product Safety Commission — Camping Equipment and Carbon Monoxide — fuel-burning equipment and enclosed-space hazards.
