

Last Updated on July 30, 2026 by Caleb Warren
The right backpack for long walks should feel stable, balanced, and almost unnoticeable once it is adjusted. Start with the type of walk you do most often, choose enough capacity for water, layers, food, and safety gear, and then judge every feature by how well it fits your body under a realistic load.
Quick Answer
Choose a backpack that matches the length, weather, and terrain of your usual walks, then fit it to your torso rather than your height. For most full-day hikes, 21–35 liters works well. Prioritize a supportive hip belt, stable shoulder straps, breathable back panel, easy water access, durable materials, and a loaded test walk.
Key Takeaways
- Choose capacity from your actual gear list, trip length, weather, and terrain—not from the biggest pack available.
- Measure your torso and check hip-belt coverage; overall height alone does not determine pack size.
- A frame or firm framesheet helps with heavier loads, but a rigid frame is not necessary for every day walk.
- For general guidance, keep a day-hiking load near or below 10% of body weight and a backpacking load near or below 20% when practical.
- Test the pack with the gear and weight you expect to carry, then check for slipping, pressure points, sway, numbness, or restricted breathing.
At a Glance
| Time Required | 30–60 minutes to compare, fit, load, and walk-test a pack |
| Difficulty | Easy, but fit requires careful adjustment |
| Tools Needed | Flexible measuring tape, your normal gear or test weights, and a mirror or helper |
| Cost | Free to evaluate; backpack prices vary by capacity, materials, and suspension |
Disclosure: As an Amazon Associate I earn from qualifying purchases. Some links on this page are affiliate links, at no extra cost to you.
Choose Capacity for the Walk You Actually Do
Begin with a list of what you normally carry. A short paved walk with water and a light layer needs far less space than an all-day mountain hike with rain gear, food, first aid, navigation tools, and emergency supplies. Season and climate matter too: cold or wet conditions require bulkier clothing and more protection.
The current REI daypack guide places most hiking daypacks in these useful ranges:
- 10 liters or less: Minimal loads for running, very short walks, or a water-and-jacket setup.
- 11–20 liters: Short hikes and light day trips with food, water, and an extra layer.
- 21–35 liters: The practical range for most full-day hikes and long walks.
- 36–40 liters: Colder weather, technical outings, family gear, or unusually bulky day loads.
Note: A larger pack is not automatically more comfortable. Extra space often encourages overpacking, while a half-empty oversized bag can shift and sag.
Assessing Comfort and Fit

Comfort starts with the correct torso length, not your overall height. Measure from the prominent C7 vertebra at the base of your neck to the line connecting the top of your hip bones. Compare that number with the manufacturer’s size chart because sizing ranges differ among brands and models.
For a structured hiking pack, the hip belt should wrap around the top of your hip bones rather than your waist or stomach. The shoulder straps should follow the curve of your shoulders without a large gap behind them. The sternum strap should steady the harness without squeezing your chest or limiting your breathing.
How to Fit a Backpack
- Place 10–20 pounds of evenly distributed test weight in the pack, or use the actual load you expect to carry.
- Loosen the hip belt, shoulder straps, load lifters, and sternum strap before putting the pack on.
- Center the padded hip belt over your hip bones and tighten it evenly.
- Tighten the shoulder straps until they sit smoothly against your shoulders without pulling the pack too high.
- Gently tension the load lifters, if fitted, to bring the upper pack closer to your body.
- Fasten the sternum strap at a comfortable chest height and leave enough room to breathe freely.
- Walk, climb stairs, bend, and reach overhead. Recheck the fit after the load settles.
These steps follow the general sequence in Osprey’s pack-fitting instructions. Exact strap angles and placement vary by model, so the pack’s manual should take priority.
Signs of a Good Fit
- The pack stays close to your body without bouncing or swaying.
- The hip belt does not slide down or create a sharp pressure point.
- The shoulder harness makes smooth contact without pinching your neck or armpits.
- You can look up, turn your head, and move your arms normally.
- The sternum strap stabilizes the pack without restricting your breathing.
Choose the Right Suspension and Ventilation
A rigid frame is not essential for every long walk. Match the suspension to the load:
- Frameless or lightly padded packs work for small, light loads but can become uncomfortable when overfilled.
- Foam framesheets or flexible stays add shape, keep hard objects from pressing into your back, and improve stability for moderate day-hike loads.
- Internal frames provide stronger load transfer and control for heavier or bulkier gear.
If you sweat heavily, look for a channeled foam panel or suspended mesh back panel. Ventilation can improve airflow, but comfort still depends on torso fit, load placement, and the way the pack sits against your body.
Evaluating Design and Usability
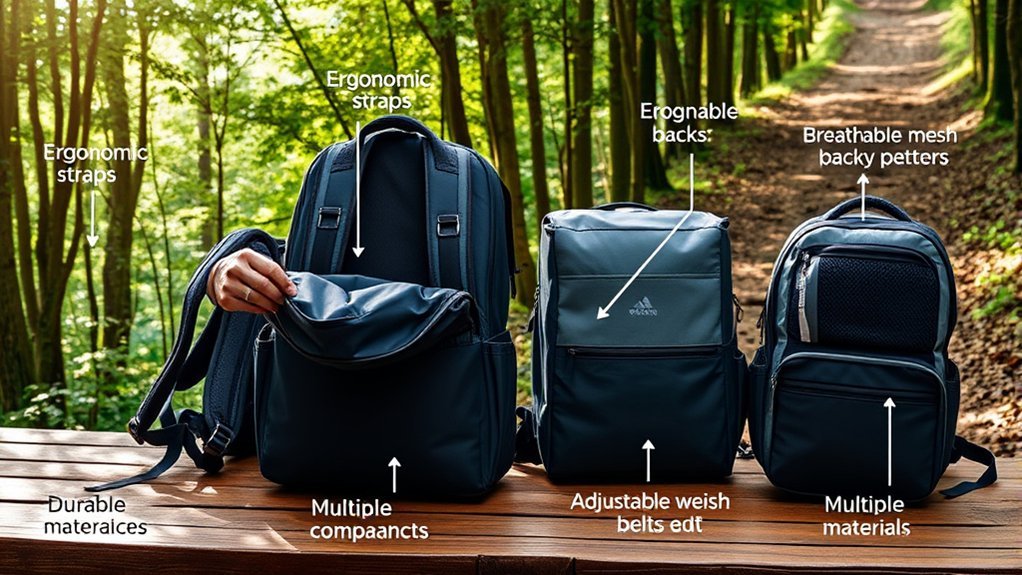
Good organization lets you reach water, food, navigation tools, and a rain layer without unpacking everything. More pockets are not always better, though. Too many small compartments add weight and make it easy to forget where items are stored.
Useful Features for Long Walks
- Reachable bottle pockets or a hydration sleeve: You should be able to drink without removing the pack whenever possible.
- Hip-belt or shoulder-strap pockets: Useful for snacks, sunscreen, a phone, or a small map.
- Compression straps: Reduce movement when the pack is not full and can secure light gear.
- Panel or side access: Makes buried items easier to reach, though extra zippers can add weight and possible leak points.
- Trekking-pole loops: Keep poles secure when they are not in use.
- Key clip and small valuables pocket: Prevents essentials from disappearing into the main compartment.
- Rain-cover storage or room for a pack liner: Helps protect gear when the weather changes.
Pro Tip: Bring your usual water bottle, trekking poles, rain jacket, and other awkward items when shopping. A feature only helps if your real gear fits and remains reachable.
Importance of Durability
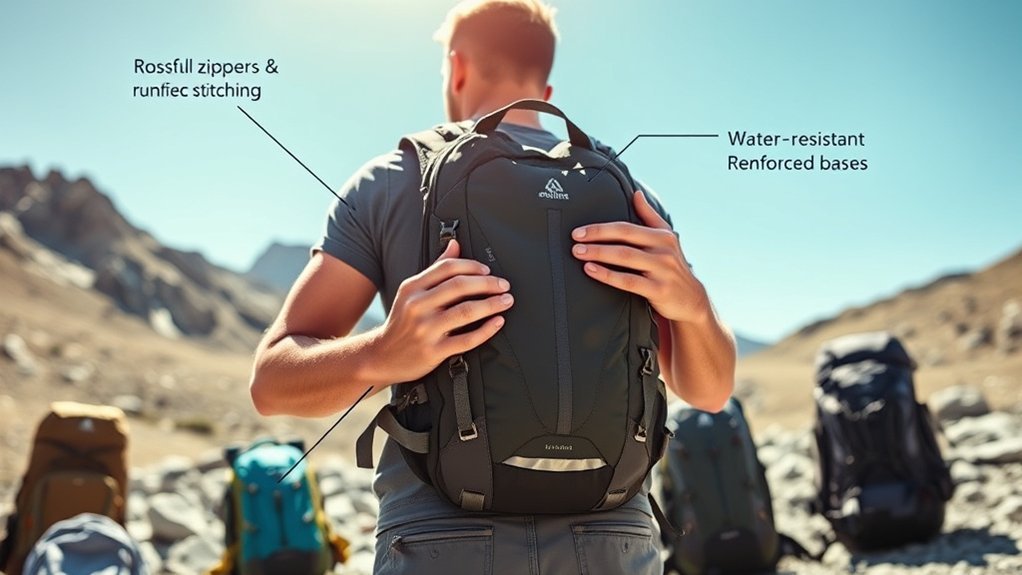
Durability depends on the whole build, not one fabric label. Nylon and polyester are both common. Ripstop weaving can help limit the spread of a small tear, while heavier fabrics may resist abrasion better but add weight. Inspect the bottom panel, shoulder-strap anchors, hip-belt attachment points, zipper tracks, buckles, and compression straps.
| Feature | What to Inspect | Why It Matters |
|---|---|---|
| Main fabric | Abrasion resistance, weave, coating, and repairability | Reduces damage from rock, branches, and repeated use |
| Reinforced stitching | Dense, even stitching at strap and hip-belt anchor points | Helps high-stress areas hold the model’s intended load |
| Hardware | Smooth zippers, secure buckles, and replaceable parts | Reduces failure risk and makes field use easier |
| Bottom panel | Extra reinforcement or a tougher fabric | Protects the area most often placed on rough or wet ground |
Also check the warranty and repair policy. A repairable backpack from a brand that supplies buckles or offers service may provide better long-term value than a pack marketed with vague “lifetime” language.
Note: Water-resistant fabric does not make an entire backpack waterproof. Zippers, seams, openings, and prolonged rain can still let water in. Use a rain cover, waterproof pack liner, or dry bags for gear that must stay dry.
Weight Considerations
Pack weight should reflect the activity and the person carrying it. The often-repeated 20–25% figure is too broad for a general long-walk guide. As a starting point, REI recommends about 10% of body weight or less for a loaded day-hiking pack and about 20% or less for a loaded backpacking pack. These are general guidelines, not guaranteed safe limits.
For a 150-pound walker, the general guide works out to about 15 pounds for day hiking and 30 pounds for backpacking—but terrain, fitness, weather, water needs, and personal health can lower the comfortable limit.
Do not judge a pack only by its empty weight. A slightly heavier model with a better-fitting hip belt and suspension can carry a moderate load more comfortably than a minimalist bag with poor support. At the same time, extra pockets, thick fabric, and complex frames add weight before you pack any gear.
Warning: Do not load a backpack to 65 pounds simply to test it. Use the weight you realistically expect to carry and stay within the manufacturer’s stated load range. Stop if you develop numbness, tingling, sharp pain, weakness, or breathing restriction.
Pack and Adjust It Correctly
Even a well-fitted backpack can feel uncomfortable when the load is poorly arranged. Keep dense items close to your back and near the middle of the pack. Put light, bulky items farther away or lower down, balance the left and right sides, and tighten compression straps so the contents do not shift.
- Store water, food, navigation tools, first aid, and rain gear where you can reach them quickly.
- Keep hard or pointed objects away from the panel that touches your back.
- Avoid hanging heavy items from the outside because they can swing, snag, and pull you off balance.
- After loading, tighten the hip belt first, then the shoulder straps, load lifters, and sternum strap.
- Make small strap changes while walking instead of overtightening everything at once.
Testing for Extended Use
Test the backpack with the same type of load you plan to carry. In a store, walk for at least 20–30 minutes if possible. Use stairs or an incline, turn your torso, reach overhead, and bend as you would on the trail. At home, conduct a longer test while the return window is still open.
Practice reaching your water, snacks, phone, rain layer, and trekking poles. Check whether zippers work under tension and whether the pack remains stable when partially full. After the test, inspect your shoulders, hips, lower back, and underarms for pressure, rubbing, or redness.
Common Fit Problems and Fixes
| Problem | Likely Cause | What to Try |
|---|---|---|
| Shoulder pain | Hip belt is loose, load is too heavy, or torso fit is wrong | Refit the hip belt, reduce weight, and recheck torso size |
| Hip belt slides down | Belt is too large, poorly shaped, or positioned too low | Try a smaller or different belt and center it over the hip bones |
| Gap behind shoulders | Torso length or harness adjustment is incorrect | Adjust the torso system or try another size |
| Pack sways or pulls backward | Load is far from the back or compression is loose | Move dense items inward and tighten compression straps |
| Restricted breathing or numbness | Straps are overtightened or the harness shape is unsuitable | Stop, loosen the pack, and change the fit or model if symptoms return |
Leave Room for Safety and Essential Gear
Lightweight packing should never mean leaving out basic safety equipment. The National Park Service Ten Essentials cover navigation, sun protection, extra clothing, illumination, first aid, fire, repair tools, extra food, hydration, and emergency shelter. The exact items should match the route, season, weather, and remoteness of your walk.
Tell someone where you are going and when you expect to return. Check trail and weather conditions, and carry a backup navigation method instead of relying only on a phone. Your backpack should have enough room for these items without becoming unstable or exceeding a load you can carry comfortably.
Frequently Asked Questions
What Size Backpack Is Ideal for Day Hikes?
For most full-day hikes, 21–35 liters is a useful range. A 10–20-liter pack may be enough for a short walk in mild weather, while 36–40 liters can suit winter layers, technical equipment, or family gear. Build a gear list first, then choose the smallest pack that carries it safely and comfortably.
How Do I Clean My Backpack Properly?
Follow the care label for your specific model. In general, empty the pack, brush out loose dirt, remove detachable parts, and hand-clean it with mild soap, warm water, and a soft sponge or brush. Rinse thoroughly and air-dry it in a ventilated place away from direct sunlight. Osprey advises against machine-washing its backpacks, but instructions can vary by manufacturer.
Can I Attach Extra Gear to My Backpack?
Yes. Use the pack’s compression straps, tool loops, or dedicated pole attachments. Keep heavy or dense gear inside and close to your back. External items should be light, tightly secured, and positioned so they do not swing, block access, or catch on branches.
What Accessories Enhance Backpack Comfort?
Useful accessories include a correctly sized hip belt, sternum strap, hydration reservoir, rain cover, waterproof liner, and small organizers. Load lifters help only when the pack’s suspension is designed for them. Extra pads cannot correct the wrong torso size or a harness that does not match your body.
How Do I Choose a Backpack Color or Style?
Choose fit and function first. Dark or muted colors hide dirt and work well for travel, while bright colors can make you easier to spot outdoors. Reflective details can help near roads or in low light, but they do not replace a headlamp, bright clothing, or other safety equipment.
Do I Need a Framed Backpack for Long Walks?
Not always. A frameless pack can work for a compact, light load. A framesheet or internal frame becomes more useful as weight and bulk increase because it adds structure, limits sagging, and helps stabilize the load. Choose by expected weight rather than assuming the stiffest frame is best.
How Do I Know Whether My Backpack Is Too Heavy?
Warning signs include leaning forward, repeated strap tightening, loss of balance, shoulder or hip pain, numbness, tingling, unusual fatigue, or an inability to walk with normal posture. Reduce the load, repack it closer to your back, and reassess the fit. Persistent symptoms deserve medical advice.
Sources
- REI Co-op: How Much Should Your Pack Weigh? — general day-hiking and backpacking weight guidance
- REI Co-op: Daypacks—How to Choose — capacity ranges, use cases, organization, and hydration features
- Osprey: Backpack Size Chart and Sizing Guide — loaded fitting sequence, torso checks, hip-belt position, and harness adjustment
- REI Co-op: How to Pack and Hoist a Backpack — load placement and balance
- U.S. National Park Service: Ten Essentials — minimum safety categories for outdoor trips
- Osprey: How to Clean Your Backpack — hand-cleaning, rinsing, drying, and machine-washing cautions
Conclusion
Choosing the right backpack for long walks comes down to matching capacity to your real gear, fitting the pack to your torso and hips, and testing it under a realistic load. Prioritize stable suspension, easy water access, durable construction, weather protection, and enough room for essential safety gear. The best pack is not the lightest, largest, or most expensive—it is the one that stays comfortable and controlled throughout your walk.
