

Last Updated on July 29, 2026 by Mason Reed
Tent condensation is the water that forms when moist air inside your shelter reaches a cooler tent surface. Breathing, wet gear, humid ground, rain, and limited airflow can all add to the problem. You cannot prevent every drop, but smart site selection, a taut pitch, open vents, and good moisture control can keep your sleeping area much drier.
Quick Answer
Tent condensation forms when warm, moist air touches a tent wall or rainfly that has cooled to the air’s dew point. Reduce it by opening vents, creating cross-ventilation, pitching the fly taut, keeping wet gear outside the sleeping area, choosing higher and breezier ground, and wiping away moisture before it can drip onto your gear.
Key Takeaways
- Condensation is normal and can occur even when a tent is fully waterproof.
- Ventilation is the most effective control: open low and high vents so damp air can escape.
- Wet clothing, shoes, pets, damp ground, and nearby water add moisture to the tent environment.
- A leak is usually localized and follows a seam, zipper, damaged panel, or repeated rain path; condensation is usually more widespread.
- Never use a fuel-burning stove, grill, lantern, or heater inside a tent.
At a Glance
| Time Required | About 5–10 minutes at setup, plus a few minutes in the morning |
| Difficulty | Easy |
| Tools Needed | Tent stakes and guylines, absorbent towel, and a dry bag or vestibule for wet gear |
| Cost | Usually $0; optional repair or seam-sealing supplies cost extra if you find a leak |
Disclosure: As an Amazon Associate I earn from qualifying purchases. Some links on this page are affiliate links, at no extra cost to you.
Understanding Tent Condensation

Condensation begins when air inside or around the tent cools to its dew point. At that temperature, the air can no longer hold all its water vapor, so droplets form on cooler surfaces such as the rainfly, tent wall, poles, or mesh.
Your breath and body add moisture throughout the night. Tent manufacturers commonly estimate that one sleeper can release roughly 1–2 pints of moisture overnight through breathing and perspiration. Wet gear, damp soil, nearby water, rain, and cooking steam can add even more.
A waterproof tent can still have a wet interior. Condensation forms from moisture already in the air; it does not automatically mean the rainfly or floor is leaking.
Why Condensation Is Worse on Some Nights
Condensation is most noticeable when the air is humid, the night turns cold, and wind is light. A large temperature difference between the warm interior and cold fly also makes droplets more likely. Calm, rainy, lakeside, and winter conditions can therefore produce moisture even when you use every vent correctly.
| Condition | Why It Raises Condensation Risk |
|---|---|
| Cold night after a warm day | The fly cools quickly and reaches the dew point. |
| High humidity or rain | The surrounding air already contains a large amount of moisture. |
| Calm air | Moist air is not replaced by drier outside air. |
| Crowded tent | More people add more breath and perspiration to the same airspace. |
Causes of Tent Condensation
Tent condensation comes from a mix of weather, campsite conditions, tent design, and moisture produced inside the shelter. Understanding each source makes it easier to control the ones you can change.
| Cause | What Happens | What You Can Do |
|---|---|---|
| Breathing and perspiration | Occupants add water vapor all night. | Vent continuously rather than sealing the tent completely. |
| Wet clothing, shoes, pets, or packs | Moisture evaporates into the enclosed air. | Use the vestibule, a covered line, or a dry bag when safe. |
| Damp ground and nearby water | Moisture rises from the site and the surrounding air. | Choose higher, drier ground away from shorelines and depressions. |
| Closed vents or a loose rainfly | Humid air becomes trapped and the fly may sag toward the inner tent. | Open opposing vents and tension the fly and guylines. |
| Cooking near the shelter | Steam increases humidity; combustion adds severe fire and carbon-monoxide hazards. | Cook outside and well away from the tent, following stove and campground rules. |
Identifying Tent Leaks vs. Condensation
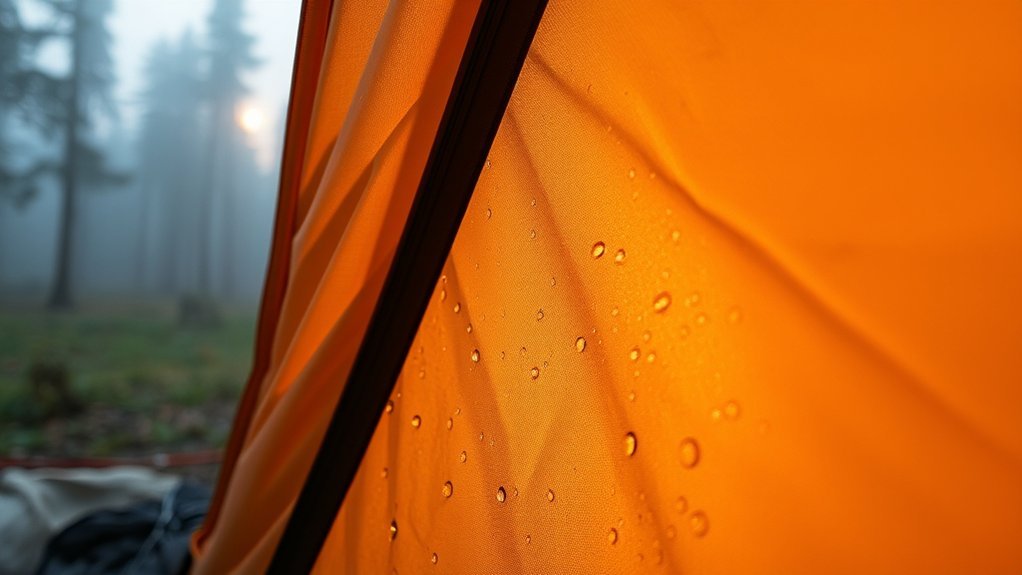
The pattern and timing of the water usually reveal its source. Condensation tends to coat broad areas of the inner fly or walls, especially after a cold, still night. A leak is more often concentrated around a seam, zipper, vent, torn panel, pole contact point, or spot where rain repeatedly strikes.
Common Misconceptions Explained
- “A new tent should never be wet inside.” Even a new, waterproof tent can collect condensation.
- “Touching the wall makes water pass through.” Touching a coated fabric does not normally pull rain through it. However, your sleeping bag can become wet by rubbing against droplets already on the wall.
- “More waterproof fabric means less condensation.” Waterproofness and condensation control are different. Vent placement, mesh area, air gaps, weather, and pitch quality matter greatly.
- “Every drip during rain is a leak.” Rain can shake condensation from the fly and create drips even when the waterproof layer is intact.
Leak Inspection Techniques
- Dry the tent first. Starting with a dry shelter makes the source easier to trace.
- Inspect the likely entry points. Check seam tape, stitching, zippers, vents, floor corners, abrasions, and holes.
- Recreate the conditions. Pitch the tent correctly, close it as you would in rain, and spray one small area at a time with a gentle hose or watering can.
- Watch from inside. A helper can look for a repeatable drip or dark wet patch while the outside area is being sprayed.
- Repair the confirmed source. Use the tent maker’s recommended patch, seam sealer, or warranty service; seal only materials that the manufacturer says are compatible.
| More Likely Condensation | More Likely a Leak |
|---|---|
| Fine droplets or a wet film across a broad area | A repeatable drip from one seam, zipper, hole, or panel |
| Worst near the roof or inner side of the rainfly | Wetness begins where outside water is contacting the fabric |
| Appears after sleeping, even without rain | Appears during a hose test or rain and follows the same path |
| Improves when ventilation increases | Continues despite good ventilation |
Note: Water on the floor is not proof of a floor leak. Condensation can run down the walls, drip from the fly, or be transferred from wet gear. Trace the water upward before applying a repair product.
Preventing Tent Condensation
The best approach is to manage airflow, moisture, and pitch quality before you go to sleep. No method eliminates condensation in every condition, but these steps greatly reduce the amount that reaches your sleeping bag and clothing.
Improve Ventilation Strategies
- Open all built-in rainfly vents and inner-tent vents.
- Create cross-ventilation by opening vents or door tops on opposite sides when weather allows.
- Use double zipper sliders to vent high on the door, where warm, moist air gathers.
- Stake the tent and rainfly taut so air can move between the inner tent and fly.
- Keep the inner body, sleeping bag, and stored gear from pressing against the rainfly.
Pro Tip: Open vents before condensation starts. Waiting until the walls are already wet means the tent must remove both airborne moisture and liquid water.
Minimize Moisture Sources
- Change out of wet clothing before entering the sleeping area.
- Store wet boots, rainwear, and packs in a vestibule or protected area without blocking vents or exits.
- Avoid drying soaked clothing inside the tent overnight.
- Keep open water containers outside the sleeping area and wipe up spills promptly.
- Use a groundsheet only in the size recommended for your tent; exposed edges can collect rain and funnel it underneath.
Warning: The CDC says never to use a portable camping stove, charcoal grill, lantern, or similar fuel-burning device inside a tent. Ventilation does not make indoor stove use safe; carbon monoxide and fire can become deadly without warning.
Optimize Tent Positioning
Choose a legal campsite that is high enough to drain, away from obvious depressions, and not immediately beside a lake, stream, marsh, or saturated meadow. Site rules and weather safety come first; condensation control is secondary.
| Situation | Positioning Approach |
|---|---|
| Light breeze and fair weather | Aim the largest vent or mesh opening toward the breeze for cross-flow. |
| Strong or stormy wind | Follow the tent manual; many tents should place the lowest or narrowest end into the wind and keep doors sheltered. |
| Cold, calm valley or hollow | Move to a safe, slightly higher site because cold, damp air settles in low areas. |
| Near water | Use the designated site but maximize spacing, venting, and morning drying; do not relocate into an unsafe or prohibited area. |
Ventilation Strategies for Rain, Cold, and Wind
Ventilation should match the weather. The goal is to keep air moving without allowing rain to enter or weakening the tent’s wind resistance.
| Conditions | Ventilation Plan |
|---|---|
| Dry and mild | Open doors, mesh panels, and opposing vents as fully as comfort and insects allow. |
| Rain | Use protected fly vents, crack the top of a door under an awning, and keep the fly taut so rain sheds away from openings. |
| Cold or winter | Keep at least some high and low ventilation open. Brush frost away and avoid breathing into your sleeping bag. |
| Strong wind | Secure all required guylines, reduce openings exposed to driving rain, and use protected leeward vents where the tent design allows. |
Double-wall tents place a breathable or mesh inner tent beneath a waterproof rainfly, helping keep occupants away from the wet outer layer. Single-wall tents save weight and can perform well in suitable conditions, but their interior surface is also the weather barrier, so careful venting and moisture management become even more important.
Managing Existing Condensation

If the tent is already wet inside, act before droplets soak your insulation or clothing:
- Wipe the walls or fly. Use an absorbent towel, bandana, or sponge and wring it out away from the tent.
- Increase protected airflow. Open roof vents, vent the top of a door, or expose more mesh without letting rain blow in.
- Separate gear from wet surfaces. Move sleeping bags, packs, and clothing away from droplets on the walls.
- Remove avoidable moisture. Put wet items in the vestibule or another protected area that does not block an exit.
- Dry during the day. Shake off the fly and air the shelter when weather permits. Use indirect sun or brief sun exposure rather than leaving technical fabrics in strong sunlight for long periods.
- Dry fully before storage. NEMO advises storing a tent only after every component is completely dry to reduce mold, mildew, and damage to waterproof finishes.
Note: A small household or rechargeable dehumidifier is rarely a practical tent solution. Most need substantial power, work slowly in a constantly ventilated shelter, and do not replace the need for airflow and moisture control.
General Tips for Reducing Condensation
Use this simple routine on every trip:
- Before pitching: Choose a safe, legal, well-drained site and check the forecast.
- During setup: Stake all corners, tension the rainfly, open vents, and create space between the fly and inner tent.
- Before bed: Move wet gear out of the sleeping area and vent from both low and high openings.
- Overnight: Adjust protected vents if the air becomes stuffy or droplets begin to form.
- In the morning: Wipe, shake, and air-dry the tent before packing when conditions allow.
- At home: Unpack and dry the entire tent before long-term storage, even if it felt dry at camp.
Frequently Asked Questions
Can condensation damage my tent fabric over time?
Condensation itself is normal, but storing a tent while it is damp can encourage mold and mildew and may harm waterproof finishes. Wipe away heavy moisture, dry every component completely, and store the tent loosely in a cool, dry place.
Is condensation worse during winter camping?
It can be. Cold fabric, frost, limited airflow, and moisture from breathing create favorable conditions for condensation. Keep designed vents partly open, avoid breathing into your sleeping bag, brush frost away before it melts, and dry the shelter whenever weather permits.
How does humidity affect tent condensation?
Humid air contains more water vapor. When the tent surface cools to the dew point, some of that vapor becomes liquid water. High humidity, nearby water, rain, wet ground, and calm air can therefore produce condensation even in a well-ventilated tent.
Can I use a dehumidifier inside my tent?
A small dehumidifier may remove a little moisture in a large powered campsite tent, but it is usually inefficient because tents must remain ventilated and are not sealed rooms. For most campers, open vents, a taut pitch, dry gear storage, and a towel are lighter and more effective.
What tent design is best for reducing condensation?
A well-ventilated double-wall tent is often easiest to manage in humid three-season conditions because the breathable inner body separates you from the wet rainfly. However, vent size, mesh coverage, fly spacing, campsite weather, and correct pitching matter more than a single fabric label.
How can I tell whether water is condensation or a leak?
Widespread droplets after sleeping usually point to condensation. A leak is more likely when water repeatedly appears at the same seam, zipper, tear, or panel during rain or a controlled hose test. Dry the tent and test one area at a time before repairing it.
Should I close every vent to stay warmer?
Usually no. Sealing the tent traps moist air, which can create more condensation and wet insulation. Use your sleeping bag and clothing for warmth, then keep enough protected high and low ventilation open for the conditions and the tent maker’s instructions.
Conclusion
Tent condensation is a normal result of moisture, cooling surfaces, and limited airflow—not automatic proof that your shelter leaks. Start with a safe campsite and taut pitch, keep vents working, move wet gear out of the sleeping area, and dry the tent before storage. When water follows one repeatable path during rain, test that area and repair it with products approved for your tent.
Sources
- National Weather Service: Dew Point vs. Humidity — explains dew point and when water vapor condenses.
- NEMO Equipment: Minimizing and Preventing Tent Condensation — covers moisture sources, ventilation, pitch, site choice, and wiping moisture.
- MSR: Tent Condensation and Ventilation Guidance — supports cross-ventilation, rainfly spacing, and the 1–2 pint overnight moisture estimate.
- Centers for Disease Control and Prevention: Carbon Monoxide Safety — warns against using camp stoves, grills, and lanterns inside tents.
- NEMO Equipment: Cleaning, Repairing, and Storing a Tent — supports complete drying before storage to prevent mold, mildew, and finish damage.
