
Last Updated on September 10, 2026 by Daniel Globe
Training for a Machu Picchu hike is not only about getting “fit.” You need enough aerobic endurance for long climbs, leg strength for stone steps, balance for uneven ground, and recovery capacity for several active days in a row. Your exact plan should match your route because a guided visit to the citadel, the one-day Short Inca Trail, the four-day Classic Inca Trail, and the Salkantay route place very different demands on the body.
A practical plan combines walking or hiking, hill and stair sessions, two weekly strength workouts, progressive pack practice, mobility, recovery, and a sensible acclimatization itinerary. Most healthy beginners should allow at least 8 to 12 weeks, while people starting from a low fitness base may benefit from a longer buildup.
Quick Answer
Train for Machu Picchu for about 8 to 12 weeks with three or four aerobic sessions, two full-body strength sessions, one progressively longer hike, and regular hill or stair practice. Train in the shoes and backpack you will use, schedule recovery days, and allow time in Peru to acclimatize before hiking at higher elevations.
Key Takeaways
- Match your training to the route. A citadel visit is not the same challenge as the Classic Inca Trail or Salkantay trek.
- Build endurance gradually with brisk walking, hiking, stairs, cycling, swimming, or other aerobic exercise.
- Strengthen the legs, hips, calves, core, back, and shoulders at least twice per week.
- Practice long climbs, controlled descents, uneven surfaces, trekking-pole use, and carrying your expected daypack.
- Fitness improves hiking performance, but it does not prevent altitude sickness. Acclimatization and a safe ascent plan remain essential.
- Test footwear, socks, layers, hydration, and trail food before the trip rather than on the trek itself.
At a Glance
| Time Required | Usually 8 to 12 weeks; longer if you are currently inactive or recovering from an injury |
| Difficulty | Moderate to challenging, depending on route, altitude, pack weight, and current fitness |
| Tools Needed | Walking or hiking shoes, stairs or hills, backpack, water, optional trekking poles, and basic resistance equipment |
| Cost | Variable; outdoor walking and bodyweight training can be free, while gym access, coaching, and new gear add cost |
Medical and altitude warning: Talk with a qualified clinician before vigorous training or high-altitude travel if you have heart, lung, blood-pressure, joint, balance, pregnancy-related, or other significant health concerns. Fitness does not make a person immune to acute mountain sickness.
Disclosure: As an Amazon Associate I earn from qualifying purchases. Some links on this page are affiliate links, at no extra cost to you.
Know the Route and Its Physical Demands
“Hiking Machu Picchu” can mean anything from walking through the archaeological site to completing a multi-day trek. The first step is to identify your route, daily distance, highest sleeping elevation, highest pass, expected pack weight, and amount of stair climbing.
| Route or Experience | Typical Demand | Training Priority |
|---|---|---|
| Machu Picchu citadel visit | Several hours of walking, ramps, and uneven stone steps at about 2,430 meters above sea level | Walking endurance, stair comfort, balance, heat and rain preparation |
| Short Inca Trail | The official Route 5 is about 10.5 kilometers and is commonly completed in one day | A sustained uphill day, stairs, stable footing, and daypack practice |
| Classic Inca Trail | The official main route is about 33.7 kilometers over four days and three nights; Warmiwañusqa Pass reaches about 4,200 meters | Back-to-back hiking days, long climbs, steep descents, recovery, and altitude awareness |
| Salkantay or another high route | Longer days and higher passes; the CDC lists the Salkantay trek at about 4,630 meters | Stronger endurance base, pack tolerance, cold-weather preparation, and a conservative acclimatization plan |
Official route distances, entry rules, campsites, and operator requirements can change. Review the current information from your authorized operator and the Peruvian National Service of Natural Areas Protected by the State before finalizing your plan.
Note: Machu Picchu itself is lower than Cusco. The CDC Peru guidance places Cusco at roughly 3,339 to 3,400 meters, so some travelers feel altitude effects before they begin the trek.
Set Your Training Timeline and Baseline
For many healthy recreational hikers, 8 to 12 weeks is enough time to make useful progress. A longer 12- to 16-week buildup may be more appropriate if you currently do little exercise, have not hiked recently, need to lose significant pack-related discomfort, or are returning after injury. The goal is not to become an elite athlete. It is to arrive able to repeat the expected work without severe soreness, pain, or exhaustion.
Before week one, complete a simple baseline check on separate days:
- Walk briskly for 45 to 60 minutes and note whether you can still speak in full sentences.
- Climb stairs or a moderate hill continuously for 10 to 15 minutes.
- Perform controlled step-ups, bodyweight squats, calf raises, and a short front plank without joint pain.
- Stand on one leg for 20 to 30 seconds per side near a stable support.
- Take an easy hike in your planned footwear and note hot spots, blisters, knee discomfort, or pack pressure.
These are not pass-or-fail medical tests. They give you a starting point so you can adjust duration, terrain, and recovery instead of copying someone else’s workload.
A 10-Week Machu Picchu Training Plan
The schedule below is a flexible template. Move sessions to fit your week, but avoid placing your hardest strength session immediately before your longest hike. Beginners can shorten each session, while experienced hikers can extend the long hike or add elevation without turning every workout into a hard effort.
| Day | Main Session | Purpose |
|---|---|---|
| Monday | Rest or gentle mobility | Recovery |
| Tuesday | Strength workout A | Leg, hip, core, and upper-body strength |
| Wednesday | Easy to moderate aerobic session | Cardiovascular base |
| Thursday | Hills, stairs, or treadmill incline | Climbing endurance and pacing |
| Friday | Strength workout B or rest | Strength, balance, and durability |
| Saturday | Long hike or long brisk walk | Time on feet, gear testing, and fueling practice |
| Sunday | Easy walk, yoga, or optional second hike | Active recovery or back-to-back-day practice |
Weeks 1–2: Establish Consistency
- Complete two strength sessions with light resistance and controlled technique.
- Do two or three aerobic sessions of about 30 to 45 minutes.
- Take one longer walk or easy hike of 60 to 90 minutes.
- Use flat or gently rolling terrain and identify any footwear or joint problems early.
Weeks 3–4: Add Hills and Pack Practice
- Increase one aerobic session to 45 to 60 minutes.
- Add a dedicated hill, stair, or incline-treadmill session.
- Extend the long hike toward two hours.
- Begin carrying a light pack with water and basic gear.
Weeks 5–6: Build Climbing and Descending Strength
- Use longer hills or repeated stair climbs at a sustainable pace.
- Practice controlled descents rather than rushing downhill.
- Extend the long hike toward three hours where your route and fitness allow.
- Increase pack weight gradually toward the load you expect to carry.
Weeks 7–8: Make Training Route-Specific
- Complete your longest training hikes on terrain that resembles your trek.
- For a multi-day route, add an easy hike or long walk the day after a longer hike.
- Train with your trekking poles, rain shell, hat, socks, footwear, and trail food.
- Keep most sessions comfortable enough that you recover within a day or two.
Week 9: Peak Without Exhausting Yourself
- Complete your final long route-specific hike early in the week or on the prior weekend.
- Use your intended daypack load and full footwear system.
- Do not test a new exercise, shoe, supplement, or aggressive workout.
Week 10: Taper and Arrive Fresh
- Reduce total training time while keeping short walks and light strength work.
- Prioritize sleep, normal meals, mobility, and travel preparation.
- Avoid a last-minute “fitness test.” Hard training in the final days is more likely to create fatigue than new fitness.
Pro Tip: Progress one main variable at a time. Add duration, elevation, speed, or pack weight, but avoid increasing all four in the same week.
Building Endurance and Stamina
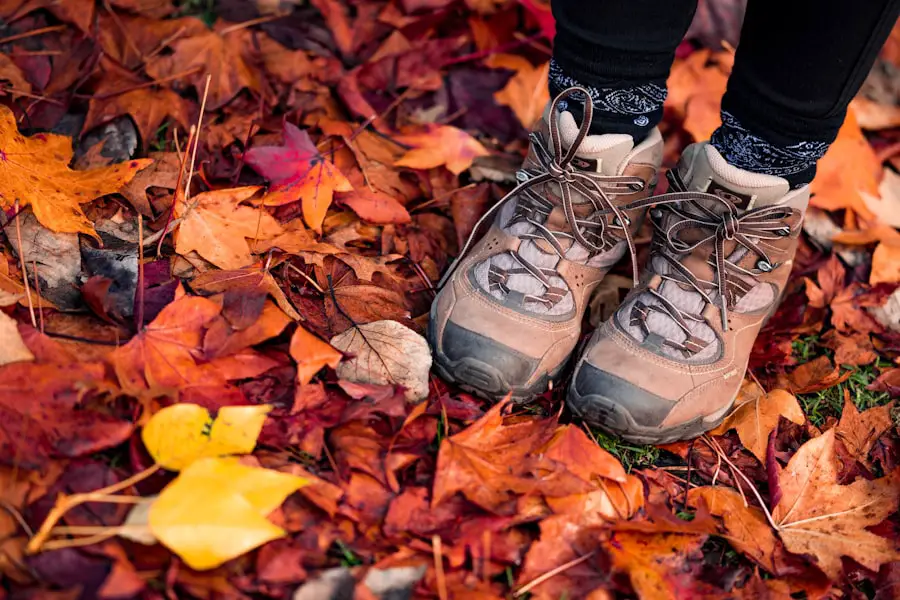
Endurance and stamina are critical for long climbs and repeated hiking days. Brisk walking, hiking, cycling, swimming, rowing, and easy running can all improve aerobic capacity. The best choice is an activity you can perform consistently without creating pain that interferes with hiking practice.
Most aerobic sessions should feel controlled. A simple talk test works well: at moderate intensity, you breathe faster but can still speak in full sentences. Current CDC physical-activity guidance recommends at least 150 minutes of moderate aerobic activity per week for adults, plus muscle-strengthening work on at least two days. A demanding trek may require more route-specific time on your feet than this health minimum, built gradually according to your condition and recovery.
Interval training can be useful, but it is optional. Once per week, a prepared hiker might alternate short uphill efforts with easy recovery. Steady walking and hiking remain the foundation because they most closely match the sustained nature of the trek.
The most useful fitness is specific fitness: comfortable hours on your feet, repeated climbing, controlled descending, and enough reserve to do it again the next day.
Incorporating Strength Training
Strength training improves stability, climbing power, pack control, and tolerance for long descents. You do not need to lift a particular maximum weight or gain a set amount of body weight. Those numbers vary by person and are not useful measures of Machu Picchu readiness.
Train the major muscle groups at least twice per week. Start with bodyweight or light resistance and use a range of motion you can control without pain.
| Exercise | Why It Helps | Practical Starting Point |
|---|---|---|
| Squat or sit-to-stand | Builds general leg and hip strength | 2–3 sets of 8–12 controlled repetitions |
| Step-up | Closely matches stairs and uphill trail movement | 2–3 sets of 8–12 per leg |
| Split squat or supported lunge | Improves single-leg control and climbing strength | 2 sets of 6–10 per side |
| Hip hinge or deadlift pattern | Strengthens glutes, hamstrings, and back for pack carrying | 2–3 sets of 8–12 with light, controlled resistance |
| Calf raise | Supports climbing, ankle control, and repeated push-off | 2–3 sets of 12–20 |
| Row or band pull | Builds upper-back strength for posture and backpack control | 2–3 sets of 8–15 |
| Push-up or press | Maintains balanced upper-body strength | 2–3 sets stopped before form breaks down |
| Plank, side plank, or loaded carry | Improves trunk stability and posture under load | 2–3 short, high-quality holds or carries |
Good technique matters more than heavy loads. Stop a set when your movement becomes uncontrolled. If a movement causes sharp pain, swelling, instability, numbness, or symptoms that persist after the workout, reduce the load and seek professional assessment when appropriate.
Train for Uphill, Downhill, Stairs, and Pack Weight
Flat cardio alone does not fully prepare you for Machu Picchu’s stone steps and mountain terrain. Include climbing and descending practice every week once your base is established.
Uphill Training
Use a hill, stairwell, stadium steps, step machine, or inclined treadmill. Begin with short blocks and recover on easier terrain. Keep your stride short, stay upright, and choose a pace you could maintain for much longer than the workout interval.
Downhill Training
Descents create substantial braking work for the quadriceps. Practice walking downhill slowly with soft knees and controlled foot placement. Step-down exercises and split squats can help prepare the muscles for this eccentric load. Do not add a large amount of downhill work suddenly because soreness can be significant.
Backpack Training
Start with a light pack and add only the items you expect to carry. Adjust the shoulder straps, hip belt, and load placement so the pack stays close to your body without restricting breathing. Your training load should reflect your actual trek arrangement: hikers with porter support may carry only a daypack, while other routes or operators may require more personal gear.
Pro Tip: Do at least two long training sessions in your complete footwear, sock, pack, and pole setup. A gear problem found near home is easier to fix than one found on the trail.
Practicing Hiking Techniques
Efficient technique saves energy and improves safety. Place each foot on a stable surface, especially on wet stone, mud, or irregular steps. Avoid overstriding downhill. On steep climbs, shorten your steps and settle into a pace you can maintain without frequent stops.
Many inexperienced hikers start too quickly and create early fatigue. Use the talk test or a familiar effort level to keep the opening hour conservative. A steady pace usually works better than repeated bursts followed by long rests.
Trekking poles can improve stability and may reduce some lower-limb loading during descents when used correctly. A small laboratory study found reductions in several knee-loading measures during downhill walking with poles, although results from a controlled ramp do not guarantee the same benefit for every hiker or trail. Review the research on knee forces during downhill walking with hiking poles.
- Adjust pole length so your elbows are comfortably bent on level ground.
- Plant poles close to your body rather than reaching far ahead.
- Use both poles rhythmically on steady terrain.
- On steep descents, place the poles securely before committing your weight.
- Practice before the trip so straps, pole placement, and timing feel natural.
Breathing should remain relaxed and rhythmic. Deep, controlled breaths can help you avoid panicked, shallow breathing during a climb, but breathing techniques do not replace acclimatization or treatment for altitude illness.
Training at High Altitudes
Reduced oxygen availability makes high-altitude hiking feel harder. Machu Picchu is about 2,430 meters above sea level, Cusco is roughly 3,339 to 3,400 meters, the Classic Inca Trail reaches about 4,200 meters, and Salkantay itineraries can go higher. These elevations make acclimatization a safety issue, not simply a fitness challenge.
The CDC Yellow Book guidance on high-altitude travel states that physical fitness does not determine a traveler’s risk of altitude illness. The acute acclimatization process is especially important during the first three to five days after ascent. When possible, the CDC advises staged ascent and notes that spending at least two to three nights around 2,450 to 2,750 meters before going higher can be protective.
Warning: Do not continue ascending to sleep higher when you have symptoms of altitude illness. Worsening headache, nausea, unusual fatigue, dizziness, confusion, loss of coordination, chest tightness, or breathlessness at rest requires prompt attention. Severe or worsening symptoms can require urgent descent and medical care.
Practical Acclimatization Steps
- Avoid scheduling your hardest hike immediately after flying from low elevation to Cusco.
- Keep activity mild during the first 24 to 48 hours at high elevation.
- Build extra acclimatization time into the itinerary rather than relying on fitness.
- Sleep at a lower elevation before going higher when your route and travel plan allow.
- Avoid alcohol during the first 48 hours at altitude.
- Discuss previous severe altitude illness, rapid-ascent itineraries, and preventive medication with a travel-medicine clinician before departure.
Living or training at elevation shortly before the trip may provide some pre-acclimatization, but access is limited and the benefit depends on elevation, timing, and duration. Breathing-resistance masks should not be treated as a substitute for a staged ascent and time to acclimatize at the destination.
Choosing the Right Gear and Equipment
The right footwear is one of the most important choices. Hiking shoes or boots should fit securely, provide dependable traction, and remain comfortable after several hours. A stiff, heavy boot is not automatically better; choose footwear appropriate for your route, ankle needs, weather, and pack weight. Break it in through training hikes rather than wearing it for the first time in Peru.
Moisture-managing socks and a tested blister-prevention routine can reduce friction problems. Carry a spare pair on longer days. Trim toenails before the trip and lace shoes firmly enough to prevent the foot from sliding forward on descents without creating numbness.
Use layers because mountain weather can change quickly. A practical system includes a moisture-managing base layer, a light insulating layer, and a waterproof, breathable outer shell. Add sun protection, a warm hat, and light gloves when the route reaches colder high passes.
Your backpack should fit close to the body and distribute weight comfortably. Pack frequently used items where you can reach them without emptying the bag. For a daypack, common needs include water, food, rain protection, sun protection, first aid, personal medication, a headlamp, navigation backup, and an emergency layer. The National Park Service Ten Essentials provides a useful general framework, although your operator’s list and local rules take priority.
For phones, cameras, or other small electronics, a compact power bank is more practical than a large vehicle or travel-trailer battery. Keep electronics protected from rain and do not depend on a phone as your only light, map, or emergency plan.
Nutrition and Hydration
A balanced daily diet supports training better than a special “hiking diet.” Include carbohydrate-rich foods for training energy, protein-rich foods for recovery, fruits and vegetables, and adequate total calories. Use familiar foods and avoid major dietary experiments immediately before travel.
Fueling During Training Hikes
- Eat a familiar meal or snack before longer sessions.
- Carry easy-to-eat foods such as fruit, sandwiches, crackers, bars, nuts, or other foods you tolerate well.
- On long days, eat small amounts regularly rather than waiting until energy drops sharply.
- Practice with the same types of snacks you plan to carry on the trek.
- Eat a normal recovery meal with carbohydrate, protein, and fluids after demanding sessions.
Hydration Without Overdrinking
Hydration needs vary with heat, altitude, effort, clothing, body size, and sweat rate. Carry enough water for the route and know whether safe refills or water treatment are available. At the same time, forcing excessive fluid can be dangerous. The Wilderness Medical Society guideline on exercise-associated hyponatremia identifies overdrinking as the main preventable problem and supports drinking according to thirst or using an individualized plan developed during training.
Electrolyte-containing drinks or salty foods may be useful during prolonged, hot, or high-sweat activity, but electrolytes do not make excessive water intake safe. Learn your needs during training and follow your guide’s water plan for each day.
Mental Preparation and Mindset
Mental preparation supports physical training. Long climbs can feel slow, repetitive, and uncomfortable even when your body is capable. Practice staying patient on hills instead of judging the session by speed.
- Break a long climb into short landmarks or timed blocks.
- Use calm breathing and relaxed shoulders when effort rises.
- Expect changing weather, slower group members, and itinerary adjustments.
- Set process goals, such as steady pacing, regular eating, and careful foot placement.
- Learn the difference between ordinary exertion and warning symptoms that should not be ignored.
Visualization can help when it is realistic. Imagine managing a wet descent, taking a short break, adjusting a layer, or continuing at a sustainable pace rather than imagining a perfect, effortless trek.
Rest and Recovery
Training creates the stimulus; recovery allows the body to adapt. Include at least one true rest day each week and reduce training when soreness, poor sleep, or fatigue begins to accumulate.
Gentle walking, mobility work, or easy yoga can support active recovery without adding much stress. Stretching may help some people feel more comfortable, but it should not be used to push through an injury. Sleep, regular meals, and adequate spacing between hard sessions usually matter more than complicated recovery products.
During the final week, reduce training volume. You will not gain meaningful new endurance from a punishing last-minute workout, but you can arrive with sore legs or an irritated tendon.
Safety and Injury Prevention
Safety starts during training. Build gradually, use stable terrain when learning new skills, and carry basic emergency items on outdoor sessions. Tell someone your route and expected return time, especially when hiking alone.
- Warm up with easy movement before stairs, hills, or strength training.
- Use footwear with suitable traction and replace badly worn equipment.
- Increase pack load and downhill volume gradually.
- Stop for sharp pain, chest pain, fainting, unusual shortness of breath, confusion, or loss of coordination.
- Protect against sun and changing weather, which can be more intense at elevation.
- Keep personal medication accessible and tell your guide about relevant medical needs.
- Check current weather, route conditions, permits, and official operator requirements before departure.
Have a pre-travel health consultation when appropriate. The CDC’s current Peru travel-health chapter covers altitude illness and other destination-specific health considerations that may affect your preparation.
Finding a Training Program or Coach
A coach or structured program can be useful if you have a previous injury, limited training experience, a demanding route, or difficulty progressing without pain. Look for someone who understands hiking, endurance development, strength training, and the difference between fitness training and altitude acclimatization.
A useful coach should ask about your route, dates, current activity, injury history, pack weight, access to hills or stairs, and weekly schedule. The program should include gradual progression, recovery, and route-specific practice rather than generic high-intensity workouts every day.
Group hikes can add accountability and teach pacing, gear management, and trail etiquette. One-on-one coaching may be more appropriate when you need exercise modifications or close monitoring. A licensed physical therapist or other qualified healthcare professional is a better choice than a general fitness coach when pain, instability, or rehabilitation is the main concern.
Frequently Asked Questions
What is the best way to train for hiking Machu Picchu?
Combine brisk walking or hiking, hills or stairs, two weekly strength sessions, one progressively longer hike, and regular recovery. Train with your planned shoes, socks, backpack, poles, food, and rain layers. Match the longest sessions to the distance, elevation gain, and number of consecutive days on your route.
How long does it take to train for hiking Machu Picchu?
Many healthy recreational hikers can prepare in 8 to 12 weeks. Allow 12 to 16 weeks or more if you are currently inactive, have not hiked recently, or need a slower progression. Experienced hikers may need less general conditioning but should still practice route-specific climbing, descending, pack carrying, and consecutive hiking days.
Which exercises should I include?
Useful exercises include step-ups, squats or sit-to-stands, split squats, calf raises, hip hinges, rows, push-ups or presses, planks, side planks, and loaded carries. Pair them with hiking, brisk walking, stair climbing, or inclined treadmill work. Use controlled form and progress resistance gradually.
Do I need altitude training before Machu Picchu?
Most travelers do not need special altitude equipment. Fitness improves hiking performance but does not prevent altitude sickness. A gradual itinerary and time to acclimatize in Peru are more important. People with previous severe altitude illness or a rapid-ascent schedule should discuss their plans with a travel-medicine clinician.
How heavy should my training backpack be?
Train toward the load you will actually carry, not an arbitrary percentage of body weight. Confirm whether your operator provides porter support and what must remain in your daypack. Start light, add weight gradually, and stop increasing when the load changes your posture, causes numbness, or creates persistent pain.
Can a beginner hike to Machu Picchu?
Yes, many beginners can complete an appropriate route with enough preparation. Choose a route that matches your available training time, health, and hiking experience. The Short Inca Trail or a citadel visit may be more suitable than a higher, longer trek for someone with limited time to build endurance.
Do I need a gym to prepare?
No. You can train with outdoor walks, hills, stairs, step-ups, bodyweight exercises, resistance bands, and a backpack. A gym is helpful when local terrain is flat or weather limits outdoor training, but consistency and route-specific practice matter more than the location.
What other factors should I consider?
Plan for footwear, blister prevention, rain, sun, cold high passes, hydration, trail food, sleep, permits, operator rules, travel health, and acclimatization. Test all important gear before departure and leave enough schedule flexibility for weather, fatigue, or altitude symptoms.
Sources
- CDC Yellow Book: High-Altitude Travel and Altitude Illness — acclimatization, ascent guidance, symptoms, and the limits of physical fitness at altitude
- CDC Yellow Book: Peru — Cusco and route elevations plus destination-specific travel-health guidance
- SERNANP: Historic Sanctuary of Machupicchu — official Inca Trail route distances, durations, access, and operator information
- CDC Physical Activity Guidelines for Adults — aerobic and muscle-strengthening benchmarks
- U.S. National Park Service: Ten Essentials — general hiking equipment and emergency-preparedness categories
- Wilderness Medical Society Hyponatremia Guideline — individualized hydration and avoidance of overdrinking during prolonged activity

