
Last Updated on September 10, 2026 by Daniel Globe
Training for a high altitude hike involves two different jobs: getting fit enough for long climbs and giving your body enough time to adjust to lower oxygen availability. Cardiovascular fitness, strong legs, pack practice, and hill training can make the hiking easier, but they do not make you immune to altitude sickness. A safe plan combines physical conditioning with gradual acclimatization, sensible pacing, proper gear, and a willingness to descend when symptoms worsen.
Quick Answer
Train for high altitude hiking by building aerobic endurance, leg and core strength, hill-climbing ability, and comfort carrying your actual pack. Start about 6–8 weeks ahead if you already exercise regularly, allow longer if needed, and remember that fitness cannot replace gradual altitude acclimatization.
Key Takeaways
- Good fitness improves hiking performance, but it does not reduce your biological susceptibility to acute mountain sickness (AMS).
- Combine aerobic exercise, strength work, hills or stairs, and progressively longer hikes with your expected backpack weight.
- Once you reach altitude, gradual increases in sleeping elevation are more important for altitude-sickness prevention than how fit you are.
- Do not force large amounts of water. Drink appropriately for thirst, exertion, weather, and sweat loss, and eat regularly during long hiking days.
- Never continue ascending to sleep higher when altitude-illness symptoms are developing. Worsening symptoms, confusion, poor coordination, or breathlessness at rest require descent and urgent medical attention.
At a Glance
| Time Required | About 6–8 weeks for an already-active hiker; 8–12+ weeks may be more realistic when starting from a lower fitness level. Altitude acclimatization happens separately during recent altitude exposure and the trip itself. |
| Difficulty | Moderate to demanding, depending on elevation, distance, vertical gain, pack weight, weather, and current fitness. |
| Tools Needed | Walking or hiking route, hills or stairs, terrain-appropriate footwear, backpack, water, strength-training equipment if desired, and your planned trail gear. |
| Cost | Training can cost $0 if you already have appropriate footwear and a pack. Gym access, new equipment, travel, guides, and high-altitude pre-exposure can add to the cost. |
Note: This guide is general educational information, not individual medical advice. People with heart or lung disease, previous HAPE or HACE, significant sleep-disordered breathing, sickle cell disease or trait, pregnancy, poorly controlled medical conditions, or other health concerns should discuss their itinerary with a clinician familiar with high-altitude medicine.
Disclosure: As an Amazon Associate I earn from qualifying purchases. Some links on this page are affiliate links, at no extra cost to you.
Understanding High Altitude and Its Effects on the Body
For hikers, about 8,000 feet (2,400 meters) is a useful threshold because unacclimatized travelers can begin developing altitude illness at this elevation and occasionally lower. The percentage of oxygen in the atmosphere remains roughly the same, but atmospheric pressure decreases as elevation rises. That lower pressure means fewer oxygen molecules are available with each breath.
The immediate response includes faster breathing and changes in heart rate and circulation. Over time, the body makes additional adjustments that improve oxygen delivery. This process is called acclimatization.
The important point is that people acclimatize at different rates. According to the CDC Yellow Book guidance on high-altitude travel, training and physical fitness do not determine whether someone will develop altitude illness. A highly trained runner can develop AMS, HAPE, or HACE just as a recreational hiker can.
Fitness can make the climb easier, but it cannot make you immune to altitude sickness. How quickly you ascend and how your individual body responds matter more.
Acute mountain sickness commonly causes headache along with symptoms such as nausea, appetite loss, dizziness, or unusual fatigue after a recent ascent. More serious illness can progress to high-altitude cerebral edema (HACE), which affects the brain, or high-altitude pulmonary edema (HAPE), which affects the lungs. Both can become life-threatening without prompt action.
Physical Conditioning for High Altitude Hiking
A good training program should prepare you for the workload of the hike rather than trying to “train away” the altitude itself. Focus on aerobic endurance, leg and core strength, elevation gain, time on your feet, backpack comfort, balance, and recovery.
Cardiovascular Endurance
Running, brisk walking, hiking, cycling, rowing, and swimming can all improve aerobic fitness. As a general health baseline, current U.S. physical activity guidance recommends at least 150–300 minutes of moderate aerobic activity per week for adults, plus muscle-strengthening work on at least two days.
For a demanding trek, gradually make some of that training more hike-specific. Hills, stairs, treadmill incline work, and actual trail hiking prepare your muscles for sustained climbing better than flat cardio alone.
One interval session each week can also be useful once you have established a base. For example, alternate several minutes of steady climbing with short harder sections on a hill, staircase, bike, or incline treadmill. Avoid adding hard intervals, longer hikes, and heavy pack work all at once.
Strength Training
Strong legs and a stable core help with climbs, descents, uneven surfaces, and pack carrying. Useful movements include squats, split squats or lunges, step-ups, hip hinges or deadlift variations, calf raises, rows, carries, and core-stability exercises.
Two strength sessions each week are enough for many recreational hikers. Use a load and range of motion you can control with good form. The goal is durable hiking strength, not exhaustion at every workout.
Train With Hills, Stairs, and Your Backpack
Specificity matters. As the trip approaches, complete some longer walks or hikes on terrain that resembles your planned route. Gradually add the backpack you will actually use and work toward your expected trail load instead of suddenly training with a very heavy pack.
This also gives you time to adjust shoulder straps, hip-belt placement, footwear, socks, trekking poles, and clothing before the real trip.
Pro Tip: A long training hike in your actual shoes, socks, backpack, and clothing is partly a fitness session and partly an equipment test. Solve rubbing, hot spots, pack discomfort, and pacing problems at home rather than above 10,000 feet.
Flexibility, Balance, and Injury Prevention
Mobility work, yoga, and gentle stretching can help maintain comfortable movement, while balance exercises may improve confidence on uneven terrain. Do not rely on flexibility alone for injury prevention; sensible training progression, recovery, appropriate footwear, and trail-specific conditioning matter just as much.
Increase training gradually. Persistent joint pain, worsening tendon pain, unusual chest symptoms, fainting, or other concerning symptoms are reasons to stop and seek appropriate medical advice rather than trying to push through.
A Practical 6–8 Week High Altitude Hiking Training Plan
The following is a flexible framework for someone who already exercises. Beginners may need additional weeks. Adjust the volume to your starting point and the difficulty of the planned hike.
| Weeks | Main Focus | Example Training |
| 1–2 | Build consistency | Three moderate aerobic sessions, two strength sessions, and one easy-to-moderate hike or longer walk. |
| 3–4 | Add vertical gain | Continue aerobic and strength work; add hills, stairs, or treadmill incline and begin hiking with a light version of your trip pack. |
| 5–6 | Build hike specificity | Complete a longer trail day with meaningful elevation gain, build toward your expected pack weight, and practice fueling, hydration, footwear, and pacing. |
| 7 | Peak and rehearse | Perform one of your most trip-specific hikes, but avoid abrupt increases in mileage, pack weight, or intensity. |
| 8 | Taper and recover | Reduce overall workload, keep moving with easy sessions, sleep well, check equipment, and arrive at the trip without accumulated training fatigue. |
If your planned trek has several long days in a row, occasional back-to-back training walks can help you learn how your feet and legs respond before repeating another day of hiking. Keep these sessions controlled rather than turning every weekend into a maximum-effort test.
Mental Preparation for High Altitude Hiking
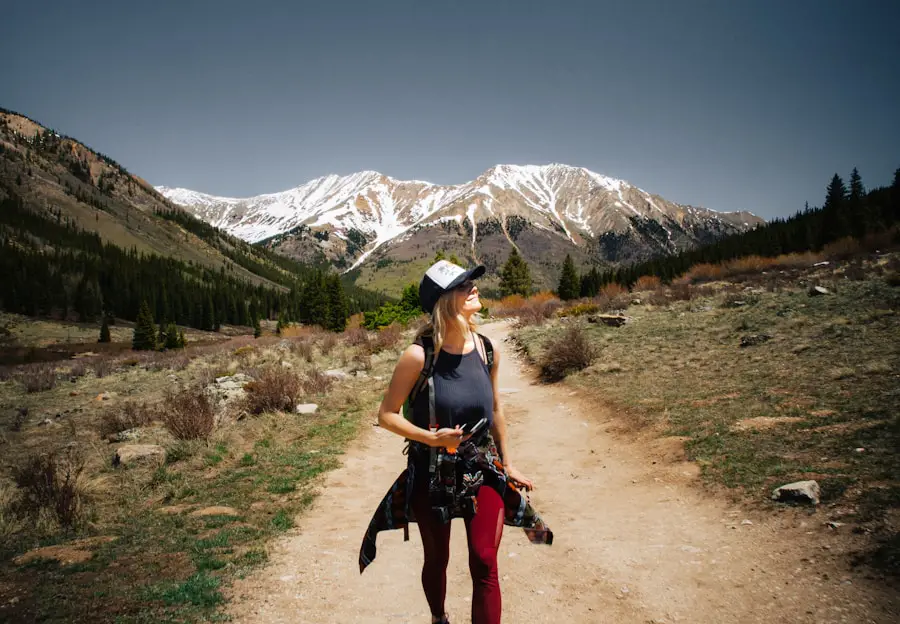
Mental preparation matters because high-elevation hiking often feels slower and harder than the same effort near sea level. A pace that normally feels easy may produce noticeably heavier breathing, and changing weather or unfamiliar terrain can add stress.
Visualization can help you think through difficult climbs, rest breaks, turnaround decisions, and unexpected weather before they happen. Mindfulness or controlled breathing may also help you remain calm and evaluate how you actually feel rather than reacting to anxiety.
Set realistic daily goals and define turnaround rules before leaving the trailhead. A successful hike does not always end on a summit. Turning around because of worsening weather, altitude symptoms, fatigue, route conditions, or insufficient daylight is sound mountain judgment.
Celebrate smaller milestones such as completing a steep section at a sustainable pace, reaching an acclimatization stop, eating and drinking consistently, or making a conservative decision before conditions deteriorate.
Acclimatization: The Part Training Cannot Replace
Acclimatization requires actual exposure to reduced oxygen pressure. According to current CDC guidance, travelers coming from low elevation should avoid going directly to a sleeping altitude above about 9,000 feet (2,750 meters) in a single day when possible.
Spending roughly two or three nights around 8,000–9,000 feet before continuing higher can reduce AMS risk. Once above about 9,850 feet (3,000 meters), a widely used guideline is to increase sleeping elevation by no more than roughly 1,600 feet (500 meters) per day and add an extra acclimatization night for each additional 3,300 feet (1,000 meters) of sleeping elevation gained.
These are general guidelines rather than a guarantee. Some people need a slower schedule.
- Keep exercise relatively mild during your first 48 hours at a new high altitude.
- Avoid alcohol during the first 48 hours at altitude.
- Do not ascend to sleep higher while symptoms of altitude illness are present.
- Descend if symptoms become worse despite resting at the same elevation.
- When possible, a daytime trip to a higher elevation followed by sleeping lower can support acclimatization.
Recent pre-exposure to high altitude may also help. The CDC notes that spending at least two nights above roughly 9,000 feet within about two weeks before a trip can provide useful acclimatization, although the benefit fades with time.
Warning: Never let a training goal or summit plan override worsening altitude symptoms. Do not continue to a higher sleeping elevation when you are sick from altitude. Confusion, loss of coordination, severe weakness, or shortness of breath at rest can indicate life-threatening HACE or HAPE and require urgent descent and medical help.
When Medication May Be Discussed
If gradual ascent is impossible, or if you have a history that places you at higher risk, a clinician familiar with altitude medicine may discuss prescription prevention such as acetazolamide. Medication does not make an unsafe ascent schedule harmless, and prescription drugs used for altitude illness have contraindications, interactions, and dosing considerations that should be reviewed for the individual traveler.
Nutrition and Hydration at High Altitude
| Metric | Lower-Elevation Training | High-Altitude Hiking |
|---|---|---|
| Caloric Intake | Match food intake to body size, training load, goals, and recovery needs. | Longer hiking days and cold conditions can increase energy needs. There is no universal 3,000–3,500-calorie target. |
| Fluid Intake | Drink according to activity, climate, thirst, meals, and individual sweat loss. | Carry enough water for the route and drink regularly, but do not force excessive water beyond your needs. |
| Carbohydrates | Include carbohydrate sources that support training and recovery. | Easy-to-digest carbohydrate foods are useful trail fuel, but a fixed 60–70% target is not necessary for every hiker. |
| Protein | Include adequate protein across meals and snacks to support muscle maintenance and recovery. | Continue eating protein-containing foods; there is no universal altitude-specific percentage that fits everyone. |
| Fat | Use healthy fats as part of a balanced diet. | Energy-dense foods such as nuts and nut butters can be convenient on long trips; altitude alone does not require a fixed 20–25% fat limit. |
Proper nutrition supports hiking performance because long climbs require steady energy. Carbohydrate-rich foods such as oats, bread, tortillas, fruit, dried fruit, rice, potatoes, and trail bars are useful because they are convenient sources of fuel. Protein-containing foods such as nuts, nut butter, meat or plant-based jerky, dairy products, beans, and protein bars can contribute to recovery.
At altitude, appetite can decrease even while energy needs remain high. Smaller meals and frequent snacks may therefore be easier than waiting for one very large meal at the end of the day.
Hydration Without Overhydration
Dry mountain air, increased breathing, exertion, heat, and sweat can increase fluid losses. Carry enough water for your route and understand where safe refill points are located.
At the same time, more water is not always better. Excessive water intake during prolonged exercise can dilute blood sodium and contribute to exercise-associated hyponatremia, a potentially dangerous condition. Current CDC guidance on exercise-associated hyponatremia specifically warns against forced overdrinking.
Urine color can provide a rough clue, particularly first thing in the morning, but do not use it as your only hydration test. Consider thirst, weather, sweating, how much you have been drinking, how often you urinate, and how you feel.
Electrolytes or salty foods can be useful during long periods of sweating or extended exertion. They are not automatically required for every short hike, and ordinary food often provides useful sodium during longer days.
Gear and Equipment for High Altitude Hiking
Footwear should match the terrain, weather, pack weight, and your own feet. Some hikers prefer supportive hiking boots, while others are comfortable in lighter hiking shoes or trail footwear. Whatever you choose, dependable traction, a secure fit, and prior trail testing matter more than simply choosing the tallest boot.
Break in new footwear before a major trip and test your sock combination on long training hikes. Moisture-managing socks and dry backup socks can reduce discomfort when conditions are wet.
Use clothing layers that can be adjusted quickly. A moisture-managing base layer, insulating layer, and weather-resistant outer layer give you more options when wind, rain, snow, or temperature changes arrive unexpectedly.
The National Park Service Ten Essentials provide a useful minimum framework for outdoor preparation:
- Navigation: map, compass, GPS or offline navigation, plus the knowledge to use them.
- Sun protection: sunglasses, sunscreen, hat, and protective clothing.
- Extra clothing or insulation appropriate for possible conditions.
- Illumination such as a headlamp plus spare power.
- First-aid supplies and personal medications.
- Fire-starting supplies where appropriate and legal.
- Repair tools.
- Extra food.
- Water plus a suitable water-treatment method where needed.
- Emergency shelter such as a bivy, tarp, tent, or emergency blanket.
Trekking poles are optional but can improve balance and reduce some of the stress of steep descents. They are especially useful when carrying a pack or crossing uneven ground.
A comfortable, properly fitted pack is also important. This guide to the best hiking backpack for multi-day trek can help when comparing pack features for longer adventures. Test your pack with realistic weight before departure so you know how the shoulder straps, sternum strap, and hip belt feel after several hours.
Techniques for High Altitude Hiking
Pacing and Resting
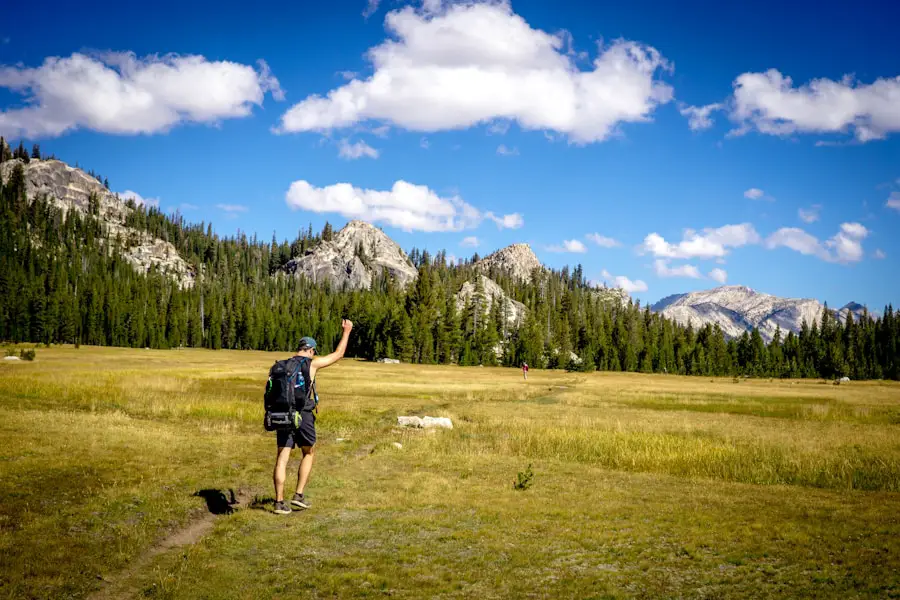
Start more slowly than you think you need to. A steady pace usually works better than repeated bursts of hard climbing followed by long stops. On steep slopes, shorten your stride and choose a speed that keeps your breathing under control.
Take breaks before exhaustion forces you to stop. Use them to eat, drink, adjust layers, check your feet, reassess weather, and compare how everyone in the group is feeling.
Acclimatization and Stability
The “climb high, sleep low” principle can be useful during a properly planned acclimatization schedule. You might hike higher during the day and return to a lower sleeping elevation at night. However, do not deliberately climb higher when you already have altitude-illness symptoms.
Trekking poles can improve balance on rocky or loose terrain and provide additional contact points during descents. Adjust pole length to the terrain instead of relying on one fixed position for every slope.
Navigating and Breathing
Use established switchbacks rather than cutting directly across them. Switchbacks reduce climbing grade and help protect fragile slopes from erosion.
Slow, controlled breathing may help you settle into a sustainable rhythm and manage anxiety. Deep abdominal breathing can be a useful pacing cue, but it does not prevent altitude sickness and cannot substitute for acclimatization, descent, or medical treatment.
Weather, Sun, and Route Planning at High Altitude
High-elevation environments add risks beyond low oxygen. Temperatures can drop quickly, winds can increase exposure, strong sunlight can burn skin and eyes, and thunderstorms can make exposed ridges dangerous.
- Check the most local forecast available before starting.
- Know your route, turnaround points, water sources, and bailout options.
- Start early when afternoon thunderstorms are common.
- Leave exposed ridges and summits when threatening weather approaches.
- Carry insulation and rain protection even when the trailhead feels warm.
- Protect skin and eyes from strong UV exposure, especially around snow.
- Download maps before losing cellular service and carry backup navigation.
If you rely on natural water sources, carry an appropriate treatment method. Never assume clear mountain water is safe to drink untreated.
Safety and Emergency Preparedness at High Altitude
Learn the symptoms of altitude illness before leaving home. Several conditions—including dehydration, heat illness, exhaustion, infection, hypoglycemia, and exercise-associated hyponatremia—can overlap with AMS symptoms, so do not dismiss worsening illness simply because you believe you are “only tired.”
| Condition | Warning Signs | What to Do |
| Acute Mountain Sickness (AMS) | Headache after ascent with symptoms such as nausea, appetite loss, dizziness, or unusual fatigue. | Stop ascending to sleep higher. Rest at the same altitude. Descend if symptoms worsen or fail to improve appropriately. |
| High-Altitude Cerebral Edema (HACE) | Confusion, unusual drowsiness, altered behavior, or inability to walk normally because of poor coordination. | Medical emergency. Begin urgent descent, obtain emergency help, and use oxygen or other appropriate emergency treatment if available. |
| High-Altitude Pulmonary Edema (HAPE) | Shortness of breath at rest, worsening weakness, cough, reduced exercise ability, or respiratory distress. | Medical emergency. Urgent descent is generally required. Minimize exertion, seek emergency care, and use supplemental oxygen if available. |
Before entering remote terrain, tell a reliable person where you are going, your route, when you expect to return, and what they should do if you miss your check-in time.
Carry a first-aid kit and know how to use the contents. In places without reliable cell service, consider a satellite messenger, personal locator beacon, satellite phone, or another communication method suitable for the route.
Navigation skills remain important even when carrying GPS. Batteries fail, devices break, and weather can reduce visibility, so carry a backup method appropriate for the trip.
Training Programs and Resources for High Altitude Hiking
Guided training hikes, mountaineering clubs, outdoor organizations, and qualified coaches can be useful when preparing for demanding high-altitude objectives. Look for instruction that covers pacing, route planning, pack systems, navigation, weather, acclimatization, emergency response, and realistic trail practice rather than promising that a workout alone can prevent altitude sickness.
Online hiking and mountaineering communities can also provide useful first-hand route information, but distinguish personal experience from medical guidance. Individual stories about someone rapidly ascending without symptoms do not prove the same itinerary is safe for another person.
Books and courses from experienced mountain guides can help with technical skills, while medical questions about prior AMS, HAPE, HACE, prescription prevention, or chronic disease are better addressed with a clinician familiar with altitude medicine.
If you are planning a high altitude hiking trip, cardiovascular endurance remains one key part of preparation, but it should sit alongside strength, pack training, recovery, acclimatization, gear practice, and emergency planning. A comfortable and well-fitted backpack can make long days much easier, but no piece of equipment can compensate for ascending too quickly or ignoring symptoms.
Love travel? Join Our Facebook Community
Frequently Asked Questions
What is high altitude hiking?
For practical hiking safety, elevations around 8,000 feet (2,400 meters) and higher deserve extra attention because unacclimatized travelers can develop altitude illness. Air pressure falls as elevation rises, so less oxygen is available to the body with each breath even though the percentage of oxygen in the atmosphere remains roughly the same.
Why is training important for high altitude hiking?
Training improves the endurance, muscular strength, balance, pack tolerance, and recovery ability needed for long climbs. It can make hiking at altitude less physically demanding, but fitness does not prevent altitude sickness. Gradual acclimatization is still necessary.
What are some training exercises for high altitude hiking?
Useful training includes brisk walking, hiking, running, cycling, swimming, rowing, stair climbing, and incline treadmill work. Strength exercises such as squats, lunges, step-ups, calf raises, hip hinges, rows, and core-stability work help prepare for climbing, descending, and carrying a pack.
How long does it take to train for high altitude hiking?
An already-active hiker can often make useful progress in 6–8 weeks, while someone starting with less conditioning may benefit from 8–12 weeks or longer. This time develops fitness, not altitude acclimatization. Acclimatization requires recent exposure to elevation and an appropriately gradual ascent during the trip.
What are some tips for training at lower elevations for high altitude hiking?
Use hills, stairs, bridges, stadium steps, or an incline treadmill to build climbing fitness. Gradually increase hiking duration and elevation gain, practice with your expected pack weight, strengthen your legs and core, and include recovery days. Low-elevation training improves fitness but cannot fully reproduce acclimatization to reduced oxygen pressure.
Can getting very fit prevent altitude sickness?
No. Physical fitness can improve hiking performance, but current CDC guidance states that training and fitness do not determine susceptibility to altitude illness. A very fit person can still develop AMS, HAPE, or HACE after an ascent that is too rapid for that individual.
What altitude-sickness symptoms mean I should descend?
Do not ascend to sleep higher while altitude-illness symptoms are present. Descend when symptoms worsen despite rest at the same elevation. Confusion, loss of coordination, severe drowsiness, or shortness of breath at rest may indicate HACE or HAPE and require urgent descent and emergency medical help.
Sources
- CDC Yellow Book — High-Altitude Travel and Altitude Illness — altitude risk, acclimatization, AMS, HACE, HAPE, prevention, and descent guidance.
- Wilderness Medical Society Clinical Practice Guidelines: 2024 Update — evidence-based prevention, diagnosis, and treatment of acute altitude illness.
- CDC Yellow Book — Heat and Cold Illness in Travelers — hydration, prolonged exercise, electrolyte balance, and exercise-associated hyponatremia.
- National Park Service — Ten Essentials — navigation, clothing, illumination, first aid, food, water, and emergency equipment.
- U.S. Department of Health and Human Services — Physical Activity Guidelines — current aerobic and muscle-strengthening recommendations for adults.

