
Last Updated on July 27, 2026 by Daniel Globe
Training for altitude hiking means preparing for two different challenges: the physical work of climbing steep trails and your body’s response to lower oxygen pressure at elevation. You can improve strength and endurance before your trip, but fitness alone does not prevent altitude sickness. A safe plan combines progressive hiking-specific training with enough time to acclimatize once you reach elevation.
Quick Answer
Train for altitude hiking for about 8–12 weeks with aerobic exercise, hills or stairs, leg and core strength work, and progressively longer hikes with your actual pack. Fitness improves hiking performance, but acclimatization requires time at elevation. Above about 8,000 feet, ascend gradually and never continue higher if altitude-illness symptoms are worsening.
Key Takeaways
- Build aerobic endurance, leg strength, balance, and hiking-specific stamina before your trip.
- Physical fitness does not make you immune to acute mountain sickness; proper acclimatization still matters.
- Practice hills, stairs, descents, and long walks while carrying the pack and footwear you will use on the trip.
- Once above roughly 9,800 feet (3,000 m), increase sleeping elevation gradually and include acclimatization days.
- Do not ascend higher with altitude-illness symptoms. Confusion, loss of coordination, or breathlessness at rest require urgent descent and medical help.
At a Glance
| Time Required | About 8–12 weeks for most recreational hikers; longer if you are starting from a low fitness base |
| Difficulty | Moderate to challenging, depending on your destination, elevation gain, pack weight, and current fitness |
| Tools Needed | Hiking shoes or boots, backpack, hills or stairs, basic strength equipment or body weight, and the clothing you plan to use |
| Cost | $0 when using local trails, stairs, and body-weight exercises; gym access, travel to elevation, or specialized hypoxic facilities cost extra |
Disclosure: As an Amazon Associate I earn from qualifying purchases. Some links on this page are affiliate links, at no extra cost to you.
Understanding the Effects of High Altitude on the Body
At elevation, the percentage of oxygen in the air remains close to 21%, but lower atmospheric pressure means each breath delivers less oxygen to your lungs. According to the CDC Yellow Book 2026, an unacclimatized traveler sleeping at about 8,000 feet (2,450 m) or higher can be at risk for altitude illness, although symptoms can sometimes occur lower.
Your immediate response includes faster breathing and changes in circulation. Exercise also feels harder, so a pace that feels comfortable near sea level may require much more effort in the mountains.
The CDC reports that about 25% of visitors who sleep above 8,000 feet in Colorado develop acute mountain sickness.
Initial Symptoms and Acclimatization
Acclimatization begins after you arrive at elevation. During the first hours and days, your breathing increases and your body makes several adjustments that improve oxygen delivery. Increased red-blood-cell production becomes more important with longer exposure, but it is not the main mechanism of acute acclimatization.
Much of the ventilatory adjustment develops over several days, and additional adaptations can continue for much longer. No training plan can make this process instantaneous.
Note: Fitness and acclimatization are not the same thing. A very fit runner can still develop altitude sickness, while a less athletic person may acclimatize without symptoms. Fitness prepares you for the workload; gradual altitude exposure prepares you for hypoxia.
Altitude Sickness and Its Consequences
Acute mountain sickness (AMS) commonly causes headache along with symptoms such as nausea, dizziness, unusual fatigue, or loss of appetite after a recent ascent. Symptoms often begin within several hours of arriving at a new sleeping elevation.
Two more serious conditions are high-altitude cerebral edema (HACE), which affects the brain, and high-altitude pulmonary edema (HAPE), which causes fluid accumulation in the lungs. Both can become fatal without prompt treatment.
| Condition | Typical Warning Signs | What to Do |
|---|---|---|
| AMS | Headache with nausea, dizziness, fatigue, or poor appetite after ascent | Do not ascend to a higher sleeping elevation. Rest and monitor symptoms. Descend if symptoms worsen or fail to improve. |
| HACE | Confusion, unusual drowsiness, inability to walk normally, or loss of coordination | Medical emergency. Descend urgently with assistance and obtain medical care. |
| HAPE | Worsening shortness of breath, reduced exercise ability, cough or chest congestion, especially breathlessness at rest | Medical emergency. Minimize exertion, descend urgently, and use supplemental oxygen if medically available. |
Warning: Confusion, loss of coordination, severe drowsiness, breathlessness at rest, or rapidly worsening respiratory symptoms are not normal signs that you should simply “push through.” They can indicate HACE or HAPE. Descend and seek emergency medical help.
Importance of Understanding Altitude-Related Effects
Knowing these symptoms before your trip helps you make better decisions when judgment is affected by fatigue or summit pressure. The most important rule is simple: never continue to a higher sleeping elevation while you have worsening altitude-illness symptoms.
The Wilderness Medical Society 2024 guidelines identify descent as the most reliable treatment for serious altitude illness. Medication and oxygen can be valuable in appropriate situations, but neither makes an unsafe ascent safe.
Preparing Physically for Altitude Hiking
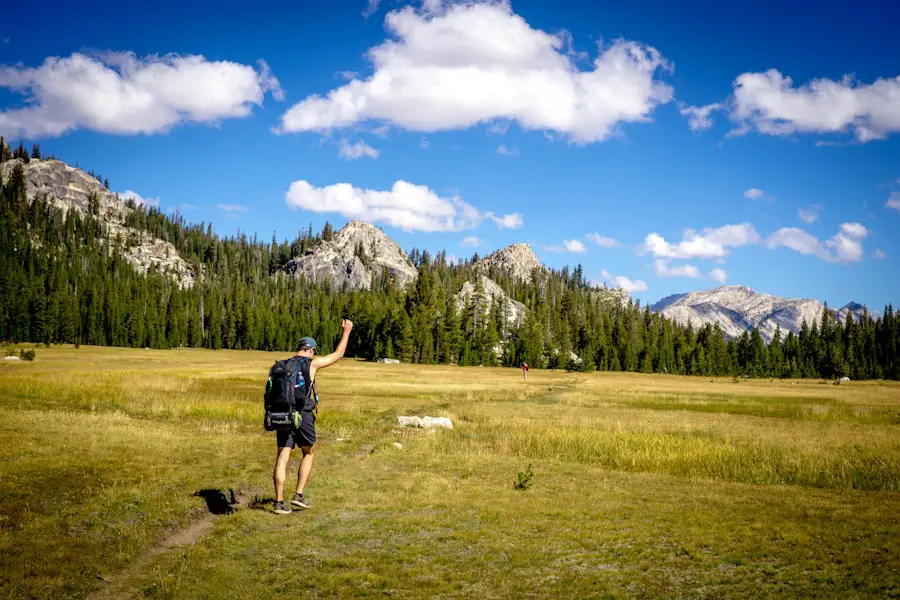
Physical preparation should focus on the work you will actually perform: walking for hours, climbing, descending, balancing on uneven terrain, and carrying a pack.
Start with aerobic conditioning. The American Heart Association identifies brisk walking, running, cycling, swimming, and stair climbing as useful forms of endurance exercise. For hiking, incline walking and stairs are particularly useful because they resemble sustained climbing.
Strength work should target the legs, hips, calves, and core. Useful exercises include squats, split squats, lunges, step-ups, calf raises, deadlift variations, and loaded carries. You do not need to lift extremely heavy weights; the goal is strong, durable movement that holds up for many hours.
Do Not Forget Downhill Training
Long descents can be surprisingly demanding because your quadriceps repeatedly control your body as you step downward. Practice downhill hiking, controlled step-downs, and eccentric leg work so your knees and thighs are prepared for the return trip as well as the climb.
Pro Tip: During your final few long training hikes, wear the same footwear, socks, backpack, and approximate pack load you expect to use on the trip. This reveals hot spots, fit problems, and uncomfortable strap adjustments before you are several miles from a trailhead.
An 8-Week Altitude Hiking Training Plan
This sample plan works best for someone who is already able to walk for at least 30–45 minutes comfortably. If you are starting from a sedentary baseline, have an injury, or are preparing for an unusually demanding expedition, allow more preparation time.
| Weeks | Aerobic Work | Strength | Hiking Practice |
|---|---|---|---|
| 1–2 | 3 sessions of 30–45 minutes at an easy to moderate pace | 2 full-body sessions emphasizing legs and core | One 60–90 minute walk or hike; begin adding gentle hills |
| 3–4 | 2 steady aerobic sessions plus 1 hill or stair workout | 2 sessions with step-ups, lunges, squats, calf raises, and core work | Build the long hike toward 2–3 hours and begin carrying a light pack |
| 5–6 | 2 steady sessions plus 1 more demanding hill, stair, or interval workout | 2 sessions; maintain good form rather than chasing maximum weight | 3–5 hour hike with meaningful climbing and the pack weight you expect to carry |
| 7 | Maintain aerobic fitness without dramatically increasing intensity | 1–2 moderate sessions | Complete your most trip-specific hike, including sustained climbing and descending |
| 8 | Reduce total training volume while keeping some easy movement | Light maintenance only early in the week | Short, easy hiking or walking; arrive rested rather than exhausted |
Progress gradually. A hard training week followed by an injury is less useful than several months of consistent work. Schedule at least one easier or rest day each week and reduce training if persistent pain, unusual exhaustion, or declining performance develops.
Preparing Mentally for Altitude Hiking
| Approximate Sleeping Elevation | What You May Notice | Recommended Response |
|---|---|---|
| 2,000–3,000 m (6,600–9,800 ft) |
Faster breathing during exertion and reduced exercise performance; susceptible people can develop AMS | Pace conservatively, allow time to adjust, and monitor for headache plus other AMS symptoms |
| 3,000–4,500 m (9,800–14,800 ft) |
Greater breathing effort, slower hiking pace, disturbed sleep, and increasing altitude-illness risk | Control sleeping-elevation gain, add acclimatization days, and do not ascend while symptomatic |
| Above 4,500 m (14,800 ft) |
Major reduction in exercise performance and greater physiological stress | Use a conservative itinerary. Confusion, loss of coordination, or breathlessness at rest require urgent descent and medical attention at any high elevation |
Mental preparation matters because altitude hiking rewards patience more than speed. Your normal trail pace may feel unsustainably fast at elevation. Expect that and avoid interpreting a slower pace as failure.
Visualization can help you rehearse difficult sections, early starts, changing weather, and the possibility of turning around. Set process goals such as maintaining a steady pace, eating regularly, and reaching predetermined turnaround points safely rather than focusing only on summiting.
A good mental plan also includes permission to stop. Summit pressure can cause hikers to ignore symptoms or continue because other people are moving faster. Turning around when conditions or symptoms are unsafe is a successful decision, not a failed hike.
How to Acclimatize Before and During Your Hike
Acclimatization is the part of altitude preparation you cannot replace with gym work. When possible, avoid traveling directly from low elevation to a very high sleeping altitude and immediately beginning strenuous hiking.
The CDC recommends avoiding a direct jump from low altitude to a sleeping elevation around 9,000 feet (2,750 m) in one day when practical. Once you are above about 9,800 feet (3,000 m), keep increases in sleeping elevation to roughly 1,600 feet (500 m) or less per night and add an extra acclimatization night for each additional 3,300 feet (1,000 m) of sleeping-elevation gain.
Use Sleeping Elevation to Plan Your Ascent
The highest point you reach during the day is not the only number that matters. Sleeping elevation is particularly important when planning acclimatization. You can sometimes hike higher during the day and return lower to sleep, a strategy often described as “climb high, sleep low.”
Pre-Acclimatize When Practical
If your schedule allows it, spending at least two nights above about 9,000 feet within the two weeks before a higher trip can provide useful pre-exposure. Closer exposure to the departure date is generally more helpful than an altitude visit many weeks earlier.
After arriving at significant elevation, keep activity relatively mild during the first 48 hours instead of immediately attempting your hardest climb.
Pro Tip: When planning a multi-day trek, build extra acclimatization time into the itinerary before buying transportation or lodging that depends on a rigid summit schedule. Extra time gives you room to slow down without feeling pressured to ignore symptoms.
Choosing the Right Gear for Altitude Hiking
High mountains can expose you to cold, strong sun, low humidity, wind, rain, snow, and fast weather changes. Clothing should therefore work as a system rather than as one heavy layer.
- Base layer: Moisture-managing synthetic fabric or merino wool.
- Insulating layer: Fleece or another layer appropriate for the expected temperature.
- Weather protection: Wind- and rain-resistant outer shell.
- Footwear: Well-fitted hiking shoes or boots matched to the terrain.
- Socks: Moisture-managing hiking socks that you have already tested.
- Sun protection: Sunglasses, sunscreen, hat, and sun-protective clothing.
- Cold protection: Warm hat and gloves where conditions require them.
- Navigation: Map and compass or reliable offline navigation, plus the skill to use them.
- Emergency equipment: First-aid supplies, headlamp, extra food, extra layers, and an emergency communication device when traveling beyond cell coverage.
The National Park Service Hike Smart guidance also recommends checking weather and park alerts, carrying the essentials, telling someone your route and expected return time, and matching the hike to your abilities.
Sturdy footwear is especially important on rocky trails, while trekking poles can improve stability and reduce some of the strain associated with long descents. Test all major gear before departure rather than discovering fit problems on the mountain.
Training Techniques for Altitude Hiking
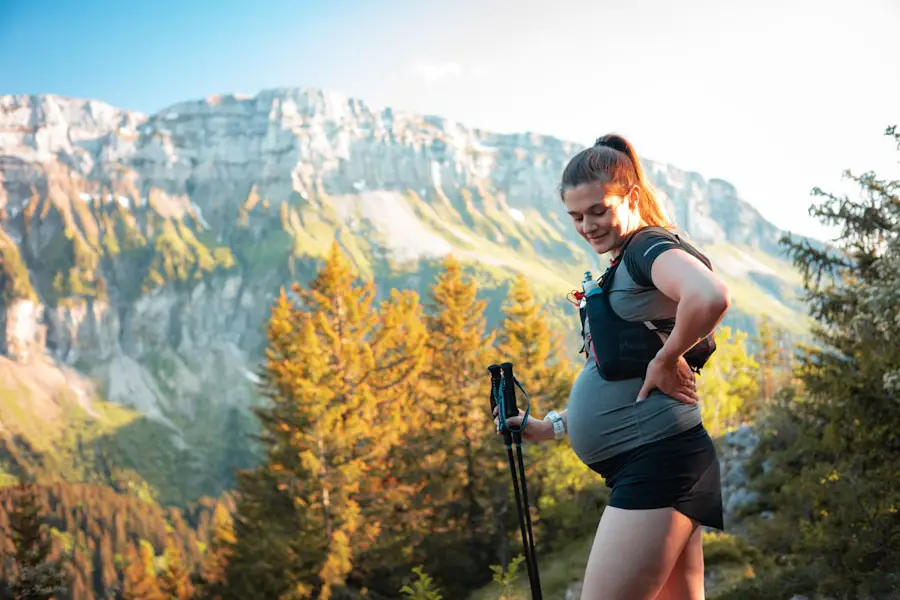
Use Hills and Stairs
Incline walking, stair climbing, hill repeats, and steep local trails provide excellent hiking-specific conditioning. They strengthen the muscles used during climbing while training you to sustain work when your breathing becomes harder.
Add Intervals Carefully
High-intensity interval training can improve cardiovascular fitness, but it should supplement—not replace—longer steady aerobic sessions and actual hiking. One demanding interval or hill session per week is enough for many recreational hikers, particularly while long hikes and strength sessions are also increasing.
Train With Your Pack
Begin with a light backpack and gradually work toward the load you expect to carry. Do not suddenly add a heavy pack to every workout. The objective is to let your shoulders, hips, feet, and legs adapt without creating an overuse injury.
Know What Altitude Masks Can and Cannot Do
Resistance-style “elevation” masks make breathing more difficult by restricting airflow, but they generally do not reproduce the reduced oxygen partial pressure found at altitude. Studies have found that these masks behave more like respiratory-resistance devices than true altitude simulators.
A purpose-built hypoxic chamber, room, or tent can reduce the oxygen available to the user and is therefore different from a simple breathing-resistance mask. Even true simulated-hypoxia systems do not eliminate the need for a sensible ascent itinerary.
Note: You can train successfully for a high-altitude trek while living at sea level. Build excellent hiking fitness at home, then rely on a conservative itinerary and actual acclimatization once you reach elevation.
Hydration and Nutrition at Altitude
Dry air, increased breathing, exercise, and changes in fluid balance can make dehydration easier during mountain travel. Drink regularly enough to replace normal losses, and eat enough food to support long hiking days.
However, drinking excessive amounts of water does not prevent acute mountain sickness. The Wilderness Medical Society notes that forced overhydration has not been shown to protect against altitude illness and can increase the risk of hyponatremia, a dangerous drop in blood sodium.
For long or sweaty hiking days, normal meals, snacks, and appropriate electrolyte-containing foods or drinks can help replace both energy and sodium losses. Carry foods that you already know you tolerate during exercise rather than testing unfamiliar products on summit day.
Safety Tips for Altitude Hiking
Before departure, check the route, weather forecast, trail conditions, water availability, daylight, and emergency options. High-elevation weather can change rapidly, and exposed ridges are dangerous places to be during thunderstorms.
The National Park Service recommends carrying water and extra food, using sturdy footwear, packing a headlamp and extra warmth, checking the weather, and telling someone where you are going and when you plan to return.
Follow Three Altitude-Safety Rules
- Recognize symptoms early. Headache combined with nausea, dizziness, or unusual fatigue after ascent may indicate AMS.
- Do not ascend with symptoms. Never move to a higher sleeping elevation while altitude-illness symptoms are continuing or worsening.
- Descend when symptoms worsen. Worsening illness despite rest at the same elevation is a reason to go lower. HACE or HAPE signs require urgent descent.
Do Not Rely on a Pulse Oximeter Alone
A pulse oximeter can provide useful supplemental information, but oxygen saturation normally decreases with altitude and devices can give imperfect readings because of cold fingers, motion, poor circulation, or equipment limitations. Symptoms and changes in a hiker’s condition are more important than chasing one specific saturation number.
Know When to Talk With a Doctor Before the Trip
People with significant heart or lung disease, pre-existing low oxygen levels, severe sleep apnea, sickle-cell disease or trait, poorly controlled medical conditions, pregnancy concerns, or a history of serious altitude illness should discuss their itinerary with a clinician familiar with high-altitude medicine.
Warning: Prescription medicines such as acetazolamide can be appropriate for some altitude itineraries, particularly when gradual ascent is not possible. They should be discussed with a qualified healthcare professional who can consider your route, medical history, other medicines, and previous altitude response.
Note: This article provides general educational information and does not replace individualized medical advice, diagnosis, or emergency treatment.
Post-Hike Recovery and Maintenance
After a demanding hike, spend several minutes walking easily before stopping completely. Gentle mobility can help you loosen tight muscles, but aggressive stretching is not required.
Replace fluids according to what you lost during the hike and eat a normal recovery meal containing carbohydrates, protein, and other nutrient-rich foods. You do not need to force a large meal the moment you finish, but eating within the next few hours can support recovery.
Sleep is equally important. Schedule lighter days after your longest training hikes and avoid stacking difficult workouts simply to meet a calendar target. Consistent training plus recovery produces better results than repeatedly exercising while exhausted.
In conclusion, successful altitude hiking preparation combines strong general fitness, hiking-specific endurance, thoughtful mental preparation, reliable gear, and a conservative acclimatization plan. Training can make steep trails and long days easier, but it cannot make you immune to altitude illness. Respect symptoms, control your sleeping-elevation gain, and be willing to descend when your body is not adapting safely.
For travelers organizing equipment before departure, packing cubes can help separate clothing and accessories during travel, although they are not an altitude-safety item. Compact binoculars are another optional item for wildlife watching or distant views. Travelers combining a mountain trip with golf may also want to review these golf travel bags for transporting clubs separately from hiking equipment.
Sources
- CDC Yellow Book 2026: High-Altitude Travel and Altitude Illness — acclimatization, AMS/HACE/HAPE, sleeping-elevation guidance, medication, and medical-risk information.
- Wilderness Medical Society Clinical Practice Guidelines: 2024 Update — altitude-illness prevention, diagnosis, hydration, descent, and treatment guidance.
- American Heart Association: Endurance Exercise — aerobic conditioning guidance.
- National Park Service: Hike Smart — general hiking preparation, weather, elevation, and essential-equipment guidance.
- National Park Service: Hiking Safety — high-elevation hiking preparation and emergency-safety recommendations.
Frequently Asked Questions
What is altitude hiking?
Altitude hiking generally refers to hiking at elevations high enough for lower atmospheric pressure to noticeably affect exercise and potentially cause altitude illness. For practical safety planning, unacclimatized travelers sleeping around 8,000 feet (2,450 m) or higher can be at risk.
Why is training for altitude hiking important?
Training improves the aerobic endurance, leg strength, balance, and hiking-specific stamina needed for long climbs and descents. It does not prevent acute mountain sickness, so physical training must be combined with a safe acclimatization schedule.
How can I train for altitude hiking?
Combine three or more aerobic sessions each week with two strength sessions, hills or stairs, and one progressively longer hike. As the trip approaches, practice in your real footwear while carrying approximately the pack load you expect to use.
Can I prepare for altitude hiking if I live at sea level?
Yes. You can build excellent hiking fitness with stairs, incline walking, strength work, and long local hikes. What you cannot fully reproduce at sea level is natural acclimatization, so your itinerary at the destination still needs to allow gradual altitude exposure.
How long does it take to acclimatize to high altitude?
Adjustment begins soon after arrival, and substantial ventilatory acclimatization develops over roughly the first several days. Other physiological adaptations continue longer. The exact response varies among people and also depends on elevation and the speed of ascent.
What are some tips for training for altitude hiking?
Train consistently rather than suddenly increasing volume. Practice sustained climbing, downhill movement, long hiking days, and carrying your actual pack. Test footwear and clothing in advance, schedule recovery days, and reduce training volume shortly before departure.
Do altitude training masks help me acclimatize?
Typical resistance-style altitude masks do not reproduce the low oxygen partial pressure of actual altitude. They mainly make breathing harder. Purpose-built hypoxic rooms, tents, or chambers work differently, but even simulated hypoxia does not replace a sensible ascent schedule.
Are there risks associated with altitude hiking?
Yes. Risks include acute mountain sickness, HACE, HAPE, dehydration, hyponatremia from excessive fluid intake, cold injury, intense sun exposure, severe weather, lightning, falls, and worsening of some existing medical conditions.
When should I descend because of altitude sickness?
Do not ascend higher while altitude-illness symptoms are present. Descend if symptoms worsen despite rest at the same elevation. Confusion, inability to walk normally, loss of coordination, breathlessness at rest, or rapidly worsening respiratory symptoms require urgent descent and medical attention.

