
Last Updated on September 10, 2026 by Daniel Globe
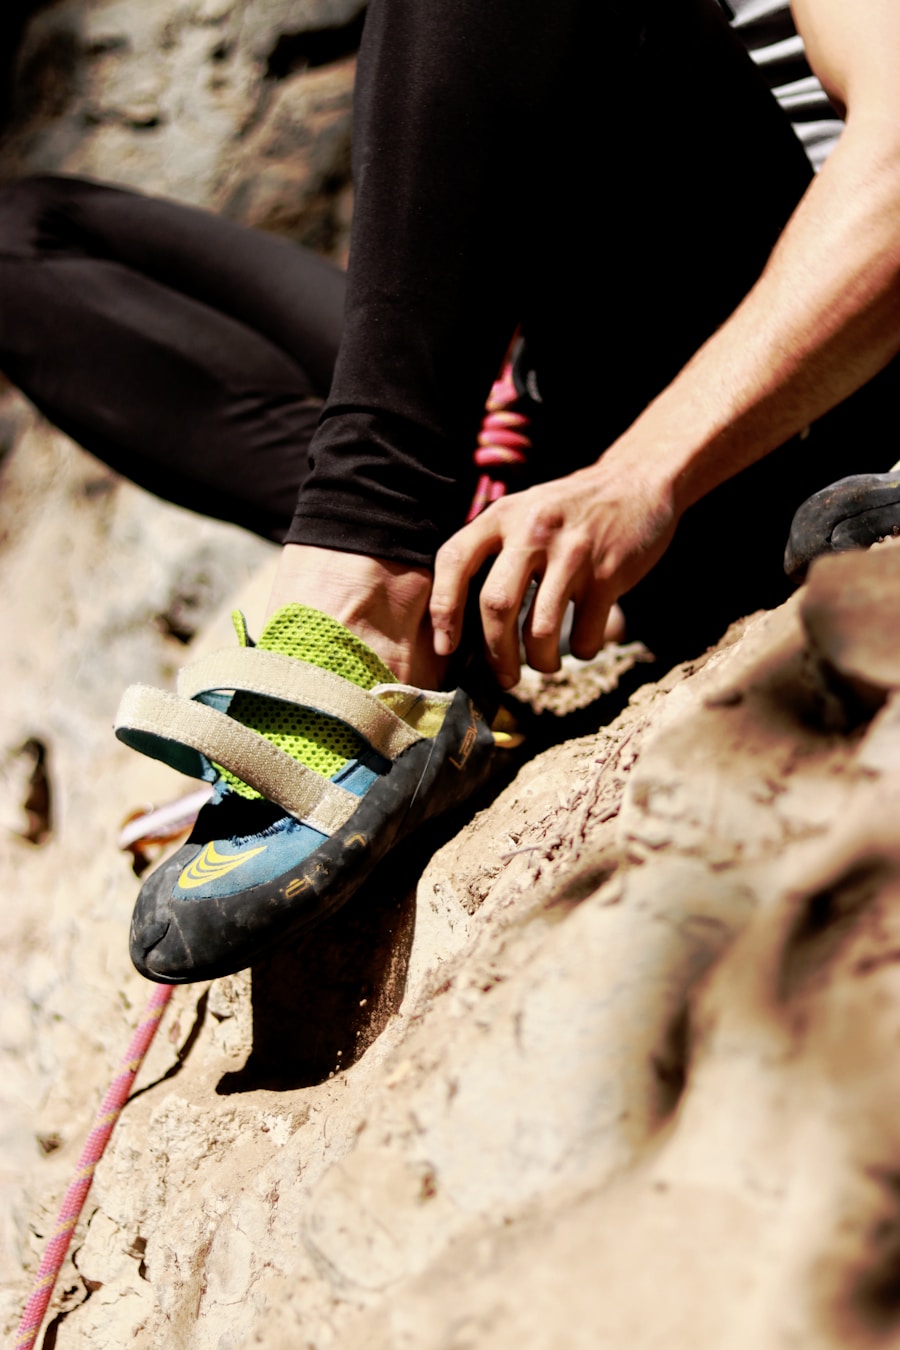
Tying hiking shoes well is less about pulling every lace as tight as possible and more about holding your foot securely without creating pressure points. The right lacing tension can reduce unwanted heel movement, give your toes room to move, and make long climbs and descents more comfortable. The best setup depends on your footwear, foot shape, and the terrain ahead.
Quick Answer
To tie hiking shoes, seat your heel at the back of the shoe, snug the laces gradually from the toes upward, keep the forefoot comfortable, secure the midfoot, and tie a firm bow. Use a runner’s loop for heel slip, window lacing for instep pressure, or a surgeon’s knot on hiking boots with lace hooks.
Key Takeaways
- Hiking shoes should feel snug and secure, but never painfully tight or numb.
- A runner’s loop, often called a heel lock, can reduce heel movement in shoes with suitable upper eyelets.
- A surgeon’s knot is useful on many hiking boots because it can hold tension between separate lacing zones.
- Window lacing can relieve pressure on the top of the foot, while toe-relief lacing can reduce pressure near the front of the shoe.
- On descents, secure the heel to limit forward sliding. On climbs, some two-zone boots allow a slightly looser upper section for ankle movement.
- Lacing can fine-tune a good fit, but it cannot correct footwear that is fundamentally the wrong size, width, or shape.
At a Glance
| Time Required | About 3–5 minutes |
| Difficulty | Easy |
| Tools Needed | Hiking shoes or boots with intact, correctly sized laces |
| Cost | $0 if your current laces are usable |
Disclosure: As an Amazon Associate I earn from qualifying purchases. Some links on this page are affiliate links, at no extra cost to you.
How to Tie Hiking Shoes Step by Step
- Loosen the shoe first. Open the lacing enough to slide your foot in without forcing it through a tightly cinched opening.
- Seat your heel. Place your foot flat on the ground and gently tap or press your heel toward the back of the heel cup.
- Snug the forefoot. Starting near the toes, remove obvious slack without squeezing the toe box. Your toes should still be able to move comfortably.
- Secure the midfoot. Work upward one eyelet at a time so the shoe holds your arch and midfoot without a single painful pressure point.
- Adjust the heel area. If your heel moves excessively, use a runner’s loop/heel lock or another technique recommended for your shoe’s eyelet design.
- Tie a secure bow. Keep the loops and lace ends short enough that they cannot drag on the trail or catch on the opposite shoe.
- Test the fit. Walk, flex your ankles, and if possible try a short incline and decline. Re-lace if your heel slides, your toes strike the front, or you feel pinching, tingling, or numbness.
Warning: Tighter is not always better. Stop and loosen or re-lace your footwear if you develop numbness, tingling, throbbing pressure, or increasing pain. Persistent symptoms can also mean the shoe itself is the wrong size, width, or shape.
REI’s current hiking-footwear fit guidance describes a good hiking shoe as snug without being tight and recommends checking heel position, toe room, and pressure points before relying on specialized lacing.
Different Techniques for Tying Hiking Shoes
There is no single lacing pattern that works best for every foot. The goal is to change tension only where you need it while keeping the shoe secure. Research on athletic footwear has shown that different lacing configurations can change pressure across the top of the foot and affect perceived stability, which is why small adjustments can make a noticeable difference.
1. Standard Crisscross Lacing
Standard crisscross lacing is the best starting point when your hiking shoes already fit well. Run each lace diagonally to the opposite eyelet and continue upward, keeping the tension even from side to side.
Do not yank the bottom eyelets tight. Instead, remove slack gradually as you work toward the ankle. This helps you avoid creating one overly tight band across the forefoot or instep.
2. Runner’s Loop or Heel Lock
The runner’s loop, also widely called a heel lock, is useful when a low-cut hiking shoe has an extra pair of eyelets near the collar and your heel moves up and down more than you would like.
- Lace normally until you reach the second-to-last eyelet.
- Run each lace straight up through the final eyelet on the same side to form a small loop.
- Cross the lace ends.
- Pass each lace through the loop on the opposite side.
- Pull the laces back and slightly downward until the heel feels more secure.
- Tie your normal bow.
This technique is also described by Salomon as a Runner’s Loop or Heel Lock. Names vary between brands, so the eyelet pattern matters more than the label.
3. Surgeon’s Knot for Hiking Boots
Higher hiking boots often use eyelets over the foot and hooks around the ankle. On this style of footwear, a surgeon’s knot can hold tension in one area before you lace the next section.
- Snug the boot over your forefoot and midfoot.
- At the point where the top of your foot begins to flex toward your ankle, cross the lace ends.
- Wrap them around each other twice instead of once.
- Pull the knot snug enough to hold the lower-zone tension.
- Continue to the next hooks and finish tying the boot normally.
REI’s hiking-boot lacing guide recommends this technique when excessive heel movement is related to too much volume in the upper part of a boot.
4. Window Lacing for Pressure on Top of the Foot
If crossing laces create a sore pressure point over your instep, window lacing—also called box or parallel lacing—leaves that spot relatively open.
- Identify the eyelets directly below the pressure point.
- Instead of crossing the laces over that area, run each lace straight up to the next eyelet on the same side.
- Resume normal crisscross lacing above the uncomfortable area.
Both REI and Hanwag describe this type of lacing as a way to relieve pressure across the instep.
5. Toe-Relief Lacing
If your toes feel compressed during a hike, REI suggests a temporary toe-relief setup: re-lace the shoe or boot while skipping the lowest set of eyelets or hooks. This reduces lace pressure near the toe box.
This is a short-term adjustment, not a cure for footwear that is consistently too short or narrow. If your toes repeatedly hit the front on descents, reassess the size and shape of the shoe.
6. Two-Zone Lacing
Some hiking boots allow the forefoot and ankle sections to be tensioned separately. A locking hook, overhand knot, or similar feature can hold the lower zone while you change the upper-zone tension.
This is especially useful when switching between long climbs and descents. Hanwag recommends keeping enough lower-zone tension to seat the heel during climbs while allowing the upper section to remain somewhat looser, then securing both areas more firmly for descents.
Choosing the Right Laces for Your Hiking Shoes
The laces themselves affect how easily you can maintain the tension you want. Hiking footwear may use flat, oval, or round laces, and the best option depends on the shoe’s eyelets, hooks, lace channels, and original design.
Rather than assuming flat or round laces are automatically better, start by matching the original pair. REI recommends matching both the shape and length of the original laces when they need replacement, while Hanwag recommends using laces designed to work with the boot’s particular construction.
Length matters as well. Laces that are too short may prevent you from using a heel lock or reaching every hook. Excessively long laces leave oversized loops that can catch on brush, trail debris, or the hardware on your opposite shoe.
Elastic lacing systems can make footwear quicker to put on and remove, but they may offer less control over separate tension zones. Before using them for hiking, make sure they are compatible with the footwear and still hold your heel and midfoot securely on slopes.
Note: Lacing techniques should fine-tune footwear that already fits. They should not be used to force an oversized, undersized, excessively narrow, or poorly shaped shoe to fit your foot.
Products Worth Considering
![Stepace Round Shoelaces [2 Pairs] Heavy Duty Boot Shoe Laces for Hiking Work Boots Coffee Khaki-120(Dots)](https://m.media-amazon.com/images/I/51CdlMxDimL._SL500_.jpg)
The Package Includes -2 pairs of Stepace round laces (4 laces)
![Miscly Round Boot Laces [1 Pair] Heavy Duty and Durable Shoelaces for Boots, Work Boots & Hiking Shoes (Black/Brown, 45 inches (114 cm))](https://m.media-amazon.com/images/I/51T1QSPEzJL._SL500_.jpg)
HEAVY DUTY: Reinforced with dual inner nylon cords, the same cords originally used in parachutes. Ensuring unparalleled strength and durability. 3/16in diameter

Compatibility: These Endoto shoelaces are designed to be compatible with Merrell shoes. Please refer to the size guide in the product images to confirm the best length for your needs.
Tips for Preventing Blisters and Hot Spots
| Preventive Tip | Why It Helps |
|---|---|
| Wear moisture-managing hiking socks | Helps manage sweat and reduces prolonged dampness inside the shoe. |
| Choose properly fitting shoes | Reduces excessive rubbing, toe impact, and pressure caused by poor fit. |
| Use blister pads, moleskin, or suitable tape | Creates a barrier over a known friction point; evidence is stronger for some taping strategies than for many other preventive products. |
| Use lubricants or foot powders cautiously | Some hikers find them useful for friction or moisture management, but research does not support every product equally. |
| Keep feet, socks, and footwear reasonably clean and dry | Helps reduce prolonged moisture and removes grit that can create concentrated rubbing. |
Blisters are usually linked to friction and repeated stress on the skin. Footwear that is too loose can allow excessive movement, while footwear that is too small or tight can create concentrated pressure and rubbing.
Try hiking footwear with the socks you expect to use on the trail. Feet can become slightly larger after hours of standing and walking, so trying footwear later in the day can also give you a more realistic idea of fit.
Moisture-wicking synthetic or wool hiking socks can help manage sweat. NHS blister guidance recommends comfortable, well-fitting footwear and moisture-wicking sports socks for people prone to friction blisters.
Break in stiffer hiking and backpacking boots on shorter walks rather than making a long backcountry trip their first outing. More flexible hiking shoes may require little break-in, but you should still test them before committing to a long day.
Evidence for blister-prevention products is mixed. A 2017 systematic review found limited high-quality evidence overall, while paper tape showed comparatively promising evidence as a friction-barrier strategy.
The review is available through PubMed.
Pro Tip: Treat a hot spot as an early warning. Stop, remove any grit, straighten your sock, adjust the lacing, and protect the irritated area before repeated rubbing turns it into a larger blister.
If a blister does form, keep it clean and protected. Do not assume that popping it is necessary. Seek medical advice for signs of infection such as increasing heat, redness, pus, or worsening pain, or if you have a condition that makes foot wounds more concerning.
Products Worth Considering

Mid-Crew length sits below the calf for non-restrictive, all day comfort.

MOISTURE MANAGEMENT: Our hiking socks are made with Coolmax fiber technology that wicks moisture away from the skin; keeps feet dry and comfortable on steep climbs, humid trails, and multi-day hikes

Breathable Bamboo Viscose: Made with Bamboo Viscose for a healthier choice—moisture-wicking, odor-resistant, and ultra-breathable, that effectively wicks away moisture and helps anti odor. Designed especially for sweaty feet, these socks keep your feet dry, fresh, and comfortable during any activity—whether running, hiking, working out, or tackling yard work.
How to Achieve a Secure and Comfortable Fit
A secure fit starts with the right shoe, not the laces. Your toes need enough room to move without hitting the front, while the heel and midfoot should feel controlled rather than sloppy.
Before putting your footwear on, loosen the laces enough that your foot slides naturally into place. Once your heel is seated, tighten gradually from the lower eyelets upward instead of pulling only on the top lace.
After tying, check four areas:
- Toes: They should not feel crushed or repeatedly strike the front of the shoe.
- Forefoot: The widest part of the foot should not feel pinched from the sides.
- Instep: The laces should hold the foot without digging painfully into the top of it.
- Heel: Minor movement varies by shoe design, but repeated lifting or rubbing is a sign to adjust the lacing or reassess the fit.
If you must pull the laces extremely tight just to stop your foot from moving inside the shoe, the footwear may have too much internal volume for your foot.
Products Worth Considering

No Tie Lacing System: Never waste time lacing up your boots again. With our Lock Laces Camo Boot Laces, you can turn all of your boots into adjustable slip-ons.


Easy on, Easy off - Traditional shoestrings are cumbersome to tie or untie. These bungee boot laces add quick slip-on feature to your boots: they stretch as you put your feet in or off your shoes, so you spend less time bending over to deal with shoe strings
Adjusting Your Laces for Different Terrain and Conditions
Your feet and ankles move differently on climbs, descents, and uneven ground. When your footwear supports separate lacing zones, adjusting those zones can improve comfort without giving up secure foot hold.
Uphill
On a long ascent, keep the lower section secure enough to hold the heel and midfoot. With a two-zone boot, the upper ankle section can sometimes be left slightly looser so the ankle can flex forward more comfortably.
Do not loosen the entire shoe until your foot slides around. The goal is controlled ankle movement, not a sloppy fit.
Downhill
Descents are where forward foot movement becomes especially noticeable. Snug the forefoot and midfoot without crushing your toes, then secure the heel and upper zone so your foot does not repeatedly slide toward the front.
Hanwag’s two-zone lacing guidance recommends tightening both areas for descents to help prevent the foot from sliding forward.
Wet or Muddy Conditions
Keep your lacing secure enough that the shoe stays firmly on your foot, and tuck or shorten loose loops so they cannot drag through mud or snag on vegetation.
Tighter laces do not make a shoe waterproof. For sustained wet conditions, rely on footwear suited to the conditions, gaiters when appropriate, and dry replacement socks rather than trying to seal the shoe by overtightening it.
Rocky or Technical Terrain
Uneven terrain generally calls for good foot-to-shoe control. Keep the midfoot and heel secure so your foot does not slide unpredictably inside the shoe.
If your boot has a true two-zone system, you can adjust the upper zone for ankle mobility when climbing, but avoid broadly loosening the entire shoe simply because the ground is rocky.
Troubleshooting Common Hiking-Shoe Lacing Problems
| Problem | Lacing Adjustment to Try |
|---|---|
| Heel lifts or rubs | Try a runner’s loop/heel lock on compatible shoes or a surgeon’s knot/locking technique on compatible boots. |
| Pressure on top of foot | Use window or parallel lacing across the sensitive area. |
| Toes feel compressed | Reduce lower-zone tension or try temporary toe-relief lacing. Persistent compression usually means the fit needs reassessment. |
| Toes hit front on descents | Seat the heel, secure the midfoot and heel zone, and use a heel lock where appropriate. Reassess shoe length if the problem continues. |
| Numbness or tingling | Stop and loosen the affected zone. Do not keep hiking with painfully tight lacing. |
| Laces repeatedly loosen | Check lace condition and compatibility, re-tie the bow securely, or replace worn laces with the correct shape and length for the footwear. |
| Lace loops hang too low | Use the available eyelets correctly, tie a compact double bow where appropriate, or install correctly sized replacement laces. |
Common Mistakes to Avoid When Tying Hiking Shoes
Tying Every Section as Tight as Possible
A snug fit is useful, but excessive lace tension can create pressure, discomfort, tingling, or numbness. The correct tension is the minimum needed to keep your foot securely positioned.
Only Tightening the Top
Pulling hard on the final eyelets while leaving the lower lacing loose can concentrate pressure around the ankle without controlling the rest of the foot. Work from the lower eyelets upward.
Ignoring Foot Swelling
Your fit can change during a long day. Recheck the laces after a climb, during a rest break, or whenever your feet begin to feel different. A setup that felt perfect at the trailhead may need a small adjustment later.
Assuming Lacing Can Fix the Wrong Shoe
Lacing can reduce a localized pressure point or improve heel hold, but it cannot add real length, change the last of the shoe, or create enough width for a foot that is being squeezed.
Starting a Long Hike in Untested Footwear
Stiffer boots in particular should be tested on short walks before a long hike. This lets you find heel movement, pressure points, sock problems, and lace-tension issues close to home.
Leaving Loose Laces Exposed
Long loops or dangling lace ends can catch on brush or the hooks of the opposite boot. Keep the finished bow compact and secure.
Expert Advice for Mastering the Art of Tying Hiking Shoes
Think of lacing as a fit-adjustment system rather than a knot you tie once and forget. Start with normal crisscross lacing, walk in the footwear, identify the exact problem, and then change only the part of the lacing that addresses it.
For example, heel movement calls for more control near the heel, not necessarily more pressure across the toes. Pain over the instep calls for less pressure at that point, not a looser shoe everywhere.
A small study published in Research in Sports Medicine found that different lacing patterns changed pressure across the top of the foot and affected perceived stability. Although the study involved running shoes rather than hiking boots, it supports the practical idea that lace configuration—not merely overall tightness—changes how footwear interacts with the foot.
Footwear specialists can also help when you cannot solve persistent heel slip, toe impact, arch pressure, or width problems yourself. Sometimes the correct answer is a different lacing pattern; sometimes it is a different shoe.
If you’re looking to upgrade your hiking gear, you may also want to consider investing in a pair of traveler pants. These versatile pants are designed to be comfortable and durable, making them useful for long days outdoors. Check out this article on traveler pants to learn more about how they can fit into your hiking setup.
Love travel? Join Our Facebook Community For More Tips.
Frequently Asked Questions
What are the benefits of tying hiking shoes properly?
Proper lacing helps hold your foot securely inside the shoe, limits unwanted movement, and lets you adjust pressure around the heel, midfoot, and instep. A good setup can improve comfort and reduce rubbing, but it does not replace choosing footwear that fits correctly.
What is the best way to tie hiking shoes?
Start with standard crisscross lacing and snug the shoe gradually from the toes upward. Seat the heel before tightening, leave comfortable room around the toes, and keep the midfoot secure. Add a specialized technique only when you need to solve a specific issue such as heel slip or instep pressure.
How tight should hiking shoes be tied?
They should feel snug enough that your foot does not slide excessively, but not so tight that you feel pinching, throbbing, tingling, or numbness. Different parts of the shoe may need different tension.
What are some common lacing techniques for hiking shoes?
Useful techniques include standard crisscross lacing, a runner’s loop or heel lock for heel movement, a surgeon’s knot for many boots with hooks, window lacing for pressure over the instep, toe-relief lacing, and two-zone lacing for compatible hiking boots.
How often should hiking shoes be re-tied?
Re-tie or adjust them whenever the fit changes. Long climbs, descents, moisture, and normal foot swelling can change lace tension. Check your footwear during breaks and whenever you notice heel movement, pressure, or a developing hot spot.
Is a heel lock the same as a runner’s loop?
For many low-cut hiking and running shoes, the terms runner’s loop and heel lock refer to the same loop-based technique using the upper eyelets. Hiking-boot manufacturers sometimes use “lock lacing” for different hardware-based methods, so check how your particular footwear is designed.
Can special lacing fix hiking shoes that do not fit?
Only to a limited extent. Lacing can reduce heel movement or relieve a localized pressure point, but it cannot make a shoe truly longer, wider, or better matched to your foot shape. Persistent toe impact, squeezing, or major heel movement usually calls for reassessing the footwear.
Sources
- REI Co-op — How to Lace Hiking Boots — surgeon’s knots, window lacing, toe-relief lacing, and lace replacement guidance.
- REI Co-op — How to Choose Hiking Boots and Shoes — hiking-footwear fit, toe room, heel fit, and break-in guidance.
- Hanwag — How to Lace Your Boots Properly — heel lock, instep-pressure relief, and two-zone lacing for climbs and descents.
- PubMed — Effects of Different Shoe-Lacing Patterns on Dorsal Pressure Distribution and Perceived Comfort — research on lacing patterns, pressure, comfort, and perceived stability.
- PubMed — Prevention of Friction Blisters in Outdoor Pursuits: A Systematic Review — evidence review of socks, antiperspirants, and barrier methods.
- NHS — Blisters — causes, prevention, basic care, and signs that require medical attention.
