
Last Updated on July 29, 2026 by Daniel Globe
A leaking inflatable travel pillow does not always need to be replaced. A small surface puncture can often be patched at home, while a leaking valve, bonded seam, internal barrier, or welded edge may require manufacturer service. The safest repair starts with locating the exact source of the air loss and identifying the pillow’s material before applying any adhesive.
Quick Answer
Inflate the pillow, check the valve, and apply soapy water to the surface. Escaping air will create bubbles at a puncture or valve leak. Mark the spot, deflate and dry the pillow, then apply a manufacturer-approved patch or flexible repair adhesive. Let it cure fully before reinflating and testing it overnight.
Key Takeaways
- Check the valve, seams, welded edges, and main air chamber before assuming the problem is a simple puncture.
- Use soapy water as the least disruptive leak test; submerge the pillow only when its care instructions allow it.
- Use the patch supplied by the manufacturer whenever possible.
- Match every adhesive or patch to the pillow’s confirmed material, such as TPU-coated fabric or PVC/vinyl.
- A seam, weld, internal barrier, or damaged valve may require warranty service or replacement instead of glue.
At a Glance
| Time Required | About 20–30 minutes of hands-on work, plus the patch or adhesive cure time |
| Difficulty | Easy for a surface pinhole; moderate or unsuitable for valve, seam, weld, or internal barrier damage |
| Tools Needed | Mild dish soap, water, sponge or spray bottle, marker, clean cloth, optional isopropyl alcohol, and a compatible repair patch |
| Cost | Low; the repair may cost nothing if a patch was included with the pillow |
Step-By-Step Guide to Detecting and Fixing Leaks in Inflatable Pillows
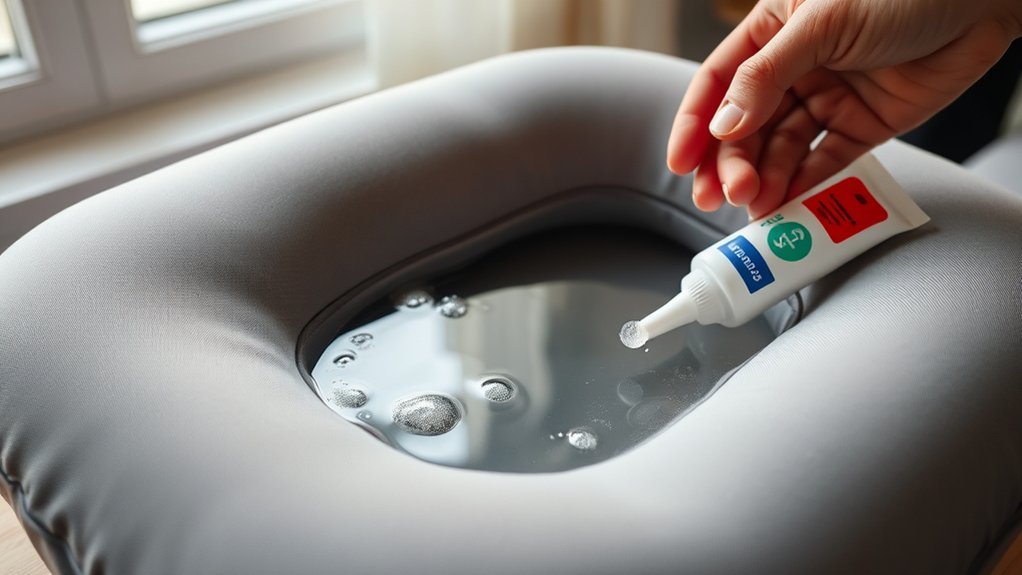
When an inflatable travel pillow stops holding air, begin with a careful diagnosis. A patch will help only when air is escaping through a repairable hole in the outer material or removable bladder. It will not correct every valve, seam, weld, or internal coating failure.
Warning: Read the adhesive label and pillow-care instructions before starting. Work in a ventilated area, keep isopropyl alcohol and other solvents away from flames, wear gloves when directed, and do not reinflate the pillow until the repair has cured.
1. Check the Instructions, Cover, and Warranty
Look for a care label, manual, product-support page, or repair kit supplied with the pillow. The manufacturer’s patch is usually the safest option because it is selected for that pillow’s surface coating or air bladder.
If the pillow has a removable fabric cover, foam layer, or separate bladder, remove the washable or absorbent parts before leak testing. Some manufacturers provide specific repair options for removable bladders and replaceable valves. For example, NEMO’s camp-pillow guidance describes a replaceable valve and peel-and-stick repair for applicable air bladders.
A new pillow with an unexplained seam, weld, valve, or internal barrier failure may qualify for warranty support. Contact the manufacturer before applying glue if a DIY repair could affect that coverage.
2. Confirm That the Pillow Is Losing Air
Inflate the pillow to its normal comfortable pressure rather than forcing it beyond its intended firmness. Close the valve carefully and leave the pillow on a clean surface for several hours. For a stronger test, place a light, evenly distributed object on it and check it again later.
A pillow that becomes noticeably flatter during a controlled test probably has an air-loss problem. Marking its starting thickness or taking a photo can make a slow change easier to see.
3. Inspect the Valve and Seams First
Check the valve opening for lint, sand, hair, or damage. Wipe accessible valve surfaces with a clean, damp cloth and let them dry. Make sure the cap, plug, or one-way flap closes fully.
Next, look along bonded seams and welded edges for lifting, wrinkles, splits, or bubbling. Air emerging from a valve hinge, long seam, welded edge, or several nearby points often indicates a problem that a small surface patch will not solve.
4. Find the Leak With Soapy Water
- Inflate the pillow to normal pressure and close the valve.
- Mix a small amount of mild dish soap with water in a bowl or spray bottle.
- Apply a thin film to one section of the pillow.
- Gently press the pillow to raise the internal pressure.
- Watch for bubbles that continue growing in one spot.
- Mark the leak with a washable marker, ballpoint pen, or small piece of tape.
- Check the other side, the valve, and every seam in case more than one leak is present.
- Rinse away the soap and dry the pillow completely.
This method follows the same basic process used in official Sea to Summit air-loss guidance and NEMO’s inflatable repair instructions.
5. Use Submersion Only When Appropriate
If the care instructions permit submersion, close the valve and place the inflated air chamber in still water one section at a time. Watch for a steady stream of bubbles, mark the point, and continue checking the rest of the pillow.
Do not submerge attached foam, down, electronics, absorbent filling, or any component that the manufacturer says should remain dry. Use the soapy-water method instead when the pillow’s construction is unclear.
6. Deflate, Clean, and Dry the Repair Area
Deflate the pillow fully and place it on a flat, clean surface. Remove soap, skin oil, sunscreen, and dirt from the area. If the product instructions allow it, wipe the repair site with a small amount of isopropyl alcohol on a lint-free cloth. Let all moisture and alcohol evaporate before applying the patch.
Do not apply a patch to a damp, creased, oily, or inflated surface. Those conditions can weaken the bond or trap air beneath the patch.
7. Apply the Compatible Patch
Use the repair kit supplied with the pillow whenever possible. Otherwise, confirm the pillow material and select a patch or flexible adhesive that lists that material as compatible.
- Round the corners of a cut-to-size patch so they are less likely to lift.
- Make the patch large enough to extend beyond the damaged area on every side.
- Center it over the marked leak without stretching or creasing the pillow.
- Press from the center toward the edges to remove trapped air.
- Apply pressure, weight, or a clamp only as directed by the repair-product instructions.
- Leave the pillow flat and undisturbed for the full cure time.
Pro Tip: Keep the patch packaging or take a photo of its instructions. Repair times vary widely, and the correct pressure, temperature, and cure period matter more than using an arbitrary amount of weight.
8. Reinflate and Test the Repair
After the stated cure time has passed, inflate the pillow to normal pressure. Repeat the soapy-water test around the patch and inspect its edges for bubbles.
Then leave the pillow inflated for several hours or overnight. If it remains firm and the patch stays flat, the repair is likely ready for travel. If it still loses air, check for a second puncture, a lifting patch edge, a valve leak, or a seam failure.
Repair Techniques for Inflatable Pillows
The correct technique depends on where the air is escaping and how the pillow is built.
Pinhole in a Smooth Air Bladder
A clean peel-and-stick patch may be enough for a tiny puncture in a compatible bladder. NEMO recommends a purpose-made pressure-sensitive patch for applicable camp-pillow bladders. Press the patch firmly over the clean, dry surface and follow its instructions before testing.
Small Hole or Tear in Coated Fabric
A small tear may need a rounded fabric patch plus a flexible repair adhesive. Purpose-made urethane inflatable-repair products are designed to flex after curing. GEAR AID’s inflatable-repair guidance describes pressure-sensitive flex patches for pinholes and flexible urethane adhesive for larger damage.
Do not assume one cure time applies to every repair. Some peel-and-stick patches can be tested after a short waiting period, while liquid adhesives may need two hours, overnight, or longer.
Leaking Valve
Remove visible dirt and confirm that every valve surface closes evenly. Do not force a sharp tool into a one-way valve. If the valve is removable, obtain the correct replacement part from the manufacturer. If it is bonded into the pillow, request repair or warranty guidance before attempting to cut it out.
Seam, Weld, or Internal Barrier Failure
A long line of bubbles, air escaping from a welded edge, or several leaks without a visible puncture may indicate structural damage. These failures can be difficult to seal because the damaged area moves and remains under pressure.
Sea to Summit notes that some Aeros pillow air loss comes from an airproof barrier or radio-frequency weld and may be better handled through warranty or replacement. Review the company’s Aeros pillow support guidance before attempting a structural repair.
Best Patches and Adhesives for Inflatable Pillow Leaks
The best repair product is not the strongest household glue. It is the product that bonds to the pillow’s confirmed material while remaining flexible under repeated inflation and folding.
| Repair Product | Best Use | Important Limitation |
| Manufacturer-supplied patch | First choice for a small puncture | Use the exact preparation and cure instructions provided |
| Flexible peel-and-stick repair patch | Pinhole or small tear on a listed compatible bladder or coated fabric | May not bond to textured, dirty, silicone-coated, or damp surfaces |
| Flexible urethane repair adhesive | Compatible coated fabrics and small tears that need a flexible seal | Often needs several hours or an overnight cure |
| Silicone adhesive | Only a surface or repair system that specifically calls for silicone | Not a universal adhesive for TPU, PVC, vinyl, nylon, or every plastic |
| PVC or vinyl repair cement | A pillow confirmed by its manufacturer to use compatible PVC or vinyl | Do not use on an unidentified TPU laminate or coated fabric |
| Duct tape | Emergency, short-term air-loss reduction | Residue and lifted edges can interfere with a later permanent repair |
Note: Avoid original expanding polyurethane glue, cyanoacrylate super glue, hot glue, and random construction adhesive unless the pillow manufacturer specifically approves the product. Original Gorilla Glue, for example, expands during curing and is designed to be clamped, making it a poor default choice for a thin flexible air chamber. See the official product instructions.
Preventative Measures for Inflatable Pillow Longevity
Good storage and inflation habits can reduce punctures, valve contamination, and moisture-related damage.
- Do not overinflate: Inflate the pillow only until it supports your head comfortably. Excessive pressure puts more stress on seams and welded edges.
- Check the resting surface: Remove sand, thorns, metal fragments, and other sharp debris before placing the pillow down.
- Keep it away from heat: Do not leave an inflated pillow against a heater, in direct sun inside a hot vehicle, or near an open flame.
- Clean it gently: Follow the care label and use mild soap rather than bleach, harsh solvent, or abrasive scrubbing.
- Dry it completely: Open the valve after cleaning and allow trapped moisture to escape before long-term storage.
- Store it loosely: Keep the pillow in a cool, dry, dark place. Do not leave foam-backed models tightly compressed for long periods unless their manufacturer permits it.
- Use a cover: A removable cover helps protect the air chamber from oils, rough surfaces, and sharp objects.
- Carry the correct patch: Keep the original patch kit with the pillow during travel.
A clean puncture in an accessible air bladder is usually a better DIY-repair candidate than a leak at a valve, welded edge, or internal barrier.
Is It Time to Replace Your Inflatable Pillow?
Repair is usually worthwhile when the leak is small, clearly located, and on an accessible surface. Consider warranty service, professional repair, or replacement when any of the following applies:
- The leak is at a bonded seam or welded edge: These areas remain under stress and may continue separating after a surface repair.
- The valve is cracked or permanently bonded: A model-specific replacement valve may be needed.
- The internal coating or barrier is failing: Air loss from several points without visible punctures can indicate broader material failure.
- The pillow has multiple leaks: Several punctures or widespread peeling may make repeated repairs unreliable.
- A patch will not remain bonded: Persistent lifting can mean the patch is incompatible with the surface or the material is deteriorating.
- The damage is large: A long tear or missing material may need professional work rather than a small field patch.
- The product may be under warranty: Contact the manufacturer before making an irreversible repair.
- It no longer provides support: Replacement may be more practical when the air chamber, foam, fabric, or shape has permanently deteriorated.
Frequently Asked Questions
How Can I Prevent Leaks in My Inflatable Travel Pillow?
Avoid overinflation, inspect the resting surface for sharp debris, use a protective cover, and keep the pillow away from high heat. After cleaning, let the air chamber dry fully with the valve open when the manufacturer recommends it. Store the pillow in a cool, dry, dark place.
What Materials Are Best for Patching Inflatable Pillows?
The best material is the patch supplied or approved by the pillow manufacturer. Flexible pressure-sensitive patches work on some TPU-coated fabrics and removable bladders. Confirm compatibility before using urethane adhesive, silicone, or PVC/vinyl cement because these products are not interchangeable.
Can I Use Duct Tape for Repairs?
Duct tape may slow air loss during an emergency, but it is not the best permanent repair. Its edges can lift as the pillow bends, and its residue may make a later patch harder to bond. Replace it with a compatible inflatable-repair patch as soon as possible.
How Often Should I Check for Leaks?
Inspect the pillow before an important trip and after it has been stored for a long period. A quick inflation test at home gives you time to find a slow leak and complete the full cure period before traveling.
Are There Specific Brands Known for Leak-Resistant Pillows?
No brand or model is puncture-proof, and broad “best” claims depend on the test method. Compare the warranty, air-chamber material, included repair kit, valve design, published care instructions, and availability of replacement parts. Brands such as NEMO and Sea to Summit publish model-specific care or repair guidance, which can make troubleshooting easier.
Can a Leaking Pillow Valve Be Repaired?
Sometimes. Dirt can prevent a valve from sealing, and certain models have removable valves that can be replaced. A cracked or permanently bonded valve usually needs a model-specific part or manufacturer repair. Do not cut out the valve unless the manufacturer provides that procedure.
How Long Should an Inflatable Pillow Patch Cure?
Follow the exact patch or adhesive instructions. Some peel-and-stick patches can be tested after a short wait, while silicone or urethane repair systems may need two hours, overnight, or up to a full day. Reinflating too early can weaken the bond.
Conclusion
A leaking inflatable travel pillow can often be saved when the damage is a small, accessible puncture. Find the exact leak, identify the pillow material, clean and dry the surface, and use a compatible flexible patch. Let the repair cure fully and test it overnight. For valve, seam, weld, or internal barrier failures, manufacturer support or replacement is usually safer than experimenting with household glue.
Sources
- Sea to Summit — Finding and repairing air loss — supports bubble testing, surface preparation, patch application, valve inspection, and material-specific repair methods.
- Sea to Summit — Aeros pillow air-loss guidance — supports the distinction among punctures, weld failures, internal barrier problems, storage moisture, and warranty replacement.
- NEMO Equipment — Camp pillow care and repair — supports bladder patches, replaceable valves, cleaning, drying, and storage guidance.
- NEMO Equipment — Inflatable leak repair — supports soapy-water and submersion tests, rounded patches, curing, and overnight pressure testing.
- GEAR AID — Inflatable repair guide — supports flexible patches, urethane adhesives, surface cleaning, overlap, and product-dependent cure times.
- Gorilla Glue — Original Gorilla Glue instructions — supports the warning that the product expands during curing and requires clamping rather than serving as a default inflatable-pillow patch.
