
Last Updated on July 27, 2026 by Daniel Globe
A safe hiking pack is not about carrying as much gear as possible. It is about bringing the right equipment for the trail, weather, distance, terrain, and distance from help. Start with the core hiking essentials, then adjust your footwear, clothing, water, food, and emergency supplies for the specific trip.
Quick Answer
For most hikes, bring navigation tools, sun protection, insulating and rain layers, a headlamp, first-aid supplies, fire-starting equipment where permitted, repair tools, extra food, enough water plus treatment supplies when needed, and emergency shelter. Also wear trail-appropriate footwear and tell someone where you are going and when you expect to return.
Key Takeaways
- Build your pack around the Ten Essentials: navigation, sun protection, insulation, illumination, first aid, fire, repair tools, food, hydration, and emergency shelter.
- Choose hiking footwear for fit, terrain, weather, and the load you are carrying rather than assuming every trail requires a heavy boot.
- Plan water by hike duration and conditions; hotter, drier, higher, or more strenuous routes can require substantially more.
- Download maps before leaving service, but carry a backup navigation method and protect your battery.
- Check weather and trail alerts, leave a trip plan with someone you trust, and be willing to turn around when conditions deteriorate.
Disclosure: As an Amazon Associate I earn from qualifying purchases. Some links on this page are affiliate links, at no extra cost to you.
Hiking Essentials Checklist: What to Bring
The National Park Service recommends carrying the Ten Essentials so you are better prepared for injuries, unexpected delays, weather changes, or other problems. The exact equipment within each category should match your route and conditions.
| Essential System | Examples to Pack |
|---|---|
| Navigation | Map, compass, offline map, GPS device, or satellite communicator as appropriate |
| Sun protection | Sunscreen, sunglasses, hat, protective clothing |
| Insulation | Warm layer, rain shell, hat, gloves when conditions warrant |
| Illumination | Headlamp or flashlight plus spare batteries or backup power |
| First aid | Bandages, gauze, tape, blister care, antiseptic supplies, personal medication |
| Fire | Lighter, waterproof matches, or fire starter where fires are legal and appropriate |
| Repair tools | Multi-tool or knife, tape, and trip-specific repair supplies |
| Food | Meals or snacks plus extra food for an unexpected delay |
| Hydration | Water plus treatment equipment when relying on natural sources |
| Emergency shelter | Emergency bivy, tarp, space blanket, or other lightweight shelter |
Note: The Ten Essentials are a starting point, not a universal packing list. Remote routes, winter conditions, desert heat, wildlife hazards, river crossings, overnight trips, and medical needs can require additional equipment.
Hiking Footwear: Choose for Fit, Terrain, and Weather
Footwear is one of the most important parts of a hiking setup. The right hiking boots or shoes can improve comfort, traction, and foot protection, while poorly fitting footwear can quickly lead to hot spots and blisters.
For rocky or uneven trails, look for footwear with a secure fit, a protective sole, and an outsole that grips the surfaces you expect to encounter. A sturdy hiking boot may be useful when you want more structure or protection, especially with a heavier pack, but many hikers are comfortable in lighter hiking shoes or trail shoes. Brands such as Merrell and Salomon offer models across several categories, but fit matters more than the logo on the shoe.
Waterproofing and breathability also depend on the conditions. Waterproof footwear can be useful in persistent rain, mud, wet vegetation, or shallow stream crossings. Technologies such as GORE-TEX footwear membranes are designed to provide waterproof protection while allowing water vapor to escape. In hot, dry weather, however, a highly breathable non-waterproof shoe may feel cooler and can dry faster after getting wet.
Wear hiking socks that manage moisture and fit without bunching. Before a long hike, test new footwear on shorter walks or hikes so you can identify pressure points, heel movement, or toe contact before committing to many miles.
Pro Tip: Check footwear fit while wearing the same socks you plan to hike in. On descents, your toes should not repeatedly strike the front of the shoe.
Clothing: Dress for Comfort and Protection
Your hiking clothes should help you stay dry, warm enough, and protected from wind, rain, and sun. Layering makes it easier to adjust as your body heats up or the weather changes.
Base Layer
Choose a moisture-managing base layer made from a synthetic fabric or merino wool. These materials move moisture away from the skin and generally work better for active use than absorbent cotton when conditions are cool or wet.
Insulating Layer
A fleece jacket, synthetic insulated layer, or lightweight down garment can provide warmth. The amount of insulation you need depends on temperature, wind, elevation, how long you may be stopped, and whether the hike could extend beyond your planned return time.
Outer Layer
Carry a weather-resistant shell when rain, snow, or strong wind is possible. Waterproof-breathable systems such as eVent or H2No are examples, but the best choice depends on climate and activity level.
Sun Protection
Long sleeves, pants, a wide-brimmed hat, sunglasses, and sunscreen can reduce UV exposure. The CDC recommends combining shade, protective clothing, sunglasses, and broad-spectrum sunscreen rather than relying on only one form of protection.
Backpack: Carry Your Essentials Comfortably
A well-designed backpack makes it easier to carry hiking gear without putting unnecessary strain on your shoulders. Pack size depends on the outing: a short day hike usually needs less capacity than a full-day winter hike or a multi-day backpacking trip.
Pay attention to fit and adjustability. Padded shoulder straps improve comfort, while a properly positioned hip belt can transfer much of the load away from your shoulders. On larger packs, an adjustable torso length helps position the hip belt and shoulder harness correctly.
Organization also matters. Multiple compartments or pockets can keep water, snacks, maps, rain gear, and first-aid supplies accessible without emptying the entire pack.
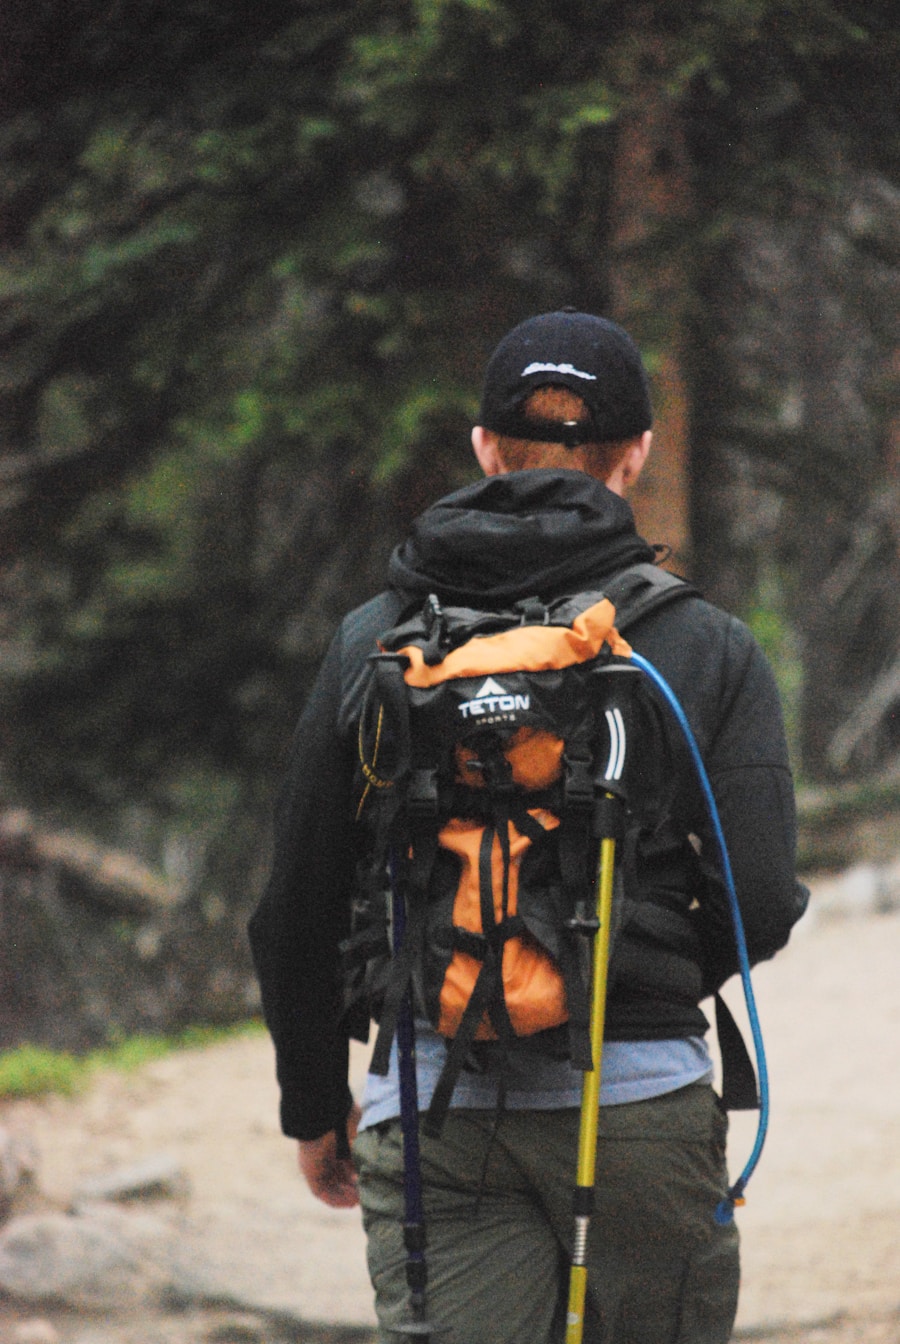
Many hiking packs include hydration-reservoir sleeves or water-bottle pockets. External attachment points can also hold trekking poles or other bulky equipment, although essential emergency equipment should be secured rather than loosely strapped where it can be lost.
Navigation Tools: Find Your Way on the Trail
Navigation begins before you reach the trailhead. Review your route, major junctions, elevation profile, trail conditions, and turnaround points before leaving.
| Navigation Tool | Strength | Main Limitation |
|---|---|---|
| Compass | Lightweight and does not depend on batteries | Requires navigation knowledge and is most useful with a map |
| Topographic Map + Compass | Shows terrain, elevation, landmarks, and route relationships | Requires map-reading skills and protection from weather |
| Dedicated GPS Device | Useful digital positioning and route tracking | Depends on batteries, satellite reception, and loaded map data |
| Smartphone App | Convenient maps, GPS positioning, waypoints, and offline downloads | Battery drain, damage, cold temperatures, and missing offline data can make it unavailable |
A topographic map can show elevation changes, terrain features, water, junctions, and landmarks that may not be obvious from a simple trail diagram. Learn how to use your chosen navigation tools before relying on them in unfamiliar terrain.
GPS devices and hiking apps can add route tracking, waypoints, and offline maps. Download the route before leaving reliable service. A phone can still use GPS without cellular service when the necessary map data is stored locally, but a dead or damaged phone is not a navigation plan.
Pro Tip: Put your phone in airplane mode when practical, reduce unnecessary screen use, and carry a power bank on longer or more remote hikes. Keep a non-phone backup when getting lost would have serious consequences.
Hydration: Carry Enough Water and Know How to Treat More
Dehydration can contribute to fatigue, headache, dizziness, and heat illness. Drink regularly and plan your water before you start rather than assuming you will find a safe source along the trail.
A useful starting estimate for moderate conditions is about 0.5 liter of water per hour of hiking. For example, Great Smoky Mountains National Park currently advises at least 1 liter for every two hours of hiking. That is only a planning baseline: hot or dry weather, direct sun, altitude, strenuous climbing, long distances, and individual needs can increase the amount you require.
Water needs are route-specific. Plan by time, weather, effort, refill opportunities, and the consequences of an unexpected delay—not by one universal bottle count.
Water bottles work well and make it easy to see how much water remains. Hydration reservoirs allow frequent sipping through a hose without stopping, although it can be harder to judge remaining volume unless you check the reservoir.
If your route depends on streams, lakes, or other untreated sources, bring an appropriate treatment method. The CDC advises treating water when you are not sure it is safe. Boiling is the most reliable method for killing germs. When boiling is not practical, CDC recommends filtering and then disinfecting the filtered water when appropriate.
Portable filters differ in what they remove. Many remove parasites and some remove bacteria, but they may not remove viruses. Chemical disinfectants also vary in effectiveness. Follow the manufacturer’s instructions for the exact filter, purifier, tablets, or drops you carry.
Warning: Clear-looking mountain water is not automatically safe to drink. Treatment also cannot make water contaminated with harmful chemicals or toxins safe.
Food: Pack Energy for the Hike and an Unexpected Delay
Bring food that is easy to carry, simple to eat, and appropriate for the length of your trip. Trail mix, energy bars, dried fruit, nut or seed products, sandwiches, jerky, and other compact foods are common choices.
For a longer outing, bring enough for your planned meals plus extra food in case the hike takes longer than expected. The National Park Service recommends planning for unexpected delays rather than carrying only the exact amount you expect to eat.
Choose foods that you know sit well during exercise. On hot days, remember that food and hydration work together; prolonged sweating can also increase electrolyte losses.
First Aid Kit: Prepare for Common Trail Problems
Even well-maintained trails can produce blisters, cuts, scrapes, insect bites, or sprains. Carry a first-aid kit that matches the size of your group, trip duration, terrain, climate, and distance from medical help.
The American Red Cross hiking first-aid checklist includes items such as adhesive bandages, antiseptic wipes, gauze, medical tape, blister treatment, gloves, tweezers, and other wound-care supplies.
A practical hiking kit may include:
- Adhesive bandages in several sizes
- Gauze pads and rolled gauze
- Medical tape
- Antiseptic or wound-cleaning supplies
- Blister treatment
- Disposable gloves
- Tweezers
- Elastic wrap
- Any personal medication you may need
- An emergency first-aid reference
If an over-the-counter pain reliever such as ibuprofen or acetaminophen is normally safe and appropriate for you, it may be included in your personal kit. Keep medicines clearly identified and use them only according to their labeling or your healthcare provider’s instructions.
In areas with heavy insect activity, insect repellent and bite-relief supplies can also be useful. An antihistamine may be appropriate for some people, but a severe allergic reaction is an emergency and should not be treated as a minor trail problem. Anyone prescribed epinephrine should carry it as directed.
Check the kit before each trip. Replace expired medication, damaged packaging, used supplies, or anything that has become wet or contaminated.
Emergency Supplies: Prepare for the Unexpected
Emergency equipment matters most when the hike does not go according to plan. Sudden weather, an injury, getting lost, or a late return can turn a routine outing into a much longer stay outdoors.
Whistle and Emergency Communication
A whistle is lightweight and can help attract attention if you are lost, injured, or separated from your group. In areas with unreliable cell coverage, a satellite messenger or personal locator device can provide another communication option, but it should supplement rather than replace trip planning and basic survival equipment.
Headlamp or Flashlight
Carry a headlamp or flashlight even when you expect to finish before dark. An injury, wrong turn, slow pace, or unexpected delay can extend a hike into the evening. Bring spare batteries or another reliable source of backup power.
Repair Tools
A multi-tool or knife can help with food preparation and simple gear repairs. A small amount of strong tape, cord, or trip-specific repair material may help fix a torn pack, broken strap, or damaged equipment. Do not use a knife as a substitute for proper first-aid equipment.
Emergency Shelter
A lightweight emergency blanket can provide some protection, but a compact bivy, tarp, or other emergency shelter offers better protection when you may need to wait out bad weather or spend an unplanned night outside.
Fire-Starting Supplies
Waterproof matches, a lighter, or another fire starter may be useful for warmth or signaling in some environments.
Warning: Fire restrictions, burn bans, and backcountry regulations can prohibit open flames. Follow all local rules and never rely on a fire as your only source of emergency warmth.
Check the Weather, Trail Conditions, and Your Trip Plan
Good hiking preparation starts before packing your backpack. The National Park Service recommends choosing a trail that matches your group’s abilities, checking weather and park alerts, and leaving a trip plan with someone who is not on the hike.
Before leaving, confirm:
- The trail distance, elevation gain, difficulty, and expected hiking time
- Current closures, fire restrictions, flood hazards, snow, or damaged trail sections
- The weather forecast for the trailhead and higher elevations
- Your planned route and turnaround time
- Where reliable water sources exist, if any
- Whether permits, parking reservations, or special equipment are required
- When someone should expect you back and what they should do if you do not check in
Thunderstorms deserve particular caution on exposed terrain. The National Weather Service warns that no outdoor location is completely safe during a thunderstorm. If thunder is approaching, leave peaks, ridges, and exposed high ground and move toward a substantial enclosed building or hard-topped vehicle when possible.
Note: Turning around is a safety decision, not a failed hike. Weather, fatigue, route-finding problems, rising water, injury, or a slower-than-expected pace are all valid reasons to change the plan.
Personal Items: Bring Extras That Improve Comfort
After the essentials are covered, a few personal items can make the trip more enjoyable. The key is to balance comfort against pack weight.
A small travel pillow, compact camping chair, lightweight blanket, or shawl can be pleasant during long breaks or at camp. These are optional items rather than substitutes for insulation or emergency shelter.
Snacks can also improve morale and help maintain energy. Trail mix, energy bars, jerky, and similar foods are popular because they are compact and easy to eat while moving.
A small book or journal can provide entertainment during downtime at camp and gives you a place to record the route, wildlife sightings, or memorable moments from the trip.
Personal items may seem less important than navigation, water, or emergency equipment, but once the safety basics are packed, small comforts can make a long day outside much more enjoyable.
If you are planning a hiking trip, also consider the season and conditions at your destination. For example, hikers considering South America can review this guide to the best time to travel to Chile when planning around regional weather and seasonal conditions.
Frequently Asked Questions
What should I bring hiking?
Start with navigation, sun protection, insulation, illumination, first aid, fire supplies where appropriate, repair tools, extra food, water and treatment supplies, and emergency shelter. Add suitable footwear, a properly fitted backpack, and any route-specific equipment you need.
How much water should I bring when hiking?
There is no single amount that fits every hike. About 0.5 liter per hour can be a useful starting estimate in moderate conditions, but heat, dry air, altitude, strenuous climbing, individual needs, and lack of refill points can increase the amount required. Carry extra for unexpected delays.
What kind of food should I bring when hiking?
Pack foods that travel well and provide useful energy, such as trail mix, energy bars, dried fruit, sandwiches, nut or seed products, or jerky. For longer hikes, bring your planned meals plus extra food in case you are delayed.
What navigation tools should I bring when hiking?
A map and compass are useful battery-free tools, while GPS devices and smartphone apps can provide positioning, route tracking, and offline maps. Download digital maps before the hike and carry a backup method when navigation errors could leave you stranded.
What should I include in a first aid kit for hiking?
Useful basics include adhesive bandages, gauze, medical tape, antiseptic or wound-cleaning supplies, blister treatment, gloves, tweezers, an elastic wrap, and personal medication. Adjust the kit for group size, trip length, terrain, climate, and known medical needs.
What clothing should I wear when hiking?
Use moisture-managing layers that you can add or remove as conditions change. A typical system includes a synthetic or merino base layer, an insulating layer when needed, and a wind- or rain-resistant outer layer. Add sun protection and trail-appropriate footwear and socks.
What else should I bring when hiking?
Bring a headlamp or flashlight, emergency shelter, whistle, repair tools, sunscreen, sunglasses, insect repellent where needed, and extra food. Depending on remoteness, weather, wildlife, or season, you may also need a satellite communicator, traction devices, trekking poles, or other route-specific gear.
Sources
- National Park Service — Ten Essentials — core hiking preparedness systems.
- National Park Service — Hike Smart — route planning, weather checks, trip plans, and hiking preparation.
- CDC — Water Treatment When Hiking, Camping, or Traveling — boiling, filtering, and disinfecting backcountry water.
- CDC — Sun Safety Facts — protective clothing, shade, sunglasses, and sunscreen.
- American Red Cross — Hiking and Backpacking First Aid Kit Checklist — recommended first-aid supplies and kit customization.
- National Weather Service — Lightning Safety — thunderstorm and outdoor lightning precautions.

