
Last Updated on July 30, 2026 by Caleb Warren
The right backpack size depends on two separate factors: how much gear you need to carry and how well the suspension fits your body. Capacity is measured in liters, while fit is based mainly on torso length, hip circumference, and harness shape. Measuring both before you buy can prevent shoulder pressure, hipbelt slippage, and an unstable load.
Quick Answer
Choose backpack capacity by trip length, then size the suspension to your torso—not your height. Most daypacks hold 10–40 liters, one- to three-night packs commonly hold 30–50 liters, and multiday packs often hold 50–80 liters. Measure from your C7 vertebra to your iliac crest, check the hipbelt range, and test the pack with realistic weight.
Key Takeaways
- Capacity in liters tells you how much the backpack holds; torso and hip measurements determine whether it fits.
- A pack’s small, medium, or large label is not universal, so always use the sizing chart for that model.
- Women-specific packs often have shorter back panels and differently shaped harnesses, but a unisex pack is suitable when it fits correctly.
- For a framed backpacking pack, the hipbelt should carry most of the load while the shoulder straps stabilize it.
- Test the pack with realistic gear and walk in it before deciding whether the fit is comfortable.
At a Glance
| Time Required | About 10–15 minutes to measure and test the fit |
| Difficulty | Easy |
| Tools Needed | Flexible tape measure, mirror or helper, and 10–20 pounds of test weight |
| Cost | $0 to measure and test a pack you already have |
Disclosure: As an Amazon Associate I earn from qualifying purchases. Some links on this page are affiliate links, at no extra cost to you.
Understanding Backpack Size and Capacity
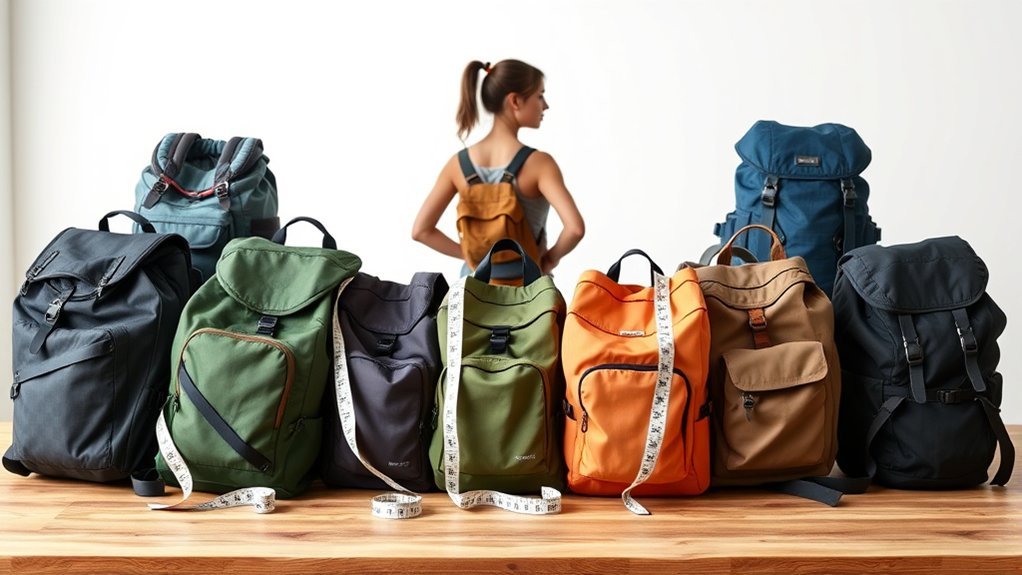
Backpack capacity and backpack fit are not the same thing. Capacity is the internal volume of the bag, measured in liters. Fit describes how the back panel, hipbelt, and shoulder harness match your body.
A 50-liter women-specific pack and a 50-liter unisex pack can hold roughly the same amount of gear, but their back lengths and harness shapes may be different. Choose the capacity first based on what you need to carry, then select the correct torso and hipbelt size.
Backpack Capacity Guide by Trip Length
| Typical Capacity | Common Uses |
| 10 liters or less | Running, cycling, hydration, and short minimalist outings with only a few essentials |
| 11–20 liters | Short hikes, light day trips, compact travel, and an extra layer, water, food, and small essentials |
| 21–35 liters | The common range for full-day hikes, travel daypacks, extra clothing, food, camera gear, or changing weather |
| 36–40 liters | Cold-weather day trips, climbing gear, family supplies, or a minimalist ultralight overnight |
| 30–50 liters | Most one- to three-night backpacking trips with compact gear |
| 50–80 liters | Three- to five-night trips, bulkier equipment, or trips that require more food and water |
| 70 liters or more | Extended trips, winter camping, family gear, or specialized equipment |
These ranges are starting points, not fixed rules. Gear bulk, weather, water availability, food requirements, and your packing style can change the amount of space you need. The current REI daypack guide places most hiking and travel daypacks in the 21–35-liter range, while its backpacking-pack guide recommends larger capacities for overnight and multiday use.
Note: A larger backpack is not automatically more useful. Extra space can encourage overpacking, while a mostly empty large pack may feel unstable unless its compression straps control the load.
How to Measure Your Torso and Hips

Your height does not reliably predict backpack size. Two people of the same height can have different torso lengths, so use your measurements and the size chart for the exact backpack model.
Measure Torso Length Accurately
- Find the C7 vertebra. Tilt your head forward and feel for the prominent bone where your neck meets the slope of your shoulders.
- Find the iliac crest. Place your hands on top of your hip bones with your fingers pointing forward and your thumbs pointing toward your spine.
- Picture a line between your thumbs. The point where that line crosses your spine is the bottom of the torso measurement.
- Stand upright. Ask another person to run a flexible tape measure from C7 down the natural curve of your spine to the imaginary line between your thumbs.
- Compare the result with the model’s chart. Torso ranges vary between brands and even between packs from the same brand.
This method follows current guidance from REI’s backpack fitting guide and Osprey’s sizing instructions.
Measure Your Hip Circumference
Wrap the tape measure around the top of your hip bones at the iliac crest. This point is usually higher than the waistband of your pants, so your hipbelt measurement may differ from your normal clothing size.
Check that your measurement falls within the hipbelt range for the pack. Some models offer interchangeable, adjustable, or extended hipbelts when the standard belt does not provide enough padding coverage or tightening range.
Pro Tip: Measure twice and ask another person to help. A small change in the bottom measurement point can move you into a different torso-size range.
What to Do if You Fall Between Sizes
Do not automatically choose the larger size. Try both sizes with weight, if possible, and compare the shoulder contact, hipbelt position, and load-lifter angle. An adjustable-torso model may provide a better result than either fixed size.
The correct option is the one that lets the hipbelt sit over your hip bones while the shoulder straps wrap smoothly around your shoulders without a large gap. The pack should remain close to your back without pressing into your neck.
How to Fit and Adjust a Backpack

Test a backpack with approximately 10–20 pounds of evenly distributed weight, or with the gear you expect to carry. A lightly stuffed empty pack will not reveal pressure points or poor load transfer.
Fit the Pack in the Correct Order
- Loosen the straps. Loosen the hipbelt, shoulder straps, load lifters, sternum strap, and compression straps before putting the pack on.
- Set the hipbelt. Center the padded belt over the top of your hip bones. Buckle it and tighten until secure without pinching.
- Tighten the shoulder straps. Pull them down and back. They should wrap closely around your shoulders but should not carry most of the weight.
- Adjust the load lifters. Tighten them gently until the upper pack moves closer to your body. They often form an angle near 45 degrees, although some manufacturers accept a range of roughly 30–60 degrees.
- Position the sternum strap. Move it to a comfortable position across the upper chest and tighten it enough to stabilize the shoulder straps without restricting breathing.
- Check the harness. The shoulder straps should maintain contact without a large gap. The harness anchor or yoke should generally sit about 1–2 inches below the top of your shoulders or C7 area, depending on the design.
- Walk and readjust. Walk, bend, step up, and move your arms. Small strap changes often make a large difference once the load settles.
For a framed backpacking pack, the hipbelt should support most of the load. REI notes that 80% or more may rest on the hips when the pack is sized and adjusted correctly. Small frameless packs, running vests, and lightweight daypacks distribute weight differently.
Capacity determines what the backpack can carry; torso, hipbelt, and harness fit determine whether you can carry it comfortably.
Warning: Stop and readjust the pack if you experience numbness, tingling, sharp pain, restricted breathing, or persistent pressure. Remove weight if adjustments do not solve the problem. A general percentage cannot determine a safe load for every person.
Women-Specific Versus Unisex Backpacks
Women-specific backpacks often have shorter torso ranges, narrower or more curved shoulder harnesses, and hipbelts shaped to wrap around different hip profiles. Manufacturers such as Deuter and Osprey describe these differences in their current fit systems.
However, the label is only a starting point. A woman with a longer torso or broader shoulders may prefer a unisex pack. A man or young hiker with a shorter torso and narrower frame may prefer a women-specific or slim-fit model.
Choose the pack that matches these areas:
- Torso range: The suspension can be set to your measured torso length.
- Hipbelt range: The padding wraps far enough around your hips and the buckle still has adjustment room.
- Harness shape: The straps do not rub your neck, press into your chest, or pull away from your shoulders.
- Sternum-strap placement: The strap can be positioned comfortably without restricting breathing.
- Load stability: The pack follows your movement without swaying or pulling backward.
Note: Body shape varies more than product labels suggest. Fit should decide the purchase—not whether the product is marketed as women-specific, men-specific, slim-fit, extended-fit, or unisex.
Backpack Features That Affect Comfort
Adjustable Torso Suspension
An adjustable back panel lets you raise or lower the shoulder harness to match your torso. It is useful when you fall between fixed sizes, share the backpack, or want more precise adjustment. The tradeoff is a small increase in weight and complexity.
Hipbelt Design
A structured hipbelt helps a framed pack transfer weight to the pelvis. Check the padding length as well as the stated circumference. The buckle should tighten securely without the padded sections ending too far behind your hip bones or meeting in front.
Frame and Back Panel
Internal frames, framesheets, and stays help control heavier loads. A ventilated back panel may feel cooler, while a close-fitting panel can offer better stability for climbing or rough terrain. Choose according to your activity rather than assuming one design is best for every trip.
Shoulder Harness and Sternum Strap
The harness should wrap around your shoulders with even contact. Padding should not end in a spot that digs into your underarm. A height-adjustable sternum strap makes it easier to accommodate different chest shapes.
Pockets and Access
Hipbelt pockets, side bottle pockets, front stretch pockets, and a top lid can keep essentials within reach. More compartments add organization but can also add weight. Check whether you can reach water, snacks, rain gear, and navigation tools without unpacking the main compartment.
Materials and Weather Protection
Nylon and polyester are common because they can provide a useful balance of weight, abrasion resistance, and cost. Fabric thickness, reinforcement, coatings, seams, zippers, and construction quality matter more than the fiber name alone.
Most ordinary backpacks are water-resistant rather than fully waterproof. For sustained rain, use a rain cover, waterproof liner, or sealed dry bags for items that must remain dry.
How to Check and Troubleshoot Backpack Fit
The Hipbelt Slides Down
Tighten the belt over the iliac crest and check whether the belt is too large. If the buckle reaches the end of its adjustment or the padding does not wrap the front of your hip bones, look for a smaller or interchangeable hipbelt.
The Shoulder Straps Carry Too Much Weight
Reposition and tighten the hipbelt first. Then loosen and retighten the shoulder straps. If the belt is correctly positioned but the shoulder straps still bear most of the load, the torso setting may be wrong or the pack may lack enough structure for the load.
There Is a Gap Above the Shoulders
A large gap can mean the torso is too long, the load lifters are overtightened, or the hipbelt is sitting too low. Reset the torso and repeat the fitting sequence from the hipbelt upward.
The Pack Rubs the Neck or Underarms
Loosen the sternum strap and shoulder straps slightly, then check the harness width and padding length. If rubbing remains, try a different harness shape or pack model rather than forcing the adjustment.
The Lower Back Feels Excessive Pressure
Check for hard objects pressing through the back panel and move dense gear into the pack’s central core. Loosen overtightened load lifters, confirm the torso setting, and make sure the pack is not sagging away from your upper back.
The Pack Sways While Walking
Balance the contents from side to side, tighten the pack’s compression straps, and bring dense items closer to your back. Adjust the sternum strap and hipbelt stabilizer straps if the pack includes them.
Pack for Better Weight Distribution
A well-packed backpack should feel balanced and should not pull strongly backward or to one side. Use the pack’s main zones rather than placing every heavy item at the bottom.
- Bottom zone: Pack light, bulky items you will not need while walking, such as a sleeping bag, sleep clothing, or a compressible camp layer.
- Core zone: Place dense items such as food, a cook kit, stove, or water close to your back and near the middle of the pack.
- Top zone: Store rain gear, insulation, a first-aid kit, and other bulky items you may need during the day.
- Accessory pockets: Keep snacks, navigation tools, sunscreen, water, and other frequently used items accessible.
- Outside attachments: Limit loose items that can swing, snag branches, or affect balance.
The REI pack-loading guide recommends dense gear in the core because placing it too low can make a pack sag, while placing it too high can make the load feel unstable.
How Much Weight Should You Carry?
There is no universal comfortable weight for every woman. As broad starting points, REI suggests keeping a loaded day-hiking pack near or below 10% of body weight and a loaded backpacking pack near or below 20%. These are general guidelines rather than medical limits.
Trip length, water availability, season, terrain, fitness, previous injuries, and pack design all affect what feels manageable. Review the full guidance in REI’s pack-weight guide, reduce nonessential gear, and build up gradually before a demanding trip.
Backpack Buying Checklist
- List the gear you must carry and choose capacity from that list.
- Measure both torso length and hip circumference.
- Use the size chart for the exact brand and model.
- Check whether the torso, hipbelt, and harness can be adjusted separately.
- Load the pack with realistic weight before judging comfort.
- Fit the hipbelt before tightening the shoulder straps and load lifters.
- Walk, bend, climb stairs, and move your arms during the test.
- Check for gaps, rubbing, pressure points, restricted breathing, and belt slippage.
- Confirm that water, snacks, rain gear, and navigation tools are easy to reach.
- Review the return policy in case the pack feels different during a longer home test.
Frequently Asked Questions
Can I use a unisex backpack if it fits well?
Yes. Torso length, hipbelt coverage, shoulder-harness shape, and load stability matter more than the gender label. A unisex pack is a good choice when it maintains shoulder contact, transfers the load to your hips, and does not rub your neck or chest.
What materials are best for women’s backpacks?
Nylon and polyester are both common choices. Instead of choosing by fiber name alone, compare fabric thickness, reinforced wear areas, seam quality, zipper construction, weather coating, weight, and repairability. The best material depends on whether you prioritize low weight, abrasion resistance, weather protection, or cost.
How do I clean and maintain my backpack?
Follow the care label for your model. A common method is to empty the pack, remove detachable components, and clean it with mild soap, warm water, and a soft sponge or brush. Rinse thoroughly and air-dry it in a ventilated area away from direct sunlight. Avoid harsh chemicals and machine washing unless the manufacturer specifically permits it.
Are certain brands known for women-specific backpacks?
Osprey, Deuter, Gregory, and REI Co-op are among the brands that offer women-specific, slim-fit, adjustable, or extended-fit options. Brand reputation does not replace a fit test, so compare torso ranges, hipbelt dimensions, and harness shapes for each model.
How much weight can a woman comfortably carry?
There is no single limit that fits everyone. Rough starting guidance is about 10% of body weight for day hiking and about 20% for backpacking, but terrain, fitness, trip length, weather, water, health, and pack design can change what is manageable. Reduce the load if you experience pain, numbness, instability, or restricted movement.
How can I tell if a backpack is too long or too short?
A pack may be too long if the hipbelt sits correctly but the shoulder harness leaves a large gap or presses into the neck. It may be too short if the shoulder straps wrap too far down the back, the load lifters angle poorly, or the pack pulls backward. Reset an adjustable suspension or compare another size.
Conclusion
The best backpack is not simply the smallest, largest, or most heavily padded option. Start with enough capacity for your actual gear, then match the suspension to your torso and hips. Test the pack with weight, adjust it from the hipbelt upward, and pay attention to pressure, rubbing, and movement.
A women-specific backpack may provide a better harness shape for some bodies, while a unisex or extended-fit model may work better for others. Let your measurements and the loaded fit—not the label—guide the final choice.
Sources
- REI Co-op: How to Choose Daypacks — daypack capacities, activities, and fit considerations
- REI Co-op: How to Choose a Backpack — backpacking capacities, torso sizing, hipbelt fit, and load transfer
- REI Co-op: How to Size and Fit a Backpack — torso and hip measurement plus strap-adjustment steps
- Osprey: Backpack Sizing and Fit — torso measurement, harness checks, hipbelt sizing, and women-specific fit
- Deuter: Backpack Sizes and Fits — slim-fit and women-specific suspension characteristics
- Osprey: How to Clean Your Backpack — mild-soap cleaning, rinsing, and air-drying guidance
