Last Updated on July 30, 2026 by Caleb Warren
A tall frame does not automatically require the largest backpack. The most important measurement is your torso length, followed by hip-belt fit, shoulder-strap shape, and the pack’s adjustment range. Measure first, compare your number with the manufacturer’s size chart, and test the backpack with realistic weight before deciding whether it fits.
Quick Answer
For a tall person, choose by torso length—not overall height. Measure from the C7 vertebra to the iliac crest, then match that number to the maker’s fit range. Prioritize an adjustable harness, usable hip belt, load lifters, and shoulder straps that wrap without gaps. Test the pack loaded before buying.
Key Takeaways
- Your torso length, not your total height, determines the backpack size you should try first.
- An adjustable torso harness is usually the safest choice for a long torso.
- A manufacturer’s published torso range is more useful than the bag’s back-panel height.
- Backpack capacity describes storage space; airlines judge the packed exterior dimensions and weight.
- A correct fit should not cause shoulder gaps, hip-belt slipping, numbness, tingling, or sharp pressure.
At a Glance
| Time Required | 10–20 minutes to measure and complete an initial loaded fit test |
| Difficulty | Easy, although a helper improves measurement accuracy |
| Tools Needed | Flexible tape measure, a helper, and a realistic test load |
| Cost | $0 if you already own a tape measure; backpack prices vary by size and suspension system |
Disclosure: As an Amazon Associate I earn from qualifying purchases. Some links on this page are affiliate links, at no extra cost to you.
Why Torso Length Matters More Than Height
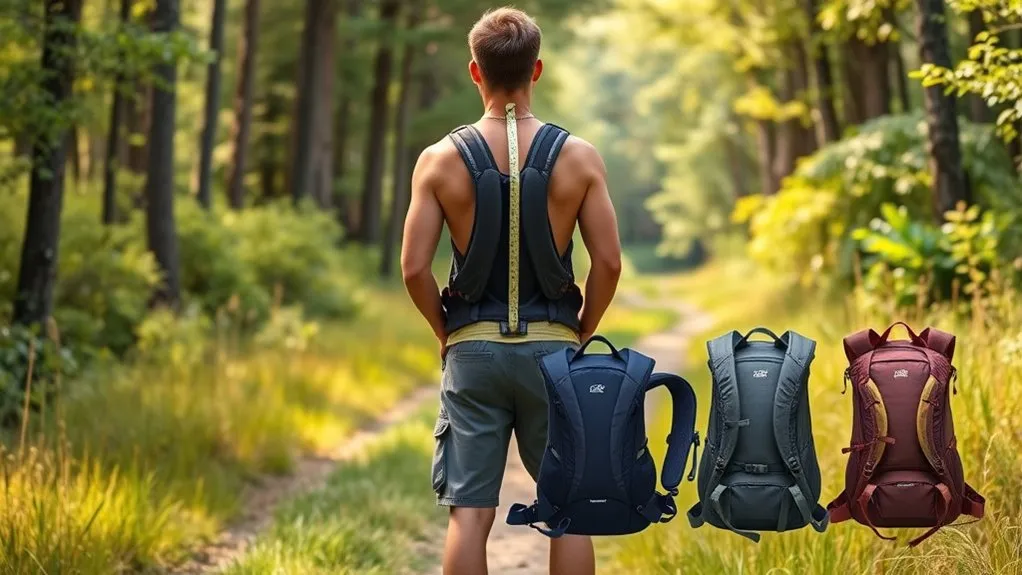
Two people who are the same height can need different backpack sizes. One may have long legs and a regular torso, while the other may have a longer back. That is why manufacturers such as Osprey and fitting guides from REI base pack sizing on torso length rather than total height.
A matching torso length helps place the hip belt over the upper part of your pelvis while allowing the shoulder straps to wrap smoothly around your shoulders. If the suspension is too short, the straps may pull backward from your shoulders and place too much weight on them. If it is too long, the shoulder straps may start too high, the hip belt may slide, or the pack may feel unstable.
How to Measure Your Torso Length
- Find the C7 vertebra. Tilt your chin toward your chest and feel for the prominent bone at the base of your neck.
- Find the iliac crest. Place your hands on top of your hip bones with your thumbs pointing toward your spine. Imagine a horizontal line connecting the tops of both hip bones.
- Measure along the spine. Ask a helper to run a flexible tape from the C7 vertebra down the natural curve of your back to the imaginary line between your iliac crests.
- Repeat the measurement. Measure again if the tape shifted or your helper had trouble locating either point. Use the most consistent result rather than relying on your height.
Pro Tip: Measure while wearing a thin shirt. A thick jacket, raised shoulders, or an arched back can change the result enough to place you in the wrong size range.
Size labels such as medium, large, tall, and extra large are not standardized. A 20-inch torso may be a large in one brand and within a one-size adjustable range in another. Always compare your measurement with the chart for the exact model you plan to buy.
Measure Your Hips Too
Torso length is only part of the fit. Measure around the area where the padded hip belt will sit, usually near the top of the hip bones. Check the manufacturer’s hip-belt range and make sure the padded sections wrap far enough around your hips without meeting in the center.
A long torso does not always come with a large waist. Tall, slim travelers may need a long suspension with a relatively small hip belt. Interchangeable or highly adjustable hip belts can be useful when standard proportions do not match your body.
Recommended Backpacks for Tall Individuals
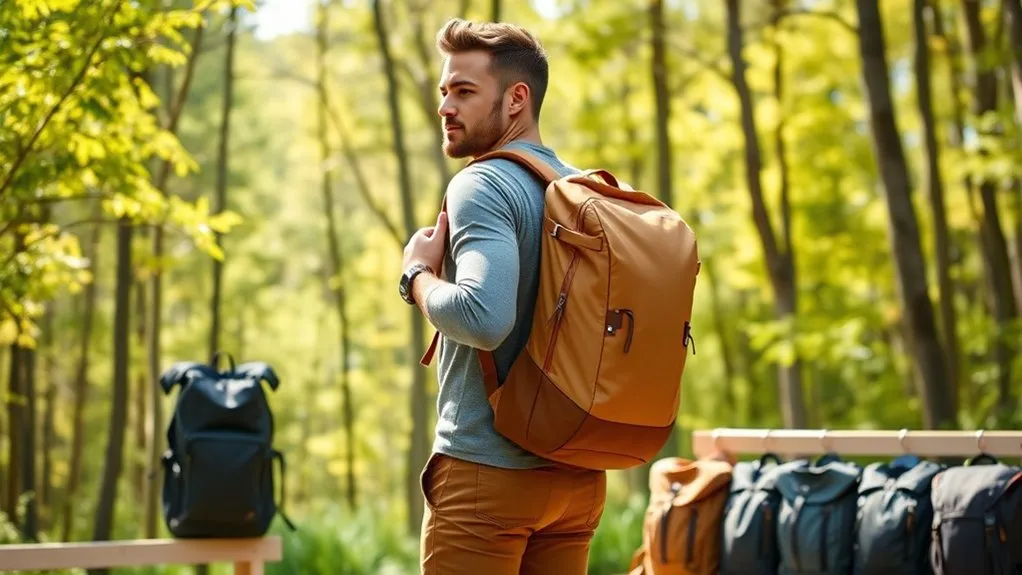
No backpack fits every tall person. The options below are useful starting points because they offer an adjustable harness, a longer fixed fit, or a taller bag body. Treat this list as a shortlist rather than a guarantee. Shoulder width, hip shape, neck clearance, and the weight you carry can change how each model feels.
Current Backpack Options to Compare
| Backpack | Fit System | Tall-Person Consideration |
|---|---|---|
| Osprey Farpoint 40 | Adjustable torso harness, framed suspension, hip belt, sternum strap, and load lifters | The documented Farpoint range is 17–21 inches. It is a strong starting point for many regular-to-long torsos, but readers above that range should not assume it will extend farther. |
| Tortuga Pro Backpack 40L | Height-adjustable shoulder harness, padded hip belt, load lifters, and sternum strap | This is the current successor to the older Outbreaker line. The manufacturer promotes broad height adjustment but does not publish a precise numerical torso range on the current product page. |
| Tortuga Lite Backpack 40L | Fixed torso fit with load lifters and shoulder support | The manufacturer lists a fixed fit for 19–21-inch torsos. This may suit a longer torso, but it offers less fine-tuning than the Pro model. |
| GORUCK GR2 | Fixed shoulder harness; available in different capacities and bag heights | The taller GR2 versions may sit better on a long back, but GORUCK does not publish a torso-length rating. Bag height is not the same as suspension fit, so a loaded test is essential. |
| Peak Design Travel Backpack 45L | Fixed, stowable shoulder straps with sternum and hip support | The tall bag body can suit some longer backs, but the torso length is not height-adjustable. Test shoulder wrap and hip-belt position carefully. |
| Minaal Carry-on 3.0 | Contoured harness with multiple strap adjustments | This is the current generation after the older 2.0. Minaal does not publish a numerical torso range, so confirm that the straps and optional hip support align with your body. |
Note: A manufacturer’s torso range describes the suspension, while the listed bag height describes the luggage itself. Do not use a 22-inch-tall backpack as proof that it fits a 22-inch torso.
Key Sizing Features
When comparing backpacks for a tall frame, look beyond capacity and overall bag height. The following features have the greatest effect on fit:
- Adjustable torso length: Moves the shoulder harness higher or lower so the hip belt and shoulder straps can align at the same time.
- Usable hip belt: Wraps the upper pelvis and helps transfer part of the load away from the shoulders.
- Load lifters: Connect the upper bag to the shoulder straps and help bring the load closer to the body.
- Long enough shoulder straps: Allow the padded section to wrap around the shoulders without the buckle or narrow webbing pressing into the armpit.
- Appropriate strap spacing: Prevents rubbing against the neck while keeping the straps from slipping off broad or narrow shoulders.
- Adjustable sternum strap: Stabilizes the shoulder straps without restricting breathing.
- Return policy: Gives you time to load the pack and test it indoors without committing to a poor fit.
Understanding Backpack Sizes and Capacity

Backpack capacity is usually expressed in liters. One liter equals about 61 cubic inches, so a one-liter water bottle can provide a rough visual reference. However, liters describe internal storage volume—not the length of the harness or whether the bag fits a tall person.
| Approximate Capacity | Common Uses | Fit Consideration |
|---|---|---|
| 1–10 liters | Running, hydration, compact essentials, and short outings | Many packs use a vest-like fit rather than a full hip-bearing suspension. |
| 10–30 liters | Day hikes, commuting, sightseeing, and personal-item travel | Small bags may look short on a tall back but can still work when the load is light. |
| 30–45 liters | Carry-on travel, weekend hiking, and minimalist trips | This range often benefits from a frame, adjustable harness, and supportive hip belt. |
| 45–60 liters | Weekend or multiday backpacking, bulky equipment, and colder conditions | Suspension fit becomes increasingly important as load weight rises. |
| 60–80+ liters | Multiday trips, winter equipment, family gear, and extended expeditions | Choose a pack with a documented torso range and a properly sized load-bearing hip belt. |
These ranges are guidelines rather than strict rules. Efficient packers may use less space, while cold-weather equipment, camera gear, medical equipment, or supplies for children may require more.
Capacity and Airline Carry-On Rules
A 40-liter label does not guarantee that a bag qualifies as a carry-on. Two bags with the same advertised volume can have different exterior shapes and measurements. The Federal Aviation Administration advises passengers to check directly with their airline because cabin-bag limits can vary and some aircraft have less overhead space.
Warning: Measure the fully packed backpack, including stuffed front pockets, handles, wheels, and items in bottle pockets. A soft bag that meets the limit while empty can exceed it after overpacking.
Choosing the Right Fit for Comfort
A backpack fits correctly only when the hip belt, shoulder straps, load lifters, and sternum strap work together. Test the pack with a realistic load instead of judging it while empty. Clothing, water, electronics, and travel gear can change how the suspension settles against your body.
Match the Torso Range
Compare your C7-to-iliac-crest measurement with the manufacturer’s range for the exact pack and size. When your measurement falls between two sizes, try both when possible. The better option is the one that positions the hip belt correctly while allowing the shoulder straps to wrap around your shoulders without a gap.
A one-size pack can work well when its adjustment range includes your measurement. “One size” does not mean that it fits every body.
Understand the Adjustment System
- Sliding or hook-and-loop harness: Offers continuous adjustment and makes small changes easier.
- Ladder-style harness: Uses fixed attachment positions. It can be supportive, but the ideal setting may fall between two positions.
- Interchangeable components: Some hiking packs let you combine a long torso size with a different hip-belt size.
- Fixed harness: Can fit well when its proportions match your body, but it provides less room to correct a mismatch.
According to Osprey’s fitting guidance, shoulder straps should wrap fully around the shoulders without a gap between your back and the pack. Its documented setup also places the padded portion of the strap roughly 1–2 inches below the armpit and the sternum strap below the collarbone.
Test the Backpack With Weight
- Place a realistic load in the pack. Use soft items around heavier objects so the test does not damage the bag.
- Loosen the shoulder straps, load lifters, sternum strap, and hip belt before putting the pack on.
- Position the middle of the hip-belt padding over the upper part of your hip bones and tighten it snugly.
- Pull the shoulder straps down and back until they follow your shoulders without crushing them.
- Tighten the load lifters enough to bring the upper pack closer. Do not pull so hard that the shoulder straps lift away from your shoulders.
- Buckle the sternum strap and tighten it only enough to keep the shoulder straps stable.
- Walk, climb stairs, sit, bend, and reach overhead for at least 10 minutes.
The best backpack for a tall person is not necessarily the tallest bag. It is the pack that keeps the hip belt, shoulder harness, and load close to the body at the same time.
How to Adjust a Backpack for a Tall Torso
1. Set the Harness Height
Move the harness upward or select the longer torso setting when the hip belt is correctly positioned but the shoulder straps begin too low on your back. Move it downward when the straps begin above your shoulders or leave a large gap behind them.
2. Position the Hip Belt
Center the hip-belt padding over the top of your hip bones. It should feel secure without pinching your stomach or restricting your movement. If the belt slides down as soon as you walk, the belt may be too large, too loosely tightened, or poorly shaped for your hips.
3. Adjust the Shoulder Straps
Tighten the shoulder straps until the padding follows the curve of your shoulders. The straps should not cut into your neck, rub heavily against your arms, or place the adjustment buckle directly in your armpit.
4. Adjust the Load Lifters
Load lifters should pull the upper pack toward your body rather than merely pulling the shoulder straps upward. On many framed packs, an angle near 45 degrees is a useful starting point, although the exact angle depends on the frame and attachment position.
5. Set the Sternum Strap
Move the sternum strap to a comfortable position below the collarbone. Tighten it enough to stabilize the straps, but leave enough room to breathe deeply and move your shoulders.
Warning: Stop and readjust the pack if you experience numbness, tingling, sharp pain, restricted breathing, or loss of circulation. Persistent symptoms are not a normal “break-in” stage.
Daypacks vs. Travel Backpacks
Choosing between a daypack and a travel backpack depends on the load, trip length, and how long you will carry it.
- Daypacks: Usually lighter and smaller, often between about 10 and 40 liters. They work well for daily use and short hikes, but compact models may have fixed straps and minimal hip support.
- Travel backpacks: Often open like a suitcase and use stowable straps. Models in the 30–45-liter range can work for carry-on travel, but their suspension quality varies widely.
- Backpacking packs: Usually provide the most advanced torso sizing, frames, hip belts, and load adjustment. They carry weight well but may be too tall, deep, or irregularly shaped for airline limits.
A small daypack does not need to reach your hips when carrying a light load. A heavier travel or hiking pack should align more closely with your torso so the hip belt can share the load.
Packing Strategies for Tall Travelers
Tall travelers often need larger clothing and longer footwear, but that does not always require a much larger backpack. Compression, a simple clothing plan, and careful weight placement can control bulk without overloading the suspension.
| Packing Element | Why It Matters | Practical Tip |
|---|---|---|
| Adjustable Features | Keep the pack aligned after the contents settle | Recheck the hip belt and load lifters after walking for several minutes. |
| Weight Testing | Reveals pressure points that an empty test cannot show | Use the approximate weight and bulk you expect to carry. |
| Packing Cubes | Control bulky shirts and trousers while keeping the load stable | Use moderate compression; overstuffed cubes can distort the bag. |
| Heavy-Item Placement | Reduces the backward pull of the pack | Place dense items close to your back and near the middle of the pack. |
| Light Packing | Improves comfort and makes airline limits easier to meet | Build outfits around reusable layers and wear the bulkiest footwear in transit. |
| Torso Measurement | Guides the initial pack size | Save your measurement in both inches and centimeters for comparing brands. |
For air travel, a 30–40-liter backpack often offers a practical balance between space and mobility. A larger 40–45-liter model may work on some airlines, but only when its packed dimensions and weight meet that carrier’s rules.
Common Fit Problems and Fixes
| Problem | Likely Cause | What to Try |
|---|---|---|
| Gap behind the shoulders | Harness too long, loose shoulder straps, or over-tightened load lifters | Lower the harness, retighten the shoulder straps, and ease the load lifters. |
| Shoulder straps pull backward | Harness too short or load sitting too far from the back | Raise the harness and move heavy items closer to your spine. |
| Hip belt slides below the hips | Belt too large, incorrect belt shape, or excess shoulder loading | Tighten and reposition it; try a smaller or differently shaped hip belt if available. |
| Buckles press into the armpits | Shoulder padding is too short for the torso | Choose a longer harness or a model with longer padded shoulder straps. |
| Straps rub the neck | Harness spacing or strap shape does not match the shoulders | Adjust the sternum strap and test a harness with wider strap spacing. |
| Pack sways while walking | Loose compression, poor weight placement, or inadequate suspension | Compress the load, move dense items inward, and readjust the stabilizing straps. |
Tips for Selecting the Perfect Backpack
- Measure your torso and hips before comparing models.
- Use the exact manufacturer chart for the current version of the backpack.
- Prefer an adjustable torso harness when your measurement is near the edge of a fixed range.
- Check whether the shoulder padding is long enough for your torso.
- Confirm that the hip belt fits your waist and wraps your hip bones correctly.
- Load the backpack before testing it.
- Walk, bend, climb stairs, and sit while wearing it.
- Measure the exterior after packing if you plan to fly.
- Choose comfort and control over brand name, appearance, or maximum capacity.
- Buy from a seller with a return policy that allows an indoor loaded fit test.
Pro Tip: Take a side-view photo during the loaded test. It is easier to spot a low hip belt, a shoulder gap, or a bag leaning away from your back in a photo than while looking in a mirror.
Frequently Asked Questions
What materials are best for a tall-person backpack?
Material does not determine whether a backpack fits a tall person. Focus first on torso range and harness design. For durability, common choices include high-denier nylon, recycled nylon, polyester, laminated sailcloth, and waxed canvas. Nylon and laminated fabrics often provide a useful balance of abrasion resistance, weight, and weather protection.
How do I maintain my backpack for longevity?
Empty the pack after each trip, remove dirt with a soft brush, and follow the manufacturer’s cleaning instructions. Avoid machine washing unless the care label specifically permits it. Dry the pack completely away from direct heat, inspect the stitching and buckles, and store it uncompressed in a cool, dry place.
Can I customize my backpack’s fit?
You can adjust the torso setting, shoulder straps, load lifters, sternum strap, hip belt, and compression straps when the model includes them. Some hiking packs also accept interchangeable hip belts or shoulder harnesses. Added shoulder pads may soften pressure, but they cannot correct a suspension that is fundamentally too short or too long.
What accessories should I consider for a tall-person backpack?
Useful accessories include a compatible hip belt, rain cover, packing cubes, bottle holder, strap keepers, and a properly sized sternum strap. Only use accessories approved for the pack when they attach to the suspension. An aftermarket part should not interfere with buckles, load lifters, or emergency movement.
Are there eco-friendly backpack options for tall people?
Yes. Look for an appropriate torso range first, then compare recycled fabrics, PFAS-free water-repellent treatments, repair programs, replaceable components, and long warranties. A durable backpack that fits well and can be repaired may have a longer useful life than a poorly fitting product made with a small amount of recycled material.
What torso length counts as tall?
There is no universal cutoff. Many brands begin labeling packs as large or tall near a 20-inch torso, but the ranges vary. Use your measured torso length and the exact model’s chart instead of relying on a general label.
Can a tall person use a 40-liter carry-on backpack?
Yes, when the suspension fits the person and the packed exterior meets the airline’s limits. Capacity and torso fit are separate measurements. A 40-liter bag can have an adjustable long-torso harness, a fixed short harness, or no load-bearing hip belt at all.
Conclusion
The right backpack for a tall person starts with torso length, not total height. Measure from the C7 vertebra to the iliac crest, check hip-belt compatibility, and compare both numbers with the manufacturer’s current chart. An adjustable harness provides the most flexibility, but even a well-designed pack must be tested with realistic weight.
During the test, make sure the hip belt stays over your hip bones, the shoulder straps wrap without gaps, and the load remains close to your back. Then compare the packed dimensions with your airline’s rules or choose the capacity that matches your activity. A careful fit check will do more for comfort than simply buying the tallest or largest backpack available.
Sources
- REI Co-op: Backpacks—Fit and Torso Size Guide — torso measurement and backpack fitting fundamentals
- Osprey: Backpack Size and Fit Guide — C7-to-iliac-crest measurement and suspension sizing
- Osprey Farpoint/Fairview Owner’s Manual — Farpoint torso range and harness-position guidance
- Tortuga: The Outbreaker Backpack Is Now the Pro Backpack — current model naming and harness update
- REI Co-op: How to Choose a Backpack — capacity ranges by trip length
- Federal Aviation Administration: Carry-On Baggage Tips — airline-size checks and cabin-storage guidance