

Last Updated on July 27, 2026 by Daniel Globe
What you wear hiking should match the trail, weather, trip length, and amount of gear you plan to carry. A comfortable outfit for a dry, easy path may be a poor choice for a steep mountain trail, cold rain, deep mud, or exposed terrain. The goal is to stay dry, regulate your temperature, protect your feet and skin, and carry enough backup gear for changing conditions.
Quick Answer
For most hikes, wear a moisture-wicking synthetic or wool base layer, flexible quick-drying pants or shorts, and sturdy trail footwear with traction. Carry an insulating layer and rain shell even when conditions look mild. Add sun protection, weather-appropriate accessories, and the Ten Essentials, then adjust the setup to the route and forecast.
Key Takeaways
- Choose hiking clothing for the actual terrain and forecast rather than dressing only for conditions at the trailhead.
- Use wool or synthetic layers that manage moisture; cotton can stay wet and lose insulating value in cool conditions.
- Choose boots, hiking shoes, or trail shoes based on fit, traction, terrain, weather, and the load you will carry.
- Carry an insulating layer and weather shell so you can adjust as your activity level and conditions change.
- Protect yourself from UV exposure with clothing, a hat, sunglasses, and broad-spectrum sunscreen.
- Carry the Ten Essentials, including navigation, a headlamp, first aid, extra food, hydration, and emergency shelter.
- Never assume untreated stream or lake water is safe just because it looks clear.
- Check current trail alerts and the weather forecast before leaving, and be willing to turn around when conditions deteriorate.
At a Glance
| Time Required | About 10–20 minutes to check conditions, choose layers, and pack before a familiar day hike; longer for unfamiliar or remote routes. |
| Difficulty | Easy for basic day-hike preparation; advanced terrain, winter travel, and remote routes require additional skills and equipment. |
| Tools Needed | Current forecast and trail report, suitable clothing and footwear, backpack, water, navigation, and the Ten Essentials. |
| Cost | Variable. You do not need an entirely new wardrobe if you already own suitable quick-drying layers, weather protection, and safe footwear. |
Disclosure: As an Amazon Associate I earn from qualifying purchases. Some links on this page are affiliate links, at no extra cost to you.
Match Your Clothing to the Terrain and Weather
Start with the trail rather than the clothing rack. Rocky paths, loose gravel, mud, roots, stream crossings, steep climbs, and exposed ridgelines place different demands on your footwear and clothing. Elevation matters too. A hike that begins in a warm valley can become much colder and windier higher up.
Look at the distance, elevation gain, trail surface, water crossings, shade, exposure, and expected temperature range before deciding what to wear. Recent trail reports can warn you about mud, snow, ice, flooding, downed trees, or other conditions that may require different equipment.
The National Park Service recommends researching the route and terrain before hiking and choosing equipment for the specific trip. Check the forecast again shortly before you leave because mountain and backcountry weather can change quickly.
Warning: Rain gear does not make a thunderstorm safe. The National Weather Service says there is no safe place outdoors when thunderstorms are in the area. If you hear thunder, move to a substantial building or an enclosed, hard-topped vehicle when one is available. Do not rely on a tent, open shelter, isolated tree, or rocky overhang for lightning protection.
Choose Hiking Footwear: Boots vs. Trail Shoes
Footwear is one of the most important parts of a hiking outfit, but there is no single best style for every trail. Fit, traction, terrain, weather, pack weight, and your own stability matter more than simply choosing the tallest boot.
Hiking boots are generally heavier and more structured than low-cut shoes. They can provide more protection around the foot and ankle and may be useful on rough trails, in brush, on rocky ground, or while carrying a heavier pack.
Hiking shoes and trail-running shoes are usually lighter and more flexible. They can work well on maintained trails and for hikers who value lower weight and easier movement. Traction varies greatly by model, however, so do not assume every trail shoe will grip wet rock or deep mud equally well.
| Footwear | Often Works Well For | Trade-Offs |
|---|---|---|
| Hiking boots | Rugged ground, heavier loads, rocky trails, brush, colder conditions | Heavier and often less breathable |
| Hiking shoes | Day hikes, moderate terrain, hikers wanting a balance of protection and weight | Less coverage around the ankle |
| Trail-running shoes | Maintained or moderate trails, faster hiking, lighter loads | Usually less underfoot and ankle protection than heavier boots |
Whatever style you choose, the shoe should fit securely without crushing your toes. Your heel should not slide excessively, and your toes need enough room that they do not repeatedly strike the front of the shoe on descents.
Pro Tip: Test new hiking footwear on shorter walks before committing to a long trail. Wear the same socks you plan to hike in and include some uphill and downhill walking so you can catch pressure points, heel slip, or toe contact early.
Layering for Comfort and Protection: Clothing Essentials
A flexible layering system makes it easier to stay comfortable as temperatures, wind, precipitation, and your activity level change. You do not always need to wear every layer at once. Instead, carry pieces that can be added or removed without replacing your whole outfit.
Base Layer
The base layer sits closest to your skin and should move moisture away from your body. Merino wool and synthetic fabrics such as polyester are common choices. A moisture-managing shirt, underwear, and—when conditions call for it—long underwear can help you stay more comfortable during sustained activity.
Insulating Layer
The insulating layer retains warmth when temperatures fall or when you stop moving. Fleece, wool, and insulated synthetic or down garments are common options. How much insulation you need depends on temperature, wind, elevation, precipitation, and how long you might remain stationary.
Outer Shell
The outer layer protects you from wind and precipitation. For wet conditions, carry a waterproof rain shell. Ventilation features such as pit zips can make a shell more comfortable during hard climbs because even breathable fabrics may feel warm during high exertion.
Note: Cotton can be comfortable on a dry casual walk, but it absorbs moisture and dries slowly. In cool, wet, windy, or remote conditions, wool and synthetic layers are safer choices because staying wet can accelerate heat loss. The National Park Service specifically advises avoiding cotton when hypothermia is a concern.
What to Wear Hiking by Weather and Season
Hot-Weather Hiking
In hot weather, choose light, breathable clothing that lets you move freely. A moisture-wicking shirt paired with lightweight hiking pants or shorts works for many trails. Long sleeves and long pants can provide additional sun, brush, and insect protection when made from breathable material.
Add a brimmed hat, sunglasses, and sunscreen. Carry enough water for the route and conditions, and adjust your plans when extreme heat makes a trail unsafe.
Rainy or Wet Conditions
Wear quick-drying layers and carry a waterproof shell before the rain begins. Waterproof pants can be useful during sustained rain, cold weather, or hikes through wet vegetation. In warm conditions, some hikers prefer quicker-drying clothing rather than wearing waterproof pants all day because rain pants can trap heat.
Footwear should have suitable tread for the trail surface. Waterproof footwear can help in cold or shallow wet conditions, but no boot prevents water from entering over the top. Gaiters can add protection from mud, shallow snow, wet brush, or debris.
Cold-Weather Hiking
Cold-weather hiking requires more insulation and more backup clothing. Start with a wool or synthetic base layer, add fleece or another insulating layer, and carry protection from wind and precipitation. Pack a warm hat and gloves even when you expect to stay active.
Snow and ice can also change footwear requirements. Insulated boots or traction devices may be appropriate when trail reports call for them. Steep snow, avalanche terrain, glaciers, or technical winter routes require specialized skills and equipment beyond a normal hiking outfit.
Warning: Do not treat ordinary hiking gear as a substitute for winter-travel skills. If a route requires traction, avalanche knowledge, technical equipment, or experience you do not have, choose a safer route or turn around.
Do Not Forget Hiking Socks and Small Clothing Details
Socks can make as much difference to comfort as the shoe itself. Wool or synthetic hiking socks manage moisture better than ordinary cotton socks and are available in different cushioning levels. The best thickness depends on your footwear fit, temperature, and personal preference.
Choose underwear that dries quickly and does not create seams or pressure points where your pack or clothing rubs. On longer hikes, small details such as a comfortable waistband, secure pockets, and clothing that does not restrict your stride can prevent repeated irritation.
Depending on conditions, useful additions include:
- A sun hat or warm beanie
- Gloves or mittens
- A neck gaiter
- Gaiters for mud, snow, or debris
- Spare dry socks
- Insect protection where mosquitoes, ticks, or biting insects are common
Selecting the Best Backpack: Size and Features
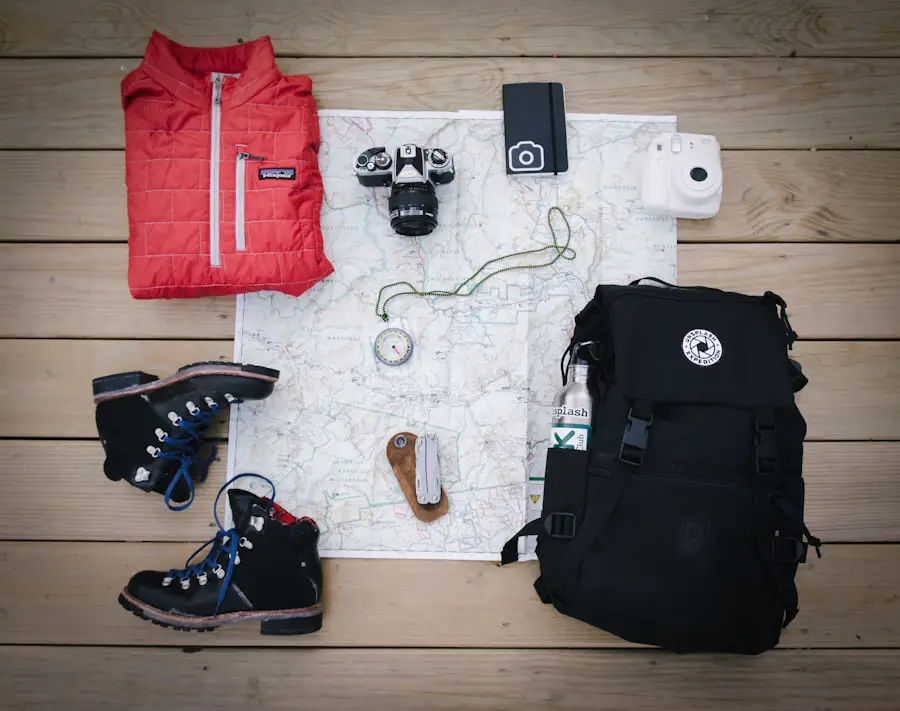
Choose a backpack based on how long you will be out, how much water and food you need, the weather, and whether you are carrying overnight equipment. Many simple day hikes can be handled with a compact daypack, while cold-weather trips and overnight hikes require more room.
As a rough example, daypacks commonly fall around 15 to 30 liters, but that range is not a rule. A winter day hike may require more space for insulation than a warm summer hike. Overnight hikers often use packs around 40 liters or larger, but the correct capacity depends on the size and quantity of the equipment being carried.
Fit matters as much as volume. Adjustable shoulder straps, a properly positioned hip belt on packs designed for heavier loads, and a stable fit can make carrying gear more comfortable. Ventilated back panels may reduce the feeling of heat against your back.
Pockets and compartments should make essential items easy to reach. Water, snacks, rain gear, a map, sunscreen, and a first aid kit should not be buried beneath everything else.
Gear Up: Essential Accessories for Hiking
| Accessory | Why It Matters | What to Look For |
|---|---|---|
| Hiking Boots or Shoes | Traction, foot protection, and support appropriate to the trail | Good fit, suitable tread, enough toe room, and construction matched to terrain and pack weight |
| Hiking Backpack | Carries clothing, water, food, and emergency equipment | Comfortable fit, enough capacity for the trip, useful pockets, and stable load carrying |
| Trekking Poles | Provide extra points of contact on uneven ground | Comfortable grips, reliable locks, and appropriate adjustment range |
| Hiking Socks | Manage moisture and create a comfortable interface between foot and footwear | Wool or synthetic material, proper fit, and cushioning suitable for your shoes |
Carry the Ten Essentials
The National Park Service Ten Essentials provide a useful baseline for hiking preparedness. Adjust the quantity and type of equipment to the route, season, group, and expected conditions.
- Navigation: map, compass, GPS, or another reliable navigation system; know how to use it.
- Sun protection: sunglasses, sunscreen, hat, and protective clothing.
- Extra clothing: insulation and weather protection suitable for the most demanding conditions you may reasonably encounter.
- Illumination: a headlamp or flashlight plus adequate battery power.
- First aid: a kit appropriate for the trip and the knowledge to use it.
- Fire: emergency fire-starting supplies where lawful and appropriate; always follow current fire restrictions.
- Repair kit and tools: items such as tape, a multitool, or other route-appropriate repair supplies.
- Extra food: enough to handle an unexpected delay.
- Hydration: sufficient water plus treatment equipment where natural sources may need to be used.
- Emergency shelter: a tarp, emergency bivy, space blanket, or another suitable emergency shelter system.
A whistle is also a useful lightweight signaling tool. Trekking poles are optional but can provide extra stability on uneven ground and during steep climbs or descents.
Treat Natural Water Correctly
Do not assume a clear mountain stream is safe to drink. The CDC states that boiling is the best way to kill germs when water safety is uncertain. When boiling is not practical, CDC says the next-best option is to filter the water and then disinfect the filtered water.
Portable filters differ in what they remove. Many filters can remove parasites but may not remove viruses or every type of bacteria. Always follow the treatment device manufacturer’s instructions and check local land-manager guidance for known water hazards.
Protecting Yourself from the Elements: Rain and Sun Gear
A waterproof jacket belongs in your pack whenever rain or rapidly changing weather is reasonably possible. Look for a shell that fits over your other layers without restricting movement. An adjustable hood and ventilation can improve comfort during sustained activity.
Sun protection matters even when temperatures are mild. The CDC recommends several forms of UV protection, including shade, clothing that covers exposed skin, a wide-brimmed hat, sunglasses that block UVA and UVB rays, and broad-spectrum sunscreen with SPF 15 or higher.
Reapply sunscreen after about two hours outdoors and after swimming, heavy sweating, or toweling off. UV exposure can occur on cloudy days and can be intensified by reflective surfaces such as snow and water.
Dressing for Safety: Visibility and Emergency Preparedness
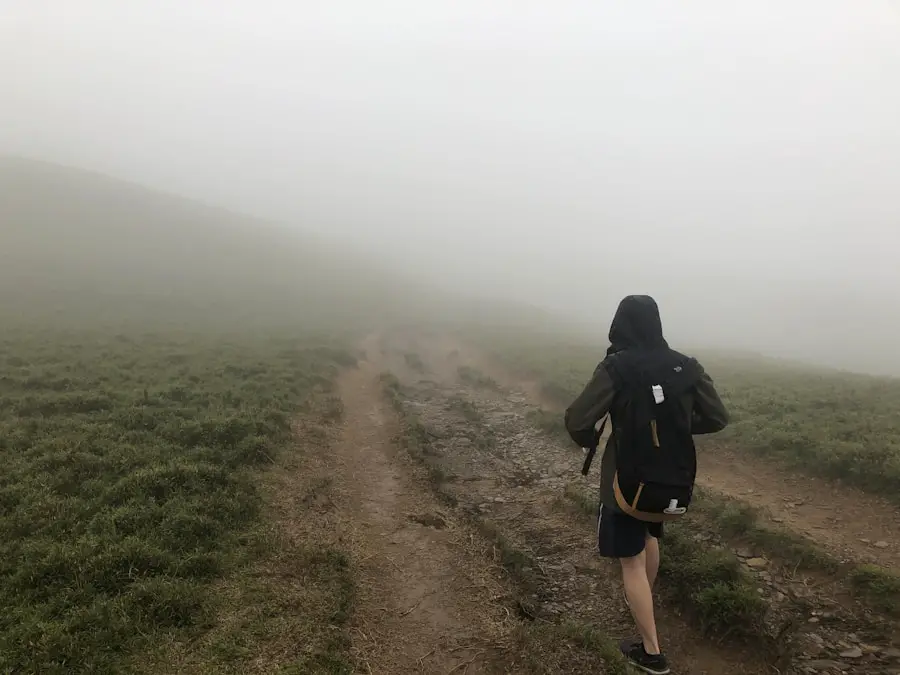
Bright or easily visible clothing can make you easier for other people—and potentially search-and-rescue teams—to spot. This can be useful near road crossings, in low visibility, or during an emergency. The National Park Service includes bright clothing in its preparedness guidance for improving visibility.
Visibility clothing should not be treated as wildlife protection by itself. Wildlife precautions vary by location and species, so follow the rules and safety guidance issued by the park, forest, or other land manager for the area you are visiting.
Keep a first aid kit and headlamp where you can reach them without unpacking your entire bag. Carry an emergency shelter appropriate to the route, and tell someone where you are going and when you expect to return before heading into remote terrain.
Good hiking clothing is not about owning the most technical outfit. It is about having enough traction, moisture control, insulation, weather protection, and backup gear to handle the conditions you may actually encounter.
Packing It All Together: Tips for Organizing and Carrying Your Gear
Organize your pack according to how quickly you may need each item. Water, snacks, rain protection, navigation, sunscreen, and first aid supplies should be accessible without emptying the whole backpack.
Keep heavier, dense items reasonably close to your back rather than allowing them to swing at the outer edge of the pack. Balance the load from side to side and tighten compression straps so the contents do not shift while you walk.
Packing cubes or lightweight sacks can keep clothing, food, and emergency supplies organized. Waterproof or water-resistant bags can also protect clothing, electronics, and emergency insulation from rain or accidental water exposure.
External straps can carry trekking poles or other equipment when the backpack is designed for that purpose. Make sure externally attached items are secure and will not catch on vegetation or swing into other hikers.
Do a Final Pre-Hike Check
- Check the latest trail status and weather forecast.
- Confirm that your footwear matches the surface and conditions.
- Wear or pack enough layers for the coldest realistic conditions.
- Pack rain protection when precipitation is possible.
- Carry sufficient water and know whether reliable refill sources exist.
- Carry the Ten Essentials.
- Charge navigation and communication devices, but do not rely on cell service being available.
- Tell someone your route and expected return time on remote hikes.
- Change or cancel the hike if weather, wildfire, flooding, snow, heat, or other hazards make the route unsafe.
Pro Tip: Dress slightly cool at the trailhead when you are about to begin a steady climb, but keep insulation immediately accessible. Adding and removing layers early is usually more comfortable than waiting until your clothing is soaked with sweat or you are already cold.
If your hiking trip also includes air travel, the existing guide to Best Carry-On Luggage for International Travel can help you plan how to transport clothing and travel gear before you reach the trail.
Love travel? Join Our Facebook Community For More Tips.
Sources
- National Park Service — Ten Essentials — navigation, sun protection, extra clothing, lighting, first aid, food, hydration, tools, fire, and emergency shelter.
- National Park Service — Hike Smart — route planning, terrain research, water, food, and trip-specific hiking equipment.
- Rocky Mountain National Park — Hypothermia — wet-weather clothing, cotton avoidance, rain protection, and cold-weather preparation.
- Centers for Disease Control and Prevention — Preventing Sunburn — sunscreen, clothing, hats, sunglasses, and UV protection.
- Centers for Disease Control and Prevention — Water Treatment When Hiking or Camping — boiling, filtration, disinfection, and backcountry drinking-water safety.
- National Weather Service — Outdoor Lightning Safety — thunderstorm planning and safe shelter guidance.
Frequently Asked Questions
What should I wear hiking?
For most hikes, wear a moisture-wicking wool or synthetic shirt, flexible quick-drying pants or shorts, hiking socks, and footwear with suitable traction. Carry an insulating layer and rain shell so you can adjust to changing temperatures and weather.
What type of footwear is best for hiking?
The best footwear depends on terrain, weather, pack weight, fit, and personal preference. Hiking boots provide more structure and coverage, while hiking shoes and trail-running shoes are lighter and more flexible. Whatever style you choose should fit well and have tread suited to the trail.
What accessories should I bring for a hike?
Carry the Ten Essentials: navigation, sun protection, extra clothing, illumination, first aid, emergency fire supplies where appropriate, repair tools, extra food, hydration, and emergency shelter. Route-specific items such as trekking poles, traction devices, insect protection, or water-treatment equipment may also be needed.
What should I consider when choosing hiking clothing?
Consider temperature, precipitation, wind, elevation, sun exposure, trail surface, trip length, and how hard you expect to work. Choose layers that can be added or removed as conditions and your activity level change.
Are there any specific clothing items to avoid when hiking?
Avoid clothing that restricts movement, creates painful pressure points, or leaves you unprepared for the expected weather. Cotton is particularly poor for cold, wet, or windy conditions because it absorbs moisture and dries slowly. Wool and synthetic layers are generally better choices when staying dry and warm is important.
What should I wear hiking in summer?
Choose lightweight, breathable, quick-drying clothing and protect exposed skin from UV radiation. A sun hat, sunglasses, and broad-spectrum sunscreen are useful additions. Carry a rain shell and an extra layer when the route or elevation can produce rapid weather changes.
What should I wear hiking in cold weather?
Use a wool or synthetic base layer, an insulating fleece or jacket, and a weather-resistant outer shell. Add a warm hat, gloves, suitable socks, and footwear appropriate for the temperature and trail surface. Snow or ice may require traction devices or specialized winter equipment.
Can I hike in regular running shoes?
Regular running shoes may be adequate for some short, dry, smooth paths, but they are not designed for every trail. Hiking shoes and trail-running shoes generally provide tread and construction better suited to dirt, rocks, roots, and uneven surfaces. Choose footwear for the specific terrain rather than the label alone.

