
Last Updated on July 27, 2026 by Daniel Globe
Scrambling is the point where an ordinary hike starts to feel more like climbing. You still travel through mountain or rocky terrain on foot, but you use your hands for balance, support, and upward movement. Easy scrambles can be a natural step up from hiking, while harder routes can involve serious exposure, route-finding, ropework, and consequences similar to rock climbing.
Quick Answer
Scrambling in hiking means moving over steep or rocky terrain where you regularly use both your hands and feet. Difficulty ranges from simple hands-on hiking to exposed terrain that overlaps with easy rock climbing. Good route selection, secure movement, suitable footwear, weather awareness, and knowing when to turn back are essential.
Key Takeaways
- Scrambling sits between hiking and rock climbing, but harder scrambles can be serious mountaineering terrain.
- Difficulty is not only about the hardest move. Exposure, loose rock, route finding, weather, and the ability to retreat all affect risk.
- A rope and harness are not automatically required for every scramble. Higher-grade routes may require them, along with the skills to use them correctly.
- Use secure handholds and footholds, move deliberately, and maintain three points of contact when it improves stability.
- Before committing to a steep section, ask whether you can safely reverse the moves and descend the same terrain.
- Check the route, weather, local restrictions, escape options, and the ability of everyone in your group before setting out.
At a Glance
| Time Required | Varies from a short rocky section to a full mountain day; always include extra time for route finding and descent. |
| Difficulty | From easy hands-on terrain to highly exposed scrambling that overlaps with rock climbing. |
| Tools Needed | Suitable footwear, navigation, weather protection, food, water, headlamp, first-aid and emergency gear; a helmet and climbing equipment may be appropriate on more serious terrain. |
| Cost | No universal cost. Easy scrambles may use normal hiking equipment, while helmets, technical climbing gear, guidebooks, courses, or professional instruction add cost on harder routes. |
Disclosure: As an Amazon Associate I earn from qualifying purchases. Some links on this page are affiliate links, at no extra cost to you.
What Is Scrambling in Hiking?
Scrambling combines hiking with simple rock-climbing movement. Instead of walking continuously on a trail, you may climb blocks, follow rocky ridges, cross slabs, or move through broken terrain where your hands become part of your balance and movement.
The British Mountaineering Council describes scrambling as the middle ground between walking and climbing. In the United States, the exact language varies. For example, Joshua Tree National Park describes scrambling across 2nd-, 3rd-, and 4th-class rocky terrain.
That means scrambling is not one fixed level of difficulty. One route might involve only a few easy hand-supported steps. Another may have sustained climbing, severe exposure, loose rock, difficult route finding, and sections where a fall could be fatal.
Note: Scrambling grades vary by country, guidebook, and local tradition. Do not assume that a Grade 2 in one system is directly equivalent to Class 2 in another.
Understanding Scrambling Grades and Exposure
Grades help you estimate the difficulty of a route, but they should never be treated as a complete risk score. Conditions, exposure, route finding, rock quality, fatigue, and the consequences of a fall can make two routes with similar technical grades feel very different.
UK Scrambling Grades
| Grade 1 | Usually straightforward hands-on terrain. Difficult moves are often avoidable, but exposure can still be serious. |
| Grade 2 | Longer or more technical scrambling where route finding, exposure, and climbing ability matter more. A rope may be appropriate for some people or sections. |
| Grade 3 | Serious scrambling that overlaps substantially with easy rock climbing. Rope use and climbing skills should be expected on many routes. |
The BMC notes that UK scrambles are generally graded from 1 to 3, although guidebooks may vary. Higher grades should not be treated as simply “a harder walk.” They may call for the same judgment, movement, ropework, and protection skills used in mountaineering.
U.S. Class Ratings
Some U.S. guidebooks describe scrambling using terrain classes rather than UK-style scrambling grades. Joshua Tree National Park notes that 2nd-class terrain may include uneven surfaces where hands are occasionally useful, while 3rd class involves more consistent use of the hands. Fourth-class terrain is steeper, more exposed, and can have severe consequences if you fall.
These descriptions are useful for context, but regional systems are not perfectly interchangeable. Read the specific route description rather than choosing a route from its number alone.
Exposure Matters as Much as the Moves
A technically easy move a few feet above level ground may feel straightforward. The same movement above a large drop can be psychologically and physically much more serious. Before starting a route, find out whether the difficult sections are exposed, avoidable, reversible, or protected by easier terrain.
The most important question is not simply “Can I climb this?” but “What happens if I slip here, and can I safely get back down?”
Understanding the Challenges of Scrambling
Unlike a well-maintained hiking trail, a scrambling route may require constant judgment. Holds can be loose, polished, wet, sandy, or difficult to see. A route that appears obvious from below may split into several possibilities higher up, and the wrong line can lead onto much steeper ground.
Scrambling also demands more whole-body movement than ordinary hiking. Your legs still do most of the work, but your arms, shoulders, core, balance, and coordination become increasingly important as the angle steepens.
The psychological challenge can be just as significant. Exposure, narrow ridges, downward views, or difficult down-climbing may trigger fear even when the individual moves are technically easy. That response should not be ignored. Slow down, communicate with your group, and turn back while retreat is still straightforward if the terrain exceeds your comfort or ability.
Warning: Do not continue upward simply because climbing up feels possible. Down-climbing often feels harder, and some routes become much more difficult to escape once you have committed to an exposed ridge, gully, or rock step.
Essential Gear and Techniques for Scrambling
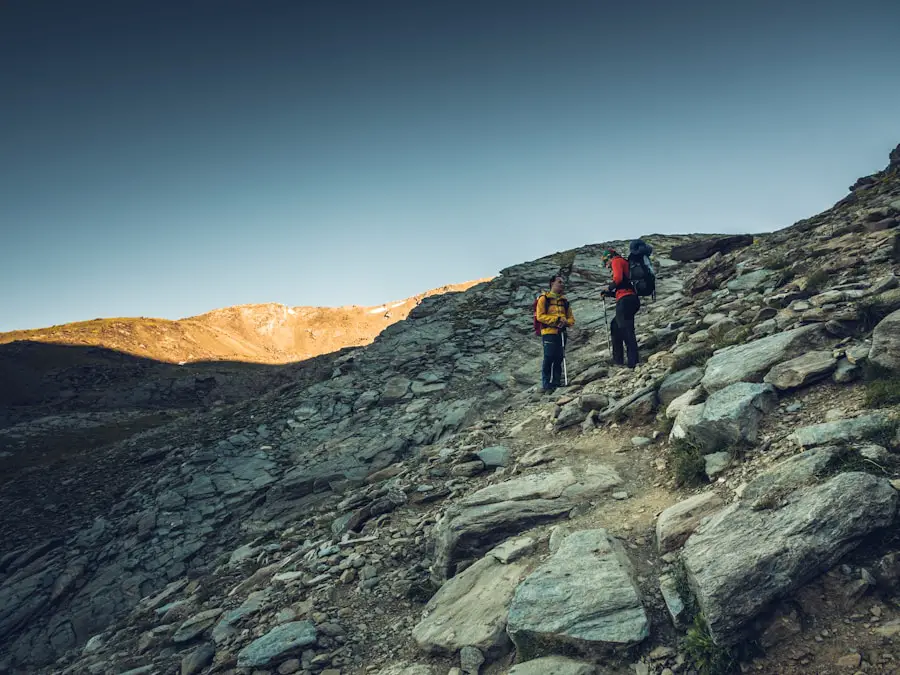
The right equipment depends on the route rather than on the word “scrambling” alone. An easy scramble in dry conditions may require little more than normal mountain-hiking equipment. A serious exposed route can require a helmet, rope, harness, protection, and the knowledge to use them correctly.
Footwear
Choose footwear that fits securely and gives you confidence on small footholds and rough rock. A grippy sole and good edging support are often more important than simply choosing the tallest boot. Sturdy hiking footwear works well on many easier routes, while approach shoes or firmer mountain footwear may offer more precise foot placement on steeper rock.
Whatever you wear, avoid attempting serious scrambling in shoes with worn, slick soles or a loose fit that lets your foot move inside the shoe.
Helmet
A climbing or mountaineering helmet becomes increasingly valuable where loose rock, falling objects, confined gullies, or more technical scrambling are concerns. It cannot remove the risk of rockfall, but it offers meaningful protection from some impacts.
Rope, Harness, and Protection
A rope and harness are not standard requirements for every scramble. On Grade 2 and Grade 3 terrain, however, the BMC advises that rope and protection may become appropriate. Carrying this equipment only improves safety when the group knows how to choose anchors, belay, manage the rope, protect a leader, and retreat correctly.
Someone without those skills should not treat a rope as an emergency shortcut. Learn the techniques from an experienced and competent person, a qualified instructor, or a structured course before relying on them in exposed terrain. Mountain Training’s Mountain Skills course, for example, covers journey planning, navigation, simple scrambling, mountain hazards, and emergency procedures.
Carry the Hiking Essentials Too
Technical equipment does not replace normal mountain preparation. The National Park Service Ten Essentials include navigation, sun protection, insulation, illumination, first aid, fire, repair tools, food, water, and emergency shelter.
A headlamp is particularly useful on long scrambles because route finding and careful movement can take much longer than normal trail hiking.
Use Three Points of Contact When Helpful
On steeper sections, keeping three secure points of contact—two feet and one hand or two hands and one foot—can improve balance while you move the remaining limb. Keep your body controlled rather than lunging for distant holds.
Do not rely only on your arms. Place your feet carefully and use your legs to support most of your weight whenever possible. This reduces fatigue and gives you more control over long sections of scrambling.
Pro Tip: Before transferring your full weight, look at the next handhold and foothold, test them gently, and decide where your next secure position will be. Smooth, deliberate movement is usually safer than large steps or hurried reaches.
Navigating Steep Terrain and Loose Rock
Loose rock is one of the most important scrambling hazards. A hold can feel solid when touched but move when your full body weight reaches it. A dislodged stone can also endanger people below you.
Assess the terrain before committing. Look for cracks around blocks, fresh debris, gravel on slabs, hollow or unstable-looking rock, and evidence of recent rockfall. Test questionable holds carefully without aggressively pulling outward on them.
| Hazard | What to Check | Safer Response |
| Loose rock | Moving blocks, gravel, cracks, fresh debris, people directly below | Test holds gently, avoid unstable blocks, and prevent the group from bunching directly beneath one another. |
| Exposure | Drop below, runout, consequences of a slip | Choose a less exposed variation or retreat before entering terrain where the consequences exceed your ability. |
| Wet or polished rock | Rain, seepage, moss, smooth slabs, watercourses | Slow down, use more secure holds, select another line, or abandon the scramble. |
| Poor route finding | Terrain becoming unexpectedly steep or technical | Stop early, compare the terrain with your route description and map, and reverse to the last known point if necessary. |
| No easy retreat | Hard down-climbing or committing ridge/gully ahead | Make the go/no-go decision before entering the committing section. |
Short, deliberate movements usually give you better control than long strides or leaps. Keep your weight over secure footholds and avoid sudden movements on loose scree or unstable blocks.
Sitting or lowering your center of gravity can occasionally make a transition feel more stable, but it should not become a substitute for secure holds and deliberate movement. Always consider how you will stand back up and make the next move.
In areas affected by natural rockfall, remember that even careful scrambling cannot eliminate all risk. The National Park Service’s Yosemite rockfall guidance notes that rockfall is an unpredictable natural process influenced by weathering, fractures, water, ice, earthquakes, temperature changes, and other factors.
Assessing Risk and Safety Measures in Scrambling
Good scrambling starts before you reach the first rock step. Research the full route rather than only the exciting section. You need to know how difficult the approach is, where the scrambling starts and ends, what the descent involves, whether escape routes exist, and how long the entire day is likely to take.
Check the Route Against Your Ability
Start with easier scrambling and progress gradually. A strong hiker is not automatically a strong scrambler: efficient footwork, exposure tolerance, route finding, down-climbing, and judgment develop through experience.
When traveling as a group, plan around the least experienced person. A route is not suitable just because the strongest member can complete it.
Check Mountain Weather, Not Only the Valley Forecast
Weather can change quickly at elevation. Rain can make rock more slippery, cloud can hide route features, thunderstorms make exposed ridges dangerous, and strong wind can make balance difficult.
The Met Office mountain forecast guidance highlights wind, temperature, freezing level, visibility, precipitation, and mountain-specific hazards as important factors for walkers and climbers.
Warning: Snow, ice, frozen turf, strong wind, or winter conditions can transform a summer scramble into technical mountaineering terrain. Do not assume that a summer grade describes the difficulty of the same route in winter.
Carry Emergency Equipment
A first-aid kit should match the remoteness and duration of your route rather than containing only a few bandages. Also carry adequate food, water, insulation, weather protection, a headlamp, navigation equipment, and emergency supplies.
Medication such as pain relief may be appropriate for an individual’s kit when it can be used safely, but emergency planning should focus first on preventing further injury, keeping the person warm, establishing location, and obtaining appropriate help.
Do Not Depend on Cell Service
A fully charged phone is useful, but mountain terrain can block cellular reception. Preserve battery power and consider an appropriate satellite communication or emergency-signaling device in remote areas.
Before leaving, tell a responsible person your intended route, start point, destination, expected return time, and what they should do if you become overdue. NPS hiking guidance recommends leaving a trip plan and warns that cellular communication may not be available in the backcountry.
Respect Closures and Local Rules
Scrambling does not automatically mean traveling wherever you choose. Follow park rules, private-property restrictions, seasonal closures, conservation measures, and route-specific guidance. Where authorities ask visitors to remain on designated routes, do so. Avoid damaging fragile vegetation or creating unnecessary erosion while searching for an easier line.
Building Confidence and Mental Preparedness for Scrambling
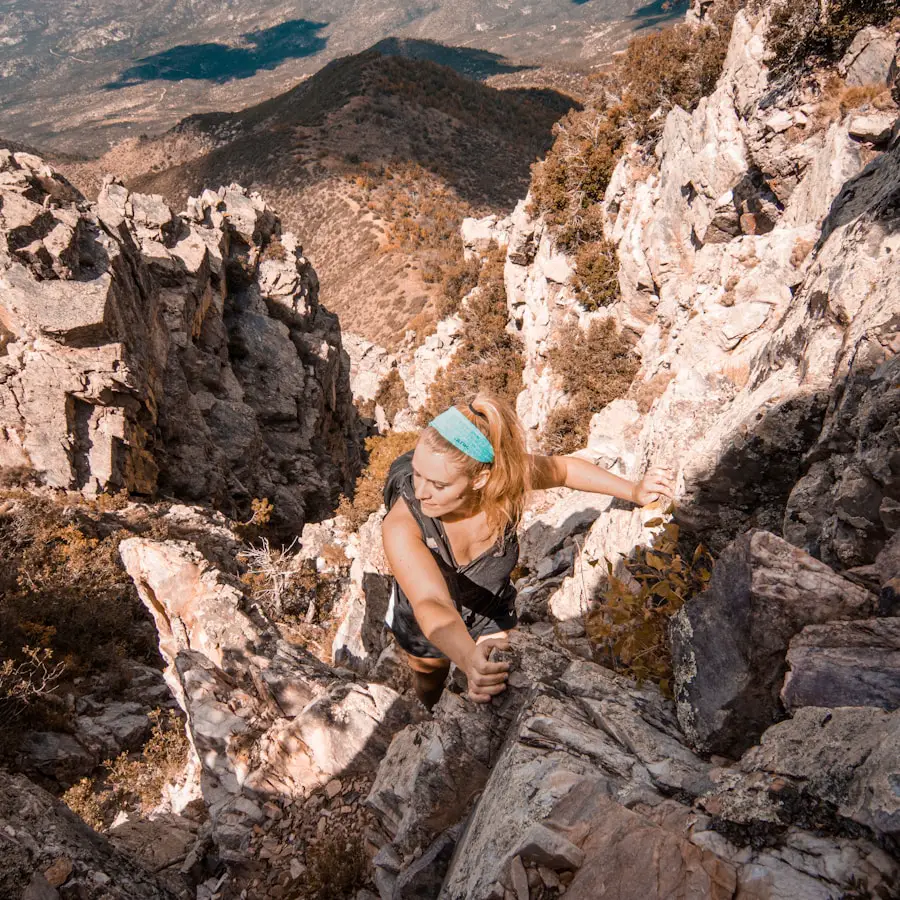
Confidence is valuable in scrambling, but confidence should come from competence rather than pressure to continue. The best way to build it is gradually: practice secure foot placement, easy down-climbing, route reading, and exposure on terrain where a mistake has limited consequences.
Before a difficult move, pause and identify your next secure foothold and handhold. Mentally rehearsing the sequence can reduce rushed decisions. Controlled breathing can also help when exposure makes you tense.
Physical training helps as well. Leg strength, core stability, mobility, cardiovascular fitness, and enough upper-body strength to stabilize yourself all make movement more efficient. However, raw strength cannot replace judgment or technique.
If exposure repeatedly causes panic or makes you freeze, choose easier routes until your comfort and skills develop. There is no benefit in forcing yourself deeper into terrain where decision-making is deteriorating.
Tips for Planning and Executing a Scrambling Hike
A successful scrambling day is usually the result of several small decisions made before and during the route.
1. Choose a Route Below Your Maximum Ability
For your first scrambles, select routes with straightforward navigation, limited exposure, and escape options. Read more than one reliable route description when possible and understand how the descent works before starting.
2. Check Conditions
Review the mountain forecast, recent route information, closures, snow or ice conditions, and daylight hours. Have an easier backup route when the forecast or ground conditions are unsuitable.
3. Pack for the Whole Mountain Day
Carry navigation, weather protection, adequate food and water, first aid, a headlamp, emergency equipment, and any route-specific technical gear. Do not leave ordinary hiking essentials behind simply because the route is short.
4. Start Early Enough
Allow more time than you would for a normal hike of the same distance. Scrambling, route finding, waiting for other parties, and careful descending can slow progress substantially.
5. Move Deliberately
Place your feet accurately, keep your center of gravity controlled, and maintain secure contact with the rock. Test suspect holds before committing your weight.
6. Check That You Can Reverse the Moves
Before climbing into a steeper section, look down. Ask whether you could safely descend what you have just climbed. Joshua Tree National Park specifically advises scramblers not to move up terrain they cannot get down.
7. Manage Loose Rock as a Group
Avoid standing directly below another scrambler where possible. Give each person enough space to complete vulnerable sections without being crowded. Take extra care not to dislodge stones onto people beneath you.
8. Communicate Clearly
Talk about route choices, loose rock, difficult moves, and turnaround decisions. A group member who feels unsafe should be able to say so without being pressured forward.
9. Turn Around Early
Retreat while you still have time and easy options if the route is harder than expected, rock is wet, visibility deteriorates, the wind becomes unsafe, someone is exhausted, or navigation is uncertain.
Pro Tip: Set a turnaround time before you start. It is easier to make a calm decision at the trailhead than to negotiate with yourself when you are tired, behind schedule, and close to the top.
Popular Scrambling Routes and What Their Grades Mean
Well-known routes are useful examples of how varied scrambling can be, but popularity should never be mistaken for beginner suitability.
- Crib Goch, Eryri/Snowdonia: Commonly described by the BMC as a Grade 1 scramble. The technical moves may be relatively straightforward, but the ridge is famously exposed, demonstrating why grade and consequences are not the same thing.
- Aonach Eagach, Glen Coe: A serious Grade 2 scramble. The BMC describes it as a committing and highly exposed ridge that should be approached with prior scrambling experience.
- Cuillin Ridge, Isle of Skye: Listed by the BMC among classic Grade 3 scrambling terrain. It is a major mountain undertaking involving serious route finding, exposure, and climbing or ropework skills rather than a casual extension of hiking.
These routes also illustrate why you should read the complete description instead of selecting a day only from its scrambling grade.
Embracing the Adventure of Scrambling
Scrambling can take you beyond ordinary trail hiking and into some of the most memorable mountain terrain. It develops balance, route-finding, movement skills, judgment, and confidence while giving you a more direct connection with rock and landscape.
The goal, however, is not to push through every difficult section. Good scramblers make conservative decisions, recognize when conditions have changed, and know that turning around is part of competent mountain travel.
Build experience gradually. Practice on easier ground, learn to descend what you climb, develop navigation skills, and seek competent instruction before progressing to terrain where ropes or protection may be needed. The greater your skill and preparation, the more freedom you have to enjoy scrambling without depending on luck.
If you’re looking to enhance your hiking experience, consider investing in one of the 5 Must-Have Minimalist Travel Backpacks for Spring Adventures 2025. A comfortable backpack can help keep water, layers, navigation tools, a headlamp, first-aid supplies, and other essentials organized while leaving your hands free for rocky terrain.
Love travel? Join Our Facebook Community For More Tips.
Frequently Asked Questions
What is scrambling in hiking?
Scrambling is travel over rocky or steep terrain where you regularly use your hands as well as your feet. It occupies the middle ground between hiking and rock climbing, ranging from simple hands-on movement to serious exposed terrain.
How is scrambling different from hiking?
Ordinary hiking mainly involves walking on a trail or rough ground. Scrambling requires more frequent use of the hands, more deliberate foot placement, and often more route-finding and exposure management. Harder scrambling may overlap with easy rock climbing.
What equipment is needed for scrambling?
Equipment depends on the route. Easier scrambles may need only suitable footwear, normal hiking essentials, navigation, and weather protection. A helmet is sensible where loose rock or more technical terrain is a concern. Higher-grade scrambles may require a rope, harness, and protection, but only when the group has the skills to use that equipment correctly.
What are some popular scrambling routes?
Well-known UK examples include Crib Goch in Eryri/Snowdonia, the Aonach Eagach ridge in Glen Coe, and the Cuillin Ridge on the Isle of Skye. They differ greatly in seriousness: Crib Goch is commonly described as Grade 1, Aonach Eagach as Grade 2, and the Cuillin Ridge includes serious Grade 3 terrain.
What skills are required for scrambling?
Useful skills include secure foot placement, balance, route finding, navigation, controlled down-climbing, weather assessment, hazard recognition, and good decision-making. More serious routes may also require rock-climbing movement, ropework, belaying, anchor selection, and retreat skills.
Is scrambling suitable for beginners?
Yes, when beginners start on straightforward, low-consequence terrain appropriate to their hiking experience. Choose an easy route with good navigation and retreat options, go in favorable conditions, and consider learning from an experienced competent partner or professional instructor.
Do you need a rope for scrambling?
Not for every scramble. Many straightforward routes are normally completed without a rope. Rope use becomes more relevant on harder or more exposed scrambling, but carrying a rope is useful only when you know how to protect the route, belay, manage anchors, and retreat safely.
Sources
- British Mountaineering Council — What is scrambling? — scrambling grades, equipment, route finding, and the relationship between walking and climbing.
- National Park Service — Joshua Tree Scrambling — terrain classes, three points of contact, rock stability, footwear, helmets, and retreat advice.
- National Park Service — Ten Essentials — navigation, emergency equipment, food, water, first aid, illumination, and weather preparation.
- Met Office — Mountain Forecast Guide — mountain wind, precipitation, visibility, temperature, freezing level, and weather hazards.
- National Park Service — Yosemite Rockfall — natural rockfall processes, triggers, unpredictability, and hazard awareness.
- Mountain Training UK & Ireland — Mountain Skills — planning, navigation, simple scrambling, mountain hazards, and emergency skills.

