
Last Updated on September 10, 2026 by Daniel Globe
Scrambling is the hands-on middle ground between hiking and rock climbing. You still travel through mountain or rocky terrain on foot, but steeper sections may require your hands for balance, movement, or support. The challenge can range from easy rock steps to highly exposed terrain where a fall could have severe consequences, so choosing the right route matters as much as fitness.
Quick Answer
Scrambling in hiking means moving across steep or rocky terrain where you use both your hands and feet. Easier scrambles are close to hiking, while harder ones can overlap rock climbing and may involve serious exposure or rope protection. Beginners should start on easy, well-documented routes in dry conditions and learn basic movement, navigation, and risk-management skills first.
Key Takeaways
- Scrambling is more technical than ordinary hiking because hands are regularly used on rock.
- Grades are not universal. U.S. routes often use Yosemite Decimal System classes, while British guidebooks commonly use scrambling Grades 1–3.
- Wet rock, ice, loose rock, poor route finding, exposure, and difficult descents can turn a manageable scramble into a serious situation.
- Carry normal backcountry safety equipment on every scramble. Rope, harnesses, and climbing protection are for routes and users that require them, not substitutes for training.
- Start with easy routes, learn to downclimb, and turn around before reaching terrain you cannot safely reverse.
At a Glance
| Time Required | Varies widely by route; short scrambles may take a few hours, while major mountain routes can take most of a day or longer. |
| Difficulty | From easy hands-on hiking to steep, highly exposed terrain approaching rock climbing. |
| Tools Needed | Grippy footwear, weather layers, navigation, water, food, first aid, headlamp and other Ten Essentials. Helmet and technical climbing equipment depend on the terrain and your training. |
| Cost | Varies. Some routes need only normal hiking equipment, while permits, parking, technical equipment, instruction, or professional guiding may add cost. |
Disclosure: As an Amazon Associate I earn from qualifying purchases. Some links on this page are affiliate links, at no extra cost to you.
What Is Scrambling in Hiking?
Scrambling combines hiking with simple climbing movements. Instead of keeping your hands free as you would on an ordinary trail, you may place a hand on rock to balance, pull over a step, move along a ridge, or climb through a short rocky section.
The National Park Service scrambling guidance for Joshua Tree describes scrambling as movement through Class 2, Class 3, and Class 4 rocky terrain. Hiking is usually concentrated on Class 1 and easier Class 2 terrain, while technical rock climbing generally begins in Class 5 terrain.
Note: “Scramble” is not a universal difficulty rating. A route described as a scramble can be easy and low-consequence or steep, exposed, and potentially fatal in a fall. Always read the specific route description rather than relying on the word alone.
Scrambling Grades and Difficulty Levels
Understanding the grading system is essential because scrambling grades vary between countries and guidebooks. Difficulty also includes more than the hardest move. Exposure, loose rock, route finding, weather, remoteness, and the difficulty of retreat can all make a technically easy route serious.
U.S. Scrambling Classes
In many U.S. mountain areas, route descriptions use the Yosemite Decimal System:
- Class 1: Normal hiking where hands are generally unnecessary for movement.
- Class 2: Rougher terrain where hands may occasionally be used for balance.
- Class 3: Genuine scrambling with regular use of the hands. Exposure may be significant, and some people may want a rope in certain situations.
- Class 4: Steep, exposed climbing-like terrain requiring considerable skill. A fall may be fatal, and some parties use rope protection.
- Class 5: Technical rock climbing where climbing systems such as ropes, belays, and protection are normally used.
The boundaries are not perfectly objective, and a route can contain sections of more than one class.
UK Scrambling Grades
The British Mountaineering Council commonly describes summer scrambles using Grades 1–3:
- Grade 1: Exposed walking and straightforward scrambling. A rope is normally unnecessary for competent participants in suitable conditions, but exposure can still be serious.
- Grade 2: A stronger overlap with rock climbing. Exposed steps may make rope protection desirable, particularly for less confident members of a party.
- Grade 3: Difficult scrambling that can overlap easy graded rock climbing. Rope use may be expected on several sections, and climbing competence becomes increasingly important.
Warning: Do not assume a UK Grade 1 equals U.S. Class 1, or that numbers from different guidebooks can be compared directly. Use the grading system defined by the guide or land manager for the specific route.
Safety Tips for Scrambling in the Wilderness
Scrambling has inherent fall, rockfall, navigation, and weather hazards. Good judgment begins before you leave the trailhead.
Check Weather and Current Conditions
Dry rock can provide excellent friction, while rain, ice, frost, snow, or even heavy condensation can make the same moves much harder. Thunderstorms create an additional hazard on exposed ridges and summits. High winds can affect balance, and extreme heat increases dehydration risk.
Check an official forecast and the managing agency’s current trail or route information. Be willing to change the route or cancel the trip when conditions are poor.
Leave a Detailed Trip Plan
Tell a reliable person where you are going, your intended route, who is in the group, where you expect to park, and when they should expect you back. This is especially important because mobile coverage can be weak or nonexistent in mountain terrain.
The National Park Service Ten Essentials provide a useful packing framework covering navigation, illumination, sun protection, first aid, repair tools, fire, shelter, extra food, extra water, and extra clothing.
Know the Route and the Descent
Study a current map and reputable route description before leaving. Identify major landmarks, difficult sections, escape routes, the normal descent, and a turnaround time.
Carry a paper map and compass when appropriate, plus an offline map or GPS device as a supplement. A phone should not be your only navigation or emergency tool.
Scramble With a Partner
A competent partner can help with route finding, recognize poor decisions, and assist during an emergency. Stay together rather than allowing the group to become widely separated.
The safest turnaround is usually the one made before you become committed to terrain that is harder than expected.
Essential Gear for Scrambling Adventures
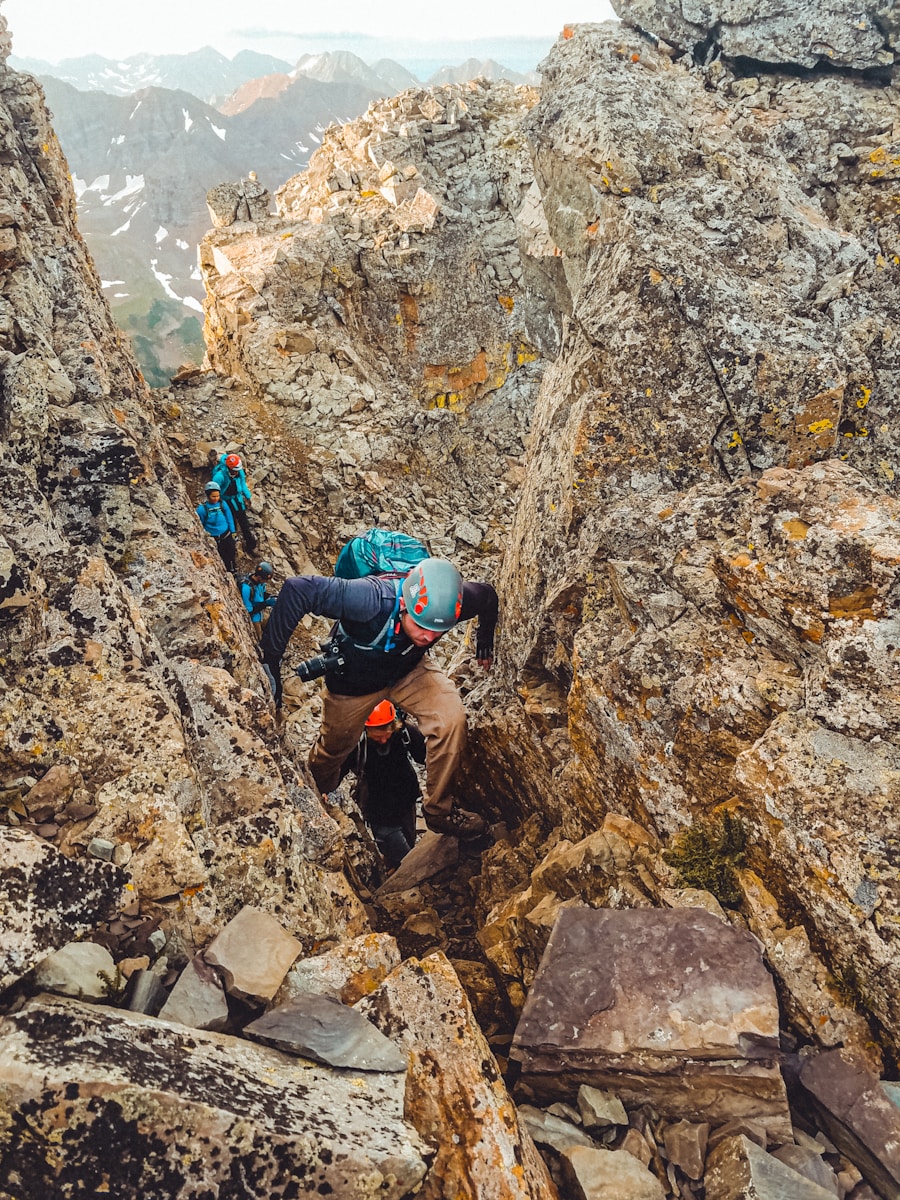
The correct equipment depends on the route, season, weather, remoteness, and technical grade. A straightforward scramble may require little beyond well-chosen hiking equipment, while difficult scrambling can demand genuine climbing skills and equipment.
Footwear
Choose footwear that fits securely and provides dependable friction on rock. Approach shoes can work well on dry rocky routes because their rubber and edging ability suit scrambling. More robust hiking boots can provide better protection and support on long approaches, loose terrain, or colder conditions.
No single shoe is best for every route. Check the expected terrain rather than assuming maximum ankle support or maximum flexibility is always preferable.
Helmet
A climbing helmet is worth considering whenever loose rock, people above you, or overhead rockfall are realistic hazards. The BMC identifies loose rock as one of scrambling’s major hazards and recommends helmets for more serious terrain.
Backcountry Essentials
A practical scrambling pack commonly includes:
- water and enough food for delays;
- map, compass, and suitable offline navigation;
- headlamp with reliable power;
- first-aid supplies;
- weatherproof and insulating layers;
- sun protection;
- emergency shelter;
- whistle or another signaling method;
- charged communication device where useful; and
- route-specific items required by the land manager.
Gaiters can be useful in scree, mud, snow, or debris-filled terrain, but they are optional rather than universal scrambling equipment.
When Do You Need a Rope and Harness?
Ropes, harnesses, slings, carabiners, and climbing protection belong in the hands of people who know how to use them. On difficult scrambling routes, proper rope systems can protect exposed sections. Incorrectly rigged systems, however, can give false confidence or expose both participants to severe falls.
The BMC recommends gaining climbing skills or taking scrambling instruction before attempting serious Grade 2 or Grade 3 terrain.
Warning: Buying a rope and harness does not make technical scrambling safe. Learn belaying, anchors, protection, rope management, and retreat techniques from a qualified instructor or experienced competent mentor before relying on climbing equipment.
Basic Scrambling Technique
Use Three Points of Contact
When the terrain becomes steep, aim to keep three secure points of contact whenever practical before moving the fourth. For example, keep two feet and one hand secure while repositioning the other hand.
Use Your Feet More Than Your Arms
Your legs are stronger and more efficient than your arms. Look for solid footholds, place your feet deliberately, and push upward through your legs rather than trying to pull yourself through every move.
Check Holds Before Committing
Loose blocks can move without warning. Look at a handhold or foothold before loading it and test questionable rock gently. Avoid pulling outward on loose-looking blocks.
When several people are scrambling through loose terrain, do not crowd directly beneath one another. Give each person enough space to move through rockfall-prone sections.
Practice Downclimbing
The descent is often more difficult psychologically because footholds can be harder to see. Practice reversing easy moves while you are still on low-consequence terrain.
Pro Tip: Before climbing an exposed step, pause and ask whether you could safely reverse the move. The National Park Service advises scramblers not to move up terrain they cannot get back down.
Finding the Best Scrambling Routes and Trails
Choose routes from current guidebooks, official land-management information, established climbing or mountaineering organizations, and reliable local sources. Social-media posts can offer inspiration, but they may omit exposure, difficult descents, seasonal hazards, closures, or permit rules.
The original examples below are useful for understanding the range from hands-on hiking to exposed routes, but they should not be treated as equivalent formal scrambling grades.
| Route/Trail Name | Location | Official / Practical Description | Distance | Elevation Gain |
|---|---|---|---|---|
| Angels Landing | Zion National Park, Utah | Steep, exposed and strenuous hike with chains; permit required beyond Scout Lookout. | 5.4 miles round trip | 1,488 feet |
| Half Dome Trail | Yosemite National Park, California | Extremely strenuous mountain hike ending with steep cable-assisted granite; permit required when cables are up. | About 14–16.4 miles round trip, depending on route | About 4,800 feet |
| Delicate Arch Trail | Arches National Park, Utah | Strenuous slickrock hike with steep terrain and an exposed ledge; not a formal scrambling route. | 3.0 miles round trip | About 480 feet |
| Devil’s Bridge Trail | Sedona, Arizona | Moderate hike with steep rocky steps and some hands-on movement near the arch; route distance varies with trailhead access. | Commonly about 4.2 miles round trip from the Dry Creek area | About 564 feet on the commonly described route |
Before using any of these numbers for trip planning, check current information from the park, forest, or other managing agency. Access, trailheads, closures, shuttle systems, permits, and seasonal conditions can change.
For example, Zion National Park requires a permit for Angels Landing, while Yosemite requires a Half Dome permit when the cables are up.
Choosing a Beginner Scramble
Your first scramble should have a clear route description, manageable exposure, an easy retreat, stable rock, and a straightforward descent. Favor good weather and dry rock.
Do not choose a route simply because someone online called it “easy.” Difficulty should fit the least experienced member of the group.
How to Improve Your Scrambling Skills
Build difficulty gradually rather than jumping from ordinary hiking to an exposed ridge. Easy scrambling gives you time to develop foot placement, balance, route reading, and downclimbing without adding unnecessary consequences.
Build Movement Skills
Practice moving slowly and efficiently over low rocky steps. Focus on precise feet, stable body position, keeping your center of gravity close to the rock, and avoiding unnecessary leaps or dynamic movements.
Improve Route Finding
Scrambling routes may be less obvious than maintained hiking trails. Learn to compare the terrain with a map and route description and to recognize when you have drifted onto steeper ground.
If the terrain suddenly becomes much harder than the advertised grade, stop. Backtrack while the moves are still reversible rather than assuming the correct route must continue upward.
Learn From Experienced Scramblers
A skilled partner, climbing club, scrambling course, or qualified mountain guide can help you recognize safe movement patterns and understand the difference between scrambling and technical climbing.
Formal instruction becomes especially valuable before moving onto terrain where rope systems, anchors, belays, or climbing protection may be required.
The Mental and Physical Benefits of Scrambling

Physical Benefits
Scrambling can provide vigorous physical activity because steep terrain uses the legs, core, upper body, balance, and cardiovascular system. The exact training effect depends on route difficulty, pace, duration, pack weight, and the individual.
The CDC notes that regular physical activity supports cardiovascular health, bone health, balance, and other aspects of physical function.
Mental Benefits
Route finding and hands-on movement demand concentration. Choosing holds, reading the terrain, and deciding when to continue or retreat can also build confidence and decision-making experience.
Those benefits should not be confused with becoming immune to risk. Confidence is useful only when it remains paired with honest assessment of conditions and ability.
Reducing Stress and Supporting Well-being
Outdoor activity can also support mental well-being. Research on physical activity and nature exposure suggests benefits for outcomes such as anxiety, mood, and stress, although experiences vary from person to person.
The main goal does not have to be speed or reaching the hardest possible summit. For many people, the combination of movement, concentration, scenery, and time outdoors is the reward.
Environmental Responsibility While Scrambling
Scramblers often travel through fragile alpine, desert, or cliff environments. Follow local regulations and the Leave No Trace Seven Principles.
Use established trails or designated routes where they exist. Where off-trail travel is permitted and necessary, favor durable surfaces such as rock rather than trampling vegetation or fragile soils. Avoid creating unnecessary shortcuts or new approach paths.
Pack out trash and food waste. Leave rocks, plants, cultural objects, and other natural features where you find them.
Observe wildlife from a respectful distance and never feed animals. Follow all seasonal closures, including restrictions designed to protect nesting birds or other sensitive wildlife.
Follow local fire regulations rather than assuming fires are permitted. Where fires are prohibited, do not build one. Where they are allowed, follow the site’s specific rules and Leave No Trace guidance.
Note: Scrambling and environmental protection are not contradictory, but route choice matters. Stay out of restoration areas and closures and avoid damaging plants while searching for an easier line.
Joining Scrambling Groups and Communities for Support and Guidance
Local hiking, mountaineering, and climbing clubs can be valuable places to meet experienced partners, learn about route conditions, and develop skills gradually. Organized trips may also provide a clearer progression from hiking into scrambling.
Online groups can help with ideas, but treat user reports as supplemental information rather than your only source. A photo may hide the exposure beneath someone’s feet, and a route report from last year may not reflect a current closure, storm-damaged trail, snowfield, or access restriction.
Before committing to a route, compare community information with current land-manager guidance, a reputable guidebook, weather forecasts, and your own ability.
Whether you join a club or arrange trips with friends, choose partners who are comfortable turning around. Good mountain judgment includes being able to say that today’s conditions are not right.
If you’re interested in hiking and outdoor activities, you may also want to check out this article on the best travel fishing pole. It provides information on portable fishing gear that can complement other outdoor adventures.
Love travel? Join Our Facebook Community
Frequently Asked Questions
What is scrambling in hiking?
Scrambling is movement through steep or rocky terrain that requires both hands and feet. It sits between ordinary hiking and technical rock climbing, although difficult scrambling can overlap climbing terrain.
What skills are required for scrambling?
Useful skills include careful foot placement, balance, three points of contact, route finding, downclimbing, weather awareness, navigation, and risk assessment. More advanced routes may require technical climbing and rope-management skills.
What equipment is needed for scrambling?
For easier routes, wear grippy footwear and carry normal backcountry essentials such as navigation, water, food, weather layers, first aid, emergency shelter, and a headlamp. A helmet may be appropriate where rockfall or loose rock is a concern. Ropes, harnesses, and protection should only be used when the route requires them and the party has the training to use them correctly.
What are some popular scrambling destinations?
Britain has famous scrambling areas such as Eryri/Snowdonia, the Lake District, Glen Coe, and the Cuillin on Skye. Routes include Grade 1 classics as well as serious Grade 2 and Grade 3 terrain. In the United States, areas such as Joshua Tree contain extensive Class 2 and Class 3 scrambling terrain. Major objectives such as the Grand Teton and Mount Stuart’s North Ridge should not be treated as ordinary beginner scrambles because many routes involve technical alpine climbing.
Is scrambling dangerous?
It can be. Hazards include falls, exposure, loose rock, rockfall, route-finding mistakes, storms, ice, wet rock, heat, and difficult retreats. Even technically easy scrambling can have severe consequences when it crosses exposed terrain.
Can beginners go scrambling?
Yes, provided they choose easy, well-documented terrain that matches their fitness, movement skills, and comfort with heights. Beginners should start in dry weather, practice on low-consequence terrain, go with a competent partner, and avoid committing or technical routes until they have appropriate training.
Do you need a rope for scrambling?
Not for every scramble. Competent parties often complete easier scrambling without ropes. Higher grades and exposed sections may justify or require rope protection, but using a rope safely requires knowledge of anchors, belaying, protection, and retreat techniques. Inexperienced scramblers should obtain instruction rather than improvising.
Are scrambling grades the same everywhere?
No. British guidebooks commonly use scrambling Grades 1–3, while U.S. route descriptions often use Yosemite Decimal System classes such as Class 2, Class 3, and Class 4. Other regions and guidebooks may use different systems, so always read the definition supplied with the route.
Sources
- National Park Service — Scrambling at Joshua Tree National Park — scrambling definition, U.S. terrain classes, movement technique, and safety guidance.
- British Mountaineering Council — What Is Scrambling? — UK Grades 1–3, equipment, exposure, and technical-skill guidance.
- National Park Service — Ten Essentials — emergency preparation and backcountry equipment.
- Leave No Trace — Seven Principles — durable surfaces, waste, wildlife, fires, and responsible outdoor travel.
- Zion National Park — Angels Landing Permits and Hiking — current permit requirement, distance, elevation gain, and safety conditions.
- Yosemite National Park — Half Dome Permits — current cable-season permit requirements and access guidance.

