Last Updated on September 10, 2026 by Daniel Globe
Scrambling is what happens when a hike becomes steep and rocky enough that your hands become part of the movement. It can be an exciting step beyond ordinary hiking, but it also adds exposure, loose-rock hazards, route-finding challenges, and sections where a fall could have serious consequences. The safest approach is to understand the terrain before you go, choose a route that matches your experience, and treat the descent as part of the challenge.
Quick Answer
Scrambling in hiking is hands-on travel over steep, rocky terrain that sits between ordinary hiking and technical rock climbing. Easy scrambles may need only balance and careful handholds; harder or more exposed terrain can require helmets, rope skills, and climbing judgment. The key is matching the route to your experience and conditions.
Key Takeaways
- Scrambling uses both hands and feet on rocky terrain and can range from easy hands-on hiking to highly exposed terrain with serious fall consequences.
- Research the route, grade, descent, weather, rock conditions, and escape options before committing to it.
- Use footwear with secure traction, carry navigation and emergency gear, and consider a helmet where rockfall or head impact is a realistic hazard.
- A rope and harness are not automatic safety devices; using them effectively requires appropriate climbing equipment, anchors, and rope-management skills.
- Three points of contact, tested holds, deliberate foot placement, and conservative turnaround decisions reduce risk on steep ground.
At a Glance
| Time Required | Route-dependent. Allow extra time for route finding, careful movement, rests, and the descent. |
| Difficulty | Ranges from easy hands-on terrain to very exposed, serious scrambling. In the U.S., scrambling commonly overlaps Class 2–4 terrain; UK guides often use Grades 1–3. |
| Tools Needed | Good-traction footwear, map/compass or GPS, headlamp, weather layers, water, food, first aid, emergency equipment, and route-dependent protective gear. |
| Cost | No fixed cost. Expenses depend on the gear you already own, transportation, guidebooks, permits, courses, or professional guiding. |
Warning: Scrambling can involve terrain where a slip or fall causes severe injury or death. A route that feels easy technically can still be serious because of exposure, loose rock, weather, difficult retreat, or navigation errors. Turn around before you become committed to terrain beyond your skills.
Disclosure: As an Amazon Associate I earn from qualifying purchases. Some links on this page are affiliate links, at no extra cost to you.
What Is Scrambling in Hiking?
National Park Service scrambling guidance describes scrambling as rocky travel that combines elements of hiking and climbing. You may use your hands for balance, pull on rock to make upward progress, step across gaps, climb short rock steps, or move along exposed ridges.
Scrambling does not always happen on an unmarked route. Some established hiking routes include well-known scrambling sections, while other scrambles follow faint paths, ridges, gullies, slabs, or rocky terrain where route finding is a major part of the challenge.
The dividing line between hiking, scrambling, and climbing is not perfectly universal. Difficulty also depends on exposure. A technically simple move a few feet above flat ground is very different from the same move above a large drop.
U.S. Terrain Classes
In areas that use the Yosemite Decimal System or similar class terminology, scrambling commonly overlaps Classes 2, 3, and 4:
- Class 2: Rough or steep hiking where hands may occasionally help with balance.
- Class 3: Hands are used more consistently for upward movement. A fall can have serious consequences, especially on exposed routes.
- Class 4: Steeper and more consequential terrain requiring considerable scrambling or climbing skill. Some parties use a rope for protection.
- Class 5: Technical rock climbing terrain where climbing techniques and appropriate protection systems are normally required.
Note: Terrain classes describe more than physical effort. Exposure and consequences matter. It is possible to be physically strong enough to climb a section while lacking the route-finding, downclimbing, or risk-management skills needed to travel through it safely.
UK Scrambling Grades
British scrambling guides commonly use Grades 1 through 3, sometimes with additional seriousness markings. Mountaineering Scotland describes Grade 1 as comparatively straightforward for experienced hill walkers, Grade 2 as more sustained and exposed, and Grade 3 as advanced scrambling where some parties may use a rope.
These grades are normally based on favorable conditions. Wet rock, snow, ice, poor visibility, or high wind can make the same route substantially more difficult and dangerous.
Do not assume a UK scrambling grade and a U.S. terrain class are exact equivalents. Always read the route-specific description rather than relying on one number.
Choosing the Right Gear for Steep Terrain
Scrambling gear should match the route rather than follow a one-size-fits-all checklist. The right setup lets you move confidently while still carrying enough equipment to handle delays, weather changes, navigation problems, or an injury.
Footwear
Good traction and a secure fit matter more than a particular outsole brand. Traditional hiking boots can work well on rough approaches, scree, mud, and long mountain days. Approach shoes often provide more precise footing and sticky rubber for dry rock.
The best choice depends on the rock, weather, length of the approach, ankle comfort, and how technical the scrambling becomes. Whatever you wear, make sure your heel does not lift excessively, your toes are not crushed on descents, and the sole gives you confidence on small footholds.
Helmet, Rope, and Harness
A climbing helmet is worth considering where falling rock, loose debris, or a head impact during a fall is a realistic hazard. NPS guidance specifically recommends considering a helmet on Class 3 terrain and wearing one for Class 4 scrambling in Joshua Tree.
A harness is different. Wearing one does not protect you unless it is part of a correctly built protection system. Roped scrambling can require suitable rope, anchors or protection, belaying, correct knots, communication, and the judgment to know when and how the system should be used.
Warning: Do not rely on a rope or harness unless someone in the party has the climbing skills needed to use the system correctly. Incorrect rope techniques can create additional hazards rather than eliminate them.
Navigation and Emergency Equipment
Carry the equipment appropriate for a mountain day, not just the gear needed for the hardest rock move. The National Park Service Ten Essentials include navigation, sun protection, extra clothing, illumination, first aid, fire, repair tools, extra food, hydration, and emergency shelter.
For scrambling, useful additions may include a climbing helmet, gloves for cold weather, a whistle, an offline map, a charged phone, a power bank, or a two-way satellite communicator where cell coverage is poor.
Tell a trusted person exactly where you plan to go, your intended route, where you will park or start, who is in the group, and when they should expect you back.
Mastering the Art of Route Finding
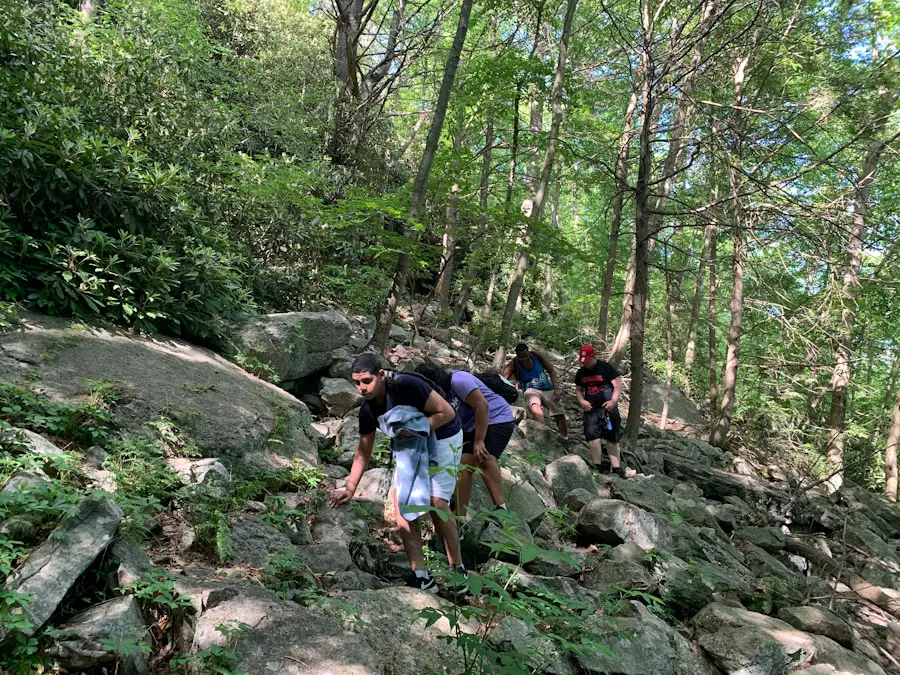
Route finding is one of the skills that separates a manageable scramble from a dangerous mistake. On rocky ridges and faces, the easiest line may zigzag around obstacles rather than follow the most direct path upward.
Before leaving home, study a current route description, topographic map, elevation profile, approach, key landmarks, descent, escape routes, expected scrambling grade, and known hazards. The U.S. Geological Survey provides guidance on using topographic maps with a compass.
GPS and mapping apps are useful, but they should not replace observation. Position errors, dead batteries, damaged phones, and poor map detail can still leave you unsure of the correct line.
Read the Terrain Ahead
Look beyond the next few feet. Ask where the current line leads and whether it funnels into a cliff, steep gully, loose slope, or terrain that looks harder than the route description.
Useful clues include:
- ridge crests and obvious weaknesses in rock;
- changes in slope angle;
- ledges that provide safer traverses;
- loose gullies that may collect rockfall;
- landmarks described in the guidebook;
- safe places where the group can stop without being exposed to falling debris.
What to Do if You Lose the Route
Stop before continuing into harder terrain. Check your map, GPS position, route description, compass, and visible landmarks. Look back at the terrain you have already traveled so you understand the safest retreat.
If you can safely reverse your last moves, return to the last point where you were confident of the route. Do not keep climbing simply because moving upward looks easier than backtracking.
Pro Tip: On easier terrain, occasionally look backward and mentally rehearse how the same section will appear on descent. This improves route memory and helps reveal moves that may be much harder to reverse.
Navigating Steep Terrain Safely
Good scrambling is controlled rather than rushed. Move one deliberate step at a time and aim to remain balanced enough that a handhold breaking or a foot slipping does not automatically turn into a fall.
| Hazard | Warning Signs | Safer Response | Consider Turning Back When |
| Loose rock | Moving blocks, gravel on slabs, fresh rock debris | Test holds gently, avoid pulling outward, and keep people out of the fall line | The route requires trusting unstable holds or crossing active rockfall terrain |
| Route-finding error | Terrain becomes much steeper or more technical than expected | Stop, verify position, and reverse to the last known point if safe | You cannot identify a safe continuation or retreat |
| Exposure | A slip would cause a long fall or there are no safe runouts | Slow down, stay balanced, and use protection only if the party is competent to do so | The consequences exceed your comfort, movement skills, or protection skills |
| Weather deterioration | Wet rock, high wind, poor visibility, thunder, snow, or ice | Use the safest retreat before conditions worsen | Conditions make secure movement, navigation, or safe retreat uncertain |
Use Three Points of Contact
On steep rock, maintain three secure points of contact whenever practical: two feet and one hand or two hands and one foot. Move the fourth limb to the next secure hold before shifting your weight.
Three points of contact are most useful when combined with good body position. Keep your hips reasonably close to the rock, avoid overreaching, and move from stable stance to stable stance.
Test Holds Before Committing
Loose rock is a major scrambling hazard. Before loading a questionable handhold or foothold, apply light pressure or tap it rather than immediately pulling with your full weight. A hollow sound, visible movement, fractures, or gravel underneath should make you suspicious.
Whenever possible, push down on holds rather than pulling blocks outward. Never deliberately dislodge loose rock when people are below.
Plan the Descent Before Climbing Up
Downclimbing often feels harder because you cannot see footholds as easily and gravity encourages your weight to move away from the rock. Before climbing a difficult step, ask whether you can reverse it if the route ahead is blocked.
On steeper descents, face the rock when that position gives you better visibility of holds and more secure hand contact. On easier angled terrain, facing outward may be more natural. There is no universal position; use whichever keeps your center of gravity controlled and your holds secure.
The descent is part of the route. Do not commit upward unless you have a realistic plan for getting back down.
Manage Loose Rock in a Group
Avoid standing directly below another scrambler in loose terrain. Move through narrow gullies or rockfall-prone steps one person at a time when practical, and wait in protected positions rather than directly in the fall line.
If you accidentally dislodge a rock that could hit someone, immediately warn the group with a clear shout such as “Rock!”
Check Weather and Conditions Before You Scramble
Scrambling grades generally assume reasonable conditions. Rain can reduce friction, moss can become slick, strong wind can disturb balance on exposed ridges, and snow or ice can transform an easy summer scramble into mountaineering terrain.
Check the latest local forecast before leaving and continue watching the sky during the trip. Build enough time into the day to retreat before darkness or a forecast weather change.
Lightning deserves special attention on ridges and summits. The National Weather Service warns that there is no safe place outside when thunderstorms are in the area. If you hear thunder, do not remain on an exposed ridge hoping the storm will pass. Retreat toward appropriate safe shelter as early as possible.
Warning: Wet rock, ice, high wind, poor visibility, and thunderstorms can change the seriousness of a scramble dramatically. A grade assigned for dry conditions does not guarantee similar difficulty in bad weather.
Building Strength and Endurance for Hiking Scrambles
Scrambling combines hiking endurance with leg strength, balance, grip, and controlled movement. A useful training plan therefore includes both cardiovascular exercise and strength work.
Running, cycling, stair climbing, and uphill hiking can improve endurance. Squats, lunges, step-ups, calf raises, and loaded carries build strength useful for long approaches and steep terrain. Core exercises help you stay stable while reaching or changing direction.
Training on easy rocky terrain can also improve movement skills, provided the consequences of a mistake are low. Practice deliberate foot placement, stepping up and down from rocks, moving sideways, and reversing short sections.
Indoor climbing or bouldering can improve body awareness and teach you how to use handholds and footholds efficiently, but gym strength does not automatically provide outdoor route-finding ability or judgment around loose rock and exposure.
Tips for Maintaining Balance and Stability on Steep Terrain
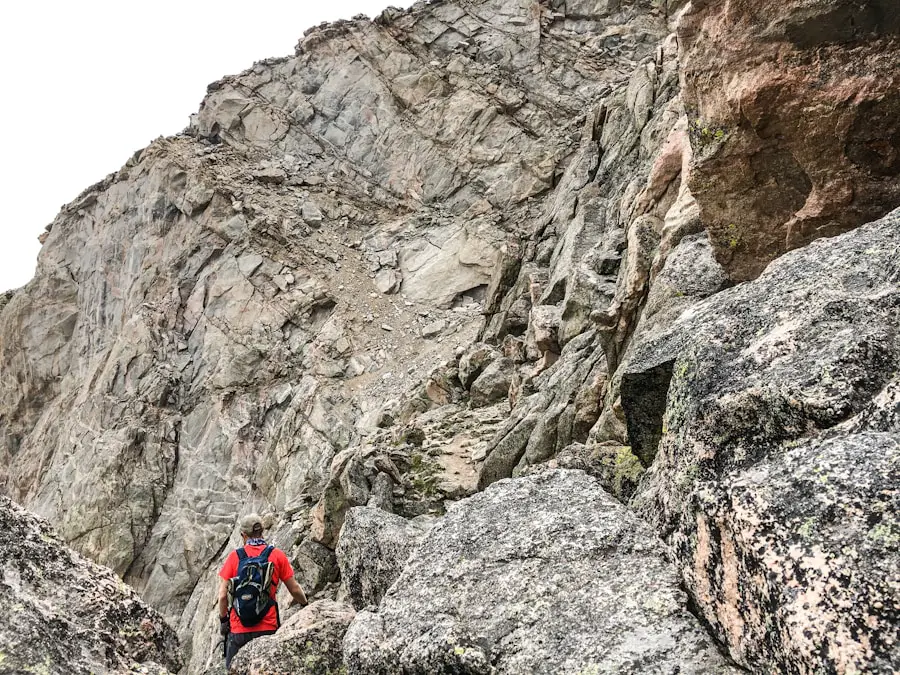
Foot placement is usually more important than pulling hard with your arms. Look for solid ledges, depressions, textured rock, or other footholds that let your legs carry most of your weight.
Keep your knees slightly bent rather than locking them. This lets you make small balance corrections and absorb unexpected movement.
Move smoothly rather than lunging between holds. Before shifting your weight, make sure the new foot or hand position is secure.
- Keep your center of gravity over your feet whenever possible.
- Avoid crossing your feet on exposed traverses unless the move is deliberate and controlled.
- Use your hands for balance as well as pulling.
- Do not depend on vegetation unless you know it is firmly rooted and strong enough.
- Pause in stable positions instead of stopping halfway through an awkward move.
Pro Tip: Quiet feet are a useful practice goal. Placing each foot once, accurately, instead of scraping around for grip encourages better balance and reduces the chance of kicking loose stones onto people below.
Overcoming Fear and Mental Challenges During Hiking Scrambles
Exposure can make an otherwise simple move feel difficult. A faster heartbeat, tense muscles, shallow breathing, or reluctance to move may be signs that your perceived risk has increased.
Do not treat fear as something that must always be conquered. Sometimes it is useful information telling you that the terrain, conditions, or consequences exceed your current comfort level.
When you are still within your abilities, slow the process down. Take a stable stance, breathe normally, identify the next secure hold, make one controlled movement, and reassess.
Breaking a difficult section into small actions can reduce panic. Visualization can also help: before moving, picture where each hand and foot will go and where your body will finish.
If anxiety prevents you from moving accurately or making clear decisions, retreat while a safe retreat is still available. There is no failure in turning around.
Knowing When to Seek Professional Guidance for Hiking Scrambles
A professional instructor or guide is particularly valuable when you are new to exposure, moving into harder grades, learning rope systems, or attempting a route where retreat is complex.
Instruction can cover route choice, movement on steep ground, ascent and descent, loose-rock management, navigation, hazard recognition, rope techniques, anchors, and group decision-making.
Experienced hiking alone does not automatically prepare someone for technical scrambling. Likewise, climbing-gym experience does not automatically provide mountain navigation or loose-rock judgment.
If the route crosses terrain where a fall could be fatal and you do not understand how to protect it safely, choose an easier route or get qualified instruction before attempting it.
Choosing a First Scrambling Route
For a first scramble, look for a well-documented route with easy route finding, limited exposure, a straightforward descent, and several places where difficulties can be avoided.
A good progression is more valuable than jumping directly to a famous exposed ridge. Build experience with:
- rough hiking where hands are occasionally used for balance;
- short, low-consequence rock steps;
- easy established scrambles in dry weather;
- longer or more exposed routes only after you are comfortable both climbing and descending easier terrain.
Popular scrambling areas include the Scottish Highlands, the Lake District in England, and many mountain ranges in the United States. Routes such as Striding Edge in the Lake District and Aonach Eagach in Scotland are well known, but popularity does not make a route suitable for every hiker.
Read current local route information before attempting any named scramble. Weather, closures, seasonal snow, erosion, damaged paths, and your own experience can matter more than a route’s reputation.
What to Do if a Scramble Becomes Too Difficult
Stop at the last secure stance rather than pushing upward until retreat becomes harder. Reassess the route description and your position.
- If you are off-route: Return to the last known point if reversing the terrain is within your abilities.
- If weather is worsening: Use your safest retreat before wet rock, wind, darkness, or lightning removes options.
- If someone is exhausted or frightened: Reduce the objective rather than pressuring them to continue.
- If the terrain becomes technical climbing: Do not improvise protection systems you have not been trained to use.
- If retreat is unsafe: Stay in the safest available location, protect the group from exposure and weather, and contact emergency services or mountain rescue as appropriate.
A phone may not have service in remote terrain, which is why itinerary sharing and an appropriate communication plan should be established before leaving.
If you’re planning a multi-day trek and need a reliable hiking backpack, you should check out this article on the best hiking backpack for multi-day trek. The right pack should carry your navigation, weather layers, emergency supplies, food, water, and any route-specific protective equipment without restricting your movement.
Love travel? Join Our Facebook Community For More Tips.
Frequently Asked Questions
What is a scramble in hiking?
A scramble is a section of steep or rocky terrain where hikers use their hands as well as their feet for balance or upward movement. Scrambling sits between ordinary hiking and technical rock climbing, although the seriousness varies greatly with exposure and terrain.
How is scrambling different from regular hiking?
Regular hiking usually allows continuous travel mainly on the feet. Scrambling requires more frequent hand use and may involve steeper rock, exposed ridges, route finding, loose terrain, or short climbing-style moves.
What skills are needed for scrambling?
Useful scrambling skills include balance, deliberate foot placement, testing holds, three points of contact, route finding, map reading, downclimbing, weather judgment, and knowing when to retreat. Harder routes may also require technical climbing and rope skills.
What equipment is needed for scrambling?
Start with secure footwear, appropriate clothing, navigation equipment, food, water, a headlamp, first-aid supplies, and emergency gear. A helmet may be appropriate where rockfall or head impact is possible. A rope and harness should be carried only when the route and the party’s skills justify using a proper protection system.
Do you need a rope for scrambling?
Not always. Easier scrambles are commonly completed without a rope. More exposed or difficult terrain may justify rope protection, but only when the party understands suitable climbing equipment, anchors, knots, belaying, and rope management. Terrain that requires technical climbing protection should not be treated as ordinary hiking.
What class of hiking is considered scrambling?
In U.S. terrain-class terminology, scrambling commonly overlaps Class 2 through Class 4, with Class 3 being classic hands-on scrambling terrain. Definitions vary by area, so always read the route description and consider exposure and consequences as well as the class number.
Are hiking boots or approach shoes better for scrambling?
Either can work. Hiking boots can provide comfort and support on long, rough approaches, while approach shoes often give more precise footing and sticky-rubber traction on rock. Choose footwear based on the route, weather, fit, and the amount of technical rock movement involved.
What are some popular scrambling routes?
Well-known scrambling regions include the Scottish Highlands, the Lake District, and mountain ranges throughout the United States. Striding Edge in England and Aonach Eagach in Scotland are famous examples. Always verify the grade, current conditions, descent, and suitability for your experience before attempting a named route.
Sources
- National Park Service — Scrambling — terrain classes, footwear, three points of contact, rock stability, route selection, partner travel, helmets, and descent planning.
- National Park Service — Ten Essentials — navigation, emergency equipment, food, water, lighting, first aid, shelter, and trip planning.
- Mountaineering Scotland — Scrambling — scrambling grades, exposure, loose rock, route seriousness, and conditions.
- U.S. Geological Survey — Using a Compass With a Topographic Map — map-and-compass navigation.
- National Weather Service — Lightning Safety — thunderstorm avoidance and outdoor lightning precautions.
- American Alpine Club — Fall on Rock, Unroped Scrambling — accident analysis involving exposed scrambling, route finding, footwear, and protection decisions.