
Last Updated on July 26, 2026 by Daniel Globe
Packing a hiking backpack correctly makes the load easier to control, keeps important equipment within reach, and reduces unnecessary pressure on your shoulders and back. The best setup depends on your route, weather, trip length, equipment, and body shape, but the same basic method works for most day hikes and overnight trips.
Quick Answer
Pack a hiking backpack by putting light, bulky sleep gear at the bottom, dense items near the middle of your back, and frequently used essentials at the top or in hip-belt pockets. Balance both sides, keep emergency gear accessible, tighten compression straps, and adjust the hip belt before the shoulder straps.
Key Takeaways
- Choose capacity according to the equipment your route and conditions require, not trip duration alone.
- Keep dense gear close to your spine and balance the load from left to right.
- Pack emergency supplies, water, snacks, navigation tools, and rain protection where you can reach them quickly.
- Use the hip belt to transfer much of the load to your pelvis, then adjust the shoulder straps, load lifters, and sternum strap.
- Check local weather, trail alerts, water conditions, permits, and food-storage rules before leaving.
At a Glance
| Time Required | About 20–45 minutes for packing, adjustment, and a short test walk |
| Difficulty | Beginner-friendly |
| Tools Needed | Backpack, trip equipment, pack liner or dry bags, and an optional luggage scale |
| Cost | $0 with equipment you already own; optional liners and organizers cost extra |
Choose the Right Backpack Size and Fit
The correct backpack is large enough for necessary equipment without encouraging you to carry items you do not need. Capacity is only a starting point. Cold weather, bulky sleeping equipment, required food containers, extra water, children’s gear, and shared group equipment can all change the size you need.
| Trip Type | Common Capacity Range | Typical Use |
|---|---|---|
| Short, light day hike | About 10–20 liters | Water, snacks, rain layer, navigation, first aid, and emergency basics |
| Full-day or gear-heavy hike | About 20–40 liters | Extra clothing, more water, winter equipment, family gear, or technical equipment |
| Compact weekend trip | About 30–50 liters | One to three nights with compact equipment and careful packing |
| Multiday backpacking trip | About 50–80 liters | Several nights of food, shelter, sleep equipment, clothing, and cooking supplies |
| Extended or winter trip | About 70 liters or more | Bulky insulation, additional food, winter shelter, or specialized equipment |
These ranges are guides rather than rules. Review the current backpack-capacity guidance from REI, then choose the smallest pack that safely holds the equipment required for your specific trip.
Products Worth Considering

50L HIGH-CAPACITY: Include Main compartment, two zipped front pocket, sleeping bag compartment, mesh side pockets, you can put your tents, blanket,cooking gear and other equipment & accessories in this backpack, backpack internal layout clear classified easily, more convenience to you.
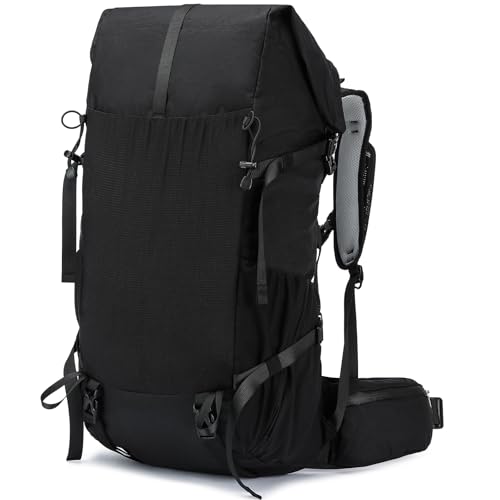
【Large Capacity & Multiple Compartment】The 40L to 50L large capacity camping hiking backpack can accommodate travel equipment for 1-2 people. The main bag can accommodate clothes, sleeping bags, and travel supplies; The external suspension system can be used to attach hiking equipment such as tents, picnic mats, and trekking poles; Two side pockets that can carry additional water bottles. Convenient and practical.

50L HIGH-CAPACITY: Include Main compartment, two zipped front pocket, sleeping bag compartment, mesh side pockets, you can put your tents, blanket,cooking gear and other equipment & accessories in this backpack, backpack internal layout clear classified easily, more convenience to you.
Measure and Adjust the Fit
Backpack size is normally based more on torso length than total height. Follow the manufacturer’s measuring instructions because sizing points and adjustment systems vary between brands.
- Load the backpack realistically. Test the fit with equipment or weight inside. An empty pack may feel comfortable even when the fit is wrong.
- Loosen the straps. Loosen the hip belt, shoulder straps, load lifters, and sternum strap before putting the pack on.
- Position and tighten the hip belt. Center the padded belt over the upper part of your hip bones and tighten it evenly.
- Tighten the shoulder straps. Pull them down and back until they follow your shoulders without lifting the hip belt.
- Adjust the load lifters. Tighten them enough to draw the upper pack closer without creating uncomfortable pressure.
- Fasten the sternum strap. Position it comfortably across the chest. It should stabilize the shoulder straps without restricting breathing.
The Osprey fitting guide provides a useful illustrated example, but always follow the instructions for your own model.
Note: Stop and readjust the pack if you develop numbness, tingling, sharp pain, restricted breathing, severe rubbing, or a noticeable change in your walking posture. A lighter load or a different pack size may be necessary.
Plan Before You Pack
Your equipment list should come from the route and expected conditions. Before packing, check the distance, elevation change, terrain, weather, daylight, trail alerts, permits, water availability, wildlife guidance, fire restrictions, and food-storage rules.
The National Park Service hiking-safety guidance recommends selecting a route suited to the group, checking current conditions, preparing for weather changes, and leaving a trip plan with someone who is not joining the hike.
Create a Basic Trip Plan
Give a trusted contact the following information:
- Your route, trailhead, destination, and planned campsites
- The names of everyone in the group
- Vehicle description and parking location
- Planned departure and return times
- Your backup route or turnaround plan
- When the contact should alert emergency services if you do not return
Do not rely only on a mobile phone. Service can be unavailable, and searching for a signal can drain the battery. Download offline maps, carry backup navigation, protect your power supply, and consider an appropriate satellite communicator or personal locator beacon for remote travel.
Organizing Your Gear
Organize equipment before placing anything in the pack. Grouping similar items helps you identify missing supplies and reduces the time spent searching for equipment on the trail.
Useful categories include:
- Navigation: Map, compass, GPS device, phone, and backup power
- Emergency supplies: First aid, whistle, emergency shelter, fire supplies, and repair kit
- Clothing: Base layers, insulation, rain protection, hat, gloves, and spare socks
- Food and kitchen: Meals, snacks, stove, fuel, utensils, and food-storage system
- Water: Bottles or reservoir, filter, disinfectant, and backup treatment
- Shelter and sleep equipment: Tent, tarp, sleeping bag, sleeping pad, and stakes
- Personal items: Medication, identification, permits, hygiene items, sunscreen, and insect repellent
Packing cubes, stuff sacks, and small dry bags can keep related items together. Use only enough organizers to simplify packing; too many separate bags add weight and make it harder to see what you have.
Protect Equipment From Water
A waterproof pack liner provides broad protection for equipment inside the main compartment. Smaller dry bags are useful for items that must stay dry, such as insulation, a sleeping bag, medication, paper maps, electronics, and fire-starting supplies.
A rain cover can reduce the amount of water reaching the outside of the pack, but wind-driven rain and water running behind the pack may still enter. Do not depend on a rain cover as the only protection for critical equipment.
Pro Tip: Assign each equipment category a consistent bag or pack location. After several trips, you will be able to find important items quickly even in darkness or bad weather.
Packing for Weight Distribution
Correct weight placement helps the backpack move with your body instead of pulling you backward or from side to side. In ordinary trail conditions, dense items usually work best close to your back and around the middle or upper-middle of the main compartment.
This placement keeps the load near your center of gravity. Manufacturer guidance from Deuter also recommends keeping heavy equipment close to the back. On steep, uneven, or technical terrain, placing the heaviest part slightly lower may improve stability.
Step 1: Pack Light, Bulky Items at the Bottom
Place equipment you will not normally need until camp at the bottom of the main compartment. Good examples include:
- Sleeping bag in a waterproof liner or dry bag
- Sleep clothing
- Soft camp clothing
- Other light, compressible equipment
These items create a soft base without placing dense weight low and far behind you.
Step 2: Build the Dense Core Near Your Back
Place the heaviest and densest items close to the back panel. Depending on the trip, these may include:
- Food or a bear-resistant food container
- Cooking equipment
- Dense tent components
- Water carried inside the main compartment
- Group equipment
Use soft items such as clothing or a tent body to fill gaps and prevent hard objects from shifting. Keep hard corners, stove parts, and other rigid equipment away from direct contact with your back.
Step 3: Fill the Outer and Upper Areas
Place medium-weight items around the dense core and toward the outside of the pack. The upper section should hold equipment you may need during the day, including:
- Rain jacket and rain pants
- Insulation layer
- First aid kit
- Water-treatment equipment
- Lunch or a larger snack bag
- Toilet kit where appropriate
Step 4: Use Quick-Access Pockets Carefully
Hip-belt pockets, side pockets, and the top lid are best for small items used frequently:
- Snacks
- Water bottle
- Map and compass
- Sunscreen and lip protection
- Insect repellent
- Phone or camera
- Whistle
- Headlamp
Do not overload the top lid with dense small objects. A heavy lid can make the pack feel top-heavy and unstable.
Step 5: Balance Both Sides
Compare the left and right sides while packing. Balance water bottles, tent poles, fuel, and other dense items so one side does not pull downward. Secure tall objects so they cannot swing or catch on branches.
Step 6: Minimize External Attachments
External straps are useful for long or awkward equipment, but hanging too many items outside the backpack can create noise, snag vegetation, shift the load, and expose equipment to damage. Attach only items that cannot fit safely inside.
Step 7: Compress and Test the Load
Close the pack and tighten its compression straps. Lift it carefully, put it on, adjust the suspension, and walk for several minutes. Use stairs or a slight incline if available.
Listen and feel for:
- Gear moving or rattling
- The pack pulling backward
- One side sitting lower
- Pressure points on the shoulders, hips, or back
- Items pressing through the back panel
- Essential supplies that are difficult to reach
A balanced backpack should feel like one compact load, not a collection of objects moving independently behind you.
Warning: Do not bury first aid, navigation, rain protection, emergency shelter, a headlamp, or critical medication beneath equipment that must be unpacked before you can reach them.
Essential Items to Pack
The National Park Service Ten Essentials are ten equipment systems rather than ten individual products. Adjust each system for the route, weather, group, season, and duration.
| System | Examples | Packing Location |
|---|---|---|
| Navigation | Map, compass, GPS, downloaded offline map, and backup power | Top, lid, or protected quick-access pocket |
| Sun protection | Sunglasses, sunscreen, hat, and protective clothing | Hip-belt, side, or upper pocket |
| Insulation | Warm layer, gloves, hat, and rain shell | Upper main compartment in waterproof protection |
| Illumination | Headlamp or flashlight and spare power | Quick-access pocket |
| First aid | Trip-specific first aid kit and personal medication | Upper main compartment or marked outer pocket |
| Fire | Lighter, waterproof matches, and fire starter where fires are legal | Waterproof quick-access bag |
| Repair kit and tools | Knife or multi-tool, tape, patches, cord, and model-specific repair items | Upper or middle compartment |
| Nutrition | Meals, snacks, and extra no-cook food | Dense core plus accessible snacks |
| Hydration | Water, bottles or reservoir, treatment system, and backup method | Close to the back or in balanced side pockets |
| Emergency shelter | Emergency bivy, tarp, space blanket, or suitable overnight shelter | Protected but quickly accessible |
Also carry required identification, permits, personal toiletries, necessary medication, and trip-specific equipment. A portable charger can support navigation and communication devices, but it does not replace a physical map, compass, headlamp, or emergency plan.
Products Worth Considering

Lightweight Emergency Kit: This ultralight medical kit fits easily in your pack's side pocket for convenient access; includes supplies to clean and bandage wounds, aid muscle aches, dress blisters, and treat other common outdoor discomforts

【Super 3 in 2 Multi-Function】3-in-2 multi charging cable provide 6 charging modes (USB-C/A for Apple Watch charger, Lightning, and Type-C),which compatible with iWatch Series 1-9, SE, and Ultra models, compatible with iPhone 17 and newer models,and iPads (Lightning/USB-C).A portable travel charger and a universal charging cable for multiple devices,designed to charge multiple devices at once

Clothing and Layering
Pack clothing as a flexible layering system rather than counting complete outfits. Most hikers do not need three to five full sets of clothing. The correct amount depends on expected temperature, precipitation, wind, trip duration, and whether wet items can be dried safely.
Base Layer
The base layer manages moisture next to the skin. Merino wool and suitable synthetic materials are common options. Avoid relying on absorbent clothing that remains wet in cold conditions.
Insulation Layer
The insulation layer holds warmth. Fleece, synthetic insulation, and down are common choices. Protect insulation from moisture, and choose a type appropriate for the climate and trip.
Outer Layer
The outer layer protects against wind and precipitation. Pack a rain shell whenever conditions may change, even when the forecast appears favorable.
Useful Clothing Extras
- Spare socks
- Warm hat and sun hat
- Gloves appropriate for the temperature
- Sleep clothing kept dry on overnight trips
- Rain pants in wet, windy, or cold conditions
Keep the day’s rain and insulation layers near the top of the pack. Clothing reserved for sleeping can remain lower in a waterproof bag.
Food and Water
Choose food that provides enough energy, travels safely, fits your cooking system, and does not create unnecessary packaging. Nuts, dried fruit, trail mix, bars, nut butter, jerky, tortillas, and other compact foods can work well, depending on dietary needs.
Freeze-dried or dehydrated meals can reduce preparation work and food weight, but check the serving size, calories, protein, sodium, cooking time, water requirement, and fuel requirement. “Two servings” on a label may not equal two adequate trail meals.
Pack Food by When You Will Use It
- Keep snacks and the next meal accessible.
- Store later meals deeper in the food bag or container.
- Label repackaged meals with ingredients and cooking instructions.
- Separate food from fuel and any chemical products.
- Carry additional no-cook food for an unexpected delay.
Treat Natural Water Correctly
Do not assume clear water is safe. The CDC’s backcountry water-treatment guidance states that boiling is the most reliable method for killing germs. When boiling is not practical, filtering followed by disinfection offers broader protection than either method alone.
Follow the treatment product’s instructions, including pore-size claims, contact time, water-temperature limits, replacement intervals, and the organisms it is designed to address. Water contaminated by harmful chemicals or toxins cannot necessarily be made safe by ordinary boiling, filtering, or disinfecting.
Research water availability before leaving, but do not treat a marked stream as guaranteed. Sources may be dry, frozen, seasonal, contaminated, or difficult to reach. Carry enough capacity for the longest distance between reliable sources plus a safety margin appropriate for the route and weather.
Warning: Dehydration and heat illness can become emergencies. Water needs vary widely with heat, altitude, exertion, body size, distance, and medical factors, so a single fixed amount is not suitable for every hiker or route.
Follow Local Food-Storage Rules
Wildlife-safe storage requirements vary by destination. Some areas require an approved bear-resistant container, while others provide lockers or permit another storage method. Check the land manager’s rules before the trip.
The National Park Service food-storage guidance treats food, trash, toiletries, sunscreen, medication, and other scented products as attractants. Do not leave these items unattended or store them in a tent where prohibited or unsafe.
First Aid Kit and Emergency Supplies
A first aid kit should match the group size, trip length, activities, known medical needs, and distance from help. Inspect it before each trip and replace used, damaged, wet, or expired supplies.
A basic kit may include:
- Adhesive bandages
- Sterile gauze and medical tape
- Antiseptic supplies
- Blister treatment
- Elastic wrap
- Gloves
- Tweezers
- Personal medication
- Emergency information
- Any supplies you are trained and prepared to use
Carry a whistle where you can reach it immediately. A whistle can attract attention while using less energy than repeated shouting. A signal mirror, brightly colored equipment, and an appropriate electronic emergency device may also help, depending on the location.
A headlamp is generally more practical than a handheld light because it leaves both hands available. Protect it from accidental activation and carry suitable spare power.
Note: Carrying first aid equipment is not a substitute for knowing how to use it. Consider recognized first aid or wilderness first aid training before remote trips.
Navigation Tools
Carry navigation systems that continue to work when a battery dies, a screen breaks, or cellular service disappears. A suitable setup commonly includes a topographic map, compass, electronic map or GPS device, and backup power.
Before departure:
- Review the complete route, junctions, elevation changes, water sources, escape routes, and turnaround points.
- Download maps for offline use.
- Protect paper maps from moisture.
- Confirm that electronic maps cover the correct area.
- Practice using the map and compass before depending on them in the field.
Keep navigation tools near the top of the backpack or in a secure outer pocket. They are less useful when buried below camp equipment.
Shelter and Sleeping Gear
For an overnight trip, choose shelter and sleeping equipment according to the expected temperature, wind, precipitation, insects, terrain, and campsite rules. A lightweight tent may provide a practical balance of weather protection, privacy, and ease of use, while tarps, hammocks, and bivy shelters require suitable conditions and skills.
Check every shelter component before leaving:
- Shelter body or tarp
- Pole sections
- Stakes
- Guylines
- Groundsheet when required
- Repair supplies
Select a sleeping bag or quilt with an appropriate temperature rating and pair it with a sleeping pad that provides enough insulation for the conditions. Keep sleep insulation dry inside the pack.
For day hikes, carry an emergency shelter appropriate to the environment even when you do not expect to stay overnight. An injury, navigation problem, weather change, or delayed return can extend a short hike unexpectedly.
Products Worth Considering
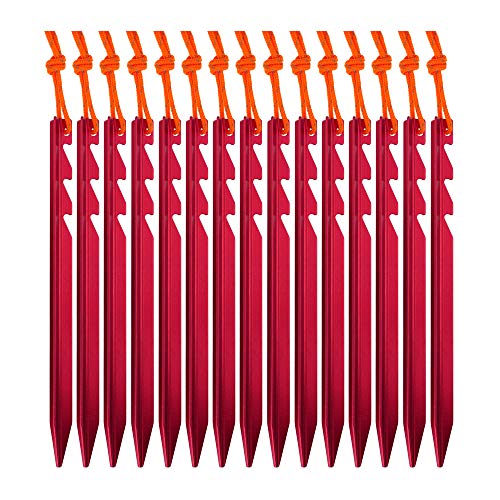
PREMIUM MATERIAL - These stakes are constructed from 7075 aircraft-grade aluminum alloy. Ultralight but much higher tensile strength, and you won't have to worry about the hassle of a broken tent peg in the backcountry.

6-pack of lightweight, durable, and versatile camping and backpacking tent stakes that stay put

10 PCS LENGTHEN FISHBONE NAILS SET: Can help to fix the tent when traveling and camping, to prevent being blown away by the wind. Size: 1.38*3.07in, diameter of round hole: 0.3in. Its fit for the max depth of wood is 1.97", and the gap between 0.12-0.99 inch. Simple and practical for boardwalk and deck camping
Leave No Trace Principles
Responsible packing helps protect natural areas. The official Leave No Trace Seven Principles provide a practical framework:
- Plan ahead and prepare: Know regulations, weather, hazards, group abilities, and equipment needs.
- Travel and camp on durable surfaces: Use established trails and campsites where required.
- Dispose of waste properly: Pack out trash, food scraps, and other waste, and follow local human-waste rules.
- Leave what you find: Do not remove plants, rocks, artifacts, or natural objects.
- Minimize campfire impacts: Follow fire restrictions and use a stove when appropriate.
- Respect wildlife: Observe from a safe distance and secure food and scented items.
- Be considerate of others: Limit noise, yield appropriately, and avoid blocking trails or campsites.
Carry durable trash bags, avoid excessive packaging, and leave enough pack space to carry all waste out. Food scraps are still waste and should not be left beside the trail or burned.
Tips for Comfortable and Efficient Packing
Use a Written Checklist
Create a checklist for the specific trip rather than copying the same list for every outing. Mark items only after they are physically inside the pack or attached securely.
Reduce Duplicate Equipment
Group members can often share selected items such as a shelter, stove, repair kit, water treatment, or navigation backup. Do not remove critical personal safety equipment simply because someone else carries a similar item.
Repackage Carefully
Remove unnecessary food packaging when local storage rules permit, but keep labels or written instructions for products that require exact preparation, dosage, contact time, or safety information.
Use Compression Sacks Selectively
Compression sacks can reduce the volume of soft items, but excessive compression may create hard, awkward shapes that leave unused gaps. A flexible waterproof bag may fit the pack more efficiently.
Practice Before the Trip
Pack the backpack several days before departure. Wear it on a short walk with the planned load, then correct pressure points, rattling, poor balance, or inaccessible equipment.
Reassess After Every Trip
Note which items you used, which items you needed but did not have, and which items were unnecessary. Use that information to improve the next packing list without removing reasonable emergency supplies.
Common Packing Problems and Fixes
| Problem | Likely Cause | What to Change |
|---|---|---|
| The pack pulls backward | Dense items are too far from the back or the load lifters are loose | Move dense gear close to the spine and readjust the suspension |
| One shoulder becomes tired | Uneven left-to-right weight or uneven strap tension | Rebalance side items and tighten both sides evenly |
| Shoulders carry most of the load | Loose or poorly positioned hip belt, incorrect torso setting, or excessive weight | Position the hip belt over the hip bones, check torso length, and reduce the load |
| A hard object presses into the back | Rigid equipment is against the back panel | Turn the object, place it in a case, or cushion it with soft gear |
| The backpack sways | Loose compression straps, a poor fit, or unsecured external equipment | Compress the load, secure attachments, and readjust the pack |
| Rain gear or first aid is hard to reach | Frequently used equipment is buried too deeply | Move it to the upper compartment or a marked quick-access pocket |
If you are also preparing for air travel, this guide to the best carry-on luggage for international travel explains features that can make luggage easier to organize and handle.
Frequently Asked Questions
What are the essential items to pack for a hiking trip?
Carry the Ten Essentials: navigation, sun protection, insulation, illumination, first aid, fire, repair tools, extra food, water and treatment supplies, and emergency shelter. Add medication, identification, permits, hygiene supplies, and any route-specific equipment.
How should I organize my backpack for hiking?
Group equipment by purpose, protect moisture-sensitive items, and pack according to weight and access. Put light camp gear at the bottom, dense items near your back, medium-weight equipment around the core, and frequently used supplies near the top or in secure outer pockets.
What should go at the bottom, middle, and top of a hiking backpack?
Put light, bulky sleep gear at the bottom. Place dense food, cooking equipment, water, and heavy shelter parts near the middle of your back. Keep rainwear, insulation, first aid, water treatment, and the next meal near the top.
What are some tips for packing food for a hiking trip?
Choose compact foods that meet your energy and dietary needs, keep snacks accessible, label repackaged meals, and carry extra no-cook food for delays. Check cooking-water and fuel needs, and follow all local rules for storing food, trash, toiletries, and scented products.
What should I consider when packing clothing for a hiking trip?
Pack adaptable layers for the coldest, wettest, and windiest conditions you may reasonably encounter. Include moisture-managing base layers, insulation, rain protection, spare socks, and weather-appropriate head and hand protection. Keep essential layers dry and easy to reach.
How can I ensure my backpack is comfortable to carry while hiking?
Use the correct torso size, position the hip belt over your hip bones, tighten the shoulder straps without lifting the belt, adjust the load lifters, and fasten the sternum strap comfortably. Balance the load, secure loose equipment, and take a test walk before the trip.
Should I use a backpack liner, dry bags, or a rain cover?
A pack liner protects most equipment inside the main compartment, while dry bags add protection for critical items such as insulation, medication, maps, and electronics. A rain cover can reduce exterior wetting but should not be the only waterproofing method.
How do I know whether my hiking backpack is too heavy?
The load may be excessive if it changes your normal walking posture, prevents stable movement, causes persistent pain or numbness, or cannot be carried safely over the planned terrain. Remove unnecessary items, share suitable group equipment, or use lighter equipment rather than relying on a universal weight percentage.
Where should I carry a bear-resistant food container?
Carry it inside the main compartment close to your back, surrounded by softer items that prevent movement. Keep frequently used food accessible according to local rules, and store all food, trash, toiletries, medication, and other scented items as required by the land manager.
Sources
- U.S. National Park Service: Ten Essentials — essential safety systems for outdoor trips
- U.S. National Park Service: Hike Smart — route planning, weather, trip plans, and emergency communication
- Centers for Disease Control and Prevention: Backcountry Water Treatment — boiling, filtration, disinfection, and treatment limitations
- Leave No Trace: The Seven Principles — responsible travel, camping, waste, fire, and wildlife practices
- Osprey: Backpack Size and Fit Guide — hip-belt, shoulder-strap, load-lifter, and torso adjustment
- Deuter: How to Pack a Backpack — load zones and weight placement
