
Last Updated on July 27, 2026 by Daniel Globe
Blisters can turn a comfortable hike into a painful walk back to the trailhead. Most hiking blisters start when repeated rubbing, pressure, and moisture irritate the skin inside your footwear. The best strategy is prevention: wear footwear and socks that fit well, manage moisture, and deal with any hot spot as soon as you feel it.
Quick Answer
To avoid blisters while hiking, start with footwear that fits without heel lift or toe pressure, wear well-fitting moisture-wicking socks, and keep your feet as dry as practical. Stop as soon as you feel a hot spot. Dry the area, fix the fit or lacing issue, and protect the skin with tape, moleskin, or a blister bandage.
Key Takeaways
- Choose hiking footwear that fits securely and matches the terrain and conditions.
- Wear properly fitted wool or synthetic moisture-wicking socks rather than cotton socks that stay damp.
- Break in stiff hiking boots gradually before a long trip, but do not expect break-in time to fix poor fit.
- Keep your feet clean, dry, and free of grit that can create extra friction.
- Treat a hot spot immediately with a fit adjustment, dry socks, tape, moleskin, or another appropriate barrier.
- Adjust your lacing if your heel slips or a specific area feels too tight.
- Powder or lubricant may help some hikers manage moisture or friction, but no single product prevents every blister.
- Take a break whenever you notice rubbing, foot pain, wet socks, or fatigue rather than waiting for a fixed time interval.
At a Glance
| Time Required | About 10–15 minutes of pre-hike preparation, plus a few minutes whenever a hot spot develops |
| Difficulty | Easy |
| Tools Needed | Well-fitting hiking footwear, moisture-wicking socks, a dry spare pair, tape or moleskin, blister dressings, and a small first-aid kit |
| Cost | Usually low; it depends on whether you already own suitable socks, footwear, and basic blister-care supplies |
What Causes Blisters While Hiking?
A friction blister forms when repeated rubbing or pressure damages layers of skin and fluid collects between them. Heat and moisture can make the problem worse. According to the American Academy of Dermatology, preventing chafing and responding quickly to discomfort can help stop blisters before they develop.
On a hike, the usual triggers include heel movement inside a shoe, toes hitting the front of the shoe on descents, a sock wrinkle, grit inside the footwear, wet socks, or a pressure point over a toe or the ball of the foot.
A hot spot is your early warning. Fix the rubbing or pressure before it becomes a fluid-filled blister.
Choose the Right Hiking Footwear
Select footwear that fits your feet and suits the trail. Rugged, rocky routes may call for more protection, traction, and underfoot support, while lighter hiking shoes or trail-running shoes can work well for many maintained trails. The National Park Service recommends proper walking footwear and sturdy, rubber-soled hiking footwear for dirt and gravel trails.
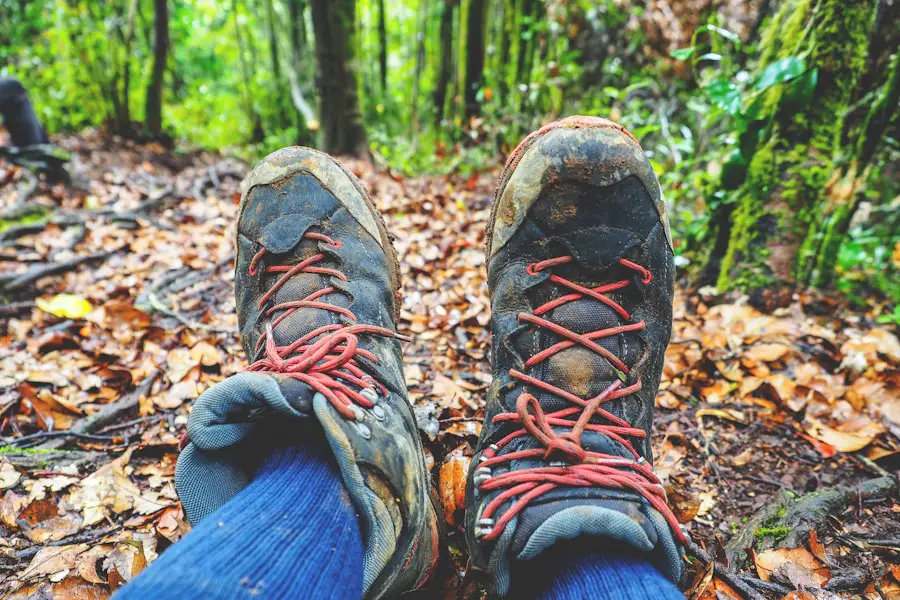
Fit matters more than choosing a boot simply because it has a high cuff or stiff sole. Your footwear should feel secure without squeezing your toes or creating pressure points. Your heel should not repeatedly lift and rub as you walk, and your toes should not strike the front of the shoe when going downhill.
Products Worth Considering

Color Note: Due to the material of the upper, these shoes in the pictures and videos may appear slightly red, but the shoes are actually BlackGray, consistent with the main picture.

Roomy Fit: These men's hiking shoes are designed with a roomy toe box that accommodates wide feet for all-day wear during outdoor adventures.

Comfy to Wear: These women's hiking shoes feature EVA insoles, ensuring every step is cushioned and responsive. The mesh covering enhances ventilation, keeping you comfortable even during extended walks.
Check the Fit Before a Long Hike
- Try hiking footwear with the same socks you plan to wear on the trail.
- Walk on an incline or stairs if possible to check for heel lift and toe contact.
- Make sure your toes can move without the forefoot sliding around.
- Check both feet because one may be slightly larger than the other.
- Do not assume that painful pressure points will disappear after several hikes.
Pro Tip: Test your full hiking system together: shoes, insoles, socks, and any liner socks. A shoe that fits with a thin everyday sock may feel too tight with a thick hiking sock.
Proper Sock Selection
Socks form the layer between your skin and your footwear, so fit and material matter. Wool and synthetic hiking socks are common choices because they manage moisture better than cotton. The National Park Service specifically recommends wool or synthetic moisture-wicking socks for longer hikes and suggests carrying an extra pair.
Choose a sock thickness that works with your footwear rather than automatically buying a larger shoe. A sock that is too bulky can create pressure, while a sock that is too loose can wrinkle and rub. The heel of the sock should sit on your heel, and the material should not bunch under your toes or arch.
Some hikers prefer a thin liner sock beneath a hiking sock. The extra layer may move against the outer sock instead of allowing as much rubbing directly against the skin. Two pairs are not necessary for everyone, so test the system on shorter walks first.
Products Worth Considering

Premium Merino Wool Blend + Breathable Design – All-Day Freshness: Crafted from 50% Merino wool mixed with tough nylon and polyamide, these hiking socks keep moisture under control and let your feet breathe easy. The breathable mesh helps you stay cool on spring hikes, summer camps, or any mild-weather adventure—no swampy, stuffy feet after hours on the trail

Comfortable Merino Wool: The innotree hiking socks women with thermoregulating merino wool and sweat wicking ventilation lanes ensure that it's cold and stay cool when it's hot weather, great for all season wearing.

Composition:Anlisim womens hiking socks are made of 70% Merino Wool, 23% Polyester, 5% Spandex , 2% Nylon,which are wearable and durable.And you can wear them in all season.
Breaking in Your Hiking Boots
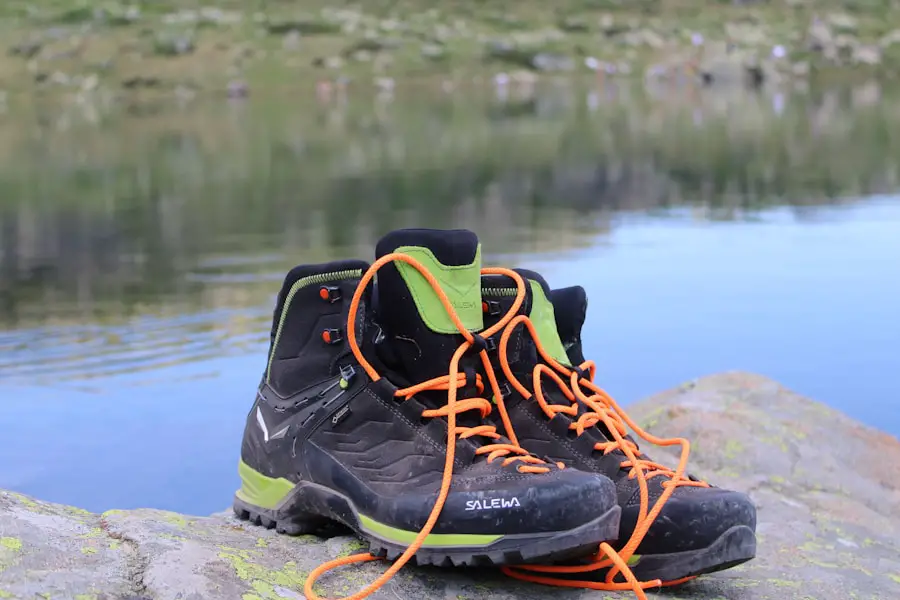
Stiffer hiking and backpacking boots often feel better after gradual use. Start by wearing new boots around the house, on neighborhood walks, and then on short hikes. Increase the distance only after you know they do not create persistent pressure or rubbing.
Pay attention to your heels, toes, the sides of your forefoot, and the top of your foot. If the same area hurts on every walk, do not assume more break-in time will solve it. Try adjusting the lacing, sock thickness, or insole. If the shoe shape simply does not match your foot, another size or model may be the better answer.
Lightweight hiking shoes and flexible trail-running shoes generally require less break-in than stiff leather or mountaineering-style boots, but every new pair should still be tested before a demanding trip.
Products Worth Considering

No More Blister Bandages for Feet | Blister prevention to avoid the need for treatment & first aid

Wool's natural properties perform wonders, providing cushioning, absorbing moisture, reducing friction, preventing blisters, and promoting breathability.
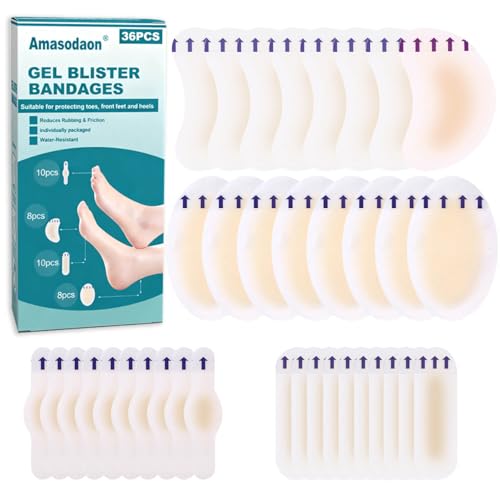
Waterproof Protection & Comfort: Hydrocolloid blister bandages provide superior care by effectively blocking sweat, moisture, and additional friction. You can confidently wear them during swimming and showering – these bandages remain firmly attached and offer secure protection even in hot summer weather.
Foot Care and Hygiene
Clean, dry feet are less likely to develop some of the problems that can make hiking uncomfortable. The CDC recommends washing the feet regularly, drying them thoroughly, and keeping the spaces between the toes dry. Changing socks and shoes regularly can also help control the warm, damp environment in which athlete’s foot can develop.
| Foot Care Check | What to Do |
| Before hiking | Check for cuts, existing blisters, sore areas, nail problems, or irritated skin. |
| During hiking | Remove grit, smooth sock wrinkles, change wet socks, and treat hot spots immediately. |
| After hiking | Wash your feet, dry them well, and inspect any areas that became sore or red. |
| Toenails | Keep nails comfortably trimmed and smooth rough edges that might catch on socks or press against neighboring toes. |
Foot powder can help some people manage moisture or friction, but it is not a substitute for proper hygiene or an antifungal treatment when an infection is present. If you have persistent itching, cracking, scaling, or another possible infection, seek appropriate medical advice.
Stop and Treat Hot Spots Early
A hot spot is a tender, warm, burning, or reddened area that develops before a full blister. This is the best time to act. Continuing to hike through the irritation allows repeated friction to keep damaging the skin.
- Stop as soon as you notice rubbing, burning, or unusual pressure.
- Remove your shoe and sock.
- Check for grit, a sock wrinkle, or another obvious cause.
- Dry the skin and change into dry socks if necessary.
- Adjust the lacing if the shoe is slipping or pressing on one area.
- Protect intact skin with paper medical tape, moleskin, or another soft blister barrier.
- Walk briefly and recheck the area before continuing at full pace.
A randomized endurance-racing trial found that paper tape reduced blister occurrence at taped locations, although a broader systematic review of outdoor blister-prevention methods found limited high-quality evidence overall. Treat tape, powder, lubricant, and sock systems as useful options to test rather than guaranteed solutions.
Using Moleskin and Blister Bandages
Moleskin, paper tape, and padded blister dressings can help protect areas that are starting to rub. On intact skin or a hot spot, apply the barrier smoothly so it does not create new wrinkles or pressure edges.
If a true blister has already formed, avoid placing a strongly adhesive material directly over fragile skin if removing it later could tear the blister roof. The American Academy of Dermatology recommends padding pressure blisters by cutting a donut-shaped opening in the padding so the blister sits in the center without taking direct pressure.
Hydrocolloid or gel-style blister dressings may also provide cushioning and protection. Follow the dressing manufacturer’s directions and replace the dressing if it becomes loose, dirty, or saturated.
Note: A useful trail blister kit can be very small. Pack paper medical tape or moleskin, a few blister dressings, sterile gauze or bandages, alcohol wipes for equipment, and an extra pair of dry socks.
Adjusting Your Lacing Technique
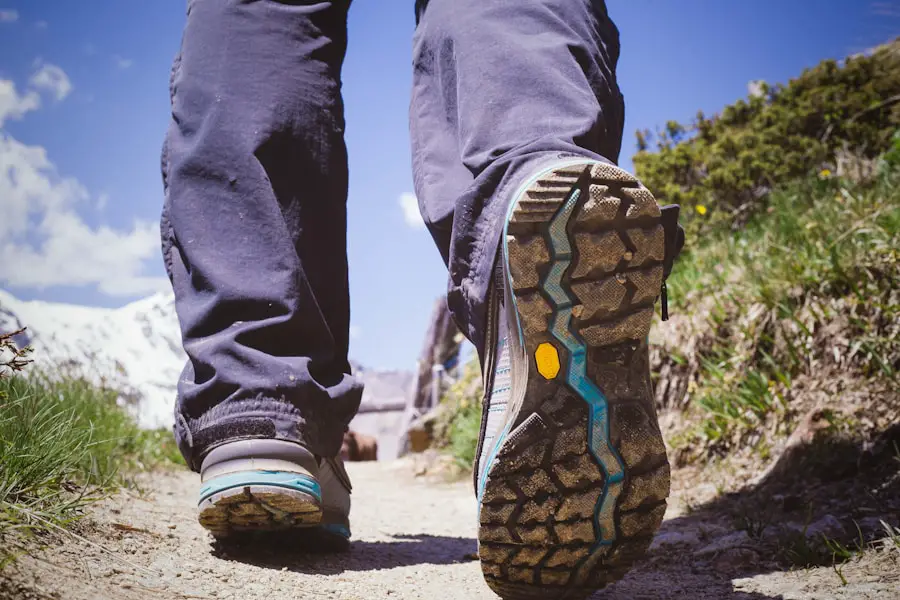
Lacing can fine-tune a reasonably well-fitting shoe or boot. It cannot turn footwear with the wrong shape or size into a proper fit.
Customizing Lacing for Uneven Surfaces
If the forefoot feels compressed, slightly reducing lace tension over that area may relieve pressure. On rough ground, a secure upper section can help reduce unwanted foot movement inside the boot. The goal is firm contact without numbness, pinching, or restricted circulation.
The Heel Lock Method for Preventing Heel Lift
A heel-lock or runner’s-loop style lacing pattern can reduce heel movement in footwear that has suitable top eyelets. Lace the shoe normally until the final eyelets, create a small loop on each side by feeding the lace through the top eyelet on the same side, then cross each lace through the opposite loop and tighten gently before tying.
The fit should feel secure, not painful. Loosen the laces immediately if you develop numbness, tingling, excessive pressure, or discomfort across the top of your foot.
Enhancing Comfort and Fit with Proper Lacing
Experiment with lacing on short walks before depending on a new setup for a long hike. If heel movement or toe pressure continues despite reasonable adjustments, reassess the shoe’s size, width, volume, or shape.
Managing Moisture and Friction
Wet feet and wet socks can make blister problems worse. Wear wool or synthetic moisture-wicking socks and carry a dry spare pair on longer or wetter hikes. After a stream crossing or heavy rain, change wet socks when practical and remove debris from inside the footwear.
Foot powder may help absorb some moisture, while petroleum jelly or a purpose-made anti-chafing lubricant can reduce rubbing on known problem areas. The American Academy of Dermatology lists powder and petroleum jelly among options for reducing friction. Individual results vary, so test a product before a major trip.
During a longer rest stop, taking your shoes and socks off for a few minutes can help damp feet dry when weather and trail conditions allow. Do not leave bare feet exposed where sharp rocks, hot surfaces, insects, or other hazards could cause injury.
Knowing When to Rest and Take Breaks
Do not wait for an arbitrary schedule if your feet are already telling you to stop. Take a break when you notice rubbing, tenderness, wet socks, worsening fatigue, or a change in your walking pattern.
A short stop gives you time to check the skin, smooth your socks, remove grit, adjust your laces, drink water, and decide whether continuing is sensible. Catching a hot spot early is usually much easier than managing a painful blister several miles later.
How to Treat a Blister on the Trail
If the Blister Is Intact
If the blister is small and tolerable, leave the roof of skin intact. Loosely cover it with a clean bandage and use donut-shaped padding around it if pressure from the shoe is painful. Reduce the rubbing that caused it.
If the Blister Breaks
Wash the area with clean water and soap when available, protect the exposed skin with a clean dressing, and avoid peeling away the remaining blister roof. Change the dressing when it becomes wet or dirty.
If the Blister Is Large and Very Painful
Dermatology guidance generally recommends avoiding drainage because opening a blister can increase infection risk. However, a large and very painful blister may sometimes need to be drained. Use clean hands and equipment, disinfect a small needle with rubbing alcohol, pierce near the blister’s edge, allow the fluid to drain, and leave the overlying skin in place. Then clean and cover the area.
Warning: Seek medical care for spreading redness, warmth, pus, increasing swelling, worsening pain, fever, or a blister that is not healing. If you have diabetes, poor circulation, or reduced sensation in your feet, contact a healthcare professional promptly about a foot blister rather than draining it yourself.
When a Blister Means You Should Stop Hiking
Continuing may be reasonable for a small protected hot spot or mild blister if your normal walking pattern is unchanged and the pain is not worsening. Stop and reconsider the hike if pain makes you limp, the blister repeatedly tears open, bleeding cannot be controlled, you see signs of infection, or you cannot protect the area from continued rubbing.
Changing your gait to avoid pain can also create new strain elsewhere in your legs or feet. Turning around early is often better than converting a manageable skin problem into an injury that makes the walk out much harder.
For additional wet-weather footwear ideas, see our guide to waterproof sneakers for travel and outdoor use. Remember that waterproof footwear alone does not prevent blisters; fit, socks, moisture management, and early hot-spot care still matter.
Love travel? Join Our Facebook Community For More Tips.
Frequently Asked Questions
What are blisters?
Blisters are fluid-filled pockets that form between layers of skin. Hiking blisters usually develop after repeated rubbing or pressure, often made worse by moisture, poor shoe fit, sock wrinkles, or debris inside the footwear.
How can I avoid getting blisters while hiking?
Wear properly fitting footwear and moisture-wicking socks, test new footwear before long trips, keep your feet as dry as practical, and stop immediately when you feel a hot spot. Fix the source of rubbing and protect the skin before continuing.
What type of socks should I wear to prevent blisters while hiking?
Choose well-fitting wool or synthetic moisture-wicking hiking socks. Avoid socks that bunch, wrinkle, or create excessive pressure inside your shoes. Carrying a dry spare pair is useful on long or wet hikes.
How should I choose the right hiking footwear to prevent blisters?
Look for a secure fit without painful pressure points. Your heel should not repeatedly lift and rub, and your toes should not strike the front on descents. Try the footwear with your hiking socks and test it on shorter walks before a long trip.
Are there products that can help prevent hiking blisters?
Paper medical tape, moleskin, padded blister dressings, foot powder, and anti-chafing lubricants can help some hikers. Evidence varies by product, so use them as part of a broader prevention plan that starts with proper fit and early hot-spot care.
What should I do if I feel a blister forming while hiking?
Stop as soon as you notice burning, tenderness, or rubbing. Remove your shoe and sock, dry the area, remove grit, correct any sock or lacing problem, and protect the intact skin with tape, moleskin, or another suitable blister barrier.
Should I pop a hiking blister?
Usually, no. Leave an intact blister alone when possible because the skin covering it helps protect the tissue underneath. A large, very painful blister may sometimes be drained carefully with clean equipment while leaving the blister roof in place.
Can I keep hiking with a blister?
A small protected blister may be manageable if the pain stays mild and you can walk normally. Stop or turn around if pain worsens, you begin limping, the blister repeatedly tears, or you notice infection signs such as spreading redness, warmth, swelling, or pus.
Sources
- American Academy of Dermatology — How to Prevent and Treat Blisters — blister prevention, padding, drainage, and infection guidance.
- CDC — Healthy Habits: Foot Hygiene — washing, drying, and fungal-infection prevention guidance.
- CDC — Your Feet and Diabetes — foot checks and precautions for people with diabetes.
- National Park Service — Hike Smart — hiking footwear, socks, spare socks, and blister supplies.
- Wilderness & Environmental Medicine — Prevention of Friction Blisters in Outdoor Pursuits: A Systematic Review — evidence on socks, antiperspirants, and barrier strategies.
- Clinical Journal of Sport Medicine — Pre-TAPED II Randomized Trial — evidence on paper tape for blister prevention.
