
Last Updated on July 27, 2026 by Daniel Globe
Preparing for a hiking trip is about more than choosing a scenic trail and packing a backpack. A safe, enjoyable hike starts with matching the route to your abilities, checking current conditions, carrying essential gear, preparing your body, and knowing what you will do if weather, navigation, or another problem changes your plans.
Quick Answer
To prepare for a hiking trip, choose a trail that fits the least-experienced person in your group, check official trail and weather updates, carry the 10 Essentials, train for the route’s distance and elevation, leave a trip plan with a trusted contact, and set a turnaround time before you start.
Key Takeaways
- Choose a trail based on distance, elevation gain, terrain, weather exposure, navigation difficulty, and the abilities of your whole group.
- Carry the 10 Essentials, enough water and food, suitable footwear, personal medication, and route-specific equipment.
- Check the managing agency’s trail alerts and an up-to-date weather forecast before leaving, then be willing to use a Plan B.
- Train progressively for the time, climbing, descending, and pack weight you expect on the actual hike.
- Leave a detailed trip plan with someone who is not hiking with you and tell that person when you return safely.
At a Glance
| Time Required | Allow about 30–60 minutes for final route, weather, gear, and trip-plan checks. Conditioning for harder hikes should begin far enough in advance to build gradually. |
| Difficulty | Easy for short, familiar day hikes; moderate to advanced for long, steep, remote, technical, or high-altitude routes. |
| Tools Needed | Official trail information, map and navigation tools, weather forecast, the 10 Essentials, suitable clothing and footwear, and appropriate communication equipment. |
| Cost | Planning is usually free. Permits, parking, transportation, food, water treatment, and missing gear vary by trail and location. |
Disclosure: As an Amazon Associate I earn from qualifying purchases. Some links on this page are affiliate links, at no extra cost to you.
Choose a Hiking Trail That Matches Your Ability
Selecting an appropriate trail is one of the most important parts of preparing for a hike. Do not judge a route by mileage alone. Look at distance, total elevation gain, steepness, terrain, exposure, navigation difficulty, expected weather, water availability, and how easy it would be to turn around or exit early.
A beginner may be happier on a well-marked route with modest elevation change and predictable footing. Experienced hikers may deliberately choose longer, steeper, rougher, or more remote routes. Either way, choose for the least-experienced person in the group rather than the strongest person.
The National Park Service’s Hike Smart guidance recommends choosing a trail that everyone in the group can safely complete. Trail labels such as “easy,” “moderate,” and “strenuous” can also vary between parks and apps, so compare the route’s actual numbers and conditions instead of relying on a label alone.
Check Trail Conditions, Closures, Permits, and Access
Before leaving home, check the website or alert system of the park, forest, preserve, or other agency that manages the trail. Look for:
- Trail or road closures
- Snow, ice, mud, flooding, washouts, or wildfire impacts
- Permit or reservation requirements
- Parking restrictions or seasonal road gates
- Water-source availability
- Food-storage or wildlife rules
- Fire restrictions
- Construction or maintenance notices
Conditions can change after storms or seasonal weather. A report from several weeks ago may no longer describe the trail accurately. Check again as close to your departure time as practical.
Pro Tip: Decide on a shorter or lower-risk Plan B before you leave home. That makes it easier to change plans when the forecast, trail conditions, group fitness, or access is worse than expected.
Packing the Essentials
The right hiking gear helps you handle both routine needs and unexpected delays. Footwear should fit well, provide traction for the terrain, and be comfortable for the distance you plan to cover. Hiking boots can be useful on rough terrain or when carrying heavier loads, but boots are not mandatory for every trail; well-fitting hiking shoes or trail shoes may be appropriate on many routes.
Choose clothing that works in layers. A moisture-managing base layer, insulating layer when needed, and weather-resistant outer layer let you adjust as temperature, wind, and precipitation change. Avoid depending on the forecast remaining exactly as predicted.
Carry the 10 Essentials
The National Park Service recommends the 10 Essentials as basic systems for outdoor preparedness:
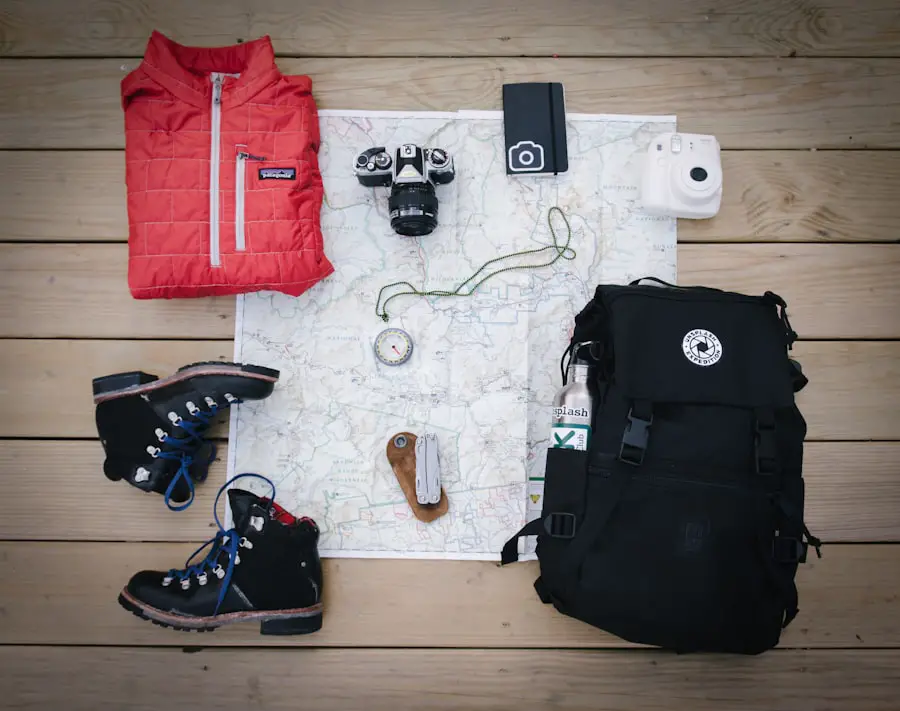
- Navigation: map, compass, GPS device, or downloaded offline map, plus the knowledge to use them.
- Sun protection: sunscreen, sunglasses, hat, and protective clothing as conditions require.
- Insulation: extra layers and rain protection appropriate to the season and elevation.
- Illumination: headlamp or flashlight and adequate battery power.
- First aid: a kit suited to your group and the trip, plus personal medications.
- Fire: emergency fire-starting equipment where carrying and using it is legal and appropriate.
- Repair kit and tools: items such as a multitool, tape, or repair materials suited to your equipment.
- Nutrition: enough food for the planned hike plus extra for an unexpected delay.
- Hydration: adequate water plus treatment supplies when you may need to refill from natural sources.
- Emergency shelter: a lightweight tarp, bivy, emergency blanket, or other suitable protection from exposure.
Depending on the location, you may also need insect repellent, traction devices, trekking poles, specialized food storage, a personal locator or two-way satellite messenger, or other route-specific equipment.
Plan Water and Food for the Actual Route
Do not wait until you are thirsty to begin thinking about hydration. A current Great Smoky Mountains National Park hiking guide uses at least 1 liter of water per two hours of hiking as a planning baseline. Treat that as a starting point rather than a universal prescription because heat, exertion, elevation, trip duration, and the availability of reliable refill points can change what you need.
Hydration baseline: One current NPS hiking guide recommends at least 1 liter of water for every two hours of hiking. Carry more when the route or conditions demand it.
If you plan to refill from a stream, lake, spring, or other backcountry source, do not assume untreated water is safe. Carry an appropriate treatment method and check local guidance about water availability and contamination risks before the trip.
Pack food that is easy to carry and eat on the move, such as trail mix, sandwiches, energy bars, dried fruit, nuts, or jerky. Longer and more remote hikes warrant a larger emergency food margin than a short trail close to developed facilities.
Note: A first-aid kit is most useful when you know what is inside it and how to use it. Check medications and supplies before each trip and replace expired or depleted items.
Checking the Weather
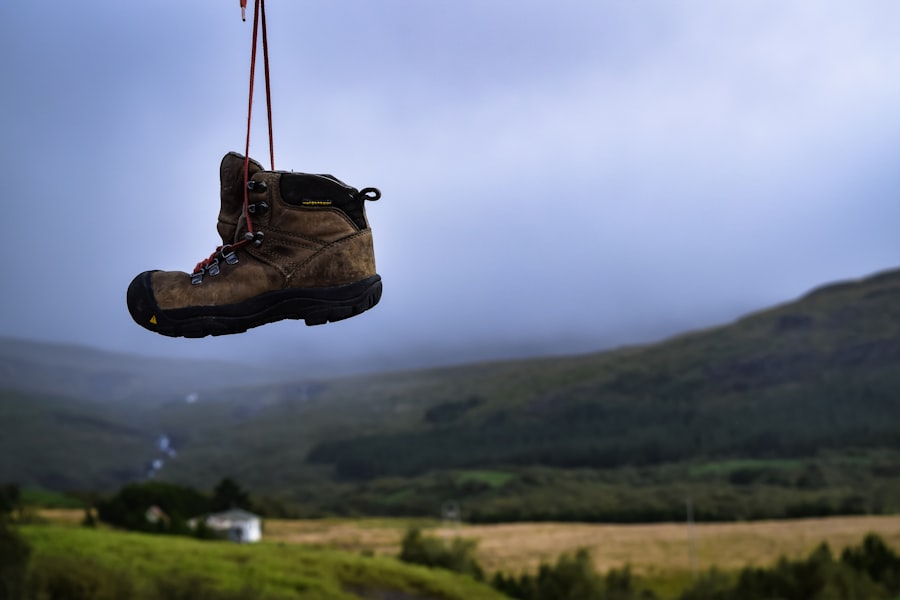
Check the forecast before your hike, but also look at the timing and type of weather expected along the route. Mountain and backcountry conditions can differ greatly from the nearest town, especially as elevation changes.
Review temperature, precipitation, wind, thunderstorm potential, visibility, and any official alerts. On hot days, consider an earlier start, a shorter trail, more water, and additional rest. In cold or wet conditions, carry enough insulation to remain safe if you must stop moving unexpectedly.
Take Thunderstorms and Lightning Seriously
The National Weather Service says there is no completely safe place outdoors during a thunderstorm. A substantial enclosed building or a hard-topped vehicle provides much better protection than a tent, open shelter, isolated tree, cliff overhang, or exposed ridge.
If thunder develops while you are near a summit, ridge, or other exposed high point, leave the elevated area promptly rather than trying to finish the objective. NWS guidance recommends waiting at least 30 minutes after the last thunder before resuming an outdoor activity.
Watch for Flood and Water Hazards
Heavy rain can also make creek crossings, washes, canyons, and low areas dangerous even when rain is falling somewhere upstream rather than directly overhead. Do not enter fast-moving or rising water simply because the route normally crosses there. Turning around is the safer choice when a crossing is beyond your ability or conditions are changing.
Warning: A summit, viewpoint, or planned mileage goal is never worth staying on exposed terrain during a thunderstorm, entering dangerous floodwater, or continuing when weather has exceeded your group’s equipment or abilities.
Conditioning and Training
| Training Area | Practical Hiking Preparation |
|---|---|
| Cardiovascular endurance | Build walking, hiking, cycling, or similar aerobic sessions gradually toward the amount of sustained effort your planned route requires. |
| Leg and core strength | Practice controlled movements such as step-ups, squats, lunges, and calf raises that support climbing, descending, and uneven footing. |
| Mobility | Maintain comfortable ankle, hip, and leg movement so normal trail steps do not feel unusually restricted. |
| Balance and terrain skills | Practice safely on surfaces similar to the intended trail rather than relying on an arbitrary single-leg balance test. |
| Pack and footwear practice | Use your intended footwear and backpack on practice hikes so you can find hot spots, fit problems, and carrying issues before the main trip. |
Physical conditioning matters most when a route is longer, steeper, higher, or rougher than your normal activity. Instead of trying to pass a universal fitness test, train for the demands of the hike you actually plan to do.
Practice hikes are especially useful. Gradually increase time on your feet, climbing, descending, and pack weight rather than making a sudden jump from short walks to an all-day mountain route. Practice hikes also reveal equipment problems. Blisters, pack rubbing, foot pain, or unstable footwear are much easier to solve before the main trip.
Prepare for High Elevation
Fitness does not prevent altitude illness. If your trip takes you to elevations much higher than you normally visit, allow time for acclimatization. The CDC’s high-altitude guidance recommends gradual ascent and cautions against going too high too quickly.
Headache, nausea, dizziness, unusual fatigue, or other symptoms after ascending can be signs that your body is not adjusting well. Do not continue climbing simply to meet a schedule. More serious or worsening symptoms require descent and medical attention.
Planning for Emergencies
Good preparation reduces risk, but it cannot eliminate every emergency. Before starting the hike, leave a written or electronic trip plan with a trusted person who is not going with you.
The National Park Service Trip Planning Guide recommends giving that person enough information to help authorities locate you if you fail to return.
Your trip plan should include:
- Your trail, route, destination, and planned direction of travel
- Trailhead and parking location
- Names of people in your group
- Expected start and return times
- Vehicle information when useful
- Your contact information and communication devices
- The time at which your trusted contact should begin trying to reach you
- Instructions to contact the appropriate authorities if you remain overdue
Tell the same person if you activate your Plan B or change your intended route. Check in promptly after the hike so an unnecessary search is not started.
Do Not Depend on One Navigation Device
A phone can be useful for downloaded maps, GPS position, and communication, but batteries die, screens break, devices get wet, and cell coverage can disappear. Download required maps before leaving service and carry a paper map or another appropriate backup on routes where navigation matters.
Know how to use your navigation tools before the trip. A map and compass provide little protection if they stay buried in the pack and you do not know how to orient them.
Plan for Limited Cell Service
Keep your phone charged and consider airplane mode when you do not need cellular service so the battery is not constantly searching for a signal. On remote trips where cell coverage is unreliable, a two-way satellite messenger or personal locator device may provide an additional communication option.
A whistle can also help attract attention while using much less energy than repeatedly shouting.
Note: In an emergency, call 911 in the United States when service is available, or use the appropriate local emergency number elsewhere. Communication equipment is a backup to good planning, not a reason to take risks you otherwise would avoid.
Understanding Leave No Trace Principles
Responsible preparation also includes reducing your impact on the places you visit. The official Leave No Trace guidance emphasizes planning ahead, using durable surfaces, disposing of waste properly, leaving natural and cultural items where they are, reducing campfire impacts, respecting wildlife, and considering other visitors.
For hikers, that generally means following established trail and land-manager guidance, avoiding unnecessary damage to vegetation, packing out trash and food scraps, and following local rules for human waste.
Do not feed wildlife or leave food where animals can obtain it. Animals that learn to associate people with food can change their behavior, creating problems for both wildlife and future visitors.
Fire rules deserve special attention. A campfire that is permitted in one season or location may be prohibited when wildfire danger rises. Check current restrictions rather than assuming an established fire ring means a fire is allowed.
Familiarizing Yourself with the Area
Research the specific environment before the hike. Local hazards vary widely. One trail may involve bears, another may involve extreme sun exposure, loose rock, venomous snakes, ticks, river crossings, snowfields, or rapidly changing mountain weather.
Learn the Local Wildlife Guidance
Follow the land-management agency’s instructions for the species found in the area. In bear country, for example, some agencies recommend carrying bear spray. The USDA Forest Service bear-safety guidance stresses knowing how to use it and keeping it immediately accessible rather than buried inside a backpack.
Bear spray is not a universal hiking requirement and should not be treated as a generic defense against every animal. Check the rules and recommendations for your actual destination, including food-storage requirements.
Know the Local Regulations
Research rules covering permits, camping, pets, fires, food storage, seasonal closures, fishing, bicycles, and overnight use when they apply. Many restrictions exist to protect visitors, wildlife, water sources, and sensitive habitat.
Also understand whether streams or rivers on the route may become unsafe after rain or snowmelt. A crossing that looked easy in a photo or old trip report can be very different on the day of your hike.
Setting Realistic Expectations
Set goals that match your current abilities rather than the hike you wish you were ready for. Distance alone can be misleading. A five-mile hike with steep climbing, rough footing, heat, snow, or high elevation can be much harder than a longer walk on smooth, flat terrain.
Travel at a pace the whole group can maintain. Build in time for breaks, navigation, photographs, food, unexpected obstacles, and a slower return than expected.
Set a Turnaround Time
Before starting, decide when you need to turn around even if you have not reached the summit, waterfall, lake, or other destination. Base that decision on daylight, weather, route difficulty, group condition, and how long the return is likely to take.
Weather changes, fatigue, injuries, route-finding problems, or unexpected trail conditions may require an earlier turnaround. Changing the plan is not a failed hike. It is part of sound backcountry judgment.
Final Pre-Hike Checklist
- Confirm the trail is open and check official alerts.
- Confirm required permits, reservations, parking, and access roads.
- Review distance, elevation gain, terrain, and expected hiking time.
- Check the latest weather forecast and thunderstorm risk.
- Download offline maps and pack an appropriate navigation backup.
- Pack the 10 Essentials and any route-specific gear.
- Carry enough water and have a treatment plan if relying on natural sources.
- Pack sufficient food plus an emergency margin.
- Check footwear, clothing layers, first-aid supplies, and personal medications.
- Charge communication devices and bring backup power when appropriate.
- Leave your route and expected return time with a trusted contact.
- Set a turnaround time and identify your Plan B.
- After the hike, tell your trusted contact that you returned safely.
If your hiking trip begins with a flight, travel logistics matter too. You can review our guide to the best carry-on luggage for international travel when choosing a bag for the journey to your hiking destination. You can also explore more travel planning information on TakeTravelInfo.com.
Love travel? Join Our Facebook Community
Frequently Asked Questions
What should I pack for a hiking trip?
Start with the 10 Essentials: navigation, sun protection, insulation, illumination, first aid, emergency fire supplies where appropriate, repair tools, food, water and treatment supplies, and emergency shelter. Add suitable footwear, personal medication, identification, insect protection, and any equipment required by the specific trail.
How should I physically prepare for a hiking trip?
Train for the route rather than trying to meet one universal fitness standard. Gradually build time on your feet, climbing, descending, leg and core strength, and experience carrying your intended pack. Practice hikes are one of the best ways to test both fitness and equipment.
What safety precautions should I take before going on a hiking trip?
Check official trail alerts and weather, choose a route your group can handle, carry the 10 Essentials, leave a trip plan with a trusted contact, download navigation information before losing service, and establish a turnaround time. Use a Plan B when conditions are worse than expected.
How can I mentally prepare for a hiking trip?
Review the route in advance, know the major landmarks and hazards, decide what conditions will make you turn around, and accept that changing plans is normal. Breaking a long hike into smaller sections can also make the day feel more manageable. Relaxation or mindfulness techniques can help with stress, but they do not replace navigation or safety planning.
What should I do to minimize my impact on the environment while hiking?
Follow Leave No Trace guidance and the rules of the land manager. Stay on appropriate durable surfaces, pack out trash and food scraps, leave plants and natural objects in place, keep your distance from wildlife, follow fire restrictions, and be considerate of other visitors.
How much water should I carry for a hike?
There is no single amount that fits every hike. One current National Park Service hiking guide uses at least 1 liter per two hours of hiking as a baseline. Hot weather, strenuous climbing, elevation, longer routes, and unreliable refill sources can increase the amount you need. Carry treatment equipment if your plan depends on natural water sources.
Do I need hiking boots for every hike?
No. Hiking boots can be useful on rough terrain, in some wet or cold conditions, or when carrying heavier loads, but well-fitting hiking shoes or trail shoes may be suitable for many trails. Choose footwear based on fit, traction, terrain, conditions, distance, and your own support needs.
What should I do if there is no cell service on the trail?
Download maps before the hike, carry an appropriate navigation backup, and leave a detailed trip plan with a trusted contact. Keep your phone battery conserved. For remote routes, consider a two-way satellite messenger or personal locator device appropriate to the trip.
Sources
- National Park Service — Hike Smart — trail selection, park alerts, weather planning, equipment, and general hiking safety.
- National Park Service — Trip Planning Guide — trip plans, permits, offline maps, backup navigation, emergency preparation, and Plan B guidance.
- Great Smoky Mountains National Park — Hiking — current Ten Essentials and hydration guidance.
- National Weather Service — Outdoor Lightning Safety — thunderstorm shelter, exposed-terrain safety, and the 30-minute rule.
- CDC Yellow Book — High-Altitude Travel and Altitude Illness — acclimatization and altitude-illness guidance.
- Leave No Trace — The 7 Principles — low-impact recreation and wildlife stewardship.

