
Last Updated on July 27, 2026 by Daniel Globe
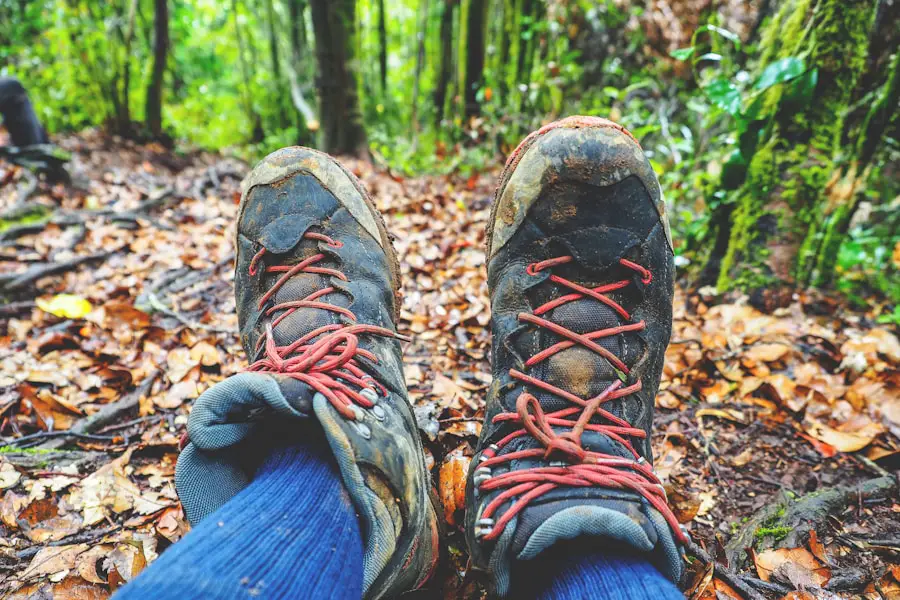
How you lace hiking shoes can change how securely your heel sits, how much pressure you feel across the top of your foot, and whether your toes have enough room on steep terrain. The goal is not to make every part of the shoe as tight as possible. Instead, use firm but comfortable tension where you need control and relieve pressure where your foot needs space.
Quick Answer
To lace hiking shoes correctly, seat your heel at the back of the shoe, lace the forefoot comfortably, snug the midfoot so it cannot slide, and secure the heel without causing pressure or numbness. Use a heel lock for heel slip, window lacing for instep pressure, and toe-relief lacing when the toe box feels compressed.
Key Takeaways
- Start with a hiking shoe that already fits your foot; lacing can fine-tune fit but cannot correct the wrong size or shape.
- Keep the forefoot comfortable, the midfoot secure, and the heel firmly seated without cutting off circulation.
- Use heel-lock or surgeon’s-knot techniques for heel movement, window lacing for pressure across the instep, and toe-relief lacing for temporary extra space near the toes.
- For descents, secure the heel and midfoot so your foot does not slide forward and drive your toes into the front of the shoe.
- Recheck your laces after you have been walking for a while because feet can swell and laces or shoe materials may settle.
At a Glance
| Time Required | 5–10 minutes to set up and test |
| Difficulty | Easy |
| Tools Needed | Hiking shoes or boots with intact laces |
| Cost | $0 unless you need replacement laces |
How to Lace Hiking Shoes Step by Step
Before trying a special pattern, set up a secure standard fit. This gives you a baseline and makes it easier to identify where your shoe needs more or less tension.
- Put on your normal hiking socks. Use the same sock thickness you expect to wear on the trail because changing socks changes the available space inside the shoe.
- Seat your heel. Put your foot fully into the shoe and tap the heel lightly against the floor or pull the shoe snugly onto the heel so your heel sits in the back of the heel cup.
- Start at the bottom. Remove obvious slack from the lowest eyelets without squeezing the toes or forefoot.
- Lace the forefoot comfortably. Use normal criss-cross lacing unless you need a pressure-relief pattern. Your toes should be able to lie naturally rather than feeling compressed together.
- Snug the midfoot. Pull enough tension through the middle eyelets to keep your foot from sliding inside the shoe. Do not yank each crossing as tight as possible.
- Secure the heel. If your heel lifts, use a heel-lock or surgeon’s-knot technique before finishing the upper eyelets.
- Tie a secure bow. Keep long lace loops and ends from hanging where they could catch on brush, hooks, or the opposite shoe.
- Walk and test the fit. Go up and down stairs or a slope if possible. Check for heel lift, toe impact, top-of-foot pressure, rubbing, tingling, or numbness.
- Readjust on the trail. Recheck the fit after the first part of your hike. LOWA notes that feet may widen with exertion and laces or footwear materials can settle, making a later adjustment useful.
Warning: Tighter is not automatically safer. Loosen and readjust the shoe if lacing causes numbness, tingling, throbbing, sharp pressure, or increasing pain. Persistent problems can indicate that the shoe’s size, width, volume, or shape is wrong for your foot.
Different Lacing Techniques for Different Foot Types and Fit Problems
Foot shape varies widely, but it is more useful to choose a lacing pattern based on the problem you feel than to assume that every person with flat feet, high arches, wide feet, or narrow feet needs the same amount of tension.
Products Worth Considering
![Stepace Round Shoelaces [2 Pairs] Heavy Duty Boot Shoe Laces for Hiking Work Boots Coffee Khaki-120(Dots)](https://m.media-amazon.com/images/I/51CdlMxDimL._SL500_.jpg)
The Package Includes -2 pairs of Stepace round laces (4 laces)

[Packing Details] Each order includes 2 pairs (4 laces) of round hiking boot laces. When you select a quantity of 1, you will receive 2 pairs of shoelaces in the same type and color. These boot shoelaces are designed for a variety of outdoor footwear, including mountaineering shoes, hiking boots, outdoor walking sneakers, running shoes, and work boots

Compatibility: Ideal replacement shoelaces for hiking boots and outdoor shoes, providing reliable performance on trails, camping trips and long-distance walks. Perfect for replacing worn or dirty laces and restoring a clean, ready-to-go look for your footwear.
For a High Instep or Pressure on Top of the Foot: Window Lacing
Window lacing, also called box lacing, creates an open area over a pressure point instead of crossing a lace directly over it. REI recommends window lacing for pressure on the top of the foot.
- Identify the eyelets directly below the sore or pressured area.
- Unlace the shoe down to that point.
- Instead of crossing the laces, run each lace straight up to the next eyelet on the same side.
- Cross the laces again above the pressure point and continue normally.
For a Wide Forefoot or Sensitive Toes
Keep the lower eyelets comfortably loose enough that the forefoot is not squeezed. You can also skip the lowest set of eyelets as a temporary toe-relief method. However, lacing cannot create unlimited space. According to the American Academy of Orthopaedic Surgeons, footwear should match the shape of the foot and provide enough room in the toe box.
If your toes are consistently pinched, overlapping, rubbing the sides, or hitting the front, look for a wider or better-shaped hiking shoe rather than trying to compensate with very loose lacing.
For a Narrow or Low-Volume Foot
A slightly firmer midfoot fit and a heel-lock or surgeon’s-knot technique can help reduce extra movement inside the shoe. The goal is to take up excess volume where needed without crushing the forefoot.
For Bunions or Hammertoes
Avoid pulling the forefoot tightly over a painful prominence. A roomy toe box is more important than an aggressive lacing pattern. AAOS recommends footwear that does not pinch the toes and notes that wider or deeper toe boxes can reduce pressure around bunions and hammer toes.
Note: Lacing can fine-tune pressure and shoe volume, but it does not correct flat feet, high arches, excessive pronation, or another biomechanical condition by itself.
Tips for Preventing Blisters and Hotspots with Proper Lacing
Blisters commonly develop where repeated rubbing or pressure irritates the skin. Lacing can reduce unwanted movement, but it works best as part of a broader blister-prevention strategy.
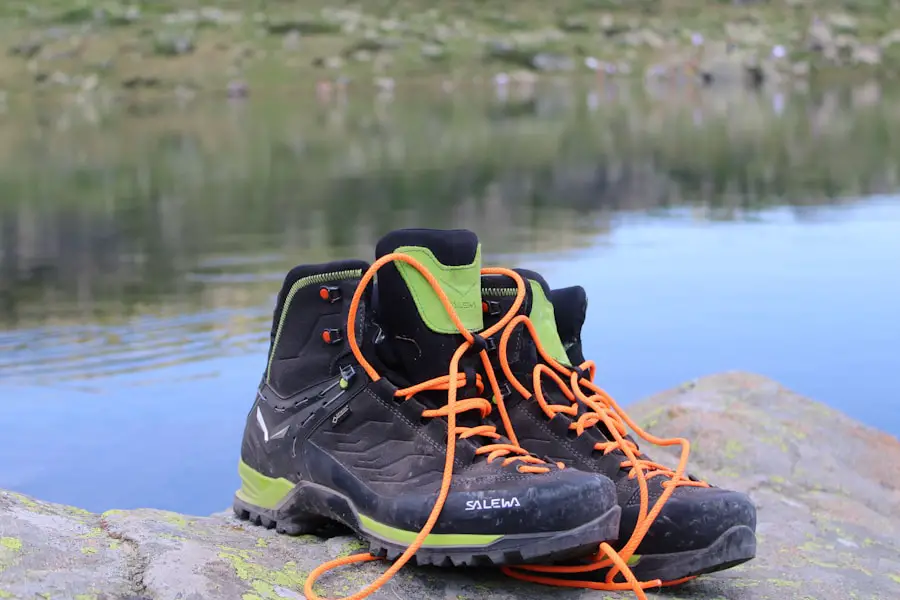
Start by removing slack evenly through the lacing system. A loose heel can repeatedly slide against the back of the shoe, while a section pulled excessively tight can create its own pressure point.
The American Academy of Dermatology also recommends properly fitting shoes, moisture-wicking socks, and protecting known problem areas from friction. Stop and make an adjustment when you first notice rubbing, warmth, redness, or discomfort rather than waiting until a blister develops.
- Heel rubbing: try a heel lock or surgeon’s knot.
- Pressure over the instep: use window lacing over the affected area.
- Toe pressure: reduce lower-eyelet tension or use temporary toe-relief lacing.
- Repeated rubbing despite adjustments: reassess the shoe size, width, socks, and overall fit.
Pro Tip: Carry a small amount of blister protection on longer hikes. The National Park Service recommends suitable hiking footwear, moisture-wicking socks, and carrying moleskin for blisters.
Products Worth Considering

Yes - it's intentionally thin because thin helps to reduce blister causing friction and shear force.

Promifun Premium Material: Our sticky moleskin pads are made of high-quality flannel and adhesive, pre-cut, easy to apply, latex-free, non-irritating and friendly to sensitive skin. They are sized to fit you and designed to provide a comfortable experience.
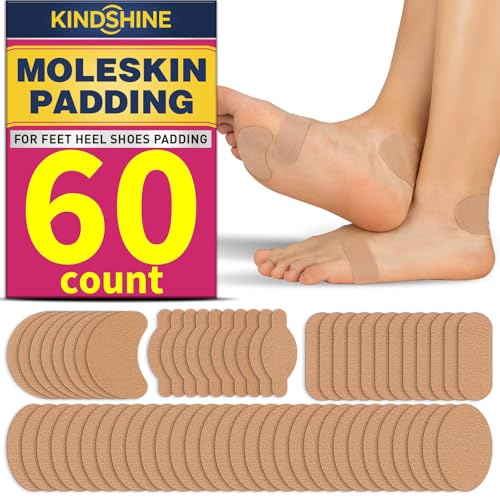
【Gentle Latex-Free Premium Fabric】Our sticky moleskin pads are made of high-quality flannel and latex-free adhesive, pre-cut for easy application. Gentle on sensitive skin with no irritation, fitting foot contours for a comfortable, non-bulky feel.
How to Customize Lacing for Maximum Comfort and Support
Rather than ranking lacing methods as universally “high” or “low” in comfort, match each method to the problem it is designed to solve.
| Lacing Technique | Best Used For | Main Effect |
| Standard Criss-Cross | A shoe that already fits well | Balanced, easy-to-adjust tension |
| Heel Lock | Heel lift or forward sliding | Improves heel retention |
| Surgeon’s Knot | Separating forefoot and upper-shoe tension | Helps hold tension at a selected point |
| Window Lacing | Pressure on top of the foot | Removes a crossing over the sensitive area |
| Toe-Relief Lacing | Temporary forefoot or toe pressure | Reduces pressure near the lowest eyelets |
You can also use different tensions in different zones. For example, keep the forefoot comfortable, secure the midfoot, and use a locking technique higher up to control heel movement.
The best lacing pattern is not the tightest one. It is the one that keeps your foot secure without creating a new pressure point.
Products Worth Considering

Hiking Boot Shoelaces: Round hiking laces made of high-quality polyester, tightly woven to ensure durability, strong pull design, fine texture, fashionable and non-slip, it is not easy to loose in running and all kinds of strenuous sports; The shoelace diameter is about 4.5 mm
![Miscly Round Boot Laces [1 Pair] Heavy Duty and Durable Shoelaces for Boots, Work Boots & Hiking Shoes (Black/Brown, 45 inches (114 cm))](https://m.media-amazon.com/images/I/51T1QSPEzJL._SL500_.jpg)
HEAVY DUTY: Reinforced with dual inner nylon cords, the same cords originally used in parachutes. Ensuring unparalleled strength and durability. 3/16in diameter

MATERIAL & CONSCIOUSLY CREATED: Durable leather stands up to the elements and is sourced from Leather Working Group certified tanneries, the gold star in environmentally preferred leather; Cleaner shoes for a better planet
How to Use a Heel Lock on Hiking Shoes
A heel lock is useful when your shoe has an extra pair of upper eyelets and your heel lifts during walking. The exact layout varies by shoe, but the common runner’s-loop version works like this:
- Lace normally until only the final pair of eyelets remains.
- Instead of crossing the laces, feed each lace through the final eyelet on the same side, leaving a small loop.
- Cross the lace ends over the tongue.
- Feed each lace end through the loop on the opposite side.
- Pull the laces outward and slightly downward to draw the loops snug and seat the heel.
- Tie your normal bow.
- Walk a few minutes and reduce tension if you feel pressure, tingling, or numbness.
Mid- and high-cut hiking boots with hooks may use a different heel-hold arrangement. One established hiking-boot approach is to secure the instep with a surgeon’s knot near the point where the foot begins to flex, then continue through the upper hooks. REI’s hiking-boot lacing guide demonstrates this method.
How to Tie a Surgeon’s Knot
- Bring the two lace ends across each other as if beginning a normal knot.
- Wrap one lace around the other twice instead of once.
- Pull the knot snug at the point where you want to hold the existing tension.
- Continue to the next hooks or eyelets and finish lacing normally.
The extra wrap creates friction that helps the lower section stay at its chosen tension while you lace the upper section.
The Role of Lacing in Maintaining Ankle Stability
Secure lacing can improve foot-to-shoe coupling by limiting unwanted movement inside the shoe. Research in running footwear has found that lacing configuration and tightness can change perceived stability and pressure over the top of the foot. However, that does not mean tight laces guarantee protection from ankle sprains.
For a stable fit, concentrate on keeping your heel seated and your midfoot secure. The upper section should feel supportive without squeezing the ankle or producing numbness.
Also remember that lacing is only part of hiking safety. Shoe construction, outsole traction, trail conditions, fatigue, balance, and choosing suitable footwear all matter. The National Park Service’s Hike Smart guidance recommends proper footwear suited to the walking surface.
Lacing Techniques for Uphill and Downhill Terrain
Hills change the direction your foot wants to move inside the shoe, so a quick lace adjustment before a long climb or descent can improve comfort.
For Uphill Hiking
Keep your heel and midfoot secure enough to reduce heel lift. The forefoot should remain comfortable so your toes can move naturally. If the top of the foot feels compressed as your ankle flexes forward, reduce tension there or try a small lacing window.
For Downhill Hiking
Descents are where heel retention becomes especially important. Your shoe should keep the foot from sliding forward while still leaving adequate room for the toes.
- Seat your heel against the rear of the shoe before retightening.
- Snug the midfoot.
- Use a heel lock or surgeon’s knot if your foot tends to move forward.
- Keep the forefoot comfortable rather than cranking the lowest eyelets tight.
- If your toes repeatedly strike the front even with the heel secured, reassess shoe length and fit.
Pro Tip: Stop for 30 seconds before a long descent and reset your laces. Pull your heel fully to the back first, then secure the midfoot and heel. This is more effective than simply tightening every eyelet.
The Impact of Lacing on Overall Foot Health and Injury Prevention
Lacing influences how the shoe holds the foot, but it should not be treated as a cure for plantar fasciitis, metatarsalgia, pronation, or other foot conditions. Those problems can have multiple causes.
What lacing can do is help manage shoe pressure and unnecessary in-shoe movement. Shoes that are excessively tight can create pressure, while shoes that are too loose can allow rubbing and sliding. AAOS advises choosing footwear that fits the actual shape of the foot, holds the heel comfortably, and leaves adequate room for the toes.
That distinction matters: if a pressure point disappears when you change one lace crossing, lacing was probably a useful adjustment. If your foot remains cramped, your toes strike the front, your heel moves excessively despite a lock, or pain persists, the shoe itself may not fit correctly.
Common Hiking-Shoe Lacing Problems and Fixes
| Problem | Try This | If It Does Not Work |
| Heel lifts while walking | Heel lock or surgeon’s knot | Check heel-cup fit and shoe volume |
| Pressure on top of foot | Window lacing | Check shoe volume and tongue placement |
| Toes feel squeezed | Reduce lower-eyelet tension or try toe-relief lacing | Choose a wider or better-shaped toe box |
| Toes hit front downhill | Seat heel and secure midfoot/heel | Check shoe length and downhill fit |
| Numbness or tingling | Loosen the affected zone immediately | Stop using that tension pattern and reassess fit |
| Laces repeatedly come loose | Retie securely and inspect the lace surface | Replace worn, damaged, or unsuitable laces |
Expert Advice on Mastering the Art of Lacing Hiking Shoes
The best time to experiment is before a long hike. Put on the socks you normally use, try a lacing adjustment at home, and walk on stairs or a local incline. That lets you find pressure points before you are miles from the trailhead.
On a hike, make small adjustments instead of dramatically tightening the entire shoe. If one zone hurts, change tension in that zone first. LOWA recommends checking the fit again after roughly half an hour to three-quarters of an hour because feet can widen with exertion and footwear materials or laces may give slightly.
Inspect the laces themselves as well. Replace laces that are badly frayed, damaged, or no longer stay tied reliably. When replacing them, match the original lace length closely so you have enough lace for all intended eyelets and locking techniques.
Most importantly, know when to stop troubleshooting with the laces. A hiking shoe that is fundamentally too short, too narrow, too wide at the heel, or wrong for your foot volume needs a better fit—not an increasingly complicated knot.
If you are preparing for a hike, combine correct lacing with appropriate footwear, socks, and trail preparation. The National Park Service’s hiking-safety guidance recommends sturdy footwear appropriate to the surface and moisture-wicking socks for longer hikes.
Frequently Asked Questions
What are the benefits of lacing hiking shoes properly?
Proper lacing can improve how securely your foot sits inside the shoe, reduce unwanted heel movement, relieve selected pressure points, and make the fit more comfortable. It can also help reduce rubbing when poor lace tension is allowing the foot to slide, although good shoe fit and suitable socks are also important for blister prevention.
What is the best lacing technique for hiking shoes?
There is no single best technique for every foot. Standard criss-cross lacing works well when the shoe already fits correctly. Use a heel lock or surgeon’s knot for heel movement, window lacing for pressure on top of the foot, and toe-relief lacing for temporary pressure near the front of the shoe.
How do you lace hiking shoes using the heel-lock method?
For shoes with a final pair of standard eyelets, lace normally until the last pair. Feed each lace through the final eyelet on the same side to create two small loops. Cross the lace ends, pass each one through the opposite loop, pull outward to snug the heel into place, and tie normally. Hiking boots with hooks may use a surgeon’s-knot or heel-hold variation instead.
Are there other lacing techniques for hiking shoes?
Yes. Common options include a surgeon’s knot for holding tension in one section, window lacing to relieve pressure across the instep, toe-relief lacing to reduce pressure near the toes, and standard criss-cross lacing for an uncomplicated fit.
How often should I re-lace or adjust my hiking shoes?
Adjust them whenever the fit changes, including after your feet warm up or swell during a hike. Check the laces regularly for fraying or damage and replace them when they become unreliable. You do not need to completely remove and reinstall healthy laces on a fixed schedule.
Should hiking shoes feel tight?
They should feel secure rather than tight. Your heel should have minimal unwanted movement, but your toes should not feel cramped and the laces should not cause numbness, tingling, or sharp pressure. If achieving heel security requires painfully tight lacing, the shoe may be the wrong shape or volume.
How do I stop my toes from hitting the front of my hiking shoes downhill?
Before descending, seat your heel at the back of the shoe and secure the midfoot and heel with comfortable tension or a heel-lock technique. If your toes still repeatedly hit the front, the problem may be shoe length, heel fit, or overall shoe volume rather than the lacing pattern.
Sources
- REI — How to Lace Hiking Boots — surgeon’s knots, window lacing, toe-relief lacing, heel-slip troubleshooting, and lace replacement.
- LOWA — Safety on the Mountain — secure lacing, avoiding excessive tightness, lace-end safety, and readjusting fit during a hike.
- American Academy of Orthopaedic Surgeons — Shoes: Finding the Right Fit — toe-box room, heel fit, support, and proper footwear selection.
- American Academy of Dermatology — How to Prevent and Treat Blisters — footwear fit, socks, friction reduction, and early blister prevention.
- U.S. National Park Service — Hike Smart — suitable hiking footwear, moisture-wicking socks, and blister-preparation guidance.
- PubMed — Effects of Different Shoe-Lacing Patterns on Dorsal Pressure Distribution — peer-reviewed evidence on lacing patterns, pressure, comfort, and perceived stability.
