
Last Updated on July 27, 2026 by Daniel Globe
Layering for hiking lets you stay comfortable when your pace, elevation, wind, rain, or temperature changes. Instead of relying on one heavy piece of clothing, you build a flexible system that manages sweat, holds warmth when you need it, and protects you from wind and precipitation. The key is choosing compatible layers and adjusting them before you become soaked with sweat or chilled.
Quick Answer
For most hikes, use three clothing layers: a moisture-managing base layer next to your skin, an insulating mid layer for warmth, and a weather-resistant or waterproof shell for wind and rain. Add or remove layers as your effort and the weather change, and carry extra warmth and rain protection even when you do not need them at the trailhead.
Key Takeaways
- A hiking layering system normally includes a base layer, insulating mid layer, and protective outer shell.
- Choose wool or moisture-managing synthetic fabrics for cool or wet conditions instead of cotton, which stays wet longer and loses much of its insulating value when soaked.
- Fleece, down, and synthetic insulation each have different strengths; choose according to temperature, precipitation, activity level, and pack weight.
- Adjust layers early. Vent or remove insulation before you become heavily sweaty, then add warmth before long breaks or exposed sections.
- Bring an extra warm layer and rain protection for sudden weather changes, even on short hikes.
At a Glance
| Time Required | About 5–10 minutes to choose and put on your starting layers; adjust them throughout the hike. |
| Difficulty | Easy once you understand what each layer does. |
| Tools Needed | Weather forecast, moisture-managing base layer, insulating layer, protective shell, and weather-appropriate accessories. |
| Cost | No fixed cost. You can build a safe layering system from suitable clothing you already own and upgrade individual pieces as needed. |
Disclosure: As an Amazon Associate I earn from qualifying purchases. Some links on this page are affiliate links, at no extra cost to you.
How the Hiking Layering System Works
Each layer has a different job. Wearing several compatible layers gives you more control than relying on one thick jacket.
- Base layer: manages moisture next to your skin.
- Insulating layer: traps warm air and slows heat loss.
- Outer shell: blocks wind and, when needed, protects you from rain or snow.
You may not wear all three layers at once. On a mild uphill climb, for example, you might hike in only a base layer while keeping your fleece and rain shell in your pack. When you stop or reach an exposed ridge, you can put those layers back on.
The National Park Service Ten Essentials guidance recommends carrying extra clothing that is suitable for the most severe conditions you may encounter. That matters because mountain and backcountry weather can change much faster than conditions around the trailhead.
Cold-weather danger is not limited to freezing temperatures. The CDC warns that hypothermia can occur even above 40°F when rain, sweat, or cold-water exposure chills the body.
Choosing the Right Base Layer for Your Hike
Your base layer sits next to your skin, so its main job is managing moisture. As you sweat, a suitable fabric helps move or disperse that moisture so it can evaporate instead of leaving you in a cold, wet shirt.
Common hiking base-layer materials include merino wool and synthetic fibers such as polyester or nylon. Merino wool is popular because it handles moisture vapor, regulates comfort across a range of temperatures, and tends to hold less body odor between washes. The Woolmark performance guide describes merino as breathable, moisture-managing, and naturally odor resistant.
Synthetic base layers are another strong choice, especially for high-output hiking. They are usually durable, relatively light, and designed to move moisture away from the skin. They can also be more affordable than high-quality merino.
A base layer should fit close enough to contact your skin without restricting movement or circulation. A very loose shirt cannot manage next-to-skin moisture as effectively, while an excessively tight garment may be uncomfortable under a backpack.
Note: Cotton can be comfortable in some hot, dry settings, but it is a poor choice for cold or wet hikes because it absorbs moisture, dries slowly, and provides little useful insulation when soaked. The National Park Service recommends wool, fleece, or synthetic clothing for cool and wet backcountry conditions.
Insulating Layers: Keeping Warm on the Trail
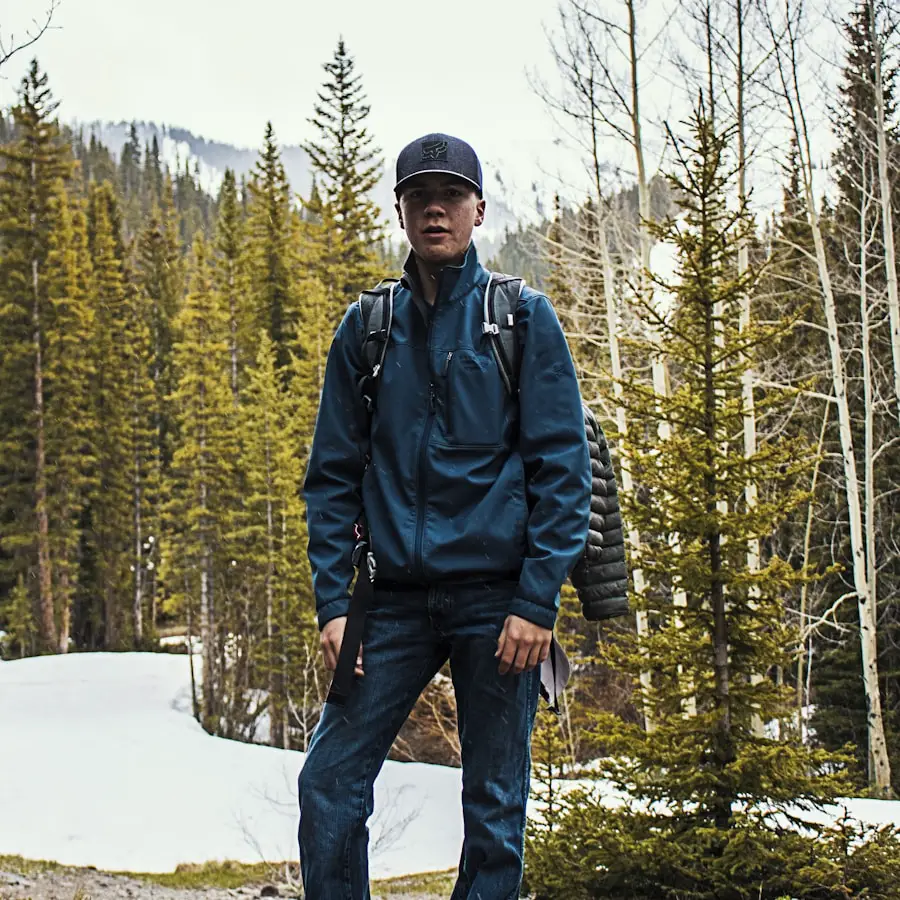
Your insulating layer traps warm air near your body. It becomes especially important in cool weather, on exposed terrain, during rest stops, and whenever your activity level drops.
Fleece is a versatile hiking mid layer because it is breathable, dries relatively quickly, and continues to provide useful warmth when damp. Lightweight fleece works well during active hiking, while thicker fleece is better when temperatures are lower or you expect long periods of inactivity.
Down insulation provides an excellent warmth-to-weight ratio and packs down very small. That makes it useful for cold, dry trips or as a lightweight layer you put on during breaks. Traditional down, however, loses much of its insulating efficiency when it becomes wet, so keep it protected from precipitation.
Synthetic insulation is often a better choice when damp conditions are likely. It generally retains more useful insulation when wet than down and can be easier to dry in the field, although it is usually bulkier for the same amount of warmth.
Choose insulation based on both the forecast and your activity. A layer that feels perfect while standing at the trailhead may be far too warm during a steep climb.
Pro Tip: Keep a warm layer near the top of your pack. Put it on as soon as you stop for lunch, photos, navigation, or a long break instead of waiting until you already feel cold.
Outer Shell: Protection from the Elements
The shell is your barrier against wind and precipitation. The right type depends on whether you expect prolonged rain, dry wind, snow, or mostly fair weather.
| Shell Type | Best Use | Main Trade-Off |
| Waterproof/breathable hardshell | Steady rain, wet snow, exposed wind, and unpredictable mountain weather | More protective but often less airy than a light wind shell |
| Wind shell | Dry, breezy conditions and high-output hiking | Usually handles only light or brief precipitation |
| Soft shell | Cool, mostly dry conditions where stretch and breathability matter | Most soft shells are not substitutes for a true rain shell in prolonged heavy rain |
A good rain shell should prevent outside water from reaching your insulating layers while still allowing moisture vapor to escape. Features such as pit zips or other vents can be especially useful because even a breathable waterproof membrane cannot eliminate all heat and sweat during hard climbing.
GORE-TEX is one example of waterproof/breathable technology. According to the GORE-TEX product FAQ, black-label GORE-TEX products are designed to be durably waterproof, windproof, and breathable. However, not every technology carrying the GORE name is waterproof; WINDSTOPPER products, for example, are intended to be windproof and water resistant rather than fully waterproof.
When comparing rain jackets, look beyond a single waterproof number. Laboratory ratings can use different test methods, and overall protection also depends on construction details such as seam sealing, hood design, cuffs, zippers, fabric condition, and fit.
Your shell should fit over your intended mid layers without feeling excessively baggy. Raise your arms, bend your elbows, and imitate using trekking poles before buying. Adjustable cuffs, hems, and hoods can help close gaps when wind or rain increases.
Lower-Body Layers, Socks, and Footwear
A complete hiking layering system includes more than your torso. Your legs and feet also need moisture management and weather protection.
- Underwear: choose a breathable synthetic or wool fabric that manages moisture.
- Hiking pants: lightweight synthetic pants work well for many three-season hikes because they dry faster than denim and allow good movement.
- Thermal bottoms: add wool or synthetic long underwear under hiking pants when cold conditions justify it.
- Rain pants: carry waterproof over-pants when sustained cold rain, wet vegetation, or snow is likely.
- Socks: wool or synthetic hiking socks help manage moisture better than ordinary cotton socks in cool or wet conditions.
- Footwear: match your shoes or boots to the terrain and expected moisture. Waterproof footwear can help in snow, mud, and prolonged wet conditions, but breathable non-waterproof footwear may be more comfortable in hot, dry weather.
Do not make every lower-body layer overly tight. Multiple snug garments can restrict movement, create pressure points, and make it harder to trap warm air between layers.
Accessories for Layering: Hats, Gloves, and Gaiters
Accessories let you fine-tune your clothing without changing your entire outfit. They are also easy to put on or remove as wind, sun, and temperature change.
A warm beanie or insulated hat is useful in cold conditions. In strong sun, a brimmed hat adds shade and complements sunscreen, sunglasses, and sun-protective clothing. The National Park Service includes a hat and protective clothing among its sun-protection recommendations.
For your hands, choose the amount of insulation according to the forecast. Lightweight gloves can cut wind and provide modest warmth, while insulated gloves or mittens are more appropriate for freezing conditions. Touchscreen-compatible fingertips are convenient when you frequently use a phone or GPS.
Gaiters cover the area around the top of your footwear and lower legs. Depending on their height and construction, they can help keep out stones, mud, brush, rain, and snow. They are particularly useful on snowy trails, muddy routes, loose scree, and paths through wet vegetation.
The Art of Adjusting Layers on the Go
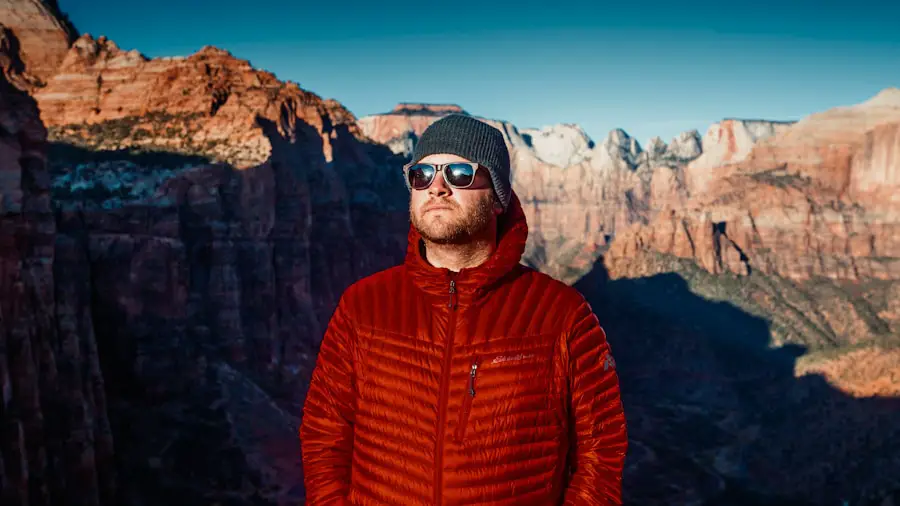
Owning good layers is only half the job. You also need to manage them while moving.
When you start a steep climb, your body can produce much more heat than it did at the trailhead. Waiting until your clothing is soaked with sweat makes it harder to stay warm later. In cold weather, the CDC advises removing one or more layers when you begin sweating heavily.
A simple adjustment routine is:
- Before a climb: open vents, remove a hat, or take off excess insulation.
- During steady hiking: stay warm enough to be comfortable without becoming drenched in sweat.
- Before a break: add an insulating layer while you are still warm.
- When wind or rain starts: put on your protective shell before inner layers become wet.
- After the weather improves: vent or remove the shell if you are overheating.
Clothing with full-length zippers, quarter zips, adjustable cuffs, and underarm vents makes these changes faster. Pack frequently used layers near the top of your backpack rather than underneath food, cookware, or other equipment.
Pro Tip: In cool weather, it is often better to begin hiking feeling slightly cool than to start bundled up and begin sweating within the first few minutes. Keep the extra layer accessible so you can add it quickly if your pace slows.
Layering for Different Weather Conditions
Cold Weather
Start with a wool or synthetic base layer, then add fleece, synthetic insulation, down, or a combination that matches the temperature. Carry a wind- and precipitation-resistant shell and protect exposed areas with a hat and gloves.
Keep spare dry clothing protected inside your pack. Once moisture enters your insulation, staying warm becomes more difficult.
Cold Rain
Cold rain combines moisture, wind, and falling temperatures, so prioritize keeping insulation dry. A synthetic base layer, breathable fleece or synthetic mid layer, waterproof shell, rain pants, and appropriate footwear form a practical system.
Avoid allowing sweat to build under your shell. Open pit zips, loosen cuffs, or slow your pace if necessary.
Snow and Wind
In snow, add insulation according to the temperature and activity level, then use a shell that blocks wind and falling or blowing snow. Waterproof gaiters can help prevent snow from entering the tops of your boots. Pack gloves, a warm hat, and dry backup layers.
Hot and Sunny Weather
In hot weather, the goal changes from trapping heat to managing sweat and reducing sun exposure. Choose lightweight, breathable clothing and avoid unnecessary insulation. A light long-sleeve hiking shirt can protect your arms from sun while remaining cooler than a heavy layer.
The National Weather Service recommends hydration, lightweight clothing, sunscreen, sunglasses, and a wide-brimmed hat for outdoor heat safety.
Changeable Mountain Weather
Mountain conditions can shift quickly with elevation, cloud cover, wind, and storms. Check the forecast before leaving, but do not treat the trailhead temperature as the only condition you will face. The National Park Service Hike Smart guidance recommends checking weather and park alerts and carrying appropriate extra equipment.
Warning: Hypothermia is a medical emergency. Shivering, exhaustion, confusion, fumbling hands, memory problems, slurred speech, and drowsiness can be warning signs. Get the person into shelter, remove wet clothing, begin gentle warming, and seek medical help. The CDC advises immediate medical attention when hypothermia is suspected.
Common Hiking Layering Mistakes
Wearing Too Much at the Start
Bundling up at the trailhead can feel comfortable for the first few minutes but leave you sweating once the climb begins. Dress for the work you are about to do, not just the temperature while standing still.
Waiting Too Long to Adjust
Do not wait until you are soaked with sweat to remove a layer or already shivering to add one. Small, early adjustments work better.
Using Cotton in Cold, Wet Conditions
Cotton absorbs water and dries slowly. On a cold or wet hike, that can leave damp fabric against your body. The National Park Service recommends wool, fleece, or synthetic materials instead of cotton for cool and wet backcountry conditions.
Assuming a Waterproof Jacket Solves Everything
A shell can stop rain from coming in while you still become wet from sweat inside. Use vents, control your pace, and choose breathable layers underneath.
Burying Important Layers in Your Backpack
A rain shell that takes ten minutes to find may not protect your insulation before a sudden shower soaks it. Keep rain protection, gloves, and your main insulating layer easy to reach.
Leaving Extra Clothing Behind
Warm, clear conditions at the trailhead do not guarantee the same conditions later. Bring enough insulation and weather protection for reasonably foreseeable changes along your route.
Tips for Layering Up Efficiently and Effectively
Use this checklist before you start hiking:
- Check the temperature, precipitation, wind, and severe-weather forecast.
- Consider whether the route gains significant elevation or crosses exposed terrain.
- Choose a wool or synthetic base layer suited to the expected temperature.
- Pack enough insulation for breaks and the coldest reasonable conditions.
- Carry a waterproof shell when meaningful rain or snow is possible.
- Add rain pants when prolonged wet conditions are likely.
- Choose socks, footwear, gloves, and headwear for the terrain and weather.
- Keep your shell and insulating layer near the top of your backpack.
- Bring a dry backup layer on cold or remote trips.
- Adjust clothing before you become excessively sweaty, wet, or cold.
Fit matters as much as fabric. Each layer should move comfortably over the layer beneath it without binding at your shoulders, hips, knees, or elbows. Before a demanding trip, test the full system together instead of discovering on the trail that your rain jacket is too small to fit over your insulation.
Versatile pieces can also reduce pack weight. A light fleece that works while hiking and under a shell, for example, may be more useful than a bulky jacket that only works in one narrow temperature range.
Finally, remember that layering is a system, not a rigid uniform. Your pace, metabolism, pack weight, elevation, humidity, wind, and weather all affect how much clothing you need. Learn how your body responds, make small adjustments early, and always carry enough protection for conditions becoming worse than they were when you started.
For broader hiking preparation, the National Park Service Ten Essentials provides a useful checklist covering extra clothing, navigation, illumination, food, water, sun protection, and other basic safety equipment.
Love travel? Join Our Facebook Community For More Tips.
Sources
- National Park Service — Ten Essentials — extra clothing, sun protection, and preparation for changing conditions.
- National Park Service — Hike Smart — weather checks, planning, and hiking preparedness.
- CDC — Preventing Hypothermia — hypothermia risks, warning signs, and emergency response.
- National Park Service — Plan for Your Safety — layering and avoiding cotton in cool or wet backcountry conditions.
- GORE-TEX — Frequently Asked Questions — waterproof, windproof, breathable, and water-resistant product distinctions.
- Woolmark — Merino Performance — merino wool moisture management, temperature regulation, and odor resistance.
Frequently Asked Questions
What is layering for hiking?
Layering for hiking means wearing several pieces of clothing that perform different jobs and can be added or removed as conditions change. A typical system uses a moisture-managing base layer, an insulating mid layer, and an outer shell for wind and precipitation.
What are the different layers for hiking?
The three main hiking layers are a base layer for moisture management, a mid layer for insulation, and an outer shell for protection from wind, rain, or snow. Depending on the weather, you may also use thermal bottoms, rain pants, gloves, a hat, gaiters, and additional insulation.
Why is layering important for hiking?
Layering lets you respond to changes in temperature, wind, precipitation, elevation, and physical effort. Removing clothing before you overheat helps limit sweat buildup, while adding insulation during stops or colder conditions helps reduce heat loss.
How should I choose the right layers for hiking?
Start with the forecast, route, elevation, activity level, and trip length. Choose a wool or synthetic base layer, insulation appropriate for the coldest conditions you expect, and a shell suited to the likely wind and precipitation. Make sure every piece fits comfortably with the others.
What are some tips for layering effectively while hiking?
Use breathable wool or synthetic fabrics, avoid cotton in cool and wet conditions, vent or remove layers before you become heavily sweaty, and add insulation before long stops. Keep rain gear and warm layers near the top of your pack so they are easy to reach.
Should I wear all three hiking layers at the same time?
No. The purpose of a layering system is flexibility. In mild weather you may hike in only a base layer, then add insulation during a break and put on your shell when wind or rain arrives. Carry the layers you may need even when you are not wearing them.
Is cotton okay for hiking?
Cotton may be comfortable in some warm, dry conditions, but it is a poor choice for cold or wet hikes because it absorbs water and dries slowly. Wool and suitable synthetic fabrics are generally safer and more useful when staying warm while wet is important.
