

Last Updated on July 30, 2026 by Mason Reed
A properly tensioned rainfly helps your tent shed rain, resist flapping, maintain ventilation, and use its pole structure as designed. The goal is firm, balanced tension—not pulling every line as hard as possible. Start with the tent fully assembled and staked, align the fly correctly, secure its corners and vestibules, and then adjust each guyline in small, even steps.
Quick Answer
Attach the rainfly to every designated buckle, clip, hook-and-loop tab, and grommet before tightening the guylines. Pull each line outward in the direction its guy point is meant to support, anchor it securely, and tighten gradually until the fly is smooth, stable, and separated from the inner tent without distorting the poles or seams.
Key Takeaways
- Follow your tent’s setup instructions because guy points, fly orientation, and tensioning systems differ by model.
- Make the fly firm and smooth, but stop before poles bend unnaturally, seams stretch, or doors become hard to operate.
- Use every structural guy point when wind or heavy rain is expected and match the anchor to the ground.
- Recheck the pitch after rain, temperature changes, shifting wind, or a stake moving in the soil.
- A tent is not safe lightning shelter. Move to a substantial building or enclosed hard-topped vehicle when thunder is heard, when one is available.
At a Glance
| Time Required | About 5–15 minutes after the tent body is pitched |
| Difficulty | Easy, with extra care required in strong wind or difficult ground |
| Tools Needed | Rainfly, compatible guylines and tensioners, suitable stakes or anchors, and an optional stake tool or repair kit |
| Cost | Usually no added cost when the tent includes its guylines, tensioners, and stakes |
Disclosure: As an Amazon Associate I earn from qualifying purchases. Some links on this page are affiliate links, at no extra cost to you.
Understanding the Importance of Tensioning a Rainfly
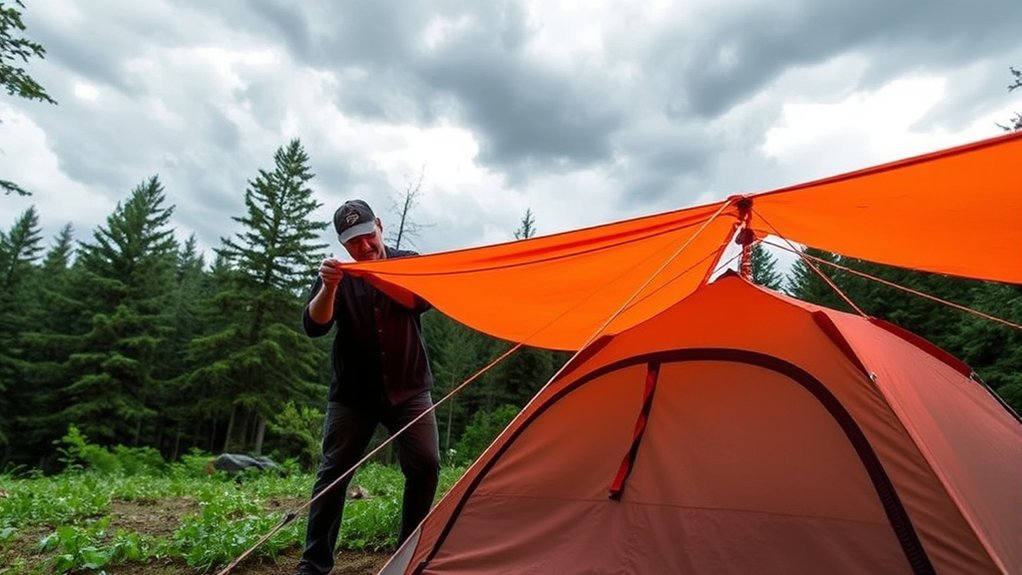
A rainfly works best when its panels are supported in the shape intended by the tent designer. Firm, balanced tension helps water run off instead of collecting in low spots. It also reduces repeated flapping, supports the pole structure, and helps maintain a gap between the fly and the inner tent on double-wall models.
That gap matters because contact between a wet fly and the inner tent can transfer moisture. Guying out the fly can also improve airflow, although ventilation cannot eliminate condensation completely. MSR advises using available vents and cross-flow ventilation in addition to properly guying out the fly. See its tent condensation guidance.
A correctly tensioned rainfly looks smooth and stable, but it does not pull the poles, clips, seams, or zippers out of their natural alignment.
Note: There is no single guyline angle, loop size, or stake length that is correct for every tent. Use your model’s designated attachment points and setup instructions first.
Essential Tools and Materials Needed
Most tents include the basic hardware needed to tension the rainfly. Before leaving home, complete a practice pitch and make sure the fly, stakes, guylines, adjusters, buckles, pole attachments, and repair supplies are present. REI also recommends practicing the setup and checking that all accessories are available before a trip in its tent-care guidance.
Tent Line Tensioners
Use the adjusters supplied with the tent whenever possible. They are sized for the original cord and designed to work with that shelter’s guy points. Common options include:
- Manufacturer-supplied line adjusters: Usually the fastest and simplest choice because they are already matched to the cord.
- Friction or cam-style adjusters: Allow quick changes without untying the line, provided the cord diameter is compatible.
- Adjustable knots: A taut-line hitch, trucker’s hitch, or another suitable adjustable knot can replace a lost tensioner when tied correctly.
Thread the line exactly as the tensioner manufacturer shows. If the cord slips under load, check for incorrect routing, worn cord, an incompatible diameter, ice, mud, or a damaged adjuster.
Durable Tent Stakes
Stake choice should match the surface rather than one fixed length:
| Ground | Useful Anchor | Setup Guidance |
|---|---|---|
| Firm soil | Strong Y-, V-, or nail-style stake | Seat it fully without bending it against buried rock. |
| Soft soil | Longer or wider-profile stake | Use more surface area and check frequently for movement. |
| Sand or snow | Broad sand/snow stake or buried deadman anchor | Bury the anchor across the direction of pull and compact the material over it. |
| Rocky ground | Compact strong stake, secure rock anchor, or approved natural anchor | Do not force a lightweight stake through rock or balance a line on an unstable stone. |
| Tent platform | Platform anchor, fishbone stake, compatible hook, or secured line beneath a board | Follow campground rules and avoid damaging the platform. |
Broad stakes can provide more holding power in sand and snow and may also be buried as deadman anchors. MSR describes this use for its Blizzard tent stakes.
Carry at least one spare stake and enough extra cord to replace a damaged line. Avoid hammering lightweight stakes with rocks, which can bend the stake, damage coatings, or chip the rock.
Adjustable Guy Lines
Use cord that fits your tensioners and is strong enough for the tent’s intended conditions. Reflective cord is easier to see after dark and may reduce trips, but it does not remove the hazard. Keep lines out of main walking paths and mark low lines when people will be moving around camp at night.
Inspect each line for cuts, melted areas, severe fuzzing, damaged knots, or slipping adjusters. Replace questionable cord before severe weather arrives.
Pro Tip: Before the trip, mark the normal position of each working tensioner with a small removable reference mark. A large change at camp can then reveal a slipping line or shifting stake.
Preparing the Tent and Rainfly Setup
The rainfly cannot compensate for a poorly placed or unevenly pitched tent. Prepare the full shelter before applying final tension:
- Choose a safer site. Avoid dead branches, unstable trees, drainage channels, depressions that may collect water, exposed ridges, and loose objects that could blow into the tent.
- Check the expected wind. Follow your tent manual’s orientation guidance. Where the design allows it, placing a lower or narrower end toward the prevailing wind can reduce the area exposed to gusts.
- Spread the tent body evenly. Stake the corners in their intended shape without stretching the floor unnaturally.
- Assemble the poles fully. Make sure every pole section is seated and every clip, sleeve, hub, or grommet is correctly connected.
- Locate the fly’s orientation marks. Check color-coded buckles, logos, door positions, seams, vestibules, pole pockets, and attachment tabs.
- Drape the fly over the tent. Center it before tightening any single corner.
Big Agnes recommends staking the tent corners, vestibules, and guylines to maintain space, ventilation, and structural support. Its general guidance is available in Tips: Tents.
Attaching the Rainfly to the Tent
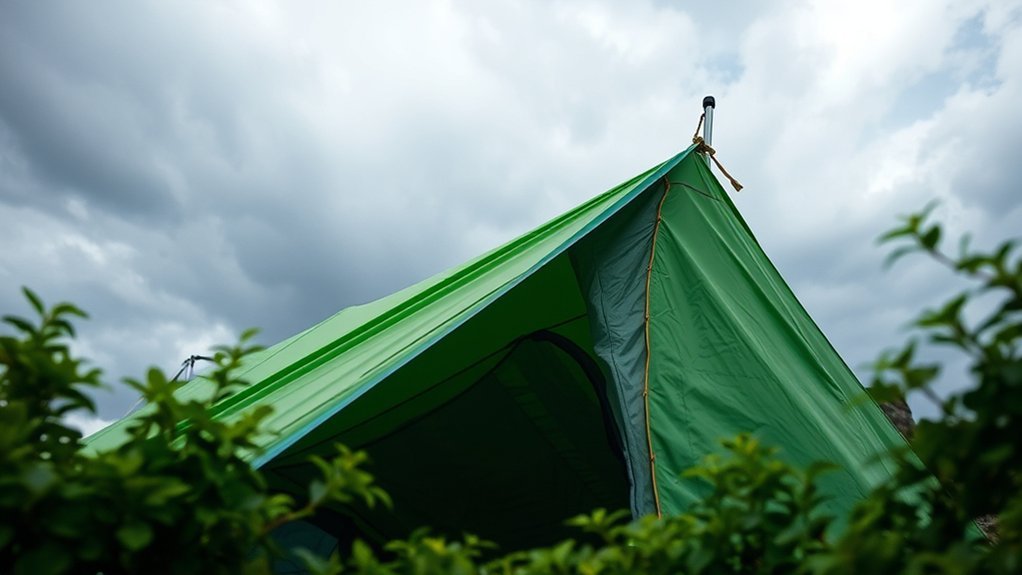
Attach the fly before applying full guyline tension. Work around the tent in a balanced order:
- Connect each fly corner to the matching buckle, hook, ring, or grommet.
- Fasten any hook-and-loop tabs beneath the fly around the poles. These attachments help transfer wind loads into the pole structure and should not be skipped when the tent includes them.
- Place any fly pole, ridge pole, brow pole, or awning support in its correct pocket or grommet.
- Stake the vestibules far enough out for the doors to operate and for rain to drain away from the entrance.
- Lightly tension opposite corners in pairs so the fly remains centered.
The fly should follow the tent’s designed coverage. Do not force a partial-coverage fly to reach the ground or pull a full-coverage fly so high that it exposes the inner tent. Check that doors, vents, and vestibules face the correct direction and remain usable.
Positioning the Tensioners Correctly
Place each tensioner where you can reach it from outside the tent without crawling under a tight line. It should move smoothly and retain its position after you release it.
Rather than forcing every guyline into the same angle, look at the panel or pole the guy point supports. Extend the line outward in a direction that braces that area and does not pull the attachment sideways. Guy points positioned over poles normally work with the pole structure, while lower points may pull a fly panel away from the inner tent.
Keep the line clear of sharp stones, bark edges, hot equipment, vehicle paths, and places where boots will repeatedly step on it. Avoid wrapping thin cord tightly around living trees where it may damage bark; use an appropriate protected anchor only where local rules allow it.
Creating Loops in the Guylines
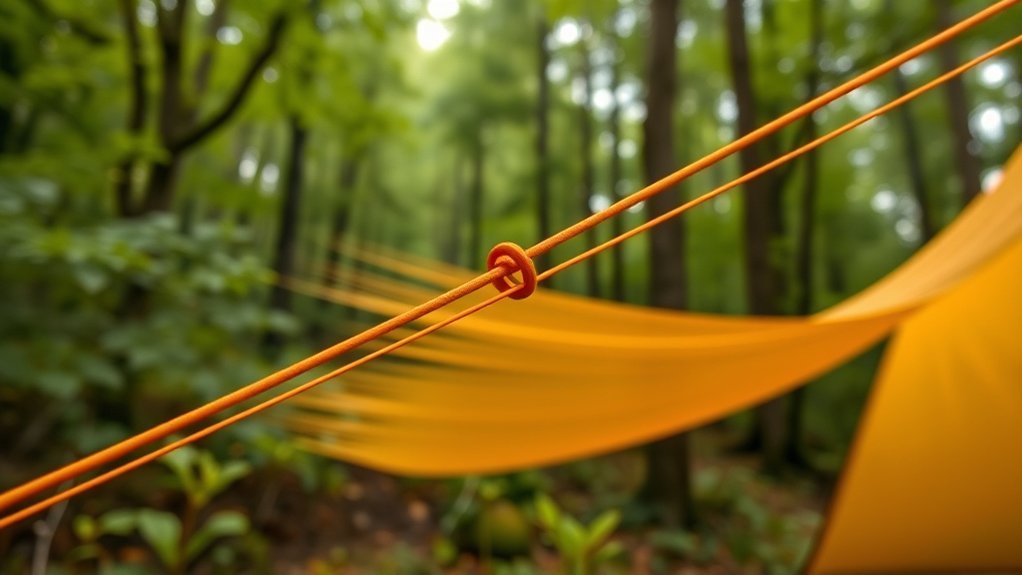
A loop can make a guyline easier to place over a stake or attach to an anchor. The correct size depends on the stake, tensioner, knot, and available adjustment range.
Loop Size Matters
Make the loop large enough to pass over the stake or anchor securely but small enough that it cannot easily fall off when the line briefly loses tension. There is no universal six- or eight-inch rule.
Before relying on the loop, check that:
- the knot is appropriate for the cord material;
- the loop cannot pull through the tensioner;
- the knot does not press against the rainfly fabric;
- enough free line remains for adjustment;
- the loop does not twist around the stake during tightening.
Proper Loop Placement
Place a fixed loop at the anchor end of the guyline when that arrangement matches the tensioner system. If the original setup uses a bare line through a tensioner, copy the manufacturer’s routing rather than adding a loop that may interfere with it.
Keep knots away from sharp stake edges. After tying a replacement loop, load it gradually by hand before exposing it to wind. A knot that appears secure without a load may slip once the cord becomes wet or repeatedly flexes.
Securing the Guylines to Stakes
Place the anchor far enough from the tent to create a useful outward pull, but not so far that the line crosses a walkway or reaches the end of its adjustment range.
- Align the stake with the load. The guyline should pull against the stake’s strongest holding direction rather than peeling it sideways.
- Seat the stake securely. Leave only enough of the head exposed to attach and remove the line.
- Use a suitable tilt when needed. Stakes are often tilted slightly away from the tent, but the goal is for the line’s pull to load the shaft and surrounding soil securely. Ground conditions take priority over a fixed angle.
- Test the anchor. Pull firmly by hand in the same direction the tent will load it. Reposition any stake that rotates, rises, or loosens.
- Back up weak anchors. Use a wider stake, a second anchor, or a buried deadman where appropriate.
Warning: Never use a loose rock, rotten branch, unstable railing, or other anchor that could move suddenly and strike the tent or another camper.
Gradually Pulling for Optimal Tension
Final tension should be applied in small, balanced adjustments. Tightening one line completely before the others can pull the fly off center and make later corrections difficult.
Correct Line Direction
Use the designated guy point to determine the direction of pull. The line should normally continue outward from the panel or pole it supports without creating a sharp sideways fold at the attachment.
Check the line from several viewpoints. A line that looks reasonable from the side may be pulling the fly sideways when viewed from above. Reposition the stake when the fabric bunches, the attachment twists, or the pole bends toward the line.
Incremental Tension Adjustment
- Take up obvious slack at each fly corner and vestibule.
- Adjust opposite corners in pairs to keep the fly centered.
- Lightly tension the main windward guy points.
- Continue around the tent, adding only enough tension to smooth each panel.
- Open and close every door and vestibule zipper.
- Check that poles remain in their natural shape and that clips, buckles, and seams are not strained.
- Make one final circuit and correct any remaining sag or imbalance.
A good pitch should feel firm when you press gently on a fly panel. It should return to shape without producing a hard, drum-like surface or pulling stitching visibly apart.
Warning: Overtensioning can deform poles, strain seams, damage coatings, make zippers difficult to use, and concentrate wind loads at one attachment. Tighter is not always safer.
Monitor Weather Changes
Rain, temperature changes, wind shifts, and softening soil can alter the pitch. Some fly fabrics relax more when wet than others, so inspect the shelter after rain begins rather than assuming the original setup is unchanged.
When weather deteriorates:
- tighten sagging panels in small steps;
- re-seat or replace stakes that have moved;
- use additional manufacturer-provided guy points;
- close or configure vents according to the tent instructions while preserving safe airflow;
- remove loose objects that could hit the tent;
- stop adjusting the shelter and seek safety when lightning, falling limbs, flooding, or dangerous wind makes remaining outside unsafe.
Regularly Checking and Adjusting Tension
Inspect the shelter after setup, before sleeping, after a major weather change, and whenever you hear new flapping. Work around the tent in the same order each time so no line is missed.
Look for:
- stakes rising, rotating, or cutting through softened soil;
- cord slipping through an adjuster;
- knots loosening or jamming;
- fly panels touching the inner tent;
- water beginning to collect in a low spot;
- doors or zippers becoming difficult to operate;
- poles bending asymmetrically;
- abrasion where lines or fabric touch rocks or branches.
Do not leave the fly loose in anticipation of later gusts. Maintain firm, balanced tension while allowing the shelter to flex as designed. If the expected weather exceeds the tent’s intended season rating or wind capability, relocate or use more appropriate shelter rather than relying on tighter lines.
Troubleshooting Common Rainfly Problems
| Problem | Likely Cause | Fix |
|---|---|---|
| Fly flaps loudly | Slack panel, unused guy point, poor anchor direction, or shifted wind | Recenter the fly, tighten gradually, and reposition or add the appropriate guyline. |
| Water pools on the fly | Sagging fabric, incorrect fly orientation, loose pole attachment, or uneven corners | Verify the fly orientation and pole connections, then balance the surrounding lines. |
| Fly touches the inner tent | Loose side panel, shifted corner, overloaded vestibule, or wet-fabric sag | Recenter the fly and tension the relevant side guy point without distorting the poles. |
| Stake keeps pulling out | Soft ground, undersized stake, poor alignment, or excessive load on one anchor | Use a broader or longer anchor, improve alignment, add a backup, or use a deadman. |
| Line tensioner slips | Incorrect threading, incompatible cord, wear, dirt, or ice | Rethread it, clean it, tie a secure backup knot, or replace the cord or adjuster. |
| Door zipper binds | Corner or vestibule is overtightened or pulled off center | Ease the nearby tension and rebalance opposite corners. |
| Pole bends toward one guyline | Line direction is wrong or tension is excessive | Release tension immediately, reposition the anchor, and inspect the pole connection. |
Best Practices for Storm Preparedness
Prepare before the weather arrives. Trying to find unused guylines, move stakes, or repair fabric after strong wind and rain begin is slower and less safe.
- Check the forecast and local hazards. Wind exposure, flooding, falling branches, snow loading, and lightning require different decisions.
- Use all structural attachments. Secure the fly to the poles and use the guy points identified for wind support.
- Place the strongest anchors on the windward side. Reinforce weak soil before it begins to loosen.
- Keep the shelter balanced. Do not place extreme tension on one side while leaving the opposite side slack.
- Secure loose equipment. Store bags, cookware, chairs, and other objects that could blow into the tent.
- Know when to leave. Tensioning cannot make an unsuitable campsite, damaged shelter, or three-season tent safe in every storm.
Warning: A tent offers no protection from lightning. When you hear thunder, move to a substantial building or enclosed hard-topped vehicle as soon as one is available. Remain in safe shelter for at least 30 minutes after the last thunder, following National Weather Service guidance.
Metal does not attract lightning, but it conducts electricity. The key danger is that a fabric tent is not an electrically protective shelter—not that its poles draw lightning toward it. Do not remain outside merely to save or retension equipment when thunder is present.
Repairing a Torn Rainfly or Broken Guyline
Put personal safety before the shelter. If dangerous wind, lightning, flooding, or falling debris is present, move to safer shelter rather than attempting an exposed repair.
Temporary Rainfly Repair
- Move the damaged area out of direct tension if possible.
- Dry and clean the fabric as thoroughly as conditions allow.
- Flatten the tear without stretching it.
- Apply compatible repair tape over the damage, extending beyond every edge of the tear.
- Apply a second patch to the opposite side when the product instructions allow it.
- Restore only moderate tension and monitor the repair.
Big Agnes recommends cleaning the damaged area and applying a suitable patch to dry fabric for field repairs. See its DIY tent-repair guidance. Complete any seam sealing, sewing, or manufacturer-approved permanent repair after the shelter is dry.
Broken Guyline or Tensioner
Replace a broken line with compatible cord and tie it only to the designated guy point. If the tensioner breaks, use an adjustable knot or a secure fixed knot with an adjustment system at the anchor. Avoid attaching cord to mesh, zippers, unsupported fabric, or a random pole section.
Frequently Asked Questions
What materials are best for guylines and stakes?
Use cord that matches the diameter and grip requirements of the tent’s tensioners. Reflective cord improves nighttime visibility. Aluminum Y- or V-profile stakes work well in many soils, while wider stakes or buried anchors are better for sand and snow. The ground and tent design matter more than choosing one universal material.
How tight should the rainfly be against the tent?
The fly should be firm and smooth, with no major sagging or water-catching pockets. On a double-wall tent, maintain the designed gap between the fly and inner tent. Stop tightening if poles deform, seams stretch, attachment points twist, or doors become difficult to operate.
Can I tension a rainfly without ordinary stakes?
Yes. Depending on the campsite and local rules, you may use platform anchors, buried deadman anchors, secure rocks, logs, or protected fixed objects. Test every anchor in the actual direction of pull and never rely on loose rocks, rotten wood, or fragile vegetation.
What weather conditions require extra tension checks?
Recheck the fly before strong or gusty wind, after rain begins, after a large temperature change, and whenever the wind changes direction. Wet fabric may sag, soil may soften, and repeatedly loaded stakes may move. Extra tension should remain balanced and must not distort the shelter.
Should I use every guyline on my tent?
Use all guy points identified by the manufacturer when significant wind or heavy rain is expected. In mild weather, some supplemental points may be optional, but installing them before conditions worsen is easier and safer than adding them during a storm.
How do I fix a torn rainfly during a storm?
First decide whether it is safe to remain outside. When conditions allow, remove tension from the damaged area, clean and dry the fabric, and apply compatible repair tape beyond the edges of the tear. Use moderate tension afterward and complete a permanent repair once the fly is fully dry.
Conclusion
Proper rainfly tension comes from balance, not brute force. Align the fly with the tent, connect every structural attachment, use anchors suited to the ground, and tighten the corners, vestibules, and guylines in small steps. The finished fly should be smooth, stable, functional, and free from obvious stress.
Check the pitch again after rain, wind shifts, or temperature changes. Correct small problems before they become pooled water, loose stakes, damaged poles, or torn fabric. Most importantly, recognize the limits of the shelter: no amount of guyline tension makes a tent safe from lightning, flooding, falling trees, or weather beyond its intended design.
Sources
- REI Co-op: How to Set Up/Pitch a Tent — guy points, guylines, wind preparation, and general tent setup.
- Big Agnes: Tips for Tents — corner, vestibule, and guyline staking for structure and ventilation.
- MSR Frequently Asked Questions — rainfly ventilation and condensation guidance.
- MSR Blizzard Tent Stakes — broad stakes and deadman anchoring in sand or snow.
- Big Agnes: DIY Tent Repairs — cleaning and patching damaged tent fabric.
- National Weather Service: Lightning Safety Tips — safe shelter and the 30-minute lightning rule.

