
Last Updated on July 29, 2026 by Mason Reed
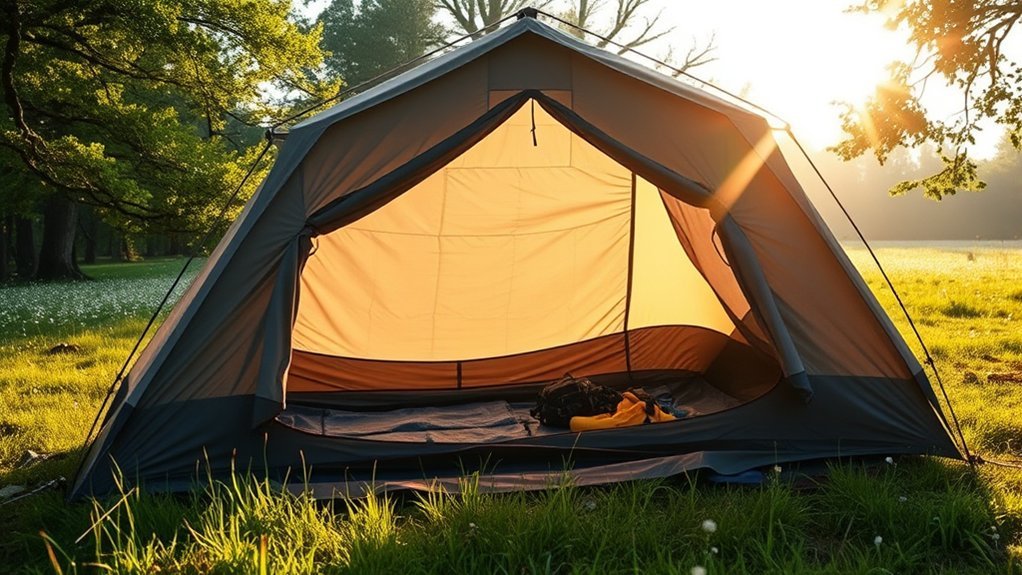
Tent condensation can leave your rainfly dripping even when the tent is not leaking. It forms when moisture from the air, your breath, wet ground, or damp gear reaches a cold tent surface. You cannot eliminate condensation in every condition, but smart campsite selection, a taut pitch, full ventilation, and dry gear can greatly reduce it.
Quick Answer
To reduce tent condensation, pitch on dry, well-drained ground, keep wet gear outside the sleeping area, tension the rainfly, and open at least two vents for cross-flow. Use safe tree cover when available, avoid damp low spots, and wipe or air-dry any moisture before packing the tent.
Key Takeaways
- Condensation forms when a tent surface cools to the dew point of the moist air around it.
- The main moisture sources are humid weather, people inside the tent, wet ground, and damp gear.
- Ventilation is the most important factor you can control, even in cool weather.
- Choose dry, gently raised ground, but avoid ridges, isolated trees, dead branches, and drainage channels.
- No tent is condensation-proof, so carry a small absorbent towel and dry the shelter before storage.
At a Glance
| Time Required | 5–10 minutes during setup, plus drying time as needed |
| Difficulty | Easy |
| Tools Needed | Tent stakes, guylines, small microfiber towel, and a dry bag for wet gear |
| Cost | Usually $0; about $5–$20 if you need a towel, extra stakes, or a dry bag |
Disclosure: As an Amazon Associate I earn from qualifying purchases. Some links on this page are affiliate links, at no extra cost to you.
Causes of Tent Condensation

Condensation forms when water vapor changes into liquid on a cool surface. The National Weather Service explains that the dew point is the temperature at which air becomes saturated. When the rainfly or tent wall cools to that temperature, droplets can form on it.
Moisture inside and around a tent usually comes from three sources:
- Weather and campsite conditions: Humid air, rain, fog, saturated soil, and cold overnight temperatures raise the risk.
- People and pets: Breathing and normal skin evaporation add warm moisture to the enclosed air.
- Wet items: Damp clothing, boots, towels, packs, and rain gear release water vapor as they dry.
The temperature difference matters as much as humidity. A rainfly can become cold while the air inside remains warm and moist. The vapor then condenses on the underside of the fly. In a double-wall tent, the mesh or fabric inner wall helps keep sleepers away from those droplets, but it does not stop condensation from forming.
No tent can eliminate condensation in every condition. The practical goal is to limit moisture, increase airflow, and keep droplets away from sleeping gear.
Is It Condensation or a Tent Leak?
Condensation and leaks can both make a tent feel wet, but their patterns are often different.
- Condensation: Fine droplets or an even film appear over a broad area, especially on the underside of the rainfly or roof. It may occur without rain and is often worse near sleepers.
- Seam or coating leak: Water repeatedly enters through the same seam, worn patch, corner, zipper, or floor area during rain.
- Rain entry: Water appears near an open vent or door after wind-driven rain.
- Pooled footprint water: The floor becomes wet where a groundsheet extends beyond the tent and collects runoff.
- Contact transfer: A sleeping bag or gear item touches a wet wall and absorbs surface moisture.
To test a suspected leak, dry the tent and set it up at home. Use a gentle hose spray in small sections while another person checks the inside. Do not use a pressure washer. Mark the exact entry point and follow the tent manufacturer’s instructions for seam sealing or coating repair.
Note: A wet rainfly alone does not mean the tent has failed. Broad, evenly spread droplets are usually condensation; water entering one repeatable spot during rain is more likely a leak.
Pitch Your Tent in the Shade of Safe Tree Cover
Safe tree cover can create a warmer, more protected microclimate than an open field. It can reduce how quickly the rainfly loses heat to the night sky, and some dew may form on foliage instead of directly on the tent. This is one of the campsite strategies recommended in REI’s tent-condensation guidance.
Tree cover does not guarantee lower humidity, however. Soil beneath dense vegetation can still be damp, and dripping foliage may wet the rainfly after rain. Check the ground as well as the canopy before pitching.
- Inspect overhead: Do not camp beneath dead, cracked, or hanging branches.
- Avoid damaged trees: Leaning, burned, diseased, or unstable trees can fall without warning.
- Check the soil: Choose firm, dry ground rather than mud, mossy depressions, or saturated roots.
- Follow site rules: Use an established tent pad when the campground or land manager requires it.
Warning: A tent does not protect you from lightning. Never shelter beneath a tall, isolated tree during a thunderstorm. Move to a substantial building or enclosed metal-topped vehicle when one is available, and follow current weather and campground guidance.
Don’t Camp Right Next to Water
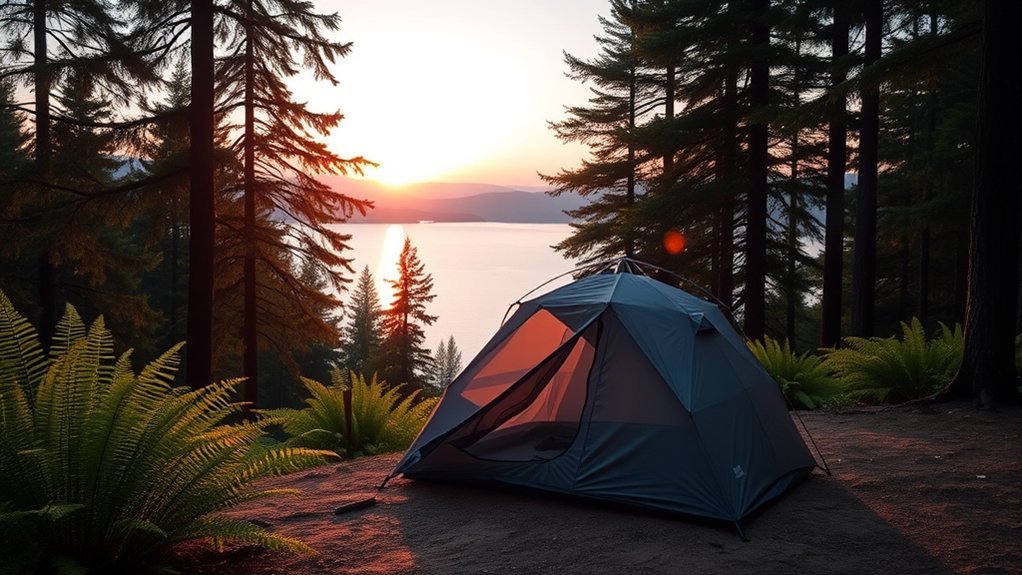
Lakes, rivers, wetlands, and ocean shorelines can create cool, moisture-rich conditions. Fog and cold air may also collect near the water overnight. Moving to a legal, established site farther back can reduce the amount of moisture surrounding your tent.
The National Park Service’s Leave No Trace guidance recommends camping at least 200 feet from lakes and streams to protect riparian areas. That distance can also help with condensation in some locations, but environmental protection is the main reason for the guideline.
Always follow posted rules and use designated campsites. Some developed campgrounds legally place tent pads closer to water, while some sensitive areas require a greater setback or prohibit camping entirely.
Pro Tip: Before pitching, touch the soil and nearby vegetation. A site that feels damp at sunset will usually release more moisture as temperatures fall.
Camp on Gently Raised, Well-Drained Ground
Choose a dry spot that sits slightly above nearby depressions. Cold, damp air and runoff often settle in low areas, while gently raised ground usually drains better. A small rise can therefore reduce both ground moisture and the risk of water pooling beneath the tent.
Higher does not mean highest. Do not pitch on a summit, exposed ridge, flood-prone bank, dry creek bed, or isolated high point. Those locations can increase wind, lightning, runoff, and erosion hazards. The National Park Service recommends checking campsites for flooding, lightning, wind, and dead-tree hazards before setup.
- Look for drainage: Avoid hollows, channels, and compacted areas where water can pool.
- Use durable surfaces: Prefer an established tent pad, bare soil, gravel, dry grass, or another permitted durable surface.
- Keep the floor level: A steep slope may drain well but can make sleeping uncomfortable and cause occupants to slide into a tent wall.
- Check the forecast: A safe site in calm weather may become unsafe during thunderstorms or heavy rain.
Don’t Dry Wet Gear Inside the Tent

Wet gear releases water vapor as it dries. Keeping soaked jackets, boots, towels, or packs in the sleeping area can quickly raise internal moisture and add to condensation on the fly and walls.
Wet Gear Increases Internal Humidity
Dry damp items outdoors when weather permits. Hang them on a line, spread them beneath a tarp, or place them where moving air can reach both sides. Keep them away from the tent fabric so runoff does not flow beneath the floor.
- Change into dry sleeping clothes before entering the tent.
- Wring out wet items away from camp and water sources where permitted.
- Keep wet boots and rain gear in a ventilated vestibule rather than beside a sleeping bag.
- Dry a wet dog as thoroughly as possible before allowing it into the shelter.
Store Wet Gear to Preserve Tent Dryness
If wet equipment must remain inside, isolate it in a waterproof dry bag or tightly closed plastic bag. Keep the bag away from sleeping gear and open it outdoors when conditions improve. Do not seal wet gear for long-term storage because trapped moisture can promote odors, mildew, and coating damage.
Warning: Never use a fuel-burning camp stove, charcoal grill, outdoor heater, or lantern to dry gear or warm a standard tent. Carbon monoxide can build up without warning, and open flames can ignite tent fabric. Follow the equipment manufacturer’s safety instructions and use outdoor appliances outdoors.
Give Your Tent Plenty of Room to Breathe
A double-wall tent needs space between its inner body and rainfly. If the fly sags against the inner wall, moisture can transfer through contact and airflow will be restricted.
- Stake the corners securely: Build the correct shape before tightening individual guylines.
- Tension the rainfly: Pull it away from the inner tent without overstressing the fabric or poles.
- Use all required guylines: Extra guy points improve the wall angle and help maintain airflow during rain.
- Keep gear off the walls: Packs and sleeping bags can push the inner tent into a wet rainfly.
- Clear the vents: Do not block low vents, mesh panels, or fly vents with equipment.
- Retension after rain: Some fabrics stretch or sag when wet.
A larger tent can provide more air volume and wall clearance for several sleepers, but size alone does not solve condensation. Vent placement, fly spacing, occupancy, weather, and setup quality still matter.
Ventilation Is Your Best Friend
Ventilation is the most effective condensation control available after the campsite has been chosen. Cooler outside air must enter while warm, moist air escapes. MSR recommends opening at least two vents when possible to create cross-flow and guying out the rainfly to increase space around the tent body.
Open Vents and Windows
Open high and low vents before moisture becomes visible. Warm, humid air gathers near the roof, so top vents and partially opened upper door zippers are especially useful. Low openings admit replacement air.
- Open opposing fly vents for cross-ventilation.
- Uncover mesh panels and inner windows.
- Roll back dry-weather fly panels when rain is not expected.
- Use the top section of a double-slider door zipper as a protected exhaust vent.
- Leave as much ventilation open as conditions safely allow during rain.
Do not seal a tent tightly just because the night is cold. A fully closed shelter may feel warmer at first, but trapped vapor can wet the fly, walls, clothing, and insulation. Adjust your sleeping system for warmth rather than relying on an airtight tent.
Optimize Tent Orientation
In a gentle breeze and dry weather, aim the largest protected vent or mesh opening toward the airflow. This encourages fresh air to move through the shelter.
During strong wind or wind-driven rain, follow the tent manufacturer’s pitching instructions. You may need to place the strongest end into the wind and turn the main door away from incoming rain. Keep leeward or protected vents open rather than exposing a large doorway.
Use the Rainfly and Vestibule Correctly
A rainfly keeps precipitation out, but it must also allow moist air to escape. Prop open built-in fly vents, tension vestibule panels, and keep the gap along the lower edge clear unless the manufacturer directs otherwise.
- Open both vestibules in calm, dry weather.
- During rain, keep the protected top of a vestibule door partly open when the design allows it.
- Store gear so that it does not block vent openings.
- Check that runoff from an open vestibule cannot reach the tent floor.
- Close only the openings that are admitting rain or blowing snow.
Note: In fog, steady rain, or very humid air, outside air may already hold substantial moisture. Ventilation still helps remove moisture produced by occupants, but some condensation may remain.
Step-by-Step Tent Condensation Checklist
- Choose a legal, durable site: Look for dry soil, safe overhead conditions, and gentle drainage.
- Avoid damp depressions: Stay out of hollows, drainage channels, and saturated ground.
- Pitch the tent fully: Use the correct poles, clips, stakes, and guylines instead of leaving the shelter partly tensioned.
- Separate the rainfly: Tension it so that it does not rest on the inner tent.
- Open two or more vents: Create low-to-high or side-to-side airflow.
- Manage wet equipment: Dry it outside or isolate it in a closed waterproof bag.
- Keep bedding off the walls: Reposition pads, bags, and packs before sleeping.
- Wipe heavy moisture: Use an absorbent towel if droplets begin to drip.
- Dry before packing: Air the tent and fly until dry whenever conditions permit.
Daily Gear Management and Use of Microfiber Towels
Check the tent each morning rather than stuffing it immediately. Open doors and vestibules, shake loose droplets from the rainfly, and place the shelter where sun or moving air can reach it. Drying time depends on humidity, wind, temperature, sunlight, and fabric type, so continue until the material is dry rather than relying on a fixed number of minutes.
| Action | Benefit | When to Do It |
|---|---|---|
| Open doors and vestibules | Releases trapped humid air | Each morning and during dry breaks |
| Wipe heavy droplets | Prevents dripping onto bedding and gear | Whenever water begins to collect or drip |
| Air-dry the tent and fly | Reduces mildew, odor, and coating damage | Before packing when possible and immediately after the trip |
| Retension the rainfly | Restores airflow and prevents wall contact | After rain, wind, or fabric sag |
A small microfiber towel works well because it absorbs droplets and dries faster than a thick cotton towel. Wring it out away from the tent, then hang it outside or store it with other wet gear.
If the tent must be packed wet, unpack and dry it as soon as possible. REI’s tent-care guidance recommends fully air-drying a tent before long-term storage because prolonged dampness can promote mildew and damage waterproof coatings.
Choose a Tent Design That Manages Moisture
No shape or material is condensation-proof, but some features make moisture easier to manage.
- Double-wall tents: A separate inner tent and rainfly help keep occupants away from condensation on the fly. They are often a practical choice for humid three-season camping.
- Single-wall tents: These shelters can be lighter and simpler, but interior droplets are closer to occupants. They require careful ventilation and enough space to keep bedding off the walls.
- High and low vents: Openings at different heights support natural air exchange.
- Opposing doors or vestibules: Two protected openings can improve cross-flow.
- Mesh inner panels: Mesh allows vapor to move toward the fly while reducing direct contact with droplets.
- Useful guy points: A well-supported fly maintains airspace in rain and wind.
Choose capacity with the real number of sleepers and the amount of gear in mind. A two-person tent occupied by two adults, wet packs, and a dog will usually collect more moisture than the same shelter used by one dry camper.
Troubleshooting Condensation in Different Weather
Warm and Humid Conditions
- Open every protected vent and mesh panel.
- Remove or roll back the rainfly when the forecast and tent design allow it.
- Keep wet clothing and pets outside the sleeping area until dry.
- Choose moving air rather than a sheltered, stagnant depression.
Cold, Clear Nights
- Expect the rainfly to cool quickly as heat radiates toward the open sky.
- Use safe tree cover when available.
- Keep high vents open even when the air feels cold.
- Use an adequately rated sleeping bag and pad instead of sealing every vent.
Steady Rain
- Keep the fly fully tensioned and separated from the inner wall.
- Open protected vents and the upper portion of sheltered doors.
- Move wet gear to a vestibule or waterproof bag.
- Wipe large droplets before they begin dripping onto bedding.
Snow and Winter Camping
- Keep roof and fly vents clear of blowing or accumulated snow.
- Brush snow away from the lower ventilation gap.
- Avoid breathing into a sleeping bag because moisture can collect in the insulation.
- Do not use an outdoor fuel-burning stove or heater inside a standard tent.
Frequently Asked Questions
What type of tent is best for reducing condensation?
A well-ventilated double-wall tent is often the easiest option for humid three-season conditions. Look for opposing vents, mesh inner panels, a rainfly that can be guyed away from the body, and enough interior room to keep sleeping bags off the walls. No tent design can eliminate condensation completely.
How does humidity affect tent condensation?
Moist air raises the risk, but there is no universal relative-humidity cutoff. Condensation develops when the tent fabric cools to the air’s dew point. Rain, fog, wet soil, occupants, and falling nighttime temperatures can all bring the shelter closer to that condition.
Can sleeping bags contribute to tent condensation?
A dry sleeping bag is not usually a major moisture source. The camper inside it produces moisture through breathing and skin evaporation. A damp bag can add moisture, and any bag can absorb water when it touches a wet tent wall. Keep the bag dry and leave space around it.
Is it helpful to use a tent footprint?
A footprint protects the tent floor from abrasion and helps keep it clean and dry on damp ground. It may reduce contact with surface moisture, but it will not stop condensation caused by humid air, breath, or wet gear. The footprint must remain slightly smaller than the tent floor so it does not collect rainwater.
What materials are best for tent ventilation?
Mesh and breathable inner fabrics allow moisture to move away from occupants, but the overall design matters more than one fabric name. The waterproof rainfly also needs protected vents, adequate spacing, and a taut pitch so vapor can escape without letting rain enter.
Can tent condensation be eliminated completely?
No. Fog, rain, cold surfaces, saturated soil, and occupant moisture can produce condensation even in a correctly pitched premium tent. Good ventilation, dry gear, suitable campsite selection, and morning drying reduce the amount and keep it from disrupting sleep.
How can I tell condensation from a tent leak?
Condensation usually appears as widespread fine droplets on the roof or rainfly and may form without rain. A leak tends to appear repeatedly at one seam, zipper, damaged area, or floor location during rainfall. Dry the tent and test small sections gently with a hose if the source remains unclear.
Should I close every vent when it is cold or raining?
Close openings that admit rain, snow, or dangerous wind, but keep protected vents open whenever possible. Fully sealing the shelter traps moisture from breathing and wet equipment. Use your sleeping bag, pad, and clothing for warmth instead of relying on an airtight tent.
Sources
- National Weather Service: Dew Point vs. Humidity — explains dew point, saturation, and condensation.
- REI Expert Advice: How to Prevent Condensation in a Tent — supports campsite selection, moisture control, fly tension, and ventilation.
- MSR/Cascade Designs: How to Prevent or Reduce Tent Condensation — supports moisture-source, cross-ventilation, and rainfly guidance.
- National Park Service: Leave No Trace — supports durable-surface and water-setback guidance.
- National Park Service: Finding and Setting Up a Campsite — supports campsite hazard and overhead-branch checks.
- U.S. Consumer Product Safety Commission: Portable Heaters and Camping Equipment — supports carbon-monoxide precautions for enclosed tents.
Conclusion
Reducing tent condensation starts before bedtime. Choose dry, safe ground; pitch the rainfly taut; open protected vents; and keep wet equipment away from the sleeping area. Check for moisture in the morning, wipe heavy droplets, and dry the tent before storage. Some condensation is normal in cold, rainy, or humid weather, but these steps keep it manageable and help protect your bedding and shelter.
