
Last Updated on July 30, 2026 by Mason Reed
A torn rainfly can turn a small storm into a wet night, but most clean tears and punctures can be repaired at home or in camp. The key is to identify the fly’s coating, prepare the surface carefully, and use a patch or sealant made for that material. A rushed repair with the wrong adhesive may peel, leak, or make professional sewing harder later.
Quick Answer
To repair a torn tent rainfly, clean and dry the damaged area, choose a patch that matches the fabric coating, cut it to overlap the tear by at least 1/2 inch on every side, round the corners, and press it flat. Standard Tenacious Tape reaches full strength after 24 hours; silicone-coated flies need silicone-compatible patches or sealant.
Key Takeaways
- Check whether the rainfly is polyurethane-coated or silicone-treated before choosing a patch.
- Clean with isopropyl alcohol, let the area dry, trim loose threads, and work on a flat surface.
- Use a rounded patch with at least 1/2 inch of overlap; add a second patch inside for a large or high-tension tear.
- Use duct tape only as a field emergency fix, then remove it promptly and make a compatible permanent repair.
- Dry the fly fully before storage and inspect the patch, seams, and waterproof coating before each trip.
At a Glance
| Time Required | 10–20 minutes of work, plus the product’s cure or set time |
| Difficulty | Easy for a clean panel tear; moderate for seams, edges, or attachment points |
| Tools Needed | Compatible repair tape or patch, isopropyl alcohol, clean cloth, scissors, and optional seam sealer |
| Cost | About $7–$25 for common DIY patching materials; professional repair varies |
Disclosure: As an Amazon Associate I earn from qualifying purchases. Some links on this page are affiliate links, at no extra cost to you.
Why a Functional Rainfly Matters

A rainfly is the tent’s main outer weather barrier. Ripstop nylon and polyester flies are commonly treated with polyurethane, silicone, or a combination of coatings to resist water. The fly also creates space between the inner tent and the weather, which helps ventilation work and reduces the chance that condensation will drip directly onto the sleeping area.
Even a small puncture can leak when wind-driven rain presses water against the fabric. Repairing damage early also limits fraying and prevents a short slit from growing under guyline or pole tension. A sound patch can extend the life of the fly, but it cannot restore fabric that has become brittle from ultraviolet exposure or a coating that is peeling, sticky, or badly degraded.
Inspect the Tear and Identify the Rainfly Fabric
Lay the dry rainfly on a flat, well-lit surface. Check both sides of the damaged area and inspect nearby seams, pole contact points, guyout tabs, and clips. Then identify the kind of damage and the fabric treatment before choosing a repair.
- Small puncture or clean slit: Usually suitable for a peel-and-stick gear patch.
- Large panel tear: May need patches on both sides, especially where the fabric is under tension.
- Frayed or missing fabric: Trim only loose strands; do not pull threads that are still woven into the panel.
- Seam or attachment-point damage: Treat this as a structural repair because stitching, seam tape, webbing, or reinforcement may also be damaged.
- Coating failure: Flaking, tackiness, widespread pinholes, or a strong sour odor may indicate that the waterproof coating is failing rather than a simple tear.
Warning: Do not assume every patch sticks to every rainfly. Standard repair tape works on many nylon and polyester fabrics, but silicone-treated nylon or polyester needs a silicone-based patch or sealant. Check the tent label, manual, or manufacturer before applying adhesive.
Choose a Compatible Repair Material
| Rainfly or Damage Type | Best Starting Option |
|---|---|
| Standard nylon or polyester with a polyurethane coating | Tenacious Tape or another gear-specific patch approved for nylon or polyester |
| Silnylon or silpoly | A silicone-adhesive repair patch or silicone-compatible sealant |
| Tiny pinhole or damaged seam | A seam sealer that matches the coating; use silicone sealant only on silicone-treated fabric |
| Mesh damage on the tent body | A mesh patch, not a rainfly patch; most rainflies do not contain mesh panels |
| Dyneema Composite Fabric or another specialty laminate | The tent manufacturer’s specified repair tape or patch |
Essential Tools for Rainfly Repair

A compact repair kit lets you stabilize damage in the field and make a cleaner repair at home. Pack products in a small sealed bag so the adhesive stays clean and the scissors cannot damage the rainfly.
| Tool | Purpose |
|---|---|
| Compatible repair tape or patch | Creates the main waterproof repair on a clean fabric panel |
| Clean cloth or alcohol wipes | Removes dirt and oils that weaken adhesion |
| Isopropyl alcohol | Prepares the small repair area when allowed by the patch maker |
| Scissors | Cuts a patch with at least 1/2 inch of overlap and rounded corners |
| Needle and weather-resistant thread | Stabilizes a large tear only when patching alone cannot hold the edges together |
| Matching seam sealer | Seals needle holes, damaged seams, or tiny pinholes when compatible with the coating |
Clean and Dry the Damaged Area
Adhesive bonds best to clean, dry fabric. Support the rainfly on a smooth table, cutting board, or other firm surface. Gently align the torn edges without stretching the panel.
Use Isopropyl Alcohol for Patch Preparation
GEAR AID’s repair-tape instructions call for cleaning the repair area with isopropyl alcohol, trimming loose threads, and allowing the surface to dry. Use a small amount on a clean cloth rather than soaking the fabric. Wipe beyond the tear so the full patch perimeter lands on a prepared surface.
- Work in a ventilated area away from flames.
- Test first in an inconspicuous spot if the manufacturer warns against solvents.
- Remove dirt, sunscreen, body oils, sap residue, and old loose adhesive.
- Let the fabric dry completely before placing the patch.
Use Soap and Water Only as an Alternative
If alcohol is unavailable or the tent maker advises against it, gently spot-clean with cool water and a mild, fragrance-free cleaner made for outdoor gear. Do not wash with soap after alcohol; choose one preparation method. Rinse away all residue and avoid bleach, stain remover, strong detergent, or aggressive scrubbing because these can damage coatings and water-repellent finishes.
Dry Thoroughly Before Repair
Air-dry the rainfly in a shaded, well-ventilated place. Moisture trapped under a patch can weaken the bond, and storing a damp fly encourages mildew and coating damage. Use the drying period to inspect nearby fabric for pinholes, peeling seam tape, or UV-weakened areas.
Pro Tip: Mark the center of a tiny puncture with a removable piece of masking tape on the opposite side. This makes the hole easy to locate after you clean and flatten the fly.
Use Duct Tape or Medical Tape Only for Emergency Repairs
Gear-specific repair tape is the better field option. If none is available, duct tape can temporarily bridge a small tear long enough to protect the shelter during the trip. A wide medical or wound dressing may work for a short, dry emergency, but it may not remain waterproof or secure in prolonged rain.
Quick Field Application
- Dry the area as well as conditions allow and brush away grit.
- Bring the torn edges together without overlapping or stretching them.
- Round the corners of the temporary tape and extend it beyond the tear.
- Press from the center outward to remove wrinkles and trapped air.
- Reduce tension on that part of the fly when possible, then monitor the repair during wind or rain.
Temporary vs. Permanent Fixes
Duct tape is a field expedient, not the preferred at-home repair. Big Agnes warns that duct-tape residue can make later stitching difficult. Replace the temporary patch with a coating-compatible gear patch when you return home, unless the tent manufacturer gives different instructions.
Clean Removal Tips
Remove temporary tape slowly while supporting the rainfly fabric with your other hand. Do not yank against a thin or UV-weakened panel. If adhesive remains, consult the tent maker before using a solvent; an aggressive cleaner can damage the waterproof coating. Do not add a permanent patch over greasy residue.
Note: Some gear-repair tapes are intended to be permanent, while others can be repositioned during the first day. Follow the exact directions for the product you use rather than assuming all tapes behave the same way.
Apply a Gear Patch for a Stronger Repair
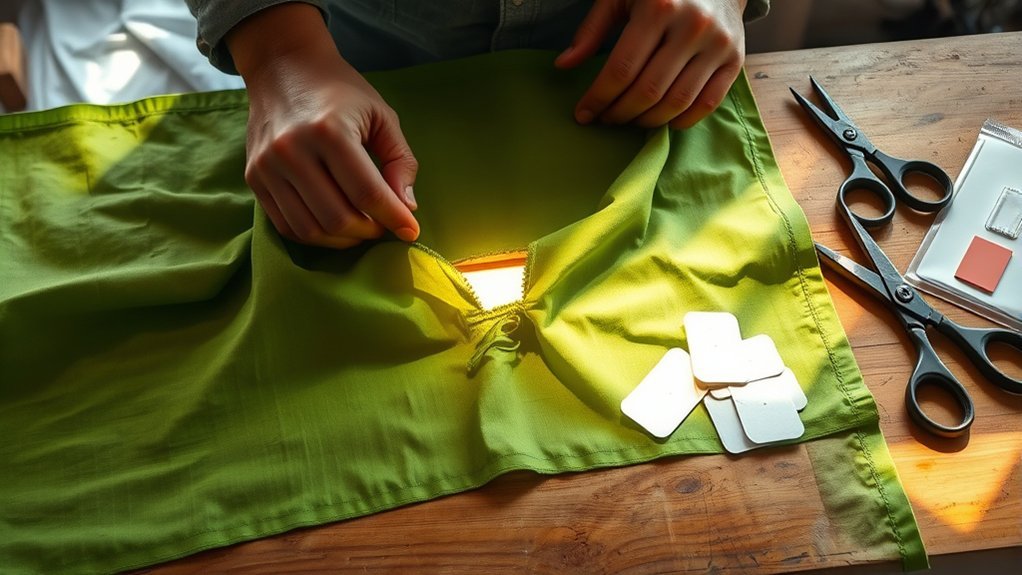
For a clean tear in compatible nylon or polyester, a peel-and-stick patch is usually the simplest durable repair. The steps below follow the general method used by REI’s tent-repair guidance and GEAR AID’s product instructions.
| Step | Action | Important Detail |
|---|---|---|
| 1. Clean | Wipe the full patch area and let it dry | Trim only loose, detached threads |
| 2. Align | Place the fly flat and bring the torn edges together | Do not stretch or overlap the fabric |
| 3. Cut | Make the patch at least 1/2 inch larger in every direction | Round all corners to reduce peeling |
| 4. Apply | Center the patch and press from the middle outward | Smooth bubbles, wrinkles, and lifted edges |
| 5. Reinforce | Patch the opposite side if the hole is large or highly stressed | Use the same compatible patch system |
| 6. Set | Leave the repair flat for the stated time | Standard Tenacious Tape reaches full strength after 24 hours |
A clean surface, rounded corners, and at least 1/2 inch of overlap do more for patch reliability than simply using a larger amount of tape.
Patch a Large or High-Tension Tear on Both Sides
For a longer tear in the middle of a sound panel, place the first patch on the exterior, then add a second patch on the interior after confirming that the edges are aligned. This sandwiches the damaged fabric and spreads the load. If the tear reaches a seam, zipper, guyout, buckle, clip, or reinforced corner, contact the manufacturer or a repair shop because those areas may need sewing and replacement reinforcement.
Stitch the Tear Only as a Last Resort

Stitching creates new needle holes and can concentrate stress in lightweight fabric. Use it only when a large tear will not stay aligned under a patch, no professional repair is available, and the surrounding fabric is still strong. A patch alone is often better for a simple panel tear.
Temporary Stitching Method
- Clean and dry the area, then trim only loose threads.
- Bring the torn edges together without pulling the panel tight.
- Use strong weather-resistant thread and small, evenly spaced hand stitches outside the frayed edge.
- Avoid sewing through seam tape, webbing, or a guyout unless you understand the original construction.
- Cover the stitched area with a coating-compatible patch or sealant to protect the needle holes from water.
Prevent Additional Damage
Do not make dense stitches that perforate the fabric like a tear-off line. Reduce guyline tension near the repair, keep the fly from rubbing on poles or branches, and stop using the shelter in severe wind if the repaired panel is distorting. A temporary stitch should be inspected and, when appropriate, replaced by a professional repair after the trip.
Maintain Waterproof Performance After the Repair
A waterproof patch does not mean the entire rainfly needs a new coating. First let the repair reach its stated cure or set time. Then inspect the patch edges, nearby seams, and the rest of the fly.
- Patch edge lifting: Re-clean and replace the patch rather than layering more tape over dirt.
- Leak at a seam: Use a seam sealer made for the fly’s coating.
- Water no longer beads on the exterior: Clean the fly and consider refreshing the durable water-repellent finish.
- Flaking or sticky inner coating: The waterproof coating may need restoration or the fly may need replacement.
REI separates tent waterproofing into seam sealing, restoring a worn urethane coating, and refreshing the exterior water-repellent finish. Use the correct product for the coating and follow its cure instructions.
Test the Repair Before a Trip
After the patch has fully set, pitch the tent and inspect the fly under normal tension. Spray the repaired area gently with clean water or test it during light rain. Check the underside for seepage, but remember that interior droplets can also be condensation. Do not use a pressure washer or a hard jet that could damage lightweight fabric.
Prevent Future Rainfly Damage
Good setup, drying, and storage habits reduce both tears and coating failure.
| Action | Why It Helps | When |
|---|---|---|
| Inspect the fly, seams, clips, and guyouts | Catches pinholes, fraying, and lifted seam tape before a storm | Before every trip |
| Clear sharp twigs and avoid low branches | Reduces punctures and abrasion against the fly | At every setup |
| Keep the tent away from campfire sparks | Prevents burn holes and heat damage | Always |
| Tension the fly evenly without overtightening | Limits stress at seams, corners, clips, and guyouts | During setup and changing weather |
| Avoid hanging heavy gear from the fly | Prevents concentrated loads that can stretch or tear fabric | During use |
| Limit long exposure to direct sunlight | Reduces ultraviolet damage that weakens tent fabric | Whenever practical |
| Dry completely and store loosely in a cool, dry place | Helps prevent mildew and waterproof-coating breakdown | After every trip |
| Use a properly sized footprint | Protects the tent floor rather than the fly, reducing overall shelter wear | At every setup |
REI’s tent-care guidance recommends limiting prolonged UV exposure, drying the tent completely, and never storing it wet.
When to Seek Professional Help
There is no universal tear-length cutoff that decides whether a rainfly can be repaired at home. Location, fabric condition, coating type, and load matter more than size alone. Contact the tent manufacturer or an outdoor-gear repair service when:
- The tear reaches a seam, zipper, reinforced corner, buckle, clip, or guyout attachment.
- A large section of fabric is missing, distorted, brittle, or weakened by UV exposure.
- Several holes appear in the same area or the waterproof coating is peeling or sticky.
- The repair requires sewing and you cannot reproduce a flexible, waterproof reinforcement.
- The fly is covered by a warranty that could be affected by an unauthorized repair.
- A previous duct-tape or glue repair left residue that prevents a clean bond.
Ask the manufacturer what to send and whether the fly should be cleaned first. Pole damage is a separate safety and structural issue; submit or replace a damaged poleset according to the tent maker’s instructions rather than trying to solve it through rainfly patching.
Frequently Asked Questions
Can I use regular tape instead of Tenacious Tape?
Regular tape may hold briefly in an emergency, but it is less dependable on coated outdoor fabric and may leave residue. A gear-specific patch that matches the rainfly coating is the better permanent choice. Remove duct tape promptly after the trip.
How long does a rainfly repair last?
There is no fixed lifespan. A compatible patch on clean, sound fabric can last for years, while a patch on dirty, brittle, or delaminating fabric may fail quickly. Inspect the edges and surrounding fabric before every trip.
Is it safe to wash the rainfly after repair?
Yes, after the patch has fully set, but follow the tent maker’s care label. Hand-clean the rainfly with cool water and a suitable mild cleaner; do not machine-wash or machine-dry the whole tent unless the manufacturer specifically permits it. Standard Tenacious Tape is washable after 24 hours.
Can I repair a rainfly with fabric glue?
Avoid generic fabric glue unless the tent manufacturer approves it. Use an outdoor-gear adhesive or seam sealer that specifically lists the fly’s coating. Urethane products and silicone products are not interchangeable.
What should I do if the tear is very large?
For a large tear in a healthy center panel, align the edges and use compatible patches on both sides. If fabric is missing or the tear reaches a seam, corner, zipper, clip, or guyout, ask the manufacturer or a professional repair service to evaluate it.
Should I patch the inside or outside of the rainfly?
Start on the exterior unless the patch maker or tent manufacturer says otherwise. Add a matching interior patch for a large tear or a high-tension area. The fabric must be clean, dry, flat, and compatible on each side.
Do I need to re-waterproof the whole fly after patching?
Usually not. A sound waterproof patch addresses the tear. Refresh the exterior water-repellent treatment only when water stops beading, reseal seams that leak, and restore or replace a failing inner coating with a product made for that fabric.
Sources
- GEAR AID: Tenacious Tape Roll FAQ — cleaning, patch overlap, rounded corners, two-sided repairs, and 24-hour full-strength guidance.
- GEAR AID: Tenacious Tape Silnylon Repair Tape — silicone-compatible patch selection and application.
- REI Co-op: Tent Repair—Leaks, Rips and Broken Poles — panel patching, interior reinforcement, seam repair, and professional-repair guidance.
- REI Co-op: Tent Care Basics — cleaning, drying, storage, and UV-damage prevention.
- Big Agnes: DIY Tent Repairs — field patching and the drawbacks of duct-tape residue.
- REI Co-op: How to Waterproof a Tent — seam sealing, coating restoration, and DWR renewal.
Conclusion
A dependable rainfly repair begins with the fabric, not the brand name on the tape. Confirm the coating, clean and dry the panel, use a rounded compatible patch with enough overlap, and give it the full set time. Keep emergency duct tape temporary, treat seams and attachment points as structural repairs, and dry the fly before storage. Inspect the repair before the next trip so a small flaw does not become a wet-night problem.
