
Last Updated on July 27, 2026 by Daniel Globe
You do not need to become an experienced athlete before you start hiking. If you feel out of shape, the safest approach is to choose a trail that fits what your body can handle today, move at your own pace, and increase the challenge gradually. A short, easy hike that leaves you wanting to go again is a much better first step than an exhausting climb that puts you off hiking altogether.
Quick Answer
You can start hiking even if you are out of shape. Begin with a short, well-marked trail with little elevation gain, walk at a pace that lets you talk, take breaks before you are exhausted, carry basic safety gear, and increase distance or climbing gradually as your fitness improves.
Key Takeaways
- Choose your first hike by distance, elevation gain, terrain, weather, and your current walking ability—not by someone else’s pace.
- Start easier than you think you need to and increase only one challenge at a time, such as distance or climbing.
- Use the talk test to control your effort: on a moderate section, you should generally still be able to speak in conversation.
- Carry water, food, navigation, extra clothing, a light source, first aid supplies, sun protection, and other appropriate emergency essentials.
- Turn around when weather, fatigue, pain, daylight, navigation, or trail conditions make continuing a poor decision.
At a Glance
| Time Required | Start with a short day hike you can comfortably complete well before dark. |
| Difficulty | Easy at first: clear route, modest distance, gentle elevation gain, and stable footing. |
| Tools Needed | Comfortable footwear, small pack, water, food, navigation, weather layers, first aid supplies, sun protection, and a light source. |
| Cost | Potentially $0 for a local trail if you already own suitable shoes, clothing, a pack, and basic safety items. Specialized gear can be added later as needed. |
Disclosure: As an Amazon Associate I earn from qualifying purchases. Some links on this page are affiliate links, at no extra cost to you.
Set a Realistic First-Hike Goal
When starting a hiking routine, set a goal that matches your current physical condition, experience, and available time. A beginner who becomes tired during ordinary walks should not make a strenuous mountain trek or multi-day backpacking trip the first test.
Start with a well-marked route that gives you room to learn how your body responds to hills, uneven ground, weather, and carrying a small backpack. Finishing with some energy left is a better result than pushing until you are exhausted.
The U.S. Department of Health and Human Services recommends that inactive adults begin with small amounts of physical activity and increase gradually. The broader goal of at least 150 minutes of moderate aerobic activity per week plus muscle-strengthening activity on two days is something people can build toward over time; it is not a requirement you must meet before going on an easy hike. See the Physical Activity Guidelines questions and answers.
You do not have to get completely fit before you hike. For an inactive beginner, the smarter strategy is to start with manageable activity and build your capacity gradually.
Choosing the Right Trail
The word easy on a trail listing does not tell you everything you need to know. Distance matters, but so do elevation gain, steepness, footing, weather, exposure, altitude, and how far you will be from your car or another exit.
The National Park Service recommends comparing a proposed hike with your actual experience: Have you walked that distance before? Climbed that much elevation? Carried a pack for that long? Hiked in the same heat, humidity, cold, or altitude? See the NPS Hike Smart guidance.
Trails for Newcomers
For your first outings, look for well-maintained and clearly marked trails with gentle grades and straightforward navigation. A short loop or out-and-back route near a populated trailhead can make it easier to turn around if you are more tired than expected.
Check at least these details before choosing a route:
- Total distance: Count the full round trip, not just the distance to the viewpoint.
- Elevation gain: A short but steep climb can feel much harder than a longer flat walk.
- Trail surface: Rocks, roots, sand, mud, snow, and stream crossings increase effort.
- Exposure: Direct sun, wind, heat, and lack of shade can change an otherwise easy hike.
- Navigation: Favor well-marked routes until you are comfortable reading maps and trail signs.
- Bailout options: Know whether you can shorten the route if necessary.
- Current conditions: Check the park or land manager’s official page for closures and hazards before leaving.
Some National Park Service trail systems classify generally level routes under about three miles as their easiest category, while also warning that trail difficulty cannot be judged by mileage alone. That is a useful reminder rather than a universal rule for every park. See the NPS explanation of hiking difficulty.
Trails for Experienced Hikers
As your fitness improves, you can gradually add distance, climbing, rougher terrain, or a slightly heavier pack. Avoid increasing every difficulty at once. For example, if you choose a longer hike, keep the elevation and terrain familiar rather than simultaneously adding a steep climb and technical footing.
Research longer routes thoroughly. Confirm distance, elevation gain, water availability, trail conditions, daylight, expected weather, navigation difficulty, and any permit requirements before you leave.
Additional Considerations
Season and elevation can transform the difficulty of a trail. Snow, ice, heat, mud, smoke, flooding, and thunderstorms may make a normally easy route unsafe.
Higher elevation deserves extra caution. NPS guidance notes that hiking around 8,000 feet and above introduces meaningful altitude-illness risk. Headache, dizziness, nausea, unusual shortness of breath, or confusion at elevation are reasons to stop ascending; worsening symptoms require descent and appropriate medical help.
Pro Tip: On your first few hikes, choose a route that looks slightly easier than your maximum ability. You can always add another short loop or stay out longer if you still feel good, but you cannot make a steep remote climb easier after you are already exhausted.
Build Hiking Fitness Gradually
You can improve hiking fitness without an aggressive workout program. Walking consistently is one of the most specific ways to prepare because it develops the basic endurance you will use on the trail. Gentle hills and simple strength exercises can then prepare your legs for climbing and descending.
Here is an adaptable progression rather than a rigid training prescription:
- Stage 1 — Comfortable walking: Take several easy walks during the week at a pace you can sustain without becoming exhausted.
- Stage 2 — Add gentle hills: Keep most walks easy, but include a small amount of climbing on one or two outings.
- Stage 3 — Add basic strength: Use controlled movements such as sit-to-stands, shallow squats, step-ups, calf raises, or similar exercises that suit your current ability.
- Stage 4 — Try an easy trail: Choose a short, clearly marked route with modest climbing. After you recover comfortably, make the next hike slightly longer or hillier—not dramatically harder.
Progress does not need to be linear. Heat, poor sleep, stress, altitude, illness, or a difficult work week can make the same trail feel harder on a different day. Adjust rather than treating every hike as a fitness test.
Essential Gear and Clothing
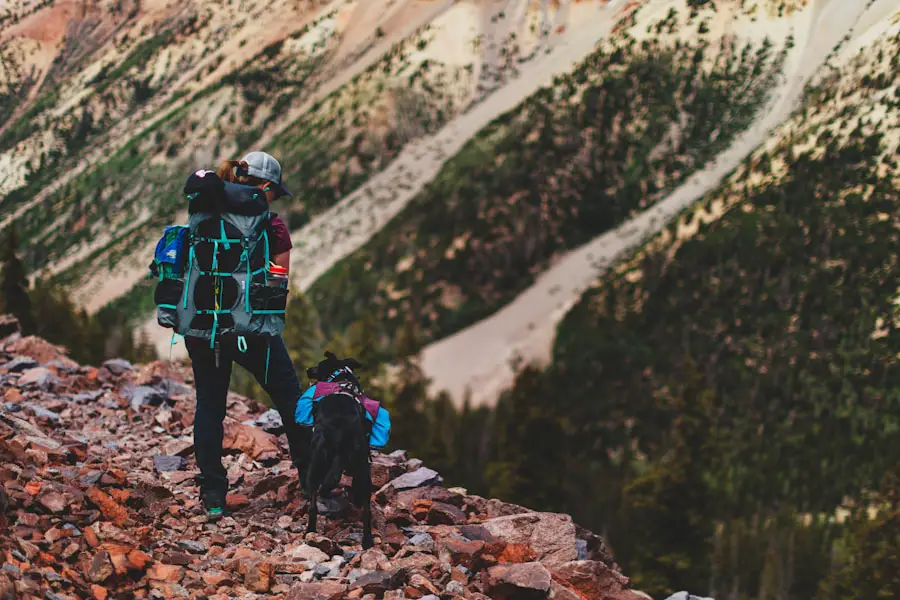
You do not need premium outdoor gear to start hiking. You do need clothing and equipment that are appropriate for the route and conditions.
Footwear is the most important comfort decision. A supportive pair of athletic shoes, trail shoes, or hiking shoes may be sufficient for an easy maintained trail if they fit well and provide suitable traction. More rugged, wet, snowy, or unstable terrain may justify hiking boots or more specialized footwear.
No shoe can guarantee that you will avoid blisters or slips. Good fit, secure lacing, appropriate socks, and traction matched to the terrain can reduce those risks.
Dress in layers when conditions may change. A moisture-managing base layer can help during exertion, while an insulating layer and weather-resistant outer layer can add warmth and protection when needed. Hats, sunglasses, sunscreen, and rain protection may also be important depending on the route.
The National Park Service recommends carrying the Ten Essentials, adapted to the hike:
- Navigation
- Sun protection
- Insulation or extra clothing
- Illumination such as a headlamp
- First aid supplies
- Fire-starting equipment where appropriate and legally permitted
- Repair tools
- Extra food
- Water and, where appropriate, water-treatment capability
- Emergency shelter
A short front-country walk may not require the same quantity of equipment as a remote wilderness hike, but you should still prepare for an unexpected delay rather than assuming your phone will solve every problem.
Proper Hydration and Nutrition
| Planning Factor | What to Consider |
| Water | Carry enough for your route and conditions, and drink regularly rather than waiting until you are significantly dehydrated. |
| Heat and Humidity | Expect fluid needs and physical strain to rise. Shorten or postpone the hike when conditions exceed your ability. |
| Remote Routes | Know whether reliable water exists and carry an appropriate treatment method if your plan depends on natural water sources. |
| Food | Pack easy-to-eat foods you tolerate well, plus extra food for longer or more remote hikes. |
There is no single correct amount of water per hour for every hiker. Temperature, humidity, pace, altitude, body size, sweat rate, route length, and available water sources all affect how much you may need.
The National Park Service recommends planning your water before leaving, drinking regularly, and carrying additional water or treatment equipment when a trail has unreliable sources. Never assume that clear-looking stream water is safe to drink untreated.
For a short hike, familiar snacks such as fruit, a sandwich, crackers, trail mix, or an energy bar can be practical. Longer outings usually require more food. Choose items that travel well and that you know your stomach tolerates during activity.
The often-cited daily values of about 3.7 liters of total water for adult men and 2.7 liters for adult women come from National Academies Dietary Reference Intakes and include water from both food and beverages. They are not fixed hiking-water targets, and physical activity or hot conditions can increase needs.
Warm-Up Exercises
A short warm-up can make the transition from sitting or driving to hiking feel easier. MedlinePlus recommends approximately 5 to 10 minutes of low-level aerobic movement before exercise.
You can begin with easy walking and then add comfortable dynamic movements such as:
- ankle circles,
- gentle leg swings,
- controlled knee lifts,
- arm circles, and
- a few slow bodyweight sit-to-stands or shallow squats if they are comfortable for you.
A warm-up should prepare you, not tire you out. There is no need to turn it into a workout before the hike begins. See MedlinePlus guidance on warming up and cooling down.
Pacing Yourself
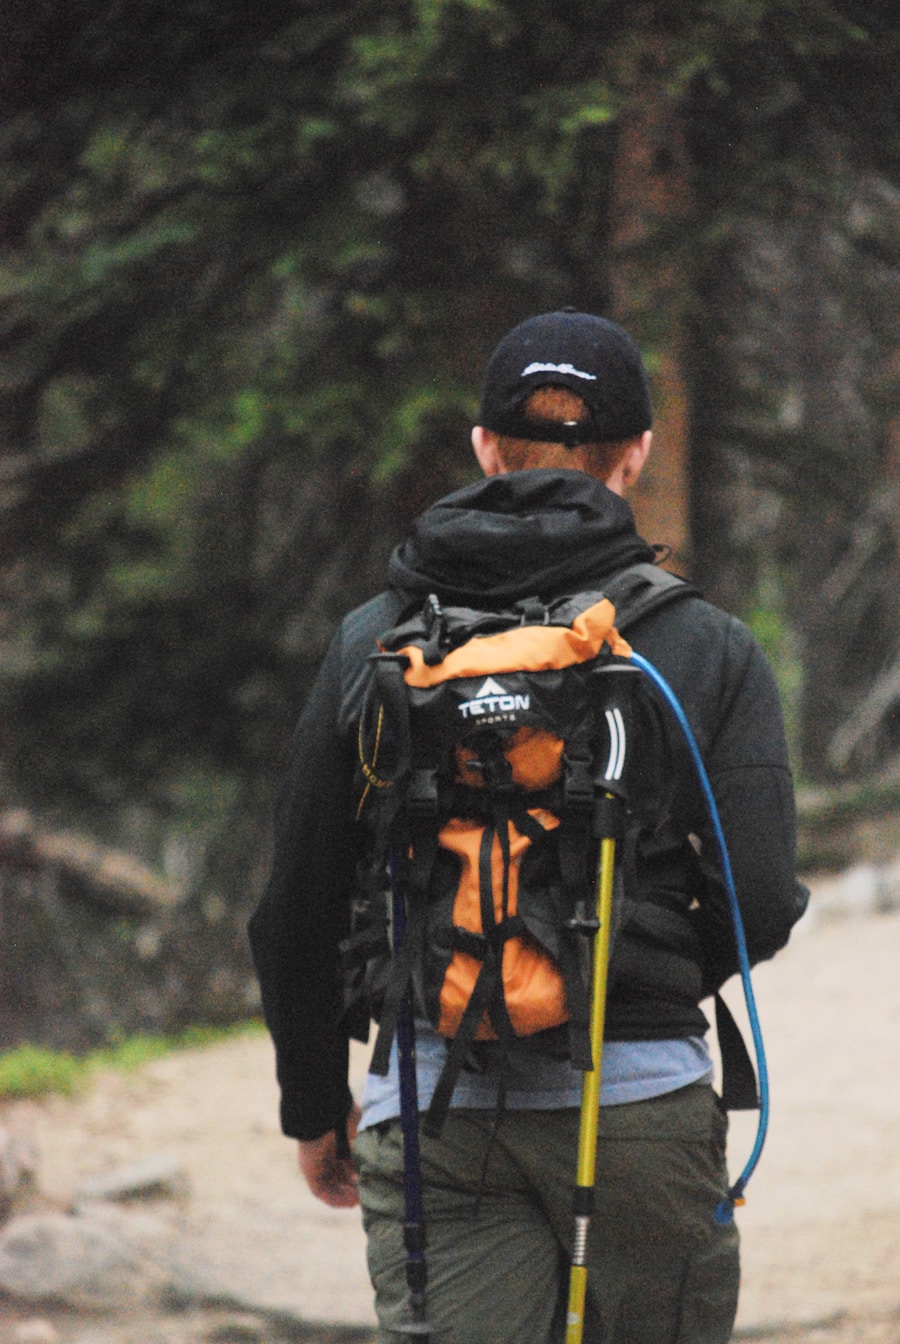
Many beginners make the first mile unnecessarily hard by starting at the pace of a fitter friend or charging uphill while they still feel fresh. Begin more slowly than your excitement tells you to.
The CDC’s talk test is a useful way to judge effort. During moderate-intensity activity, you can generally talk but not sing. During vigorous activity, you may manage only a few words before needing another breath. Steep uphill hiking and hiking with a heavy backpack can become vigorous exercise.
There is nothing wrong with stopping to catch your breath. Short breaks taken before you are exhausted are usually more useful than pushing until you need a long recovery.
When hiking uphill, shorten your stride and settle into a pace you can maintain. On descents, slow down when the trail is loose or uneven rather than trying to make up time.
Note: Trail-app completion times are not deadlines. Your pace may be slower because of fitness, photography, weather, terrain, altitude, breaks, or simply because you prefer to move more carefully.
Hiking With Fitter Friends
Tell your group before the hike that you may need a slower pace or extra breaks. Choose the route based on the least-conditioned member of the group rather than expecting that person to keep up with the fastest hiker.
A supportive group waits at intersections, keeps the group within communication range, and does not pressure anyone to continue when conditions or fatigue suggest turning around.
Safety Precautions
Good hiking safety begins before you reach the trailhead. Check the official park, forest, or land-management page for trail closures, fire restrictions, flooding, snow, wildlife advisories, road access, and permit requirements. Then check the weather forecast for the actual hiking area, which may be very different from conditions at home.
Tell a trusted person where you are going, your planned route, where you expect to park, and when you expect to return. Let that person know when you are safely back.
Carry a map or another reliable navigation method and know how to use it. A phone is useful, but batteries fail and cellular service can disappear. Downloading an offline map before leaving can add another layer of protection, but it does not replace route awareness.
Warning: If you hear thunder, do not stay on an exposed ridge, summit, or open high point. The National Weather Service says there is no safe place outdoors during a thunderstorm. Move toward a substantial enclosed building or hard-topped vehicle when one is reachable, and postpone exposed hiking when thunderstorms are expected.
Flooding also deserves respect. Do not enter fast-moving or flooded water simply because it crosses your planned route. Conditions upstream can raise water levels even when it is not raining directly over you.
Know When to Turn Around
Turn around before reaching complete exhaustion. Reasons to stop or shorten a hike include:
- you are using substantially more time or water than planned,
- weather is deteriorating,
- you are unsure of the route,
- the trail is more technical than expected,
- you will not finish safely before dark,
- pain is changing the way you walk, or
- you feel increasingly weak, dizzy, confused, or unwell.
The destination is optional. Getting yourself and your group back safely is not.
Warning: Normal exertion can make you breathe harder, but chest pressure or pain, fainting, confusion, or unusual or extreme shortness of breath should not be treated as something to “push through.” Stop exercising and seek appropriate medical help. Call 911 for symptoms that may represent a medical emergency.
Post-Hike Recovery
After finishing, walk slowly for a few minutes rather than stopping abruptly after a hard climb. Gentle movement can help your body transition back toward rest. Comfortable stretching of the calves, quadriceps, hamstrings, hips, and back may also feel good after a long outing.
Continue drinking fluids according to thirst and the conditions you experienced. Eat a normal meal or snack containing carbohydrates, protein, and other foods you tolerate well. For an ordinary recreational hike, you do not need to treat a one-hour post-hike eating window as a strict deadline.
Pay attention to how you feel later that day and the following morning. Mild muscle fatigue after unfamiliar activity can occur, but persistent joint pain, worsening swelling, or an injury that changes the way you walk deserves more caution than ordinary soreness.
Use each hike as information for the next one. If you finished comfortably, you might increase distance or climbing slightly next time. If you struggled, repeat an easier route or shorten the next outing. Building hiking fitness is a progression, not a test you pass in one weekend.
Frequently Asked Questions
What is hiking?
Hiking is walking for recreation on trails, paths, or natural terrain. It can range from an easy paved nature walk to a steep backcountry route, so the word “hiking” does not describe one fixed difficulty level.
How can I start hiking when I am out of shape?
Choose a short, clearly marked trail with modest elevation gain and stable footing. Walk slowly enough that you can still talk, rest before you are exhausted, and turn around if the hike is harder than expected. Increase the challenge gradually over later outings.
What are some tips for hiking when out of shape?
Start easier than your maximum ability, check distance and elevation before leaving, wear comfortable footwear, carry water and food, use the talk test to control your pace, take short breaks, and avoid comparing your speed with fitter hikers.
How can I improve my fitness for hiking?
Regular walking is a simple starting point. Gradually add gentle hills and basic strength exercises for the legs and hips. As your stamina improves, use easy hikes themselves as training and increase either distance or climbing a little at a time.
What should I bring on a hike when out of shape?
Bring suitable footwear, water, food, navigation, weather-appropriate clothing, sun protection, a first aid kit, a light source, and other Ten Essentials appropriate for the location. A fully charged phone is useful, but do not assume you will have cellular service.
How far should my first hike be?
There is no universal first-hike distance. Choose a route shorter and easier than the maximum distance you think you can walk. Consider elevation, footing, heat, altitude, and return distance as well as mileage. A one- or two-mile nature trail can be a perfectly legitimate first hike.
Do I need to train before my first hike?
Not necessarily. If you can safely walk, you can select a hike that matches your current capacity. Regular walking and basic strength work can make hiking more comfortable, but you do not need to reach a particular fitness milestone before trying an easy trail.
When should I turn around during a hike?
Turn around when fatigue is increasing faster than expected, you are running short on water or daylight, weather is worsening, navigation is uncertain, the terrain exceeds your ability, or someone in the group feels unwell. Reaching the planned destination is never more important than returning safely.
Sources
- U.S. National Park Service — Hike Smart — trail selection, physical readiness, hydration, food, and trip-planning safety.
- U.S. National Park Service — Ten Essentials — recommended emergency and preparedness categories for outdoor recreation.
- Centers for Disease Control and Prevention — Measuring Physical Activity Intensity — talk test and moderate versus vigorous activity.
- U.S. Department of Health and Human Services — Physical Activity Guidelines Q&A — starting with small amounts of activity and increasing gradually.
- MedlinePlus — Warming Up and Cooling Down — basic pre- and post-exercise preparation.
- National Weather Service — Lightning Safety — thunderstorm and outdoor lightning precautions.

