
Last Updated on September 10, 2026 by Daniel Globe
Packing a rucksack well can make a hiking trip noticeably more comfortable, organized, and safer. The goal is not simply to fit everything inside. You need the right-size pack, a stable load close to your center of gravity, quick access to important gear, and enough emergency equipment for the route, weather, and length of your trip.
Quick Answer
To pack a rucksack for hiking, put light bulky gear at the bottom, dense items close to your spine in the pack’s central core, and frequently used gear at the top or in outside pockets. Carry the Ten Essentials, protect critical gear from water, and adjust the hipbelt, shoulder straps, load lifters, and sternum strap after loading the pack.
Key Takeaways
- Choose pack capacity for the length of the trip, the season, and how bulky your equipment is.
- Fit the rucksack to your torso and hips rather than choosing a size based only on your height.
- Keep dense gear close to your back and centered rather than loading the top or outside of the pack with heavy objects.
- Keep navigation, water, food, rain protection, first aid, and other frequently used items easy to reach.
- Carry the Ten Essentials and add equipment required by your destination, weather, wildlife, and trip duration.
- Treat questionable backcountry water correctly; a basic filter or tablet is not effective against every possible contaminant.
- Test the fully loaded pack before leaving and make final strap adjustments with the actual load inside it.
At a Glance
| Time Required | About 15–30 minutes, plus a short loaded test walk |
| Difficulty | Easy |
| Tools Needed | Rucksack, packing list, gear, and optional stuff sacks, dry bags, pack liner, and luggage scale |
| Cost | $0 if you already own the needed gear; organizers and waterproof storage are optional additions |
Disclosure: As an Amazon Associate I earn from qualifying purchases. Some links on this page are affiliate links, at no extra cost to you.
Choosing the Right Rucksack
Selecting the appropriate rucksack is a critical first step whether you are planning a day hike, weekend camping trip, or extended trek. Capacity matters, but a larger pack is not automatically better. Extra room often makes it easier to carry unnecessary equipment.
As a general guide, small daypacks commonly fall around 18–30 liters, weekend packs often fall around 30–50 liters, multiday packs commonly range from about 50–80 liters, and extended or winter trips may require 70 liters or more. These ranges are only starting points because sleeping-system bulk, weather, food, water availability, and specialty equipment can change what you need.
Current backpack-fitting guidance from Gregory Mountain Products and Osprey emphasizes torso length and hip fit rather than overall body height. Measure your torso according to the manufacturer’s instructions, check the pack’s sizing chart, and try the pack with realistic weight inside whenever possible.
Note: Pack-volume ranges are guidelines, not rules. A compact sleep system may fit in a smaller pack, while winter insulation, a bear-resistant food container, or family gear can require substantially more space.
Look for padded shoulder straps, a hipbelt that wraps securely around the upper hip bones, a sternum strap, and load lifters on larger packs. Ventilated back panels can improve comfort in warm weather, while external pockets can make water, snacks, maps, and rain gear easier to reach.
Packing for Comfort and Safety
Weight Distribution
A stable rucksack keeps its densest equipment close to your body rather than hanging away from your spine. For a typical framed backpack, place light, bulky equipment such as a sleeping bag or spare camp clothing near the bottom. Put dense equipment such as food, cooking gear, or a bear canister in the pack’s core, close to your back and roughly around the middle to shoulder-blade area.
Deuter’s current packing guidance similarly recommends keeping heavier equipment close to the body and around shoulder height so the load does not pull you backward.
Avoid putting several heavy objects in the lid, outside mesh pockets, or far away from your back. That can make the rucksack feel unstable on uneven ground.
The best-packed rucksack keeps dense gear close to your spine while keeping emergency and frequently used items easy to reach.
Accessibility of Gear
Gear you may need while walking should not be buried underneath your sleeping system. Keep items such as snacks, navigation tools, water, sunscreen, a rain shell, gloves, headlamp, and first aid supplies near the top of the pack or in suitable outside pockets.
Equipment generally needed only after reaching camp, such as a sleeping bag and sleep clothing, can sit deeper in the pack.
Avoiding Overstuffing
A rucksack packed beyond its intended capacity can become awkward to close, unstable to carry, and difficult to organize. It can also encourage you to attach too many loose items outside the pack, where they may swing, snag branches, or become wet.
After packing, check the manufacturer’s recommended load range when one is provided. Remove duplicate or low-value items before sacrificing food, water, navigation, weather protection, emergency gear, or other safety essentials.
Pro Tip: Pack everything at home, put on the same shoes and clothing you expect to hike in, and walk for 10–15 minutes. Stairs are useful for revealing bouncing, shoulder pressure, loose equipment, and poor weight distribution before the trail does.
Organizing Your Gear
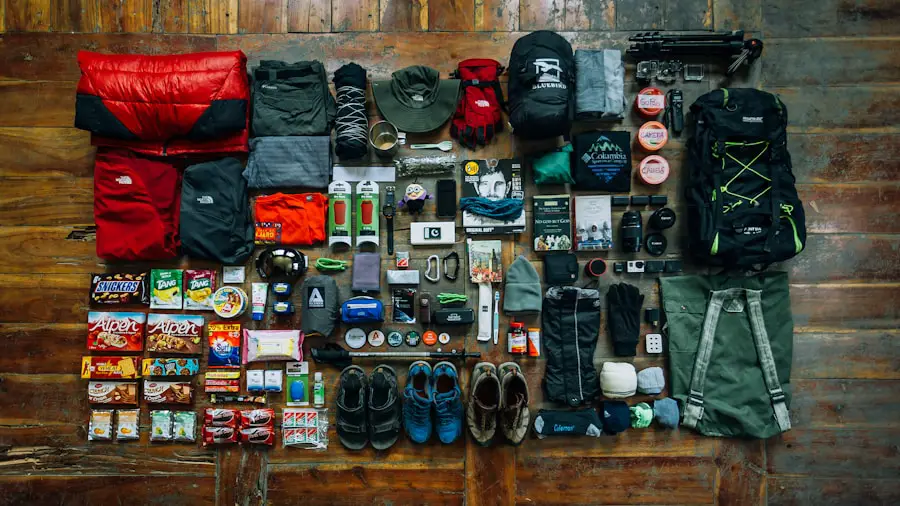
A simple organization system makes it easier to find equipment without emptying the entire rucksack. Packing cubes, stuff sacks, and dry bags can separate clothing, sleeping gear, cooking equipment, first aid supplies, and electronics.
Use organizers selectively. Too many separate bags can add weight and make an oddly shaped pack harder to fill efficiently. Soft items can often fill empty spaces around cookware, a bear canister, or other rigid equipment.
Use Packing Zones
- Bottom: light, bulky items you normally will not need while walking, such as a sleeping bag or camp clothing.
- Core near your back: dense items such as food, cookware, or a bear-resistant container.
- Core away from your back: medium-weight equipment and soft items that help stabilize the load.
- Top: rain gear, insulation, first aid, or other equipment you may need quickly.
- Hipbelt and outer pockets: snacks, navigation, sunscreen, gloves, water, and other small frequently used items.
Keep Critical Gear Dry
Do not assume a normal backpack or rain cover is completely waterproof. Protect items whose failure could create a serious problem—especially sleeping insulation, spare warm layers, medication, maps, electronics, and fire-starting supplies—with a waterproof pack liner or properly sealed dry bags.
Essential Items to Pack
| Item | What to Pack | Priority |
| Clothing | Weather-appropriate base, insulating, and outer layers; extra socks as needed | High |
| Toiletries | Small trip-appropriate quantities; store scented items according to wildlife rules | Trip dependent |
| Medication | Required personal medication plus appropriate backup where advised | High |
| Travel documents | Permits, identification, tickets, passport, or reservation details when the trip requires them | As required |
| Electronics | Phone, GPS or satellite communicator where appropriate, charging cable, and backup power | Trip dependent |
| First aid kit | Trip-appropriate first aid and blister supplies | High |
| Food and snacks | Meals plus extra food appropriate to the trip | High |
| Water | Adequate carrying capacity plus treatment equipment when relying on natural sources | High |
For outdoor safety, a more useful checklist than a generic travel list is the National Park Service Ten Essentials. The exact equipment should still be adapted to the location and activity.
The Ten Essentials
- Navigation: map, compass, GPS, or an appropriate combination. Carry a physical backup when practical and know how to use it.
- Sun protection: sunglasses, sunscreen, hat, and protective clothing as conditions require.
- Extra clothing: insulation and weather protection suitable for conditions worse than the forecast minimum.
- Illumination: preferably a headlamp plus spare power.
- First aid: supplies appropriate to your group, route, and medical needs.
- Fire: a legal and appropriate emergency fire-starting method where regulations permit its use.
- Repair kit and tools: equipment appropriate to what you carry, such as repair tape or a multi-tool.
- Extra food: enough to handle an unexpected delay.
- Water: adequate water plus a treatment strategy when natural sources are part of the plan.
- Emergency shelter: such as an emergency bivy, tarp, or other shelter appropriate to the trip.
For overnight trips, you will normally add a complete shelter and sleeping system. A tent, hammock, or tarp may be suitable depending on the environment and regulations. Choose a sleeping bag or quilt with a temperature rating appropriate to expected conditions and use a sleeping pad that provides suitable insulation from the ground.
Lightweight and Multi-Purpose Gear
A lighter rucksack can reduce unnecessary effort, but cutting weight should never mean removing equipment needed for safety. Start by eliminating duplicates and oversized packaging rather than navigation, water, insulation, emergency shelter, or first aid.
Multi-purpose equipment can help when it genuinely replaces several separate objects. A suitable multi-tool may cover several repair jobs. A bandana can serve as a sweat cloth, pre-filter for silty water before proper treatment, or cleaning cloth. A foam sit pad can add camp comfort and provide supplemental insulation in an emergency.
Choose a sleeping bag or quilt for its actual temperature requirements rather than expecting one sleeping system to perform several incompatible jobs. Likewise, collapsible cookware can save space, but it should still be stable, heat-safe, and suitable for your stove.
Lightweight materials such as titanium and modern synthetic fabrics can reduce pack weight, but low weight should be balanced against durability, weather resistance, repairability, and cost.
Food and Water Considerations
Food and water can make up a large part of a loaded rucksack, so plan them around the route rather than guessing. Choose food that provides useful energy for its weight, fits your cooking setup, and remains safe for the expected temperature and trip duration. Freeze-dried and dehydrated meals are popular because they store compactly and require relatively little preparation.
Keep some food available without unpacking your cooking gear. Snacks that are easy to eat during short breaks can help you avoid repeatedly opening the main compartment.
Plan Water Before You Leave
Do not assume every lake, stream, or spring is safe to drink. The Centers for Disease Control and Prevention recommends treating water when its safety is uncertain.
CDC guidance states that boiling is the most reliable way to kill germs. Bring clear water to a rolling boil for one minute; above 6,500 feet, CDC recommends three minutes. When boiling is not practical, the appropriate method depends on the organisms that may be present. Many portable filters remove parasites but not viruses, and some do not remove all bacteria. Filtering followed by disinfection provides broader protection when source safety is uncertain.
Warning: A water filter, UV device, or purification tablet is not automatically effective against every contaminant. Follow the treatment manufacturer’s instructions and destination-specific public-health guidance. Boiling or disinfection cannot make water contaminated by harmful chemicals or toxins safe to drink.
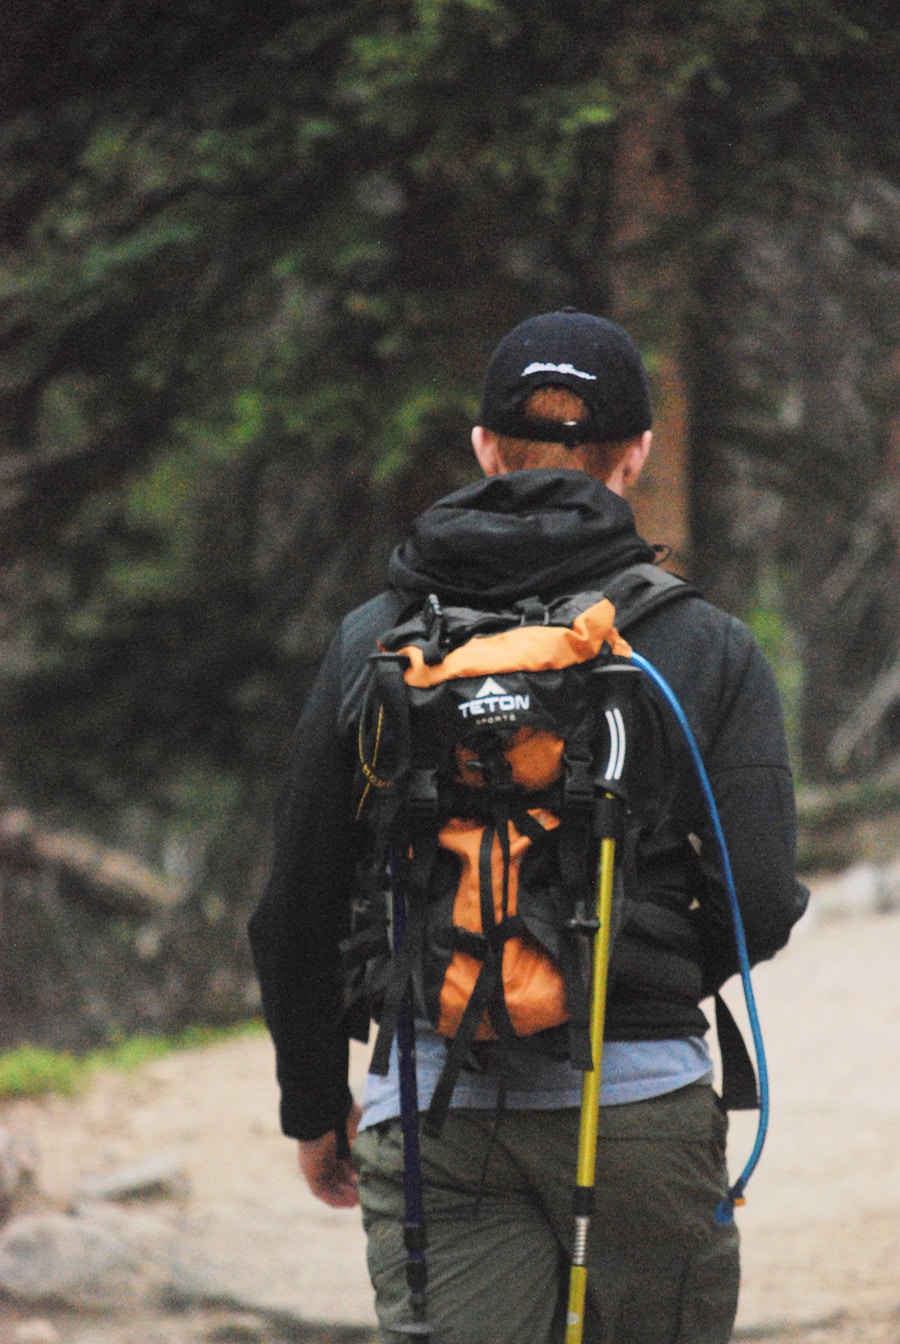
Hydration bladders can provide convenient hands-free access while walking, while bottles are easier to inspect, refill, and ration. Either system can work well. Carry enough capacity for the longest dry section of your route and have a backup plan if your primary treatment device fails.
Store Food Safely Around Wildlife
Wildlife-food rules vary substantially by destination. Some parks require an approved bear-resistant food container, while others specify lockers or another approved storage method. The National Park Service food-storage guidance also treats many scented toiletries, trash, and cooking items as attractants.
Check the managing agency’s current rules before leaving. Do not assume that a traditional tree hang is legal or effective everywhere. Yosemite, for example, requires approved bear-resistant storage for wilderness backpacking and does not allow conventional food hangs.
Emergency and First Aid Supplies
Accidents, sudden weather, route-finding problems, and unexpected delays can occur even on familiar trails. Carry a first aid kit appropriate to your group and trip. Common components include adhesive bandages, gauze, medical tape, wound-cleaning supplies, blister treatment, and required personal medication.
A headlamp is especially useful because it keeps both hands free. Carry adequate power for your planned trip plus a reasonable emergency margin.
A whistle can provide a simple way to signal for help, while an emergency bivy or blanket can provide temporary protection if you are forced to stop unexpectedly. Fire-starting equipment may also be part of an emergency kit, but its use must comply with current fire restrictions and land-management rules.
Leave a Trip Plan
Before leaving, tell a reliable person where you are going, your planned route, who is with you, and when you expect to return. The National Park Service’s Hike Smart guidance recommends leaving a trip plan so someone knows when a delayed group may need assistance.
For remote trips, consider whether a satellite messenger or personal locator beacon is appropriate. A phone is useful, but do not assume you will have cellular service.
Note: Check current weather, trail closures, permits, fire restrictions, wildlife requirements, water availability, and other destination-specific rules shortly before departure. General packing advice never overrides posted regulations or equipment-manufacturer instructions.
Final Check and Adjustments
Once the rucksack is packed, review your list one final time. Confirm navigation, water, food, weather protection, first aid, illumination, emergency gear, permits, medication, and any destination-specific equipment before worrying about convenience items.
Adjust the Loaded Rucksack
Fit adjustments should be made with realistic weight inside the pack.
- Set the torso length: adjust the suspension according to the manufacturer’s sizing instructions.
- Position the hipbelt: place it so the padding wraps securely around the upper hip bones and tighten it snugly without painful pressure.
- Tighten the shoulder straps: bring the pack toward your body without forcing all of its weight onto your shoulders.
- Adjust the load lifters: snug them enough to stabilize the upper pack without creating uncomfortable shoulder pressure.
- Fasten the sternum strap: position it comfortably across your chest and tighten only enough to stabilize the shoulder straps without restricting breathing.
Walk around with the loaded pack. If it pulls backward, check whether dense equipment is too far from your spine. If your shoulders take excessive pressure, recheck hipbelt position, torso length, and load distribution. If the pack leans to one side, rebalance dense equipment.
Do a Final Shakedown
Look at every item and ask whether it is necessary for safety, shelter, food, water, weather, navigation, or the planned activity. Remove needless duplicates, oversized packaging, and “just in case” luxury items that do not justify their weight.
If your hiking trip includes a long flight, a travel pillow may make the journey to the trail more comfortable; the options in this travel pillow article are intended for the transit portion of the trip rather than the trail itself.
Likewise, a travel humidor for cigars is a travel-specific luxury rather than hiking equipment. Travelers who choose to carry one can review this travel humidor guide, but smoking and ignition sources must comply with local laws, trail rules, and wildfire restrictions.
Love travel? Join Our Facebook Community
Frequently Asked Questions
What is a rucksack?
A rucksack is a backpack carried on the back. In outdoor use, the term commonly refers to packs designed for hiking, camping, trekking, or carrying equipment over longer distances.
Why is it important to pack a rucksack properly for hiking?
Good packing keeps the load stable, puts dense equipment close to your center of gravity, protects important gear, and keeps frequently used or emergency items accessible. It can also reduce unnecessary shoulder pressure and prevent loose equipment from shifting as you walk.
What are the essential items to pack in a rucksack for hiking?
Start with the Ten Essentials: navigation, sun protection, extra clothing, illumination, first aid, fire or another appropriate emergency heat strategy, repair tools, extra food, water and treatment, and emergency shelter. Add equipment required for the route, weather, trip duration, permits, and wildlife regulations.
How should I distribute the weight when packing a rucksack?
Put light, bulky equipment near the bottom. Keep dense equipment centered close to your spine in the pack’s core, roughly around the middle to shoulder-blade area. Place frequently used items near the top or in accessible pockets and avoid attaching heavy objects far from your back.
What are some tips for organizing a hiking rucksack?
Use a small number of stuff sacks, packing cubes, or dry bags to group similar equipment. Keep rain gear, navigation, snacks, water, headlamp, and first aid easy to reach. Protect sleeping insulation and other critical equipment from moisture with a pack liner or waterproof bag.
How should I adjust the straps on a rucksack for hiking?
Start with the correct torso length. With the pack loaded, position and tighten the hipbelt first, then snug the shoulder straps, adjust the load lifters, and finally fasten the sternum strap. The pack should feel stable without restricting breathing or creating painful pressure points.
Sources
- U.S. National Park Service — Ten Essentials — navigation, first aid, emergency shelter, food, water, illumination, and other core hiking-safety equipment.
- U.S. National Park Service — Hike Smart — trip planning and leaving a route plan with a reliable contact.
- Centers for Disease Control and Prevention — Water Treatment While Hiking, Camping, or Traveling — boiling, filtration, disinfection, and treatment limitations.
- U.S. National Park Service — Bear Safety: Storing Food — destination-specific bear-resistant storage and management of scented items.
- Deuter — How to Pack a Backpack — placement of heavy, medium-weight, and light equipment.
- Gregory Mountain Products — Pack Fit & Sizing Guide — torso measurement, hipbelt position, shoulder harness, and load-lifter adjustments.

