
Last Updated on July 27, 2026 by Daniel Globe
Packing for a hike is less about carrying everything you own and more about being ready for the problems that can turn a normal day outside into an emergency: getting lost, running short on water, sudden weather, injury, darkness, or an unexpected delay. Build your hiking kit around the route, forecast, season, group, and distance from help.
Quick Answer
Bring the 10 hiking essentials: navigation, sun protection, extra clothing, light, first aid, fire supplies where permitted, repair tools, extra food, water plus treatment, and emergency shelter. Add trail-appropriate footwear and a comfortable pack, check conditions before leaving, and tell someone your route and expected return time.
Key Takeaways
- Choose footwear for the terrain, load, weather, and your foot shape; test it on shorter walks before a major hike.
- Dress in adjustable wool or synthetic layers and carry protection for the worst reasonable weather you could encounter.
- Carry navigation, a headlamp, first aid, emergency shelter, repair tools, extra food, sufficient water, and a way to treat natural water.
- Do not depend on a phone, cellular hotspot, or untreated stream as your only backup plan.
- Check the weather, trail alerts, closures, fire rules, route difficulty, and expected return time before you leave.
At a Glance
| Time Required | About 10–20 minutes to check conditions and pack for a familiar day hike; longer for remote or technical routes. |
| Difficulty | Easy planning task; the gear and skills required increase with remoteness, weather, elevation, and terrain. |
| Tools Needed | Backpack, current route information, navigation tools, weather/trail alerts, and the trip-specific hiking essentials below. |
| Cost | Varies widely. Use reliable gear you already own when it fits the trip; premium brands are not a substitute for preparation and skills. |
Hiking Footwear
Footwear is one of the most important comfort decisions for a hike, but there is no single shoe that is best for every trail. Match the footwear to the terrain, weather, distance, pack weight, and your own feet.
On rocky, uneven, muddy, or rough trails, hiking shoes or boots with dependable traction, underfoot protection, and a secure fit can be useful. Higher boots can provide more coverage around the ankle, while lighter hiking shoes and trail runners usually feel more flexible and breathable. Neither category automatically guarantees better injury prevention, so fit and stability matter more than simply choosing the tallest boot.
Brands such as Merrell and Salomon make hiking footwear in many shapes and styles. Try more than one model when possible because two shoes with the same labeled size can fit very differently.
For lighter trails or faster hiking, trail-running shoes may be appropriate. The Altra Lone Peak series, for example, is designed with room for the toes and a cushioned trail-running platform. Altra describes its FootShape fit as providing toe room while maintaining a secure fit through the midfoot rather than simply calling every model a wide shoe.
Pro Tip: Do not make a long or remote hike the first outing for new footwear. Stiffer hiking and backpacking boots often benefit from a gradual break-in period. Flexible hiking shoes and trail runners may need little break-in, but you should still test the fit and deal with any hot spots before they become blisters.
Products Worth Considering

Stronger and safer spikes: Featured 19 high quality stainless steel spikes per foot and firm chain system, providing excellent traction on a variety of terrain or other worst conditions, keep you safe and injury-free

【Non-slip Cleats】Ice cleats with 9 plum shaped stainless steel studs which firmly embedded in the rubber,not easy to fall off.evenly spreading from the toe to the heel,providing excellent traction on slippery surfaces

Stronger and safer spikes: Featured 19 high quality stainless steel spikes per foot and firm chain system, providing excellent traction on a variety of terrain or other worst conditions, keep you safe and injury-free
Clothing for Hiking
Hiking clothing should help you manage sweat, wind, rain, sun, and temperature changes. Layers work well because you can add or remove them as conditions change.
Base Layer: Manage Moisture
A base layer sits next to your skin and should manage moisture while remaining comfortable. Merino wool and synthetic fabrics are common choices. Icebreaker is one well-known maker of merino base layers, but fabric performance and fit matter more than brand.
In cool or wet conditions, avoid relying on cotton as your primary insulating layer because it absorbs moisture and can stay wet for a long time. Wool and many synthetic materials retain useful insulating performance more effectively when damp.
Middle Layer: Add Insulation
The middle layer supplies warmth. Fleece jackets, synthetic insulated jackets, and down garments are common choices. Fleece is breathable and dries relatively quickly. Down offers excellent warmth for its weight but needs protection from moisture because wet down loses much of its loft. Synthetic insulation can be more forgiving in persistently damp conditions.
Outer Layer: Block Wind and Rain
The outer layer protects you from wind, rain, and wet snow. A waterproof-breathable shell, including options that use membranes such as GORE-TEX, can be valuable in wet weather. In warm and dry conditions, a lighter wind layer may be more comfortable.
Sun and Weather Protection
Pack for the most severe reasonable conditions you could face, not just the temperature at the trailhead. Depending on the route, that may include a rain shell, warm hat, gloves, dry socks, spare insulation, sunglasses, a brimmed hat, and sunscreen.
Navigation Tools
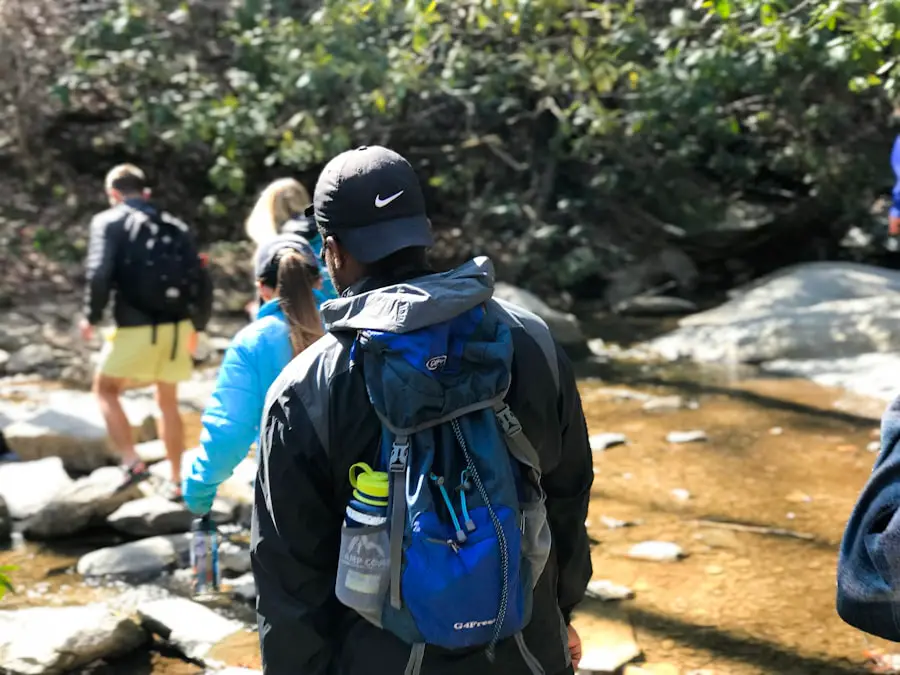
Reliable navigation is essential because trail signs, batteries, and cellular service are not guaranteed. Before leaving, know the route, major junctions, approximate distance, elevation gain, and a realistic turnaround time.
A USGS topographic map uses contour lines to show the shape and elevation of the terrain and includes many geographic features such as rivers, streams, lakes, roads, boundaries, and place names. Trail coverage can vary, so pair a topographic map with the most current trail information from the park, forest, or other land manager.
Learning to interpret contour lines helps you recognize steep slopes, ridges, valleys, climbs, and descents before you reach them. Closely spaced contour lines usually indicate steeper terrain than widely spaced lines.
Modern tools such as offline smartphone maps and dedicated GPS units, including models in Garmin’s GPSMAP family, can make route tracking easier. Download maps before leaving because an app may still provide GPS positioning when cellular data is unavailable.
Note: The National Park Service Ten Essentials guidance recommends knowing how to use your navigation tools, carrying a physical map as a backup, and bringing extra power for electronic devices.
Products Worth Considering

PROFESSIONAL GRADE: Trcosenp professional compass will always lead you in the right direction. The compass hiking survival are ideal for camping, military usage, emergencies, navigation and anywhere the beaten track takes you. It's also a good choice as the gifts for kids.

KEY FEATURES: This manual magnet compass consists of Acrylic Baseplate with Azimuth bearing and 360 degree rotating bezel. With the help of a magnetic needle which consists of a liquid-filled capsule (bubble free) helps to swing fast and freely point you towards north. The Magnifying Glass is used for reading and navigating geological maps. Along with this, it has the compass Ruler Scale of 1:24000 for precise route mapping
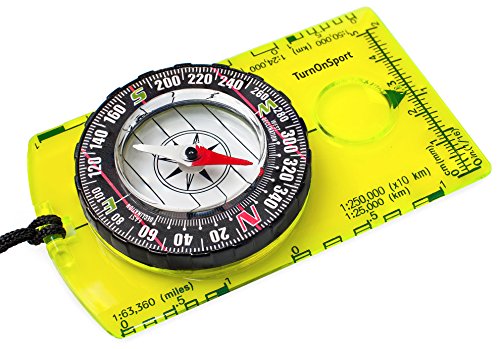
KEY FEATURES: This manual magnet compass consists of Acrylic Baseplate with Azimuth bearing and 360 degree rotating bezel. With the help of a magnetic needle which consists of a liquid-filled capsule (bubble free) helps to swing fast and freely point you towards north. The Magnifying Glass is used for reading and navigating geological maps. Along with this, it has the compass Ruler Scale of 1:24000 for precise route mapping
Choosing a Hiking Backpack
A backpack should hold the gear you actually need without forcing you to carry unnecessary bulk. Trip length is important, but weather, group gear, water availability, winter clothing, and overnight equipment can change the required capacity dramatically.
| Pack Type | Typical Use | Approximate Capacity | What to Consider |
|---|---|---|---|
| Small daypack | Short, simple hikes | About 6–20 L | Water, food, light layer, navigation and basic emergency gear still need to fit. |
| Full-day pack | Longer day hikes | About 20–35 L | Useful when carrying extra water, layers, first aid, or group gear. |
| Weekend pack | Light overnight trips | About 30–50 L | Sleeping system, shelter, food and seasonal gear drive the size. |
| Multiday pack | Several nights or bulky conditions | About 50–80 L | Fit, load transfer, food volume and weather protection become increasingly important. |
These ranges are starting points, not rules. Efficient warm-weather hikers may use less space, while winter equipment, large water carries, group equipment, or family gear can require much more.
Hydration reservoirs and accessible bottle pockets make drinking easier while moving. Larger packs may also include adjustable suspension, several compartments, hip-belt pockets, and exterior attachment points for items such as trekking poles.
Brands such as Osprey and Deuter offer multiple torso lengths and suspension designs. Whatever brand you choose, the pack should match your torso and hip dimensions. Adjust the hip belt and shoulder straps with realistic weight inside the pack rather than evaluating the fit while it is empty.
Products Worth Considering

MINIMALIST HYDRATION DAYPACK: Designed for short hikes and excursions, this lightweight daypack features a streamlined yet capable design, an included hydration reservoir and durable ripstop main body fabric made from 100% recycled, ocean-sourced nylon

MINIMALIST HYDRATION DAYPACK: Designed for short hikes and excursions, this lightweight daypack features a streamlined yet capable design, an included hydration reservoir and durable ripstop main body fabric made from 100% recycled, ocean-sourced nylon

Lightweight 12 L Hydration Backpack: Super lightweight 8.5 oz hydration pack backpack with 2 L water bladder. Waterproof and tear-resistant fabric, PU coated nylon hydration pack bears 25 lbs
Water and Hydration
Carry enough water for the route and have a backup plan before you start. There is no safe universal number of liters for every hike because your needs change with duration, heat, humidity, altitude, effort, body size, and reliable refill opportunities.
For context, several National Park Service locations in hot, dry environments advise hikers to plan around approximately one liter of water per person per hour. Cooler or less strenuous hikes may require less. Treat local land-manager guidance as more useful than a fixed “two liters per day hike” rule.
Hydration reservoirs make frequent drinking convenient, while bottles are easy to inspect, refill, and share. Whichever system you use, check your remaining supply regularly instead of discovering near the turnaround point that you have used most of your water.
Treat Natural Water Before Drinking
Do not assume a clear mountain stream or spring is safe. According to the CDC’s current backcountry water-treatment guidance, boiling is the most reliable way to kill germs. Bring clear water to a rolling boil for one minute, or three minutes above 6,500 feet.
If boiling is impractical, CDC recommends filtering and then disinfecting the filtered water. Filter specifications matter: some portable filters remove parasites but do not reliably remove all bacteria or viruses. Follow the filter or disinfectant manufacturer’s instructions and required treatment time.
Warning: Boiling, ordinary filters, and common disinfectants cannot make water contaminated with harmful chemicals, toxins, or radioactive materials safe. Choose another water source when chemical contamination is suspected.
Food and Nutrition for Hiking
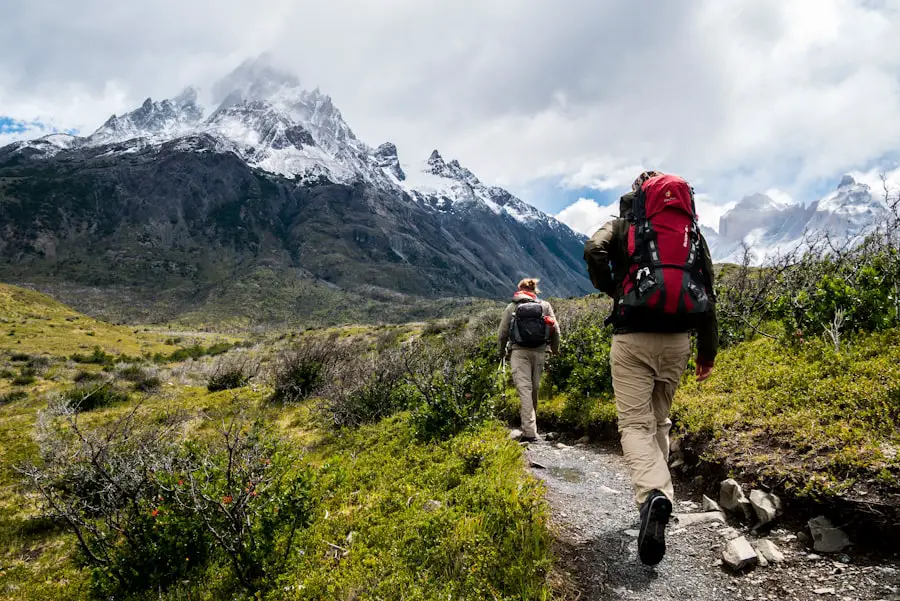
Food for hiking should be easy to carry, easy to eat, and appropriate for the length of the trip. Bring enough for your planned hike plus some extra food in case an injury, navigation problem, weather change, or other delay keeps you out longer than expected.
High-Energy Snacks for On-the-Go
Trail mix, nuts, dried fruit, energy bars, jerky, crackers, and nut-butter packets are easy to carry and require little preparation. A mixture of carbohydrate-rich foods plus some fat and protein gives you more variety than relying on one type of snack.
Lightweight Meals for Longer Trips
For longer hikes and backpacking trips, shelf-stable and dehydrated meals reduce weight and do not require refrigeration before preparation. Freeze-dried meals are convenient when you have enough treated water and a legal, reliable way to heat it.
Never assume you will be permitted to build a campfire for cooking. Fire rules can change with drought, wildfire danger, season, and location.
Fresh Food and Food Safety
Whole fruits and vegetables can work well on day hikes. Sandwiches and other perishable foods are also possible when they are kept at a safe temperature.
The USDA’s hiking and camping food-safety guidance says perishable food should not remain in the 40°F–140°F danger zone for more than two hours, or more than one hour when the temperature is above 90°F. Use an insulated container and adequate cold sources when necessary.
First Aid Kit for Hiking
A hiking first-aid kit should be matched to the size of your group, the terrain, expected weather, activity, trip duration, and distance from professional help. A tiny kit for a paved local loop will look different from one carried into remote backcountry.
The American Red Cross hiking first-aid checklist includes supplies such as:
- Adhesive bandages in several sizes
- Gauze pads and rolled gauze
- Medical tape
- Antiseptic or wound-cleaning supplies
- Blister treatment
- Non-latex medical gloves
- Elastic wrap
- Tweezers
- First-aid reference information
- Pain-relief medication that you can safely use and take according to its label
- Personal prescription medications
- Trip-specific allergy or medical supplies
In areas with biting insects or ticks, add appropriate insect protection. If someone in the group has a known serious allergy or another medical condition, carry the medication and emergency supplies prescribed for that person.
Note: Carrying first-aid supplies is not the same as knowing how to use them. First-aid or wilderness first-aid training is especially valuable when you hike far from rapid emergency response.
Emergency Essentials
Several items that seem unnecessary at the trailhead become extremely important if an injury, wrong turn, or delayed return keeps you outside after dark.
Headlamp and Backup Power
Carry a headlamp or flashlight even when you expect to finish during daylight. A headlamp is especially practical because it keeps both hands free. Check the battery before leaving and bring spare batteries or another suitable power source.
Emergency Shelter
An emergency blanket, lightweight bivy, tarp, or other compact shelter can reduce exposure to wind, precipitation, and cold if you cannot finish the hike as planned. Extra clothing is helpful, but it does not completely replace protection from the weather.
Repair Tools
A small repair kit can include strong repair tape, a knife or multi-tool, and any repair parts your trip depends on. The goal is not to carry a workshop; it is to fix a torn strap, loose piece of equipment, or other simple failure well enough to get home safely.
Fire-Starting Supplies
The National Park Service includes matches or a lighter and fire-starting material among its Ten Essentials. These can provide heat or a signaling option in some emergencies.
Warning: Carrying fire-starting equipment does not mean you are permitted to build a fire. Check current fire restrictions before the hike and never start a fire when it is prohibited or when doing so could create a wildfire hazard.
Whistle and Signaling
A whistle is small, light, and much easier to sustain than shouting. A signal mirror and a bright item of clothing can also help rescuers notice you in suitable conditions.
Phone, Satellite Communication, and WiFi
A fully charged phone is useful for offline maps, emergency calls where service exists, weather information before the hike, and communication near developed areas. Carrying a power bank can extend its usefulness on longer trips.
Remote hikers should not assume a phone will have service. Depending on the location and consequences of losing contact, a two-way satellite messenger or personal locator beacon may provide a more appropriate emergency option.
A portable WiFi hotspot for international travel can be useful for travel logistics when compatible cellular data service is available, especially before or after a hike. It should not be treated as an emergency locator, satellite communicator, or guaranteed source of connectivity on a remote trail.
Check the Route and Conditions Before You Leave
Good preparation starts before anything goes into your backpack. The National Park Service Hike Smart guidance recommends checking weather and park alerts and being willing to change plans when conditions are poor.
- Check the forecast: Look at expected temperature, rain, wind, storms, and major temperature changes during the period you expect to be outside.
- Check trail alerts: Look for closures, damaged bridges, flooding, snow, wildfire activity, access restrictions, and other current hazards.
- Know the route: Review distance, elevation gain, junctions, water availability, and difficult terrain before starting.
- Set a turnaround time: Do not let reaching a summit or viewpoint pressure you into finishing after dark or continuing into deteriorating weather.
- Share your plan: Tell a trusted person where you are going, your route, where your vehicle will be, and when they should expect you back.
- Charge electronics: Download offline maps and check batteries before leaving.
- Check regulations: Confirm permits, fire rules, pet rules, food-storage requirements, and seasonal restrictions.
Pro Tip: Pack for the most serious reasonable condition you could encounter, not just for the conditions in the parking lot. A warm trailhead can still lead to wind, rain, cold, snow, or darkness at higher elevation or later in the day.
Condition-Specific Hiking Gear
The Ten Essentials are a planning system, not a claim that every hiker should carry identical equipment. Add or remove trip-specific items based on the environment and activity.
- Sun exposure: sunglasses, sunscreen, brimmed hat, and sun-protective clothing.
- Insects and ticks: appropriate repellent, protective clothing, and tick-removal tools where needed.
- Snow or ice: appropriate traction devices, gaiters, and winter layers when conditions require them.
- Steep or uneven trails: trekking poles can improve stability and reduce the need to balance only with your legs.
- Wet conditions: waterproof shell, pack protection, dry socks, and protected spare clothing.
- Remote routes: additional navigation redundancy, emergency communication, shelter, food, and first-aid capability.
- Backcountry sanitation: toilet paper, hand sanitizer, trowel, or waste bags according to local regulations.
- Wildlife areas: use the food-storage method required by the land manager, which may include lockers or an approved bear-resistant container.
Frequently Asked Questions
What should you bring when hiking?
Bring navigation, sun protection, extra clothing, a headlamp, first-aid supplies, fire-starting supplies where legal and appropriate, a repair kit and tools, extra food, water plus a treatment method, and emergency shelter. Add trail-appropriate footwear, a backpack, and condition-specific gear.
How much water should you bring when hiking?
There is no single amount that fits every hike. Base your water on hike duration, heat, humidity, altitude, exertion, and reliable refill points. In hot, dry conditions, some National Park Service locations advise about 1 liter per person per hour. Carry extra capacity and treat natural water before drinking it.
What kind of food should you bring when hiking?
Choose lightweight, calorie-dense, easy-to-eat foods such as trail mix, nuts, dried fruit, bars, jerky, nut-butter packets, or sandwiches kept at a safe temperature. For longer trips, shelf-stable or dehydrated meals are practical. Bring extra food for delays.
What navigation tools should you bring when hiking?
Carry a current trail map and know how to use it. A compass, offline phone map, or dedicated GPS can help, but electronics should not be your only navigation method on remote hikes. Download maps before leaving and carry backup power when appropriate.
What should be included in a first aid kit for hiking?
A hiking first-aid kit should match the group, terrain, weather, and distance from help. Common items include adhesive bandages, gauze, medical tape, antiseptic supplies, blister treatment, gloves, elastic wrap, tweezers, pain relievers you can safely take, and personal medications.
What clothing should you bring when hiking?
Wear moisture-managing layers suited to the forecast and the worst reasonable conditions. A typical system includes a wool or synthetic base layer, an insulating layer when needed, and a wind- or rain-resistant outer layer. Add sun protection, a hat, gloves, and dry spare layers when conditions call for them.
What other items should you bring when hiking?
Useful additions can include a headlamp with spare power, whistle, multi-tool, emergency blanket or bivy, sunscreen, insect repellent, repair tape, trekking poles, traction devices, a power bank, sanitation supplies, and required food-storage equipment. Choose extras based on the trail and season.
Is a phone enough for hiking navigation?
Not for every hike. Phones are useful for offline maps and GPS, but batteries can die, devices can break, and cell service may be absent. On remote routes, carry a physical map and the skills to use it; consider a dedicated GPS or satellite communication device when the consequences of losing contact are high.
Do you need the 10 essentials on a short hike?
Use the 10 Essentials as a planning system, then scale the exact items to the route, weather, remoteness, and group. Even short hikes can be delayed by injury, darkness, or weather, so basic navigation, water, light, first aid, layers, and emergency items are still prudent.
Sources
- National Park Service — Ten Essentials — navigation, sun protection, extra clothing, illumination, first aid, fire, repair supplies, food, hydration, and emergency shelter.
- National Park Service — Hike Smart — weather checks, park alerts, changing plans, and general hiking preparation.
- U.S. Geological Survey — What Is a Topographic Map? — contour lines, elevation, terrain, and mapped geographic features.
- CDC — Water Treatment While Hiking, Camping, or Traveling — boiling, filtration, disinfection, and treatment limitations.
- American Red Cross — Hiking and Backpacking First Aid Kit Checklist — recommended first-aid supplies and trip-specific preparation.
- USDA Food Safety and Inspection Service — Food Safety While Hiking and Camping — outdoor food storage, perishables, safe temperatures, and meal planning.
