
Last Updated on July 27, 2026 by Daniel Globe
New hiking boots should feel secure and comfortable before you ever take them on a long trail. Breaking them in can soften stiff materials, settle the tongue and padding, and help you learn how the boots behave on hills and uneven ground. What break-in cannot do is rescue boots that are the wrong size or shape for your feet.
Quick Answer
There is no fixed number of hours or miles required to break in hiking boots. Flexible hiking shoes may need only a few test walks, while stiff leather or backpacking boots can take a week or longer of gradual wear. Start indoors, increase distance slowly, and never expect break-in to correct a poor fit.
Key Takeaways
- A new hiking boot should fit correctly before break-in begins; major pinching, toe impact, numbness, or excessive heel movement usually points to a fit problem.
- Wear the same hiking socks, insoles, or orthotics you plan to use on the trail.
- Progress from indoor wear to short walks, easy trails, hills, and finally hikes with your normal pack.
- Lightweight hiking footwear may need little break-in, while thick leather and stiffer backpacking or mountaineering boots usually need more time.
- Stop and deal with hot spots early instead of trying to “walk through” pain or developing blisters.
- Do not soak, overheat, or aggressively force new boots to soften.
At a Glance
| Time Required | A few short sessions to a week or more; stiff leather and technical boots may take longer |
| Difficulty | Easy, but patience matters |
| Tools Needed | Your hiking socks, normal insoles or orthotics, laces, daypack, and optional blister tape or moleskin |
| Cost | Usually $0; optional blister protection or manufacturer-approved boot-care products may add a small cost |
Breaking in a hiking boot can fine-tune a good fit. It cannot turn the wrong size or the wrong boot shape into the right one.
Disclosure: As an Amazon Associate I earn from qualifying purchases. Some links on this page are affiliate links, at no extra cost to you.
Factors to Consider When Breaking in Hiking Boots
The biggest factors are the boot’s construction, its initial fit, your socks and insoles, and the kind of hiking you plan to do. Modern hiking footwear varies from flexible trail-oriented shoes to heavy leather backpacking and mountaineering boots, so there is no single break-in schedule that works for every pair.
Boot Material and Stiffness
Light synthetic or fabric hiking shoes often feel comfortable almost immediately. They should still be tested before a major trip, but they may not need much material softening. Heavier full-grain leather boots and footwear with stiff midsoles, shanks, or technical support normally need more gradual wear.
REI’s hiking-boot guidance notes that light hikers may feel good straight out of the box while burly leather models can require considerably more time. Danner similarly advises allowing extra time for footwear made with thicker leather or stiffer components.
Your Foot Shape and Initial Fit
Different brands and models use different shapes, widths, heel cups, and toe boxes. A boot that fits one hiker perfectly can pinch another hiker even when both normally wear the same numbered size.
Before wearing new boots outside, walk around indoors and check the fit carefully. Danner recommends hiking footwear that is snug at the sides without pinching, leaves room in front of the toes, and does not allow substantial heel sliding.
- Toes: Your toes should not press against the front when standing or walking.
- Heel: A small amount of movement can occur, but repeated lifting or rubbing is a warning sign.
- Width: Your forefoot should feel held without being squeezed.
- Instep: Laces should secure the foot without creating numbness or sharp pressure.
- Overall feel: Stiffness can be normal; pain is not something you should expect to “break through.”
Warning: Do not rely on break-in to fix a boot that causes persistent pain, numbness, significant toe pressure, or major heel movement. Those problems usually call for a different size, width, lacing setup, insole, or boot model.
Socks and Insoles
Use the same socks and insoles you expect to wear on the trail. LOWA recommends wearing your intended hiking socks when trying on and breaking in boots. This gives you a much more accurate picture of the final fit.
Thicker is not automatically better. A thick sock can cushion a roomy boot, but it can also make a close-fitting boot too tight. For longer hikes, choose hiking socks that manage moisture well. The National Park Service recommends wool or synthetic hiking socks for longer outings.
How Long Does It Take to Break in Hiking Boots?
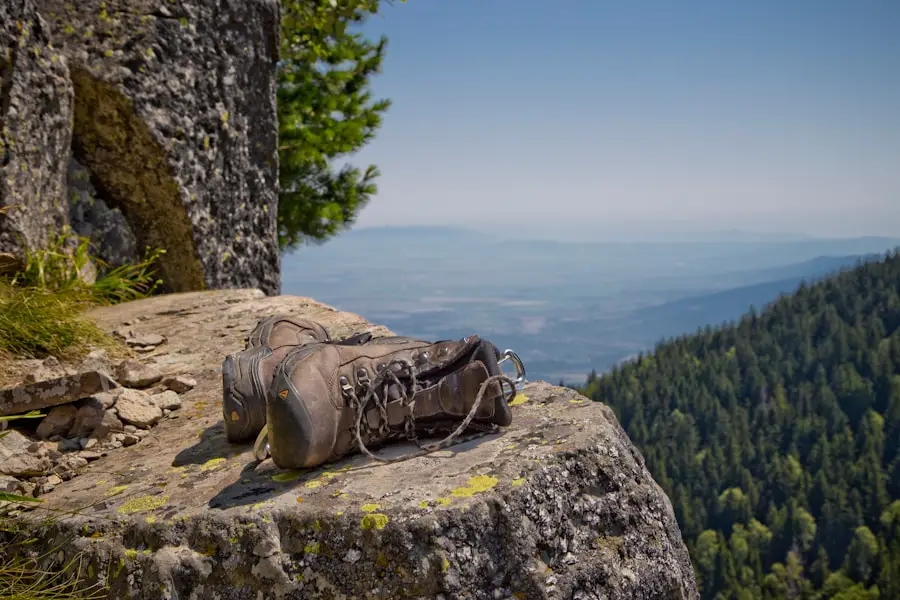
There is no dependable rule such as “20 miles,” “30 miles,” or a fixed number of hours. Break-in time depends on the boot’s stiffness, materials, construction, your feet, and how well the boot fit in the first place.
Some flexible hiking shoes need little more than a few short test walks. Stiffer leather hiking boots may need several days of gradual use, while heavy backpacking or mountaineering boots can require longer. Danner suggests wearing its new hiking and lifestyle boots on short outings for a couple of hours per day for about a week, with additional time for thicker leather or stiffer components. REI notes that burly leather boots may take weeks.
Use comfort and control rather than mileage as your guide. Before committing to a long hike, you should be able to walk on flat ground, climb, descend, and carry your normal daypack without developing worsening pressure points.
Note: A boot does not need to become soft like a casual shoe to be “broken in.” Backpacking and mountaineering boots are intentionally stiffer because their construction is designed for support, load carrying, and rough terrain.
Tips for Breaking in Hiking Boots
| Tip | What to Do |
| Choose the right size and shape | Confirm toe room, secure heel hold, and no painful pinching before wearing the boots outdoors. |
| Break them in gradually | Move from indoor wear to neighborhood walks, easy trails, hills, and longer outings only when the previous stage feels comfortable. |
| Use your hiking socks | Wear the same sock thickness and material you expect to use on your trip rather than automatically choosing the thickest socks available. |
| Use care products selectively | Only condition or waterproof boots with products approved by the footwear manufacturer for that exact leather, fabric, or waterproof membrane. |
| Keep them clean and dry correctly | Remove dirt after use and let wet footwear dry naturally instead of placing it against strong direct heat. |
Step 1: Wear Them Indoors First
Start at home while the boots are still clean enough to return if the fit is wrong. Put on your normal hiking socks and the insoles or orthotics you intend to use. Lace the boots securely, straighten the tongue, and walk around on different indoor surfaces.
Pay attention to heel movement, toe pressure, seams, ankle contact, and the top of your foot. Mild stiffness is expected in a substantial new boot. A sharp pressure point or growing pain is different.
Step 2: Take Short Walks Close to Home
Once the indoor fit feels right, wear the boots for short neighborhood walks or routine outings. Increase wear time only if your feet still feel comfortable after the previous session.
This stage is useful because you can easily stop, adjust the laces, or return home if a problem develops.
Step 3: Move to an Easy Trail
Next, use the boots on an easy local trail with dirt, gravel, roots, or other uneven surfaces. REI and LOWA both recommend gradually progressing to real trail terrain rather than making a long backcountry trip the first outdoor test.
Uneven ground lets you evaluate lateral movement, ankle comfort, sole stiffness, and whether your heel stays controlled when the terrain changes.
Step 4: Test Hills and Descents
Climbs and descents reveal fit problems that may not appear on level pavement. On the way uphill, notice whether your heel repeatedly lifts and rubs. On the way downhill, make sure your toes do not strike the front of the boot.
If downhill toe contact continues even after reasonable lacing adjustments, the boot may be too short, too loose around the heel, or simply the wrong shape for your foot.
Step 5: Add Your Daypack
Once the boots are comfortable on short trails, wear them with the pack and approximate load you expect to carry. REI specifically recommends gradually increasing both mileage and pack weight during later break-in outings.
A load can change your stride and the way your foot moves inside the boot, so this is an important final test before a full-day hike or backpacking trip.
Pro Tip: Schedule at least one realistic shakedown hike before a major trip. Use your normal socks, insoles, pack, and terrain whenever possible. That test tells you much more than simply wearing the boots around the house for the same number of hours.
How to Use Lacing to Improve Comfort
Lacing cannot fix the wrong boot size, but it can fine-tune how a correctly sized boot holds your foot. The North Face recommends experimenting with different lacing techniques during the break-in period.
- Heel slipping: A heel-lock or surgeon’s-knot style lacing pattern can help secure the heel before the ankle section is tightened.
- Pressure across the top of the foot: Skipping or “windowing” the laces over the sensitive area may reduce direct pressure.
- Toe pressure on descents: Snug the lower and midfoot sections so the foot does not slide forward, but do not tighten enough to create numbness.
Recheck your laces after several minutes of walking. Padding can settle and feet can change volume during a hike, so a setup that felt perfect at the trailhead may need a small adjustment.
How to Handle Hot Spots and Blisters During Break-In
A hot spot is an early warning that repeated friction or pressure is irritating your skin. Do not wait for it to turn into a blister.
- Stop walking when you first notice rubbing, heat, or tenderness.
- Check whether the sock has folded, bunched, or become unusually wet.
- Adjust the lacing if the foot is moving or a lace is creating pressure.
- Protect the area with moleskin, blister tape, or a suitable blister pad if needed.
- Shorten the outing if the irritation continues.
Danner recommends addressing friction and hot spots during break-in, while the National Park Service advises hikers to carry blister protection such as moleskin on longer outings.
Signs That Your Hiking Boots Are Properly Broken In
Your boots are ready for a serious hike when they feel predictable and comfortable over the type of terrain you expect to encounter. Look for these signs:
- Your heel remains secure without repeated rubbing.
- Your toes do not hit the front on descents.
- You do not develop new hot spots as distance increases.
- The tongue, collar, and upper no longer create distracting pressure.
- The boot flexes where it is designed to flex without painful creasing.
- You can walk over uneven ground without your foot sliding excessively inside the boot.
- You can carry your normal daypack without the fit changing enough to cause discomfort.
Do not judge readiness only by how soft the material feels. A supportive hiking boot may remain noticeably stiffer than an everyday sneaker even after it has settled comfortably around your foot.
Common Mistakes to Avoid When Breaking in Hiking Boots
Taking Them Straight on a Long Hike
One of the most common mistakes is making a difficult, all-day hike the first real test. A small fit issue can become a painful blister or pressure point once you are several miles from the trailhead.
Increase distance, terrain difficulty, and pack weight gradually instead.
Trying to Force a Bad Fit
Do not assume every painful area will disappear once the boot softens. A boot that is too short, too narrow, or badly shaped for your heel may never become comfortable.
If an indoor fit test reveals major pressure or heel movement, resolving the sizing problem before wearing the boot outside is usually better than hoping weeks of use will change it.
Choosing Socks Only to Make the Boot Fit
Sock thickness can make small changes to boot volume, but it should not be used to disguise a major sizing problem. Use the sock system you actually want for hiking and judge the boot around that setup.
Ignoring Lacing
Loose lacing can allow the heel to lift and the foot to slide forward, while excessive tension can create pressure and numbness. Experiment with small adjustments instead of simply tightening every lace as hard as possible.
Soaking or Heating the Boots
Warning: Avoid shortcuts such as soaking new boots and then walking long distances, placing them next to a heater, using a hair dryer on high heat, or aggressively forcing the boot to bend. REI specifically advises against soaking as a break-in shortcut, and GORE-TEX recommends drying compatible footwear naturally at moderate temperatures rather than with direct heat.
Using the Wrong Conditioner or Waterproofing Product
Some full-grain leather boots can be softened with an approved conditioner. Danner, for example, says its appropriate full-grain leather dressing can help during break-in. That does not mean every leather, suede, nubuck, synthetic, or waterproof boot should receive the same product.
For GORE-TEX footwear, GORE-TEX care guidance says to follow the footwear manufacturer’s instructions, dry naturally at moderate temperatures, and restore water repellency when water no longer beads properly. It also advises against waterproofing waxes or greases that can affect breathability.
Do All Hiking Boots Need to Be Broken In?
No. The amount of break-in needed has changed as footwear construction has evolved. Flexible hiking shoes and lightly structured boots may feel trail-ready almost immediately when they match your feet well.
Stiff backpacking, mountaineering, and thick leather boots are more likely to benefit from a longer acclimation period. Hanwag notes that modern hiking boots are generally easier to break in than older, very stiff leather designs, and some modern models can be comfortable from the beginning.
Even when a shoe feels perfect straight out of the box, a short test hike is still worthwhile before a remote or multi-day trip. You are testing more than material stiffness: you are also testing your socks, insoles, lacing, traction, heel hold, and downhill toe room.
When to Stop Breaking In a Boot and Change the Fit
Give normal stiffness time to settle, but do not keep forcing the process when the symptoms point to a mismatch.
Consider a different size, width, insole, or boot model when you repeatedly experience:
- toes hitting the front of the boot;
- strong pinching at the sides of the forefoot;
- numbness or tingling;
- substantial heel lift that lacing cannot control;
- a hard pressure point in the same location every time;
- blisters that return despite reasonable sock and lacing adjustments; or
- pain that increases as the boot is worn.
A qualified footwear fitter can help determine whether the issue is sizing, foot volume, boot shape, lacing, or insole choice. For certain leather boots, a manufacturer or professional cobbler may also be able to make a minor targeted stretch. Stretching should not be treated as a substitute for buying the correct size.
When to Replace Hiking Boots
Breaking in new footwear is only one part of hiking-boot ownership. Eventually, wear can reduce traction, support, weather protection, or comfort.
Inspect your boots regularly for:
- outsole lugs that are badly worn or uneven;
- rubber that has hardened, cracked, or separated;
- sole separation that continues to spread;
- damaged uppers, eyelets, or hooks;
- cushioning that feels permanently compressed;
- loss of support or stability that was not present when the boots were newer;
- persistent leaks after appropriate cleaning and water-repellency maintenance; or
- recurring foot pain caused by worn components.
Replacement is not always the only option. Some stitched or otherwise repairable hiking boots can be resoled or recrafted. Vibram promotes resoling through qualified repair shops, and manufacturers such as Danner offer recrafting for eligible models. Check the boot manufacturer’s repair policy before discarding a pair with a worn outsole but a sound upper.
Final Thoughts on Breaking in Hiking Boots
Breaking in hiking boots is best treated as the final test of an already good fit, not as a way to force uncomfortable footwear to work. Start indoors, use your normal hiking socks and insoles, and gradually move to longer walks, uneven trails, hills, and your normal pack load.
Pay attention to what your feet tell you. Mild stiffness can improve as the materials settle, but persistent pain, numbness, severe heel movement, or toe impact deserve a fit change rather than more punishment. With a patient break-in process, you can head into a long hike knowing that your footwear has already been tested under realistic conditions.
If you are preparing for a cold-weather or multi-day trip, footwear is only one part of staying comfortable. You may also find this guide to a rechargeable hand warmer for travel useful when planning your gear.
Love travel? Join Our Facebook Community For More Tips.
Frequently Asked Questions
What is the break-in period for hiking boots?
There is no universal break-in period. Flexible hiking footwear may need only a few short test walks, while stiff leather, backpacking, or mountaineering boots may need several days, a week, or longer. Increase distance only while the boots remain comfortable rather than aiming for a specific mileage.
How long does it take to break in leather hiking boots?
Leather boots often need more gradual wear than flexible hiking shoes, especially when the leather and supporting components are thick or stiff. Some manufacturers suggest short daily wear for roughly a week, while heavier boots may take longer. Comfort and fit are better guides than a fixed number of miles.
What are the best steps for breaking in hiking boots?
First confirm the fit indoors with your normal hiking socks and insoles. Then take short walks near home, progress to an easy trail, test climbs and descents, and finally add your normal daypack. Increase distance and difficulty only after each stage feels comfortable.
Can I speed up the break-in process for hiking boots?
You can make the process efficient by wearing the boots regularly on progressively longer walks, but aggressive shortcuts are not recommended. Do not soak the boots, expose them to strong direct heat, or force long hikes through pain. Use leather conditioner only when the boot manufacturer approves it for that exact material.
Should I wear thick socks to break in hiking boots?
Wear the socks you actually plan to hike in rather than automatically choosing extra-thick socks. Added thickness can help fill a slightly roomy boot, but it can also make a properly sized boot too tight. Your break-in setup should match your real trail setup as closely as possible.
How do I know if my hiking boots are properly broken in?
They are ready when you can walk on realistic terrain without worsening hot spots, toe impact, painful pressure, or excessive heel movement. You should also be able to climb, descend, and carry your normal pack comfortably. The boots can remain supportive and relatively stiff even after break-in.
Is heel rubbing normal while breaking in hiking boots?
A new collar may feel unfamiliar, but repeated rubbing that creates a hot spot should be addressed immediately. Check sock placement and lacing first. If your heel continues to lift substantially or blister in the same place, the boot’s heel shape or size may not suit your foot.
Can I soak hiking boots in water to break them in faster?
No. Soaking is not a recommended shortcut for modern hiking boots because it can be hard on both the footwear and your feet. Break them in through gradual wear instead, and follow the manufacturer’s care instructions whenever the boots become wet.
Sources
- REI Expert Advice — How to Break in Your Hiking Boots — gradual break-in, pack progression, fit limitations, and avoiding soaking shortcuts.
- Danner — New Boots — initial hiking-boot fit, toe room, heel movement, short break-in sessions, leather guidance, and hot-spot prevention.
- LOWA — Break in Hiking Boots — planned hiking socks, gradual terrain progression, lacing, pressure points, and care.
- GORE-TEX — Footwear Care Instructions — cleaning, moderate-temperature drying, DWR restoration, and membrane-compatible care.
- U.S. National Park Service — Hike Smart — appropriate hiking footwear, hiking socks, and blister-preparedness guidance.
- The North Face — Breaking in Your New Hiking Boots — indoor testing, hiking socks, and lacing adjustments.

