
Last Updated on July 27, 2026 by Daniel Globe
New hiking boots should feel comfortable and secure before you ever try to break them in. Breaking in a good-fitting pair can soften stiff materials, reduce minor pressure points, and help the footwear move more naturally with your feet. It cannot fix boots that are fundamentally too short, too narrow, too wide, or the wrong shape. The safest way to speed up the process is gradual wear—not heat, soaking, freezing, or other aggressive shortcuts.
Quick Answer
To break in hiking boots faster, start with the correct fit, wear the same socks and insoles you will use on the trail, and increase walking time gradually from indoor wear to short outdoor walks and easy hikes. Avoid heating, soaking, or freezing boots, because these shortcuts can damage leather, adhesives, foam, or waterproof membranes.
Key Takeaways
- Make sure the boots fit properly before trying to break them in; break-in cannot correct the wrong size or shape.
- Wear your normal hiking socks, insoles, and orthotics during every break-in session.
- Start indoors, progress to short walks, and then gradually increase trail distance and pack weight.
- Treat hot spots early instead of walking until they become painful blisters.
- Avoid ovens, microwaves, stovetops, hairdryers, soaking, and freezing unless the footwear manufacturer specifically provides different instructions.
- Use conditioners or stretching methods only when they are compatible with the boot’s materials.
At a Glance
| Time Required | Several short sessions over a few days for flexible boots; stiff, heavy leather boots can require longer and sometimes several weeks. |
| Difficulty | Easy |
| Tools Needed | Hiking socks, normal insoles or orthotics, optional blister protection, and manufacturer-approved conditioner for compatible leather boots. |
| Cost | Usually $0 if you already have your hiking socks; optional conditioner, blister protection, or professional stretching adds to the cost. |
Disclosure: As an Amazon Associate I earn from qualifying purchases. Some links on this page are affiliate links, at no extra cost to you.
Check the Fit Before You Break In Hiking Boots
Selecting the correct size is the most important first step. There is no rule that every hiker should automatically buy hiking boots one full size larger than everyday shoes. Brand lasts, foot width, foot volume, sock thickness, and boot construction all affect fit.
According to Danner’s fitting guidance, hiking footwear should have room at the toes without substantial heel sliding or pinching. The boot should feel secure rather than painfully tight.
Try the boots indoors while wearing the socks, insoles, and any orthotics you expect to use on the trail. Lace both boots properly, stand with your full weight on your feet, walk around, and test stairs if available.
Pay attention to these fit checks:
- Toe room: Your toes should not strike the front of the boot while standing or walking downhill.
- Heel hold: Minor movement can occur in some boots, but your heel should not repeatedly lift and slide.
- Width: The sides should feel secure without squeezing your forefoot or little toe.
- Volume: Lacing should hold your foot securely without extreme tightening.
- Comfort: Sharp pressure, numbness, pinching, or obvious rubbing before break-in is a warning sign.
Warning: Do not count on break-in to fix boots that are clearly too short, painfully narrow, excessively loose, or the wrong shape for your feet. Keep them indoors until you are confident about the fit and your ability to return or exchange them.
Wear Them Around the House
Start Indoors
Once you know the basic fit is correct, begin by wearing the boots around your home for short periods. Use your normal hiking socks and insoles and lace the boots the same way you intend to wear them outside.
This low-risk stage lets your feet become accustomed to the footwear while the boot begins flexing at natural movement points. It also gives you a chance to identify problems before dirt or outdoor wear affects your ability to return the boots.
Watch for Fit Problems
Walk on normal household surfaces and pay attention to the heel, toes, sides of the forefoot, ankle collar, tongue, and top of the foot. A new boot may feel stiff, but stiffness is different from sharp pressure or painful rubbing.
If one area begins to feel unusually warm or irritated, stop and investigate rather than continuing until a blister forms. Sometimes correcting the tongue position or changing the lacing pattern solves the problem immediately.
Increase Wearing Time Gradually
If the boots remain comfortable, extend each session. Current REI break-in guidance recommends progressing from indoor wear to neighborhood walking and then to trail use, increasing distance and pack weight only after the boots feel comfortable at the previous stage.
Lightweight hiking footwear may require very little break-in. Stiff backpacking or full-leather boots generally need more time because their uppers and supporting components are less flexible.
Use the Right Hiking Socks, Not Just Thicker Socks
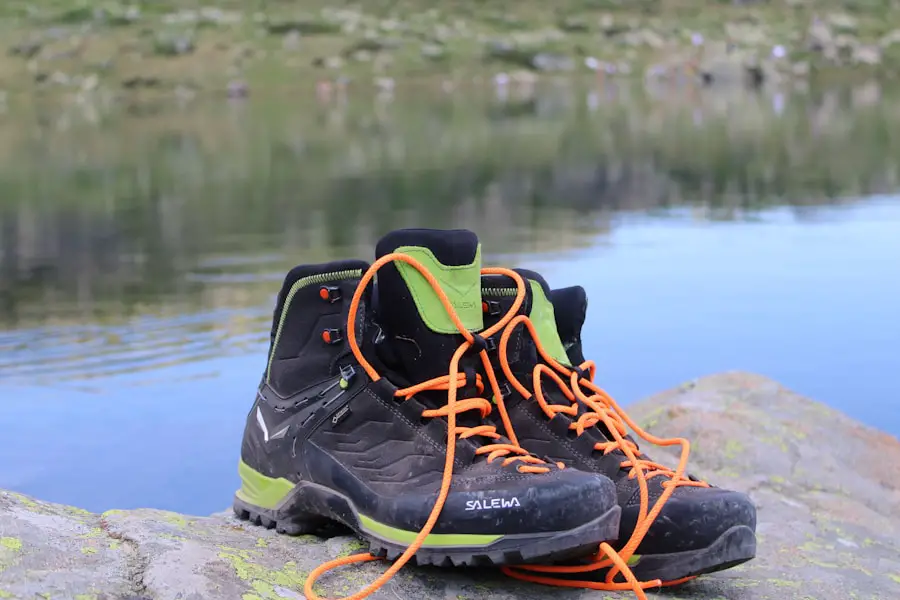
It may be tempting to put on the thickest socks you own in an attempt to stretch new boots faster. That approach can make the boots artificially tight and may create pressure that you will not experience with your normal trail setup.
Instead, use the same type and thickness of hiking socks you expect to wear regularly. Moisture-wicking socks can also help manage moisture inside the boot. Avoid assuming that a particular fiber alone will prevent blisters; keeping socks dry is especially important.
A 2022 study of 203 long-distance hikers found that finishing a hiking stage in wet socks was associated with a 1.94-times greater risk of foot blisters. See the study on PubMed.
If your regular hiking socks make a supposedly correct pair of boots painfully tight, reconsider the size, width, or boot model rather than attempting to force the material to stretch around excessive sock bulk.
Adjust the Lacing and Insoles
Before attempting to physically stretch a boot, check its lacing. Different lacing tensions can change how securely the heel is held and how much pressure falls across the instep.
Keep the tongue centered and smooth, and lace the boot firmly enough to control movement without cutting off circulation. If your heel moves excessively, a heel-locking lacing pattern may help. If the top of your foot feels compressed, reducing tension across that area may relieve the pressure.
Also use the same insoles or custom orthotics during break-in that you plan to use while hiking. Changing the insole later can alter foot position and interior volume enough to change the fit.
Pro Tip: Test only one adjustment at a time. If you change socks, insoles, and lacing simultaneously, it becomes much harder to tell which change actually improved—or worsened—the fit.
Skip Heat, Soaking, and Freezing Shortcuts
| Method | Recommendation | Why |
|---|---|---|
| Hairdryer, heater, or radiator | Avoid | Direct heat can harm leather or other boot components and may affect waterproof construction. |
| Oven, stovetop, or microwave | Never use | These appliances are not safe boot-treatment tools and can damage footwear or create a household safety hazard. |
| Soaking or freezing water inside the boot | Avoid | Uncontrolled moisture and expansion can distort materials and shorten footwear life. |
Internet break-in hacks often recommend warming boots with a hairdryer, soaking them, or placing bags of water inside and freezing them. These methods are unnecessary and can be harmful.
Columbia specifically advises against heating, soaking, and freezing shortcuts. For waterproof footwear, GORE-TEX footwear-care guidance also says to dry footwear naturally at moderate temperatures and avoid direct heat.
Warning: Never place hiking boots in an oven, microwave, on a stovetop, against a fire, or directly on a high-temperature heater. Follow the specific care instructions supplied by the boot manufacturer.
Let the Soles Flex Naturally
New hiking boots—especially backpacking and mountaineering models—can feel stiff underfoot. The safest way to develop normal flex is simply to walk in them progressively.
Avoid aggressively folding, twisting, or repeatedly bending a stiff sole by hand. Stiffness may be an intentional part of the boot’s support system rather than something that should be forced out of it.
As you progress from indoor walking to sidewalks and then easy trails, the footwear will begin flexing in the places that correspond to your natural stride. This also gives you a much more realistic picture of how the outsole grips and how the boot behaves on slopes.
Use a Boot Stretcher Only for Appropriate Leather Boots
What a Boot Stretcher Can and Cannot Do
A boot stretcher may create a small amount of extra space in a compatible leather upper, especially at a localized pressure point. It cannot reliably make a boot substantially longer, transform a narrow last into a wide one, or fix a boot whose overall shape does not match your foot.
Synthetic uppers, waterproof laminates, reinforced toe caps, protective rands, and heavily structured hiking boots may respond very differently to stretching. Do not assume a tool that works on traditional leather footwear is appropriate for every hiking boot.
Use a Boot Stretcher Safely
Check the footwear manufacturer’s care instructions before applying stretching products or mechanical pressure. Do not force the stretcher farther simply because the material has not changed quickly.
Also remember that stretching or applying care products may affect return eligibility. For example, Danner advises customers to confirm fit before conditioning or stretching new boots.
When to See a Cobbler
For a stubborn localized pressure point in a suitable leather boot, professional stretching is safer than experimenting with aggressive DIY methods. Danner recommends professional boot stretching for persistent problem areas in leather footwear.
If multiple areas feel wrong or the boot is clearly the wrong length, width, or volume, replacing the boot is usually a better solution than stretching it.
Condition the Leather Only If the Manufacturer Allows It
Conditioner can help some full-grain leather boots remain supple, but it is not a universal break-in treatment. Leather types such as full-grain, nubuck, suede, and rough-out leather can require different products, while synthetic hiking footwear usually requires completely different care.
Danner, for example, states that its boot dressing can help soften compatible full-grain leather during break-in. That does not mean the same treatment should be applied to every leather or waterproof boot.
Before applying anything:
- Read the manufacturer’s care instructions.
- Confirm that the product is approved for the specific leather.
- Test a small inconspicuous area when color change is possible.
- Use only the recommended amount.
- Do not use heat to force conditioner into the leather.
Note: Conditioning and waterproofing are not automatically the same thing. Waterproof membranes and exterior leather treatments have separate care requirements, so follow the instructions for your exact boot.
Manage Hot Spots Before They Become Blisters
A hot spot is an early warning that repeated movement or pressure is irritating the skin. Do not treat it as something you must endure to make the boot fit.
Stop walking and check the sock for folds, inspect the tongue position, remove grit or debris, and adjust the laces. If the skin is already irritated, protective moleskin or another soft blister-prevention bandage can reduce further damage.
The American Academy of Dermatology recommends properly fitting footwear, moisture-wicking socks, and protection for known problem areas to help prevent blisters.
Persistent numbness, sharp pain, significant toe impact, or repeated blistering in the same location is a reason to reassess the fit rather than simply extending the break-in period.
Take Them on Short Hikes
Once the boots remain comfortable indoors and during ordinary outdoor walks, move to easy trails. This stage exposes the footwear to the conditions that matter most: uneven ground, uphill and downhill movement, longer walking periods, and the weight of a pack.
- Begin indoors. Confirm that the boots remain comfortable with your real hiking socks and insoles.
- Move to short local walks. Test normal pavement and gentle inclines close to home.
- Try an easy trail. Choose a short route where turning around is simple if a hot spot appears.
- Add normal trail conditions gradually. Introduce hills, rougher terrain, and a light daypack only after the previous stage is comfortable.
- Increase mileage last. Avoid making your first long or remote hike the first serious test of new boots.
At every stage, inspect your feet after the walk and note any areas of redness or irritation. Small fit problems become far easier to solve when you notice them early.
How to Know When Hiking Boots Are Broken In
Your boots are sufficiently broken in when you can complete the type of shorter walking or hiking session you plan to build from without developing new pressure points, excessive heel movement, painful stiffness, or repeated hot spots.
The boot does not need to become soft like a running shoe. Stiffness may be part of the design, especially in backpacking and mountaineering footwear. The goal is predictable comfort and natural movement—not maximum softness.
When to Return or Replace the Boots
Stop treating the problem as “break-in” and reconsider the footwear if:
- Your toes repeatedly hit the front on descents.
- The forefoot is painfully squeezed.
- Your heel continues sliding substantially despite sensible lacing adjustments.
- You experience numbness or sharp pressure.
- The boot creases or presses painfully against the same part of your foot every time.
- You need extremely thick socks, aggressive stretching, or excessive lacing tension just to hold your foot in place.
A different size, width, or boot model is often a better solution than trying to force unsuitable footwear to conform to your feet.
If you are breaking in hiking boots for a walking-heavy vacation, complete several comfortable test outings before departure. For a trip where you expect to combine walking or hiking with public transportation, this guide to exploring Ireland without a car can help with the broader travel-planning side.
Frequently Asked Questions
What are the fastest safe ways to break in hiking boots?
Wear them with your normal hiking socks and insoles, start indoors, progress to short neighborhood walks, and then take progressively longer easy hikes. Proper lacing and early treatment of hot spots can also improve comfort without damaging the footwear.
How long does it take to break in hiking boots?
There is no universal break-in period. Lightweight hiking footwear may feel comfortable almost immediately, while stiff backpacking or heavy leather boots can require repeated wear over days or weeks. Move to longer hikes only after shorter sessions remain comfortable.
Why is it important to break in hiking boots?
Gradual wear lets stiff materials begin moving with your stride and gives you time to discover pressure points before committing to a long or remote hike. It also helps you test socks, insoles, lacing, and pack weight under increasingly realistic conditions.
Can I use heat to break in hiking boots faster?
Direct heat is not a recommended general break-in method. It can harm leather and may damage adhesives, foam, or waterproof construction. Avoid hairdryers, heaters, ovens, microwaves, stovetops, and fires unless the manufacturer of your exact footwear provides specific instructions stating otherwise.
Are there risks to breaking in hiking boots too quickly?
Yes. Long walks before your feet and boots are ready can turn small hot spots into blisters, while aggressive heat, soaking, freezing, conditioning, or stretching can damage footwear. A gradual increase in walking time is safer for both your feet and your boots.
Should new hiking boots hurt during break-in?
No. Some stiffness is normal in heavier boots, but sharp pain, numbness, severe pinching, substantial heel sliding, or toes striking the front usually points to a fit problem. Break-in should improve normal stiffness, not require you to tolerate significant pain.
Do lightweight hiking boots need to be broken in?
Many lightweight hiking boots and shoes require much less break-in than traditional stiff leather boots. Even when they feel comfortable immediately, it is still wise to wear them on shorter outings before relying on them for a long hike or backpacking trip.
Sources
- REI Co-op — How to Break in Your Hiking Boots — gradual break-in process and differences in break-in time.
- Danner — New Boots Care Guide — proper fit, gradual wear, full-grain leather conditioning, friction prevention, and professional leather stretching.
- Columbia Sportswear — How to Break In Hiking Boots — manufacturer guidance against heat, soaking, and freezing shortcuts.
- GORE-TEX — Footwear Care Instructions — cleaning, moderate-temperature drying, and avoidance of direct heat.
- American Academy of Dermatology — How to Prevent and Treat Blisters — footwear fit, moisture-wicking socks, and blister prevention.
- PubMed — The Influence of Sock Composition on the Appearance of Foot Blisters in Hikers — evidence linking wet socks with increased blister risk.

