
Last Updated on July 26, 2026 by Daniel Globe
A safe hiking trip starts with more than a pair of boots and a bottle of water. Your equipment should match the route, weather, distance, terrain, group, and possible delays. This hiking essentials guide explains what to carry for a day hike, what to add for an overnight trip, and how to choose each item without overpacking.
Quick Answer
The essential hiking gear includes navigation, sun protection, extra clothing, a headlamp, first aid, fire-starting supplies where permitted, repair tools, extra food, sufficient water with a treatment method, and emergency shelter. Also carry a charged communication device and leave a detailed trip plan with someone you trust.
Key Takeaways
- Match your footwear, clothing, backpack, water, and emergency equipment to the trail and expected conditions.
- Check the route, elevation, weather, trail alerts, permits, water availability, and daylight before leaving.
- Carry a map or downloaded offline map and a backup navigation method that does not depend entirely on your phone.
- Plan water by hiking time and conditions; never assume that clear stream water is safe to drink.
- Pack the Ten Essentials even on a familiar day hike because weather, injuries, and delays can change the trip.
- Tell a trusted person where you are going, your route, who is with you, and when to request help if you do not return.
At a Glance
| Time Required | About 20–45 minutes to research the route, check conditions, calculate supplies, and pack |
| Difficulty | Easy for a day hike; more detailed planning is required for remote or overnight routes |
| Tools Needed | Route information, weather forecast, trail alerts, map, gear checklist, and a trusted-contact trip plan |
| Cost | Varies by trip; use reliable gear you already own and add specialized equipment only when the route requires it |
Plan Before You Pack
Start by researching the entire route rather than looking only at its mileage. Check elevation gain, surface conditions, exposed areas, river crossings, water availability, trail markings, current closures, required permits, wildlife rules, and possible exit routes. A short but steep or exposed hike may require more preparation than a longer walk on level ground.
Review the forecast for the trail’s location and elevation. Conditions at a mountain summit can differ greatly from conditions at the parking area. Check expected temperature, precipitation, wind, heat, thunderstorms, and sunset time. The National Park Service Trip Planning Guide also recommends checking active alerts and preparing a backup plan.
- Choose a turnaround time: Turn back at the planned time even if you have not reached the destination.
- Prepare a Plan B: Select a shorter or less exposed route in case conditions change.
- Check local rules: Confirm permit, camping, fire, food-storage, fishing, pet, and waste-disposal requirements.
- Leave a trip plan: Tell a trusted person your route, trailhead, vehicle information, companions, expected return time, and when to contact emergency services.
- Update your contact: Report any route or return-time change before leaving cellular coverage.
Warning: No outdoor location is safe during a thunderstorm. If thunder is audible, leave peaks, ridges, open ground, isolated trees, cliffs, and water. Reach a substantial enclosed building or an enclosed hard-topped vehicle when possible. Postpone exposed hikes when thunderstorms are forecast.
The Ten Essential Hiking Gear Systems
The National Park Service Ten Essentials provide a practical foundation for both short and long hikes. The exact products will vary, but every pack should address these ten needs.
| System | What to Carry | Why It Matters |
|---|---|---|
| Navigation | Map, compass, GPS device, or offline map | Helps you follow the route and recover from a wrong turn |
| Sun protection | Sunscreen, sunglasses, hat, and protective clothing | Reduces exposure to strong sunlight and reflected glare |
| Insulation | Extra warm layer, rain shell, hat, and gloves as conditions require | Protects you during weather changes or unplanned delays |
| Illumination | Headlamp or flashlight with spare power | Provides light after sunset and can help signal rescuers |
| First aid | Trip-appropriate kit and personal medication | Supports initial care for common trail injuries |
| Fire | Lighter, waterproof matches, or fire starter where permitted | May provide heat or an emergency signal when legal and safe |
| Repair and tools | Knife or multi-tool, tape, cord, and repair items | Helps repair clothing, packs, tents, and other equipment |
| Nutrition | Meals, snacks, and extra no-cook food | Supplies energy and provides reserve food during delays |
| Hydration | Water, reserve capacity, and treatment supplies | Prevents dehydration and provides a backup water option |
| Emergency shelter | Tarp, bivy, tent, or emergency blanket | Reduces exposure during an injury, storm, or unexpected night outside |
Products Worth Considering

Rugged Emergency Shelter: The Go Time Gear Emergency Tent is a robust addition to any survival kit, offering protection against harsh weather for outdoor adventurers and families. Its ultralight design integrates easily into a bugout bag or emergency backpack
![Don’t Die in The Woods – Emergency Poncho [4 Pack Starter] [Green/Orange]](https://m.media-amazon.com/images/I/51vf+rXlz0L._SL500_.jpg)
RELIABLE RAIN PROTECTION – Unexpected rain storm? Our Survival Poncho has you covered, literally. It’s 100% waterproof to help protect against rain, wind, and snow.

[Preparedness for the Unknown]: While no one can predict when or how severe a disaster or unexpected event will be, our 262pcs survival kit helps your family stay prepared during the critical first 72 hours. Designed for family use, it was developed in collaboration with survival experts, outdoor professionals, special forces operators, and mountain guides. Whether you're preparing for earthquakes, tornadoes, wildfires, or hurricanes, our survival kit provides peace of mind.
Hiking Footwear
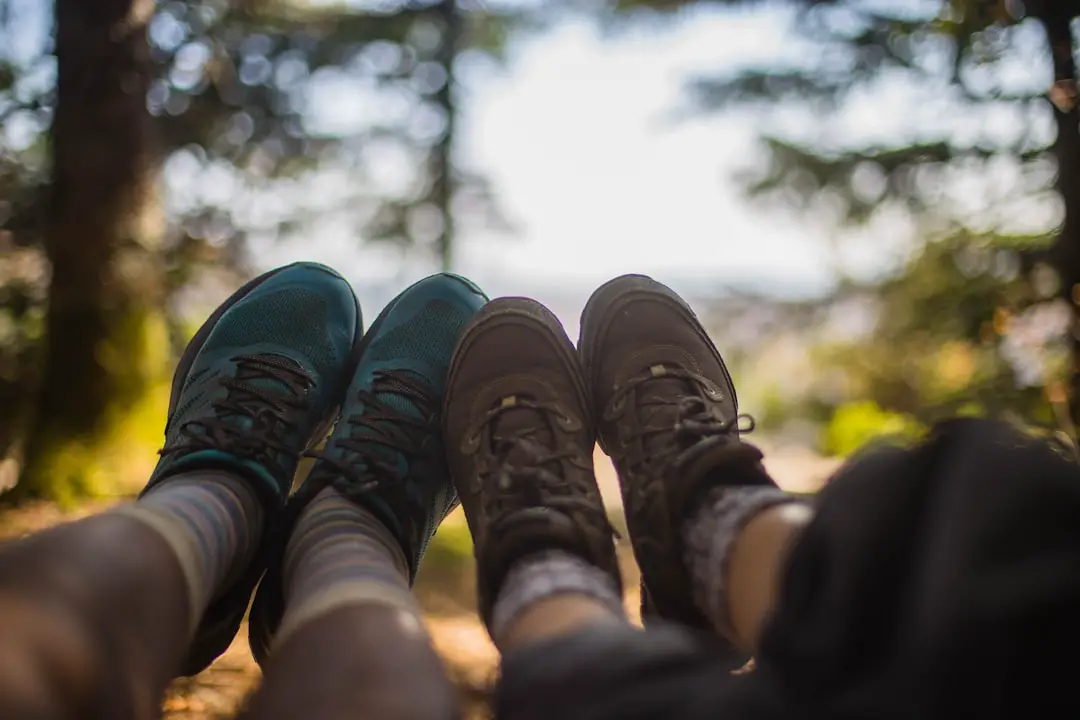
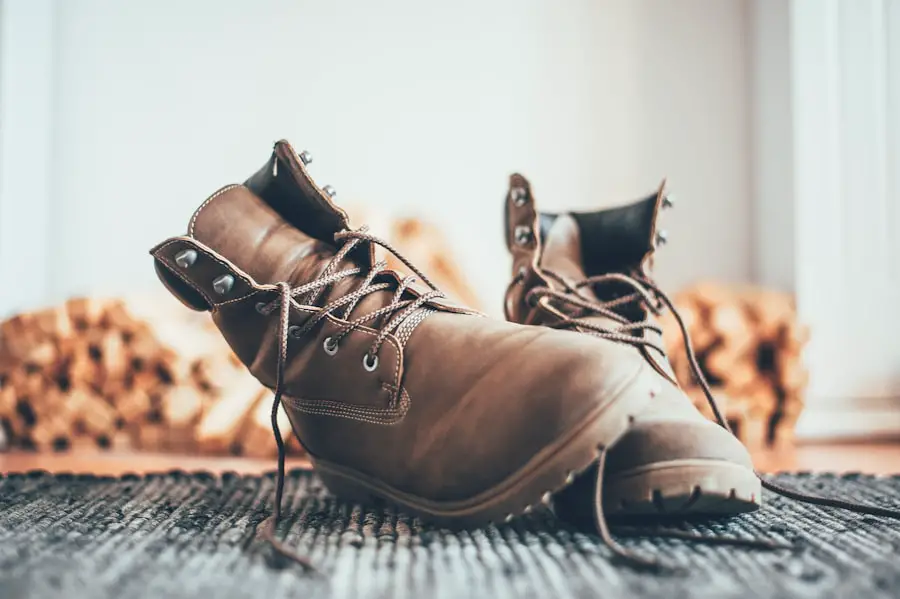
Select footwear according to the terrain, weather, pack weight, trip length, and support your feet need. A well-fitting hiking shoe may be suitable for a maintained trail and light daypack. Boots with a protective upper, deeper tread, and additional support may be more appropriate for loose rock, mud, snow, off-trail travel, or a heavier backpack.
Waterproof footwear can be useful in prolonged rain, mud, snow, or cold conditions. In warm or mostly dry conditions, breathable footwear may feel cooler and dry faster. Waterproof footwear is not a substitute for gaiters, careful route selection, or avoiding dangerous water crossings.
Try footwear on with the socks you plan to wear. Your heel should remain secure, the midfoot should feel supported, and your toes should have enough room to move without striking the front during a descent. Footwear that is too tight can cause pressure and blisters, while a loose fit can allow sliding and instability.
Supportive insoles may improve fit for some hikers, but they should not make the shoe cramped. Wear new footwear on several shorter walks before a long trip and test it on slopes, stairs, and uneven surfaces.
Pro Tip: Check your feet during the first break. Address a rubbing spot immediately with a blister dressing, tape, a sock adjustment, or a lacing change instead of waiting for a blister to develop.
Products Worth Considering

Stay Dry Outdoors: Crafted with waterproof hiking shoes, these women boots ensure your feet remain dry and comfortable during wet hiking conditions. Perfect for outdoor enthusiasts, these waterproof boots are a reliable choice for rugged adventures.

Excellent Comfort: Nortiv 8 women's waterproof hiking boots use our lightweight, durable midsole, and advanced traction rubber soles, which can be slip-resistant on rugged ground. If you prefer a looser fit, consider choosing the wide toe box version.

Genuine Leather: High-performance suede leather is softer and more wear-resistant than PU
Backpacks and Daypacks
A well-fitted backpack carries your equipment close to your body and spreads the load more comfortably. Choose capacity according to the trip rather than buying the largest pack available.
Products Worth Considering

LIGHTWEIGHT & COST-EFFECTIVE DESIGN:<br> Designed for everyday outdoor use, this lightweight daypack balances practical features with an affordable build. Fine, tight stitching improves overall structure and long-term usability without adding extra weight.
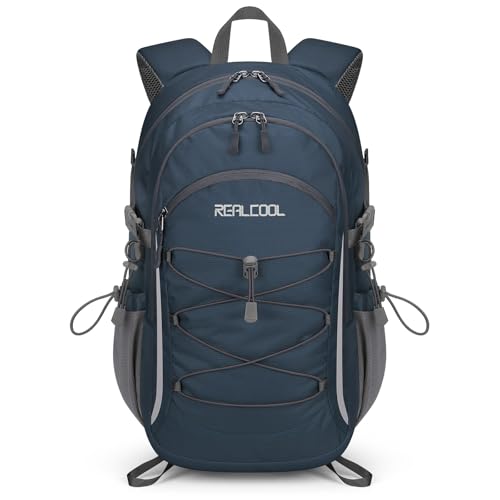
【Ergonomic and Comfortable Design】:This breathable backpack is engineered based on the natural movement patterns of the human back, conforming to muscle contours for superior comfort and ventilation. Its scientific weight distribution evenly disperses load across the entire pack, effectively alleviating muscle soreness caused by prolonged carrying.

Unique Strap Design: Our small backpack features an innovative strap design with a zippered phone pocket on the left and a drawstring pocket on the right. The breathable mesh shoulder straps ensure comfort during your outdoor adventures, while reinforced stress points prevent strap breakage.
Capacity Considerations
A 20- to 30-liter pack is often enough for a typical day hike, although winter gear, children’s supplies, camera equipment, or long waterless routes may require more space. Multi-day hikers commonly use larger packs, often around 50 to 70 liters, depending on food, shelter, weather, and how compact the equipment is.
Capacity numbers are only a starting point. Lay out the full gear list and confirm that essential items fit without hanging loosely outside the pack.
Comfort and Ventilation Features
Look for adjustable shoulder straps, a stable sternum strap, and a hip belt suited to the expected load. With a heavier backpack, the hip belt should transfer much of the weight to the hips instead of leaving it entirely on the shoulders.
A ventilated or mesh back panel can reduce the damp feeling caused by sweat, although it cannot eliminate sweating during hard exercise. Test the pack with realistic weight and walk for at least 15 to 20 minutes before relying on it for a full trip.
Organization and Accessibility
Keep frequently used items where you can reach them quickly. Water, snacks, rain gear, navigation tools, sunscreen, insect repellent, and the first-aid kit should not be buried under overnight equipment.
Hydration-reservoir sleeves and bottle pockets can make drinking easier. Confirm that bottles cannot fall out when you bend over and that a reservoir hose will not freeze in expected conditions.
Pro Tip: Place dense items near your back and around the middle of the pack. Put lighter items farther away and use the compression straps to prevent the load from shifting.
Clothing and Layering
Clothing should manage sweat, provide insulation, and protect you from wind, rain, sun, insects, and changing temperatures. A flexible layering system lets you add or remove clothing before you become excessively hot or cold.
Base Layer
Choose a moisture-managing synthetic or merino-wool layer that fits comfortably against the skin. Cotton absorbs moisture and can remain wet for a long time, so it is a poor choice when cold, rain, or an unexpected overnight delay is possible.
Insulating Layer
A fleece jacket, synthetic insulated jacket, or down layer can trap warm air. Down offers excellent warmth for its weight but must be protected from moisture. Synthetic insulation generally retains more useful warmth when damp.
Outer Layer
A wind-resistant and waterproof or water-resistant shell protects the inner layers. For persistent rain, use a waterproof, breathable jacket with a secure hood and adjustable cuffs and hem. Ventilation zippers can help release heat during steep climbs.
Pants, Socks, and Accessories
Wear flexible hiking pants or shorts suited to the route. Convertible pants can be useful when temperatures vary, but exposed legs may need protection from sun, insects, thorns, or cold wind. Choose moisture-managing socks and carry a dry spare pair on long or wet hikes. Add gloves, a warm hat, a sun hat, gaiters, or traction devices when conditions require them.
Navigation Tools
Reliable navigation begins before the hike. Study the route, major junctions, elevation profile, landmarks, water sources, and possible escape routes. Download maps before leaving cellular service and confirm that the downloaded area includes the full route and surrounding terrain.
| Navigation Tool | Best Use | Main Limitation |
|---|---|---|
| GPS device | Tracking position, following a loaded route, and recording progress | Depends on battery power and may lose accuracy under heavy cover or steep terrain |
| Compass | Orienting a map and following a bearing without batteries | Requires practice and a suitable map |
| Topographic map | Understanding terrain, elevation, water, trails, and alternate routes | Must be current and protected from water |
| Smartphone map | Convenient offline maps, route recording, and location checks | Battery, cold, water, impact, and accidental settings changes can disable it |
Learn how to use the map, compass, or GPS before the trip. Do not rely on a screenshot of a route or assume that cell service will be available. Carry a waterproof map or other independent backup on remote routes.
Note: Airplane mode can reduce battery use while still allowing many phones to receive GPS signals. Test your offline map at home and carry a power bank and suitable charging cable.
Hydration and Water Treatment
Water needs vary with trip length, heat, humidity, elevation, exertion, body size, clothing, and individual health. As an initial planning estimate, the Great Smoky Mountains National Park recommends at least 1 liter for every two hours of hiking. Carry more in hot, dry, exposed, or strenuous conditions and include reserve capacity for delays.
Plan water by expected hiking time and conditions, not by using one fixed amount for every day hike.
Water bottles are easy to inspect, refill, share, and clean. Hydration reservoirs allow hands-free drinking and may encourage frequent sipping. Many hikers use both so that one container can serve as a backup if the other leaks.
Never assume that a clear mountain stream is safe. Water can contain disease-causing bacteria, viruses, and parasites even when it looks and smells clean. Verify whether natural sources are seasonal, accessible, and legally usable before depending on them.
Backcountry Water-Treatment Options
| Method | What It Can Do | Important Limitations |
|---|---|---|
| Boiling | Kills bacteria, viruses, and parasites when performed correctly | Requires fuel, time, and cooling; does not make chemically contaminated water safe |
| Portable filter | Performance depends on pore size; suitable filters may remove parasites and bacteria | Most common hiking filters do not remove viruses; follow the exact product specifications |
| Chemical disinfectant | Can kill many bacteria and viruses | Effectiveness against parasites and required contact time vary by product and water temperature |
| UV purifier | Can inactivate bacteria, viruses, and parasites in small amounts of clear water | Requires batteries and works poorly in cloudy water unless the water is prefiltered |
The CDC recommends boiling uncertain water when possible. When boiling is impractical, filtering and then disinfecting the filtered water provides broader protection than relying on a basic filter alone. Always follow the treatment product’s instructions.
Warning: Boiling, filtering, UV treatment, and chemical disinfectants do not reliably make water contaminated by fuel, pesticides, mining waste, harmful algal toxins, salt, or other chemicals safe. Use another water source.
Essential First Aid Kit
Stocking Your First Aid Kit
Build the kit around the group size, trip length, environment, distance from help, and each person’s medical needs. A basic hiking kit may include:
- Adhesive bandages in several sizes
- Blister dressings or suitable tape
- Sterile gauze pads and a roller bandage
- Medical tape
- Antiseptic wipes
- Disposable gloves
- Tweezers for splinters or ticks
- Small trauma shears or scissors
- An elastic wrap
- A compact first-aid reference
- Personal medications and emergency medical information
Store the contents in a water-resistant pouch and inspect them before each trip. Replace expired, opened, damaged, or depleted items.
Medications and Special Considerations
Possible kit items include pain relievers, antihistamines, prescribed inhalers, epinephrine auto-injectors, glucose, or other personal medication. Use medication only according to its label and your clinician’s instructions. Consider the needs of children, older hikers, and anyone with allergies or chronic medical conditions.
Preparation Is Key
A first-aid kit is useful only when you know what is inside and how to use it. Basic first-aid and CPR training can help you respond more effectively to bleeding, sprains, fractures, burns, heat illness, cold stress, and other emergencies.
Warning: A first-aid kit does not replace professional medical care. Contact local emergency services or activate an appropriate emergency device for severe bleeding, breathing trouble, chest pain, altered consciousness, suspected spinal injury, severe allergic reaction, or another life-threatening condition.
Sun Protection and Lighting
Sun protection is a core hiking need, including on cool or cloudy days. Carry broad-spectrum sunscreen, sunglasses that protect against ultraviolet light, a brimmed hat, and protective clothing. Reapply sunscreen according to the product directions, especially after heavy sweating.
Carry a headlamp or flashlight even when you expect to finish before dark. Delays caused by wrong turns, injuries, weather, difficult terrain, or slower group members can extend the hike. A headlamp leaves both hands free for balance, first aid, or equipment repairs.
Pack spare batteries or a compatible power source. Check that the light works before leaving and protect its power switch from being pressed accidentally inside the backpack.
Shelter and Sleeping Gear
Even on a day hike, carry a compact emergency shelter suited to the weather. A tarp, bivy sack, emergency blanket, or both can reduce wind and heat loss while you wait for help or manage an unexpected night outside.
For an overnight trip, select a tent according to capacity, packed weight, setup difficulty, ventilation, campsite conditions, and expected wind and precipitation. Practice setting it up before leaving and carry the correct poles, stakes, guylines, and repair materials.
Choose a sleeping bag with a temperature rating suited to the expected overnight low and your sleeping habits. Down insulation offers excellent warmth for its weight but needs protection from moisture. Synthetic insulation is often bulkier but performs better when damp.
A sleeping pad provides cushioning and slows heat loss to the ground. Choose an insulation level, size, and construction appropriate to the season, and bring a repair patch for an inflatable model.
Note: An emergency blanket is a backup, not an equivalent replacement for a suitable sleeping bag, insulated pad, tent, and clothing on a planned overnight trip.
Nutrition and Food Supplies
Pack food that provides enough energy for the hike and remains safe in the expected temperature. Useful trail foods include nuts, trail mix, dried fruit, energy bars, nut-butter packets, crackers, jerky, sandwiches, and other foods that are easy to carry and eat.
For longer or overnight trips, dehydrated meals can reduce weight, but they require enough water and fuel for preparation. Check the serving size and cooking time before leaving. Bring an extra supply of food that can be eaten without cooking in case the stove fails or the trip is delayed.
Account for allergies, dietary restrictions, appetite changes at elevation, and the nutritional needs of every group member. Pack food in sealed bags or lightweight containers and protect it from crushing or leaking.
Use a stove only where it is permitted. Carry the correct fuel and confirm that the system works before the trip. Follow all local food-storage rules, especially in bear and other wildlife habitats.
Safety and Emergency Gear
A compact repair kit can solve small problems before they become serious. Depending on the trip, it may include a multi-tool or knife, strong tape, cord, zip ties, spare buckles, a sewing needle, repair patches, and equipment-specific parts.
Carry a whistle where it is easily reached. Repeated whistle blasts can carry farther than shouting and require less energy. A signal mirror and a bright headlamp may also help attract attention when used appropriately.
Waterproof matches, a lighter, or another fire starter may be useful where fires are permitted. However, fire bans, dry vegetation, wind, and site rules may make ignition illegal or unsafe. Do not rely on an open fire as your only source of warmth; carry insulation and emergency shelter.
What to Do If You Become Lost or Injured
- Stop moving: Avoid turning one navigation error into a larger search area.
- Stay calm: Control breathing and make a careful assessment before acting.
- Check your position: Use your map, GPS, compass, landmarks, and last confirmed location.
- Assess immediate hazards: Move only if you are exposed to falling rock, flooding, fire, lightning, extreme cold, or another direct threat.
- Contact help: Call the appropriate local emergency number, send a satellite message, or activate a PLB when the situation is a genuine emergency.
- Make yourself visible: Use a whistle, light, bright clothing, or other signal without exhausting yourself.
- Conserve warmth, water, food, and power: Use shelter and insulation before you become dangerously cold.
Retracing your route may be reasonable when you are certain of the direction, conditions are safe, and the distance is short. Otherwise, staying in a safe, visible location may make it easier for rescuers to find you.
Communication Devices
A charged phone remains useful for navigation, photos, trip information, and emergency calls wherever service exists. Protect it from water and impact, download essential information in advance, and carry a compatible power bank and cable.
Remote areas may require a satellite messenger or Personal Locator Beacon. These devices serve different purposes.
| Device | Typical Capability | Important Consideration |
|---|---|---|
| Cell phone | Calls, messages, maps, and internet where service is available | Coverage can disappear in valleys, forests, and remote areas |
| Satellite messenger | SOS and, on many models and plans, two-way text messaging and tracking | May require a subscription, charged battery, and a clear view of the sky |
| 406 MHz PLB | Emergency distress alert through the Cospas-Sarsat system | Emergency use only; generally does not provide routine two-way messaging |
The NOAA SARSAT program explains how 406 MHz PLBs transmit emergency alerts. Register the beacon, keep its emergency contacts current, inspect the battery-expiration information, and learn the activation procedure before the trip.
Note: A communication device supports a trip plan but does not replace one. Batteries can fail, messages may be delayed, and terrain may obstruct satellite visibility.
Hygiene, Waste, and Leave No Trace
Carry a small trash bag and pack out wrappers, food scraps, wipes, damaged equipment, and other waste. Do not burn or bury trash. Follow local rules for dishwater, soap, food scraps, and wildlife attractants.
Use an available toilet whenever possible. Where catholes are permitted, common guidance is to dig one about 6 to 8 inches deep and at least 200 feet from water, camp, and trails. Pack out toilet paper, wipes, and hygiene products in a sealed bag. Some deserts, alpine zones, river corridors, crowded areas, and sensitive habitats require all solid human waste to be packed out, so check the land manager’s rules first.
Carry only the toiletries needed for the trip. Biodegradable soap can still affect natural water and should not be used directly in streams or lakes. Clean hands before eating and after using the toilet to reduce the spread of illness.
Miscellaneous Essentials
Sunscreen, insect repellent, lip protection, sunglasses, and a hat can make a major difference during a long day outside. Depending on the destination, you may also need trekking poles, gaiters, microspikes, a mosquito head net, bear-resistant food storage, bear spray, or other location-specific equipment.
A lightweight camp chair is optional, but it may improve comfort during long breaks or at an overnight campsite. Books, cards, a camera, or compact binoculars can add enjoyment when weight and pack space allow.
Personal-care items also matter. A compact toothbrush can help maintain oral hygiene on multi-day trips; this guide to the best travel toothbrushes covers portable options. Hikers interested in wildlife viewing can review these compact binoculars for hiking.
A travel-friendly fishing rod may be useful when fishing is part of a permitted trip. Review these travel fishing rods, and confirm licensing, seasons, species rules, tackle restrictions, and local food-storage requirements before fishing.
Day-Hike and Overnight Packing Checklist
| Day-Hike Essentials | Add for an Overnight Trip |
|---|---|
|
|
This checklist is a minimum framework rather than a universal packing list. Add equipment for snow, ice, desert heat, river crossings, hunting seasons, wildlife, children, pets, medical needs, technical terrain, or other trip-specific conditions.
Frequently Asked Questions
What are the essential items for hiking?
Carry navigation, sun protection, insulation, a headlamp, first aid, fire-starting supplies where permitted, repair tools, extra food, water and treatment supplies, and emergency shelter. A charged communication device, whistle, identification, and written trip plan are also important.
What type of footwear is best for hiking?
The best footwear fits securely and provides enough traction, protection, and support for the route. Hiking shoes can work well on maintained trails with a light pack. Boots may be better for loose rock, mud, snow, rough off-trail terrain, or heavier loads.
What should I pack in my hiking backpack?
Pack the Ten Essentials, your route information, a charged communication device, identification, required permits, and any equipment needed for local weather, wildlife, water, terrain, or medical needs. Keep rain gear, water, snacks, navigation tools, and first aid easy to reach.
How much water should I bring for a hike?
A practical starting estimate is at least 1 liter for every two hours of hiking, but heat, humidity, elevation, exertion, body size, and water availability can increase your needs. Carry reserve capacity and confirm whether dependable treatment-ready sources exist on the route.
Can I drink directly from a clear mountain stream?
No. Clear water can contain bacteria, viruses, and parasites. Use a safe source or treat the water correctly. Boiling is the most reliable germ-killing method; filtering followed by disinfection offers broader protection than a basic filter alone when boiling is impractical.
What should I include in a hiking first-aid kit?
Include bandages, blister treatment, sterile gauze, medical tape, antiseptic wipes, gloves, tweezers, scissors, an elastic wrap, personal medications, and a compact first-aid reference. Adjust the kit for the group, trip duration, environment, and distance from professional help.
What clothing is best for hiking?
Use moisture-managing base layers, an insulating middle layer when needed, and a weather-resistant outer layer. Add hiking socks, a sun hat, warm hat, gloves, rain protection, and other accessories according to the forecast and terrain.
What food should I bring on a hike?
Bring lightweight food that is easy to eat and provides sufficient energy, such as trail mix, nuts, dried fruit, bars, sandwiches, crackers, or jerky. Carry extra no-cook food in case the hike takes longer than planned or the stove cannot be used.
Do I need a headlamp for a daytime hike?
Yes. An injury, wrong turn, weather delay, or slower pace can keep you out after sunset. Carry a working headlamp or flashlight and spare power even when the planned hike should finish during daylight.
Should I carry a satellite messenger or PLB?
Consider one for remote routes without dependable cellular coverage. A satellite messenger may provide two-way messages, tracking, and SOS service, depending on the model and plan. A registered 406 MHz PLB is designed primarily to send an emergency distress alert through the satellite search-and-rescue system.
Sources
- National Park Service: Ten Essentials — core hiking safety and emergency equipment categories
- National Park Service: Trip Planning Guide — route research, weather, alerts, backup plans, and trusted contacts
- CDC: Water Treatment When Hiking and Camping — boiling, filtration, disinfection, and UV guidance
- National Weather Service: Lightning Safety Tips — thunderstorm avoidance and safe shelter
- NOAA SARSAT: 406 MHz Emergency Beacons — PLB purpose and emergency signaling
- National Park Service: Leave No Trace — trash, catholes, toilet paper, and low-impact travel
