
Last Updated on July 27, 2026 by Daniel Globe
Cold weather hiking can be comfortable and rewarding when your clothing, footwear, and safety gear match the conditions. The goal is not simply to wear the thickest jacket you own. A better approach is to manage moisture, block wind and precipitation, protect exposed skin, and carry enough backup gear to handle changing weather or an unexpected delay.
Quick Answer
For cold weather hiking, wear a moisture-wicking wool or synthetic base layer, an insulating fleece or puffy layer, and a windproof or waterproof shell. Add warm socks, suitable boots, gloves or mittens, and a hat. Carry traction, navigation, food, water, a headlamp, emergency supplies, and extra dry clothing.
Key Takeaways
- Use adjustable layers so you can add warmth when resting and remove or vent clothing before you become sweaty.
- Choose wool or quick-drying synthetic clothing instead of cotton when cold and wet conditions are possible.
- Wear footwear that keeps your feet dry without squeezing your toes or restricting circulation.
- Carry traction devices or snowshoes when trail conditions require them, rather than relying on winter boots alone.
- Check weather, trail conditions, daylight, and avalanche information before leaving and tell someone your route and expected return time.
- Know the warning signs of hypothermia and frostbite and be willing to turn around before conditions become dangerous.
At a Glance
| Preparation Time | About 10–20 minutes for a day hike once your gear is organized, plus time to check weather and trail conditions. |
| Difficulty | Easy to moderate preparation; winter route-finding and avalanche terrain require additional skills and training. |
| Core Gear | Layered clothing, boots, gloves or mittens, hat, navigation, headlamp, traction as needed, food, water, first aid, emergency shelter, and extra dry clothing. |
| Cost | Varies widely. Many hikers can use clothing they already own and add only condition-specific items such as traction, gaiters, or a warmer insulating layer. |
Layering Clothing for Cold Weather Hiking
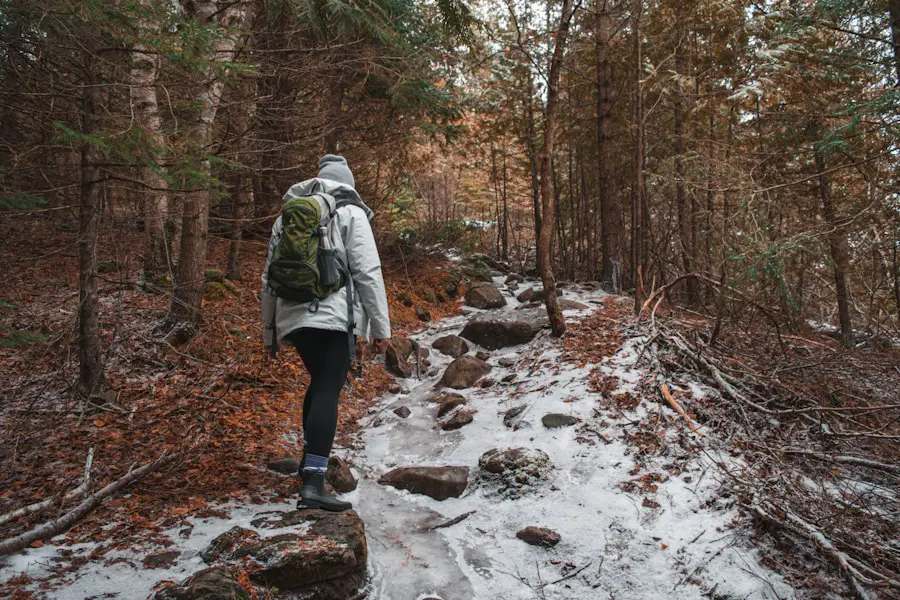
Layering clothing is one of the most effective ways to stay comfortable in cold conditions because it lets you adjust insulation as the temperature, wind, precipitation, and your activity level change. The basic system uses a base layer, an insulating middle layer, and a protective outer shell.
Base Layer
The base layer sits next to your skin and should move perspiration away from your body while drying reasonably quickly. Merino wool and synthetic fabrics such as polyester or nylon blends are common choices. A good base layer should fit comfortably close to the skin without restricting movement.
Avoid relying on cotton for cold, wet outings. Cotton readily absorbs moisture and dries slowly, which can leave you chilled after sweating or getting wet. The National Park Service winter hiking guidance recommends warm, waterproof clothing and extra dry clothing, while other NPS winter guidance specifically favors wool and synthetic materials over cotton.
Insulating Middle Layer
The middle layer traps warm air close to your body. Fleece, synthetic insulated jackets, and down jackets are common options. The right amount of insulation depends on temperature, wind, how hard you are moving, and how quickly you personally become cold.
Fleece works well during active hiking because it remains breathable and is easy to vent. A puffy jacket can provide more warmth for rest stops or colder conditions. Down offers excellent warmth for its weight but should be protected from moisture; synthetic insulation is often easier to manage in persistently damp conditions.
Pro Tip: Adjust your layers before you become soaked with sweat. Open pit zips, remove a hat, loosen your shell, or take off an insulating layer during a steep climb, then add warmth again before a long stop or exposed descent.
Outer Shell
The outer layer protects you from wind, rain, and wet snow. In stormy conditions, look for a shell that is both waterproof and breathable so it blocks external moisture while allowing some water vapor from perspiration to escape.
Your shell also needs enough room to fit comfortably over your insulating layers without becoming excessively loose. Adjustable cuffs, a protective hood, hem adjustment, and ventilation zippers can make temperature and weather management easier.
Insulated Boots
Cold-weather hiking footwear should match the temperature, snow depth, trail surface, and length of your outing. Waterproof boots are especially useful in snow, slush, and wet conditions. Insulation may also be valuable in sustained cold, but more insulation is not automatically better during high-output hiking because overly warm feet can become sweaty.
Some winter boots use synthetic products such as 3M Thinsulate insulation. 3M describes its footwear-specific Type B insulation as lightweight, moisture-resistant, breathable, and designed to retain warmth when compressed.
Fit is just as important as insulation. Your toes should have room to move, and thick socks should not make the boot so tight that circulation is restricted. Overly loose footwear can also create rubbing and blisters. Try your winter boots with the socks you expect to wear on the trail.
Products Worth Considering
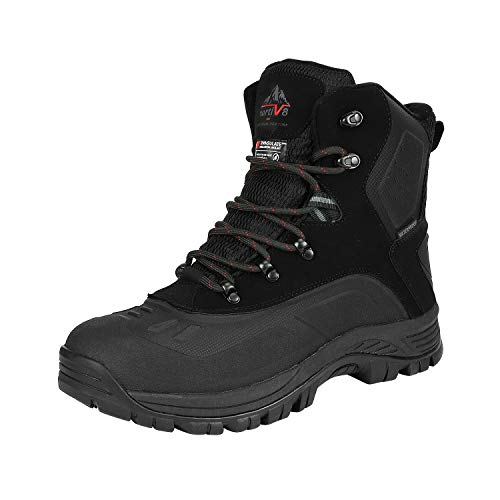
Waterproof material: Men's snow boots feature waterproof construction and windproof synthetic toe caps for anti-collision.
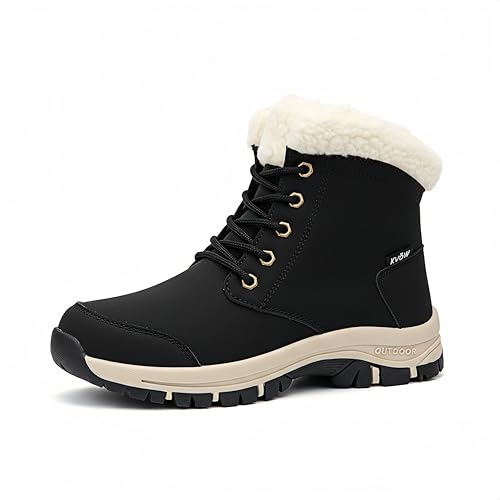
Water- Repellent & Warm Winter Boots: Keep your feet dry and cozy in any condition,These fully waterproof boots for women are built with advanced insulation,making them the best winter boots for women who need warm boots for winter,Perfect as snow boots for women comfortable and warm work boots for women.Not completely waterproof
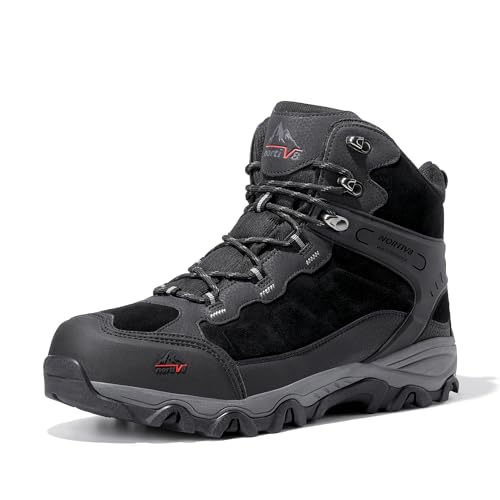
Waterproof Build: These men’s hiking boots feature a waterproof membrane construction that keeps your feet dry when trudging through any mud or water.
Socks and Gaiters
Wool or synthetic hiking socks help manage moisture while adding insulation. Carrying a dry spare pair is useful on longer or wetter outings. Gaiters can help keep snow, mud, and debris from entering the top of your boots, and the National Park Service includes waterproof boots and gaiters among its winter hiking essentials.
Note: Boot insulation ratings and comfort vary by brand, sock thickness, activity level, circulation, wind, and moisture. There is no single insulation amount that is ideal for every hiker or every winter temperature.
Waterproof Outerwear
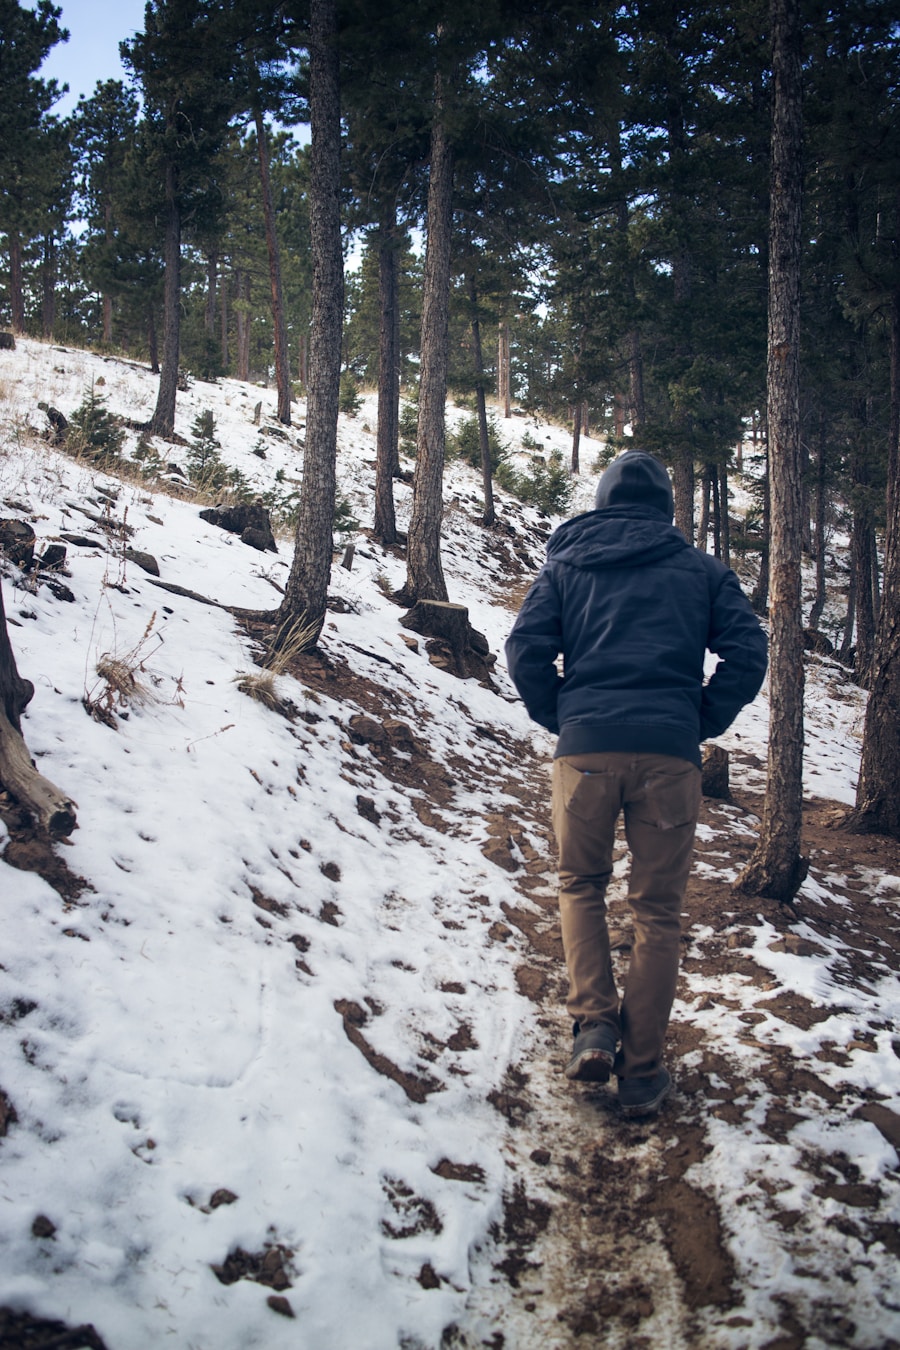
Waterproof outerwear becomes especially important when a cold hike may include rain, wet snow, strong wind, or prolonged exposure. Once clothing becomes wet, staying warm becomes harder, particularly during rest stops or after your activity level drops.
High-quality waterproof jackets may use technologies such as GORE-TEX product technologies. Gore describes its waterproof GORE-TEX range as durably waterproof, windproof, and breathable. Other manufacturers use different waterproof-breathable membranes and coatings, so evaluate the finished garment rather than focusing only on a membrane name.
Design matters too. A hood that moves with your head, adjustable cuffs and hem, protected zippers, and ventilation openings can improve performance. In sustained rain, wet snow, or strong wind, waterproof or wind-resistant pants may be just as useful as the jacket.
A shell also needs to fit over your base and insulating layers without compressing them excessively. Test the complete clothing system before a long outing so you know that you can raise your arms, use trekking poles, and adjust your pack comfortably.
Products Worth Considering

Waterproof & Windproof for Ultimate Protection – This rain jacket men is made of high-quality waterproof fabric, effectively blocking rain while offering excellent wind resistance to keep you dry and comfortable outdoors.

Packability and Portability: 33,000ft packable rain jacket women is super lightweight, with packable carrying pouch, easy to keep in your handbag, travelling bag, suitcase or car. It's intelligently designed to allow minimal space occupation.Ultra-light weight only 250g.

[Waterproof] 33,000ft Packable rain jacket for men features superior waterproof fabric and full heat seam-sealed construction, with 10000mm H2O in waterproof level. All zippers outside are 100% water resistant, keep your storage items dry. This shell allows you to dry completely even during downpour rain.
Gloves and Hats
| Item | Best Use | What to Look For |
|---|---|---|
| Liner gloves | Active hiking and tasks requiring dexterity | Quick-drying fabric and a close, comfortable fit |
| Insulated gloves | General cold-weather hiking | Warm insulation plus wind and moisture protection appropriate for conditions |
| Mittens | Colder conditions and long stops | Enough room for fingers to share warmth without excessive tightness |
| Hat or balaclava | Protecting the head, ears, and exposed skin | Wool or quick-drying synthetic fabric that works comfortably under a hood |
Gloves, mittens, hats, and face protection are important because uncovered skin loses heat and can be vulnerable to cold injury. Fingers, toes, ears, cheeks, chin, and the nose are also common frostbite sites.
Covering your head helps reduce heat loss from exposed skin, but the popular claim that the head automatically loses a uniquely large share of body heat is misleading. Heat loss depends strongly on how much skin is exposed and how well the rest of the body is insulated. The practical lesson is simple: protect all exposed areas rather than focusing on the head alone.
For hands, a layering system can work just as well as it does for the torso. Thin liner gloves provide dexterity, while warmer gloves or shell mittens can be added when conditions deteriorate. Mittens generally keep fingers warmer because the fingers share a common insulated space, although they offer less dexterity.
A wool or synthetic hat should cover the ears when conditions require it. A balaclava or neck gaiter can add protection for the face and neck in strong wind or very cold air.
Hand and Foot Warmers
Hand and foot warmers can add localized comfort during cold-weather hiking, especially during rest stops, photography sessions, ski-lift rides, or other low-activity periods. They should supplement—not replace—appropriate gloves, socks, footwear, and safe exposure limits.
One common type is the disposable air-activated warmer. For example, HotHands states that its warmers use ingredients including iron powder, water, salt, activated charcoal, and vermiculite. Exposure to air starts an oxidation reaction that produces heat. Other products use different designs, including rechargeable battery-powered warmers.
Use each product exactly as its manufacturer directs. Do not assume a warmer is safe for direct skin contact, sleeping use, or use inside very tight footwear. Check your skin regularly, especially if you have reduced sensation.
Warning: Hand and foot warmers do not make unsafe exposure safe and should never be treated as frostbite prevention on their own. Numbness, pale or waxy skin, confusion, unusual clumsiness, or uncontrollable shivering are reasons to stop, seek shelter, and take cold injury seriously.
Traction and Snow Travel
Winter boots alone may not provide enough grip on packed snow or ice. The National Park Service recommends over-the-shoe traction devices for icy conditions and snowshoes when snow is deep enough to make normal walking difficult.
Choose traction for the actual terrain. Lightweight traction devices can be useful on icy trails and packed snow, while more technical crampons belong to steeper or mountaineering terrain and require appropriate knowledge and footwear. Snowshoes help prevent excessive sinking in unconsolidated snow.
Trekking poles can improve balance on slippery terrain. In deep or soft snow, poles with larger snow baskets are generally more useful than narrow summer baskets.
Never assume a frozen lake, pond, or stream is safe just because other people have crossed it. NPS winter guidance warns hikers to stay off questionable ice because thickness and strength can vary dramatically over short distances.
Navigation Tools
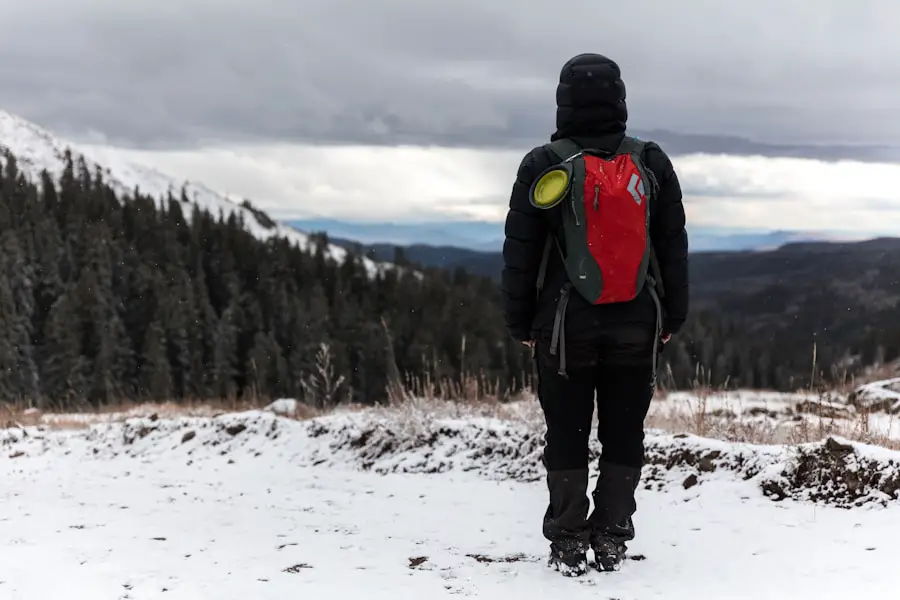
Reliable navigation is essential in winter because snow can hide trail markers, footpaths, junctions, and familiar landscape features. A route that is obvious in summer may look completely different after fresh snowfall.
The National Park Service Ten Essentials recommends a map, compass, and GPS system and advises hikers to know how to use them before heading out. A physical map is valuable as a backup even when you use a phone or dedicated GPS device.
Download maps for offline use before leaving reliable service. Carry sufficient battery capacity and keep important electronics protected from moisture and extreme cold. A backup power bank can be useful, but it does not replace basic route-finding skills.
Do not blindly follow footprints in snow. Tracks can lead away from your intended route, disappear during snowfall, or belong to someone traveling to a different destination.
Check Weather, Trail Conditions, and Avalanche Risk
Cold-weather hiking starts before you reach the trailhead. Check the latest weather forecast, expected wind, precipitation, temperature trend, trail closures, snow depth, and local hazards. Mountain weather can change quickly, and conditions at elevation may be much colder or windier than conditions in town.
Leave your route, alternate plan, vehicle information when appropriate, and expected return time with someone who is not on the hike. Let that person know when you are safely back.
Winter also brings shorter daylight hours in many locations. Carry a headlamp even when you expect to finish before sunset, and start conservative routes early enough that a slower pace in snow does not leave you navigating unexpectedly in darkness.
Avalanche Terrain
If your route enters or passes below avalanche terrain, normal hiking preparation is not enough. Check the regional avalanche forecast before the trip. Avalanche.org notes that forecasts describe current danger and snowpack conditions but are only the starting point for managing risk.
Avalanche.org explains that avalanches are possible on slopes steeper than about 30 degrees and that low-angle ground can still be exposed to avalanches starting on steeper terrain above it. Proper avalanche travel therefore requires training in terrain recognition, decision-making, and rescue.
Warning: Do not enter avalanche terrain simply because you have a phone app or forecast. Backcountry avalanche travel requires appropriate education and, where exposure exists, rescue equipment such as a transceiver, probe, and shovel that you know how to use.
Emergency Supplies
An emergency kit is essential because a minor problem in mild weather can become much more serious in freezing temperatures. Your kit should match the route, remoteness, group size, weather, and expected duration.
The National Park Service Ten Essentials system includes navigation, sun protection, extra insulation, illumination, first aid, fire, repair tools, food, water, and emergency shelter. In winter, useful additions can include extra gloves or mittens, dry socks, spare clothing, traction equipment, and additional insulation.
Carry a headlamp or flashlight rather than relying on your phone as your only light source. Include a first-aid kit, fire-starting supplies appropriate for the environment, a repair tool or multi-tool, whistle, and an emergency shelter such as a bivy sack, tarp, or emergency blanket.
A signaling whistle is valuable because it requires less energy than shouting repeatedly. Satellite communication equipment may also be appropriate for remote routes, but no electronic device is a substitute for conservative planning.
Food and Hydration
Cold weather can make it easy to forget to drink, but hikers still need adequate fluids. Bring enough water for the route and conditions, plus water-treatment capability when your plan depends on natural water sources. In freezing weather, insulate bottles or carry them where they are less likely to freeze.
Pack food that is easy to eat without lengthy preparation. Energy-dense snacks such as nuts, trail mix, nut-butter packets, dried fruit, cheese, or bars can be practical depending on your dietary needs. Keep at least some food accessible so you do not have to unpack the entire backpack in wind or snow.
Do not assume snow is an effortless emergency water supply. Eating large quantities of unmelted snow can cool you and provides relatively little water by volume. When melting snow is part of a longer-trip plan, carry an appropriate stove, fuel, and safe operating knowledge.
Recognize Hypothermia and Frostbite
Cold-weather hikers should know the early signs of cold injury. According to the Centers for Disease Control and Prevention, adult warning signs of hypothermia include shivering, exhaustion, confusion, fumbling hands, memory loss, slurred speech, and drowsiness.
A body temperature below 95°F is a medical emergency and requires immediate medical attention.
If hypothermia is suspected, get the person into shelter, remove wet clothing, begin warming the center of the body, and obtain medical assistance. Handle a person with severe hypothermia gently.
CDC frostbite guidance lists white or grayish-yellow skin, unusually firm or waxy skin, and numbness among warning signs. Frostbite commonly affects fingers, toes, the nose, ears, cheeks, and chin.
Do not rub or massage frostbitten tissue. CDC advises warming affected areas with warm—not hot—water when immediate medical care is unavailable and says direct high heat such as heating pads, fires, stoves, or radiators should not be used because numb tissue can burn.
Warning: Confusion, worsening coordination, slurred speech, unusual drowsiness, or severe shivering are not signs to “push through.” End the hike, get the person protected from the environment, and seek appropriate emergency help.
Backpack with Supportive Straps
A well-fitting backpack makes winter gear easier to carry. Padded shoulder straps, an adjustable sternum strap, and a supportive hip belt can help distribute the load, especially when you are carrying extra layers, food, water, traction equipment, and emergency supplies.
Organization matters more in winter because standing still while searching for gear can quickly make you cold. Keep frequently used items such as gloves, hat, snacks, map, headlamp, shell, and traction devices easy to reach.
External attachment points can help with trekking poles or snowshoes, but secure equipment so it cannot swing, snag vegetation, or fall off. Waterproof stuff sacks or durable plastic liners can help protect spare clothes and other moisture-sensitive items inside the pack.
Pack the items you are most likely to need during changing weather near the top or in an accessible pocket. Emergency supplies should remain available even if another part of the load becomes wet.
Products Worth Considering
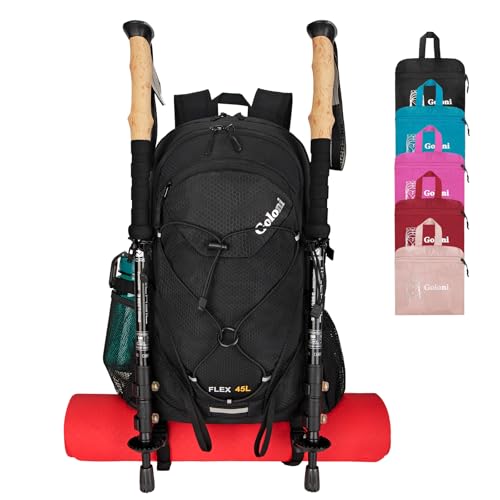
45L Spacious & Ultra‑Light Foldable Design:Weighs only 1.15 lbs (0.58 kg). This 45‑liter foldable hiking daypack compacts into its own built‑in pocket for easy suitcase or drawer storage. Great storage volume for day‑hike supplies, travel clothing and light‑camping gear. Best suited for short‑distance outdoor adventures

【Lightweight And Foldable Backpack】 Seektop lightweight travel backpack weighs only 0.76 lbs but has a capacity of 15 liters, ideal for adult hikers seeking minimalist gear for day trips. Folds into 7.48"x7.87" compact pouch using built-in zippered pocket, effortlessly store in travel luggage as backup hiking backpack for sudden adventures.

50L HIGH-CAPACITY: Include Main compartment, two zipped front pocket, sleeping bag compartment, mesh side pockets, you can put your tents, blanket,cooking gear and other equipment & accessories in this backpack, backpack internal layout clear classified easily, more convenience to you.
Packing Electronics and Travel Gear
When preparing for a cold-weather hiking trip, separate genuine trail essentials from items needed only during transit or at your lodging. A laptop is normally unnecessary on a day hike and adds weight, so leave it securely at your accommodation unless your trip has a specific work requirement. Travelers who do need one can review this lightweight laptop for travel guide for off-trail packing considerations.
Likewise, rolling luggage belongs in the travel portion of the trip rather than on the trail. For flights or road-trip organization, this hardside carry-on luggage guide covers options for transporting gear to your destination.
Photography equipment can make a winter pack heavier and more complex. Protect batteries and electronics from moisture, keep critical navigation separate from camera equipment, and make sure photography does not delay you past a safe turnaround time. For dedicated camera storage, see this travel camera backpack guide.
Whatever you carry, prioritize warmth, navigation, food, water, illumination, emergency shelter, and weather protection before optional electronics. Winter hiking is safer when the backpack supports the trip rather than becoming the reason you cannot move comfortably or turn around quickly.
Frequently Asked Questions
What should I wear for cold weather hiking?
Use a moisture-wicking wool or synthetic base layer, an insulating fleece or puffy layer, and a shell that protects you from wind and precipitation. Add suitable hiking pants, warm socks, boots, gloves or mittens, and a hat or balaclava. Carry spare dry layers for changing conditions.
What materials are best for cold weather hiking?
Merino wool and quick-drying synthetic fabrics such as polyester and nylon are common choices. Fleece, synthetic insulation, and protected down can all work as insulating layers. Avoid relying on cotton when cold and wet conditions are possible because it absorbs moisture and dries slowly.
Should I wear waterproof and insulated boots for cold weather hiking?
Waterproof boots are useful in snow, slush, and wet conditions. Insulation should match the expected temperature and your activity level. Your boots should have enough room for your toes and chosen socks without becoming loose enough to cause rubbing or tight enough to restrict circulation.
What accessories are essential for cold weather hiking?
Useful cold-weather accessories include gloves or mittens, a hat, neck gaiter or balaclava, warm socks, sunglasses, sunscreen, and gaiters when snow is deep or wet. Depending on the trail, you may also need traction devices, snowshoes, trekking poles, and avalanche equipment.
How can I stay warm and dry during cold weather hiking?
Manage your layers throughout the hike rather than waiting until you are soaked with sweat or already chilled. Vent or remove clothing during hard climbs, add insulation before long stops, protect yourself from wind and precipitation, keep spare layers dry, eat and drink regularly, and turn back when conditions exceed your equipment or experience.
Do I need traction devices for winter hiking?
Traction depends on trail conditions. Packed snow and ice may require over-the-shoe traction devices, while deep unconsolidated snow may require snowshoes. Technical crampons are intended for more demanding terrain and require suitable footwear and skills.
When should I turn around on a cold weather hike?
Turn around when weather or trail conditions deteriorate beyond your preparation, daylight becomes inadequate, navigation becomes uncertain, someone cannot stay warm and dry, required traction is missing, avalanche risk exceeds your training or plan, or anyone shows possible hypothermia or frostbite symptoms.
Sources
- National Park Service — Winter Hiking Tips — winter clothing, traction, gaiters, navigation, weather checks, avalanche awareness, and extra dry clothing.
- National Park Service — Ten Essentials — navigation, extra insulation, illumination, first aid, food, water, repair tools, and emergency shelter.
- CDC — Preventing Hypothermia — hypothermia warning signs and emergency response.
- CDC — Preventing Frostbite — frostbite symptoms and safe first-aid guidance.
- Avalanche.org — Get the Forecast — avalanche forecasting and risk-management guidance.
- GORE-TEX — Product Technology — waterproof, windproof, and breathable performance claims for applicable GORE-TEX products.
