
Last Updated on July 30, 2026 by Caleb Warren
Packing a backpack for a long trip is not about forcing in as much gear as possible. The goal is to carry the right items in a stable, weather-ready load that stays comfortable and keeps essentials easy to reach. A good system works for both multi-day hiking and long-term travel, with a few adjustments for flights, lodging, climate, and food storage.
Quick Answer
Choose a backpack that fits your torso and expected load, then pack soft camp gear at the bottom, dense items close to your spine in the middle, and frequently used essentials near the top. Balance both sides, protect gear from moisture, test the loaded pack, and confirm airline and trail rules before leaving.
Key Takeaways
- Fit matters more than brand: size the pack to your torso and hips, then test it with your real travel load.
- Put soft, low-priority gear at the bottom and heavier items in the core, close to your back.
- Use a pack liner, packing cubes, and small pouches to separate dry gear, clothing, food, electronics, and documents.
- Match clothing and footwear to the climate and terrain instead of relying on one “best” product.
- Check airline battery rules, local water conditions, and wildlife food-storage regulations before departure.
At a Glance
| Time Required | 30–60 minutes, plus a short loaded-pack test |
| Difficulty | Easy to moderate |
| Tools Needed | Packing checklist, pack liner, organizers or dry bags, and an optional luggage scale |
| Cost | $0 with gear you already own; optional organizers and water-treatment supplies vary in price |
Disclosure: As an Amazon Associate I earn from qualifying purchases. Some links on this page are affiliate links, at no extra cost to you.
Choosing the Right Backpack

Start by deciding what the backpack must do. A trail pack should carry camping gear comfortably over distance. A travel pack usually favors suitcase-style access, lockable zippers, and a protected electronics area. A hybrid pack may do both, but it can be heavier and may not meet carry-on limits.
Choose Capacity for the Load, Not Just the Trip Length
Trip length alone does not determine capacity. Climate, food carries, sleeping gear, laundry access, and how often you can resupply matter just as much. Lay out your full gear list before buying a pack, then choose a size that holds the load without bulging or requiring many items to hang outside.
The Osprey Exos 48 shows why the specification sheet matters: the S/M size is listed at 48 liters, while the L/XL size is listed at 51 liters, with a recommended load range of 25–30 pounds. That does not automatically make it suitable for every 7–10 day trip or for cabin baggage. Your gear volume, body fit, and transport rules still decide whether it is appropriate.
Check Torso Fit and Load Transfer
A backpack should match your torso length, not your overall height. The hip belt should wrap securely over the top of your hip bones so it can transfer much of the load away from your shoulders. Shoulder straps should follow your body without large gaps, while load-lifter and sternum straps should improve stability without restricting breathing.
Try the pack with the weight you expect to carry. Walk for at least 15–20 minutes, use stairs if available, and check for pressure points, slipping, numbness, or a load that pulls backward. Mesh back panels, such as the air-mesh panel on the REI Ruckpack 40, may improve airflow, but ventilation does not replace correct sizing.
Treat Product Recommendations as Starting Points
Comfort is personal, so avoid blanket claims that a specific model is comfortable or uncomfortable for everyone. The Cotopaxi Allpa 42 may work well for one traveler and poorly for another depending on torso length, load, and walking distance. The Caribee Sky Master 80 includes a detachable daypack, but the full 80-liter system is designed as large luggage rather than a typical cabin bag.
Warning: There is no universal overhead-bin size. Measure the packed bag at its fullest point and confirm both size and weight limits with every airline on your itinerary. A bag that is marketed for travel can still be too large for carry-on use.
Essential Packing Techniques

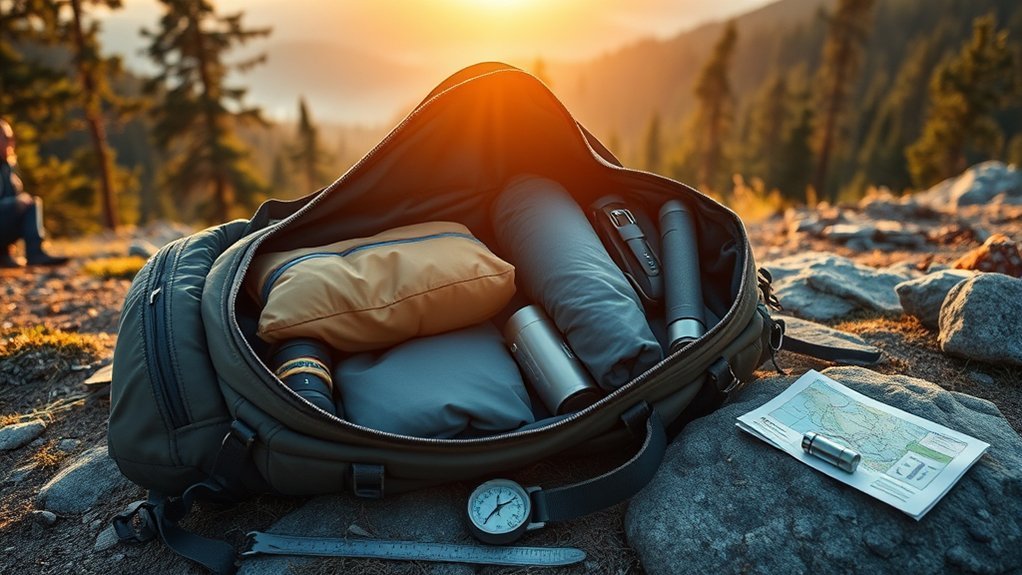
A stable backpack uses zones. The bottom holds soft items that are not needed until camp. The core holds dense, heavy gear close to the spine. The top and outer pockets hold items needed during the day. This method keeps the load balanced and reduces the need to unpack everything at each stop.
Packing Order Strategy
- Line the pack: If the backpack is not fully waterproof, use a durable pack liner to protect sleeping gear and clothing.
- Install the hydration reservoir first: Fill it, check the cap and hose, and slide it into the sleeve against your back before the pack becomes crowded.
- Load the bottom zone: Add your sleeping bag, sleep clothing, camp shoes, or other soft items you will not need until camp.
- Build the core: Place dense items such as food, a cook kit, stove, or bear canister close to your spine and between your shoulder blades. Pad hard edges with clothing.
- Pack the top zone: Add an insulating layer, rain jacket, first-aid kit, lunch, and other bulky items you may need before camp.
- Fill access pockets: Keep snacks, sunscreen, navigation tools, insect repellent, and small electronics in secure pockets you can reach without disturbing the main load.
- Compress and inspect: Tighten compression straps, check that nothing shifts, and make sure the pack stands or rests without twisting to one side.
Note: A hydration reservoir belongs in its dedicated sleeve or core area close to your back, not loose at the top. Putting it in first also makes refilling and hose routing easier.
Weight Distribution Techniques
Keep the densest items near your back and centered from left to right. Heavy gear that sits too far away can pull you backward; heavy gear placed very high can make the pack feel top-heavy; and heavy gear placed at the very bottom can make the pack sag. Use soft clothing to fill gaps and prevent cookware, food bags, or electronics from moving.
After loading, fasten the hip belt first, then adjust the shoulder straps, load lifters, and sternum strap. The pack should move with your body without squeezing your chest or placing all pressure on your shoulders. If it sways, rebalance the sides and tighten the compression straps. If your shoulders become numb, check torso length, hip-belt position, and total load.
A well-packed backpack feels like one stable load resting on your hips—not a stack of loose items pulling away from your back.
Essential Gear Organization
Sort items into clear groups before packing: shelter and sleep, clothing, food, cooking gear, water, hygiene, first aid, electronics, documents, and small essentials. Packing cubes work well for clothing and hostel travel. Dry bags protect critical items from moisture. Compression sacks save space, but do not compress every item so tightly that the pack becomes a hard, awkward cylinder.
Use consistent locations. For example, keep all charging cables in one pouch, all toiletries in another, and all travel documents in a slim organizer that stays with you. Limit exterior attachments because swinging bottles, sandals, and cookware can snag on branches, shift your balance, or get damaged in transit.
Final Fit and Load Test
Wear the fully packed backpack with the same clothing and footwear you plan to use. Walk, bend, climb stairs, and reach for the items you expect to use during the day. Repack if the load sways, if hard objects press into your back, or if you must remove half the contents to reach rain gear, water treatment, medication, or identification.
Pro Tip: Photograph each packing layer before closing the bag. The images create a fast visual map when you need to repack in a hostel, campsite, or airport.
Clothing Choices for Versatility
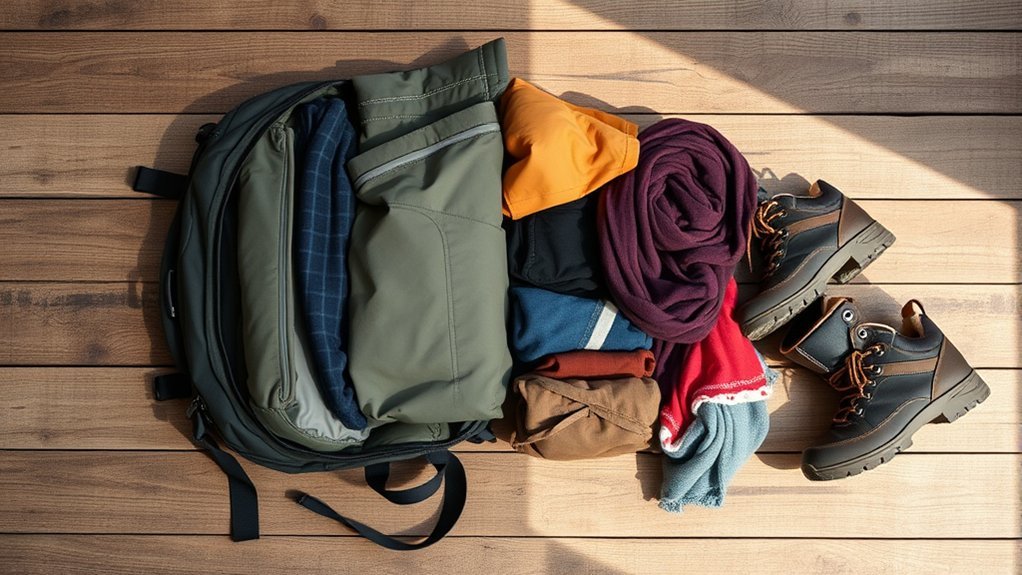
Build a small clothing system around layers and repeat wear. Choose colors that work together and fabrics that dry quickly after rain or sink washing. A practical starting point is three or four tops, two bottoms, enough underwear and socks for several days, sleepwear, one warm layer, and one weather-resistant outer layer. Adjust the count for climate, culture, trip length, and laundry access.
Use a Three-Layer System
- Base layer: Moves moisture away from the skin. Merino wool and many synthetic fabrics work well.
- Midlayer: Adds warmth. A fleece, light sweater, or compressible insulated jacket can fill this role.
- Outer layer: Blocks wind and rain. Choose a shell that fits over the other layers without restricting movement.
A compressible puffer, including products in the Norrona Trollveggen Superlight range, can be useful when its warmth rating and weather protection match the trip. A casual fleece or hoodie such as the Kari Traa Rothe may work as a midlayer and town piece, but no garment is automatically suitable for every temperature or dress setting.
Use dual-purpose items carefully. A soft clothing sack can double as a pillow, a large scarf can serve as a light wrap, and swim shorts may work as casual shorts if the fit and local customs allow. Avoid bringing bulky pieces that only work with one outfit.
Plan a Simple Laundry System
Pack a lightweight laundry bag, a small amount of travel-safe detergent, and a short clothesline if your lodging may not provide drying space. Wash small loads before everything is dirty, wring garments gently in a towel, and hang them where ventilation is allowed. Keep damp clothing separate from dry insulation and electronics.
Footwear Recommendations for Comfort
Choose footwear by terrain, weather, pack weight, and fit. Waterproof boots can help in sustained wet or muddy conditions, while breathable hiking shoes or trail runners may feel better in hot, dry weather. A road-running shoe can be comfortable for cities but may lack the outsole grip and protection needed on rough trails.
Ideal Hiking Footwear Types
Selected Danner hiking boots use GORE-TEX liners for waterproof protection, but confirm the exact model because not every Danner boot has the same construction. Standard Saucony Ride models are road-running shoes, not technical trail shoes; choose a trail-specific model when you need deeper lugs, more protection, or better grip on loose ground. Teva Original Universal sandals are compact options for travel, water activities, and downtime, but they are not a substitute for supportive hiking footwear on demanding terrain.
Avoid choosing footwear only because it is soft, rigid, fashionable, or highly rated. Match the sole, support, and upper to the surface you will actually walk on. Boots and trail runners can both work; the best choice depends on terrain, speed, ankle preference, climate, and the load you carry.
Importance of Waterproof Features
Waterproof footwear is useful when rain, mud, cold ground, or shallow stream crossings are likely. A waterproof membrane helps block outside moisture, but it can also feel warmer and may dry slowly if water enters over the collar. In hot climates, a breathable non-waterproof shoe that dries quickly may be more comfortable.
For warm-weather downtime, packable sandals can let your main shoes dry. Do not rely on sandals for steep, rocky, or slippery routes unless the specific model is designed for that terrain and gives you secure traction and support.
Comfort and Fit Considerations
Try footwear late in the day, when feet may be slightly swollen, and wear the socks and insoles you will use on the trip. Your heel should stay secure, your toes should not strike the front on descents, and the toe box should allow natural movement. Break in new boots gradually and treat hot spots before they become blisters.
| Footwear | Features | Best For |
|---|---|---|
| Danner GORE-TEX hiking model | Waterproof membrane, supportive construction; specifications vary by model | Wet or cool hiking conditions |
| Saucony Ride road-running shoe | Lightweight road cushioning and flexible everyday comfort | Cities, paved paths, and road running—not technical trails |
| Teva Original Universal sandal | Packable design and adjustable straps | Travel, water activities, casual outings, and camp downtime |
Organizing Gear Efficiently
Good organization reduces stress because every item has a home. Use a written master list and divide the pack into access zones rather than stuffing items wherever they fit. Keep the system simple enough to repeat when you are tired, wet, or moving between accommodations.
- Deep storage: Sleep system, spare clothing, and other items used only at the end of the day.
- Main access: Food, cooking gear, shelter parts, and clothing layers.
- Quick access: Rain shell, first aid, water treatment, snacks, navigation, and headlamp.
- Personal security: Passport, wallet, medication, phone, keys, and backup payment method in a secure pouch that stays under your control.
- Wet or dirty zone: Sandals, rain cover, damp towel, and laundry isolated from clean, dry gear.
Fill empty spaces around rigid objects with socks or soft clothing, but do not hide critical gear inside random gaps. Tighten compression straps after packing and again after eating food or removing layers, because the load can loosen during the day.
Hydration Solutions for Long Trips
Choose a hydration system that matches the route and your ability to refill. Soft bottles are light and easy to divide between side pockets. A hydration reservoir allows frequent sipping without stopping, but it is harder to see how much water remains and must be checked carefully for leaks.
- Plan capacity by route: Consider heat, effort, distance between reliable sources, and whether you need water for cooking.
- Balance the load: Keep bottles secure and distribute them evenly when possible. A full reservoir should sit close to your back.
- Treat uncertain water: Clear-looking streams can contain germs. Follow the treatment instructions for the specific filter, purifier, disinfectant, or UV device.
- Carry a backup method: A second treatment option can help if a filter clogs or a device fails, but no method guarantees safety from every biological or chemical hazard.
- Test and clean the system: Fill the reservoir or bottles at home, check closures, route the hose, and dry everything fully after use.
The Centers for Disease Control and Prevention advises boiling as the best way to kill germs in uncertain water. The next-best approach is generally to filter and then disinfect, following the product instructions and the risks at the destination.
Warning: Boiling, filtering, or disinfecting cannot make water contaminated with harmful chemicals, toxins, or radioactive material safe. Use a different source.
Safety Considerations While Hiking
Safety starts before the trail. Check weather, closures, permits, fire restrictions, wildlife rules, water availability, and the difficulty of the route. Leave your route, start time, expected return, vehicle details, and emergency instructions with a trusted person.
Carry a first-aid kit that matches the group and trip, plus required personal medication. Include navigation tools, a headlamp, sun and insect protection, emergency insulation, and a way to communicate that works in the area. A phone is useful, but do not assume there will be service.
Store Food for Local Wildlife
Food-storage rules vary by park and region. Some areas require an approved bear-resistant canister or food locker; others allow a properly executed hang; and some prohibit hanging. Check the land manager’s current rules before packing. Store food, trash, cookware, toiletries, sunscreen, and other scented items as required, and never keep them in your tent.
The National Park Service advises travelers to treat scented products as food, pack out all scraps and garbage, and follow the specific storage method required by the park. A generic “hang your food” instruction is not safe or legal everywhere.
Note: This packing guide does not replace local regulations, weather advisories, medical advice, or route-specific safety planning.
Travel Accessories for a Better Experience
The best accessories solve a real problem without adding much weight. Review each item by asking whether you will use it often, whether another item already performs the same job, and whether it creates an airline or security restriction.
- Compact USB battery pack: Keep your phone available for navigation, tickets, and emergency communication. The Federal Aviation Administration requires power banks and other spare lithium batteries to remain in carry-on baggage, with terminals protected from short circuits. Remove them if your cabin bag is gate-checked.
- Quick-drying travel towel: A compact towel is useful in hostels, campsites, beaches, and shared bathrooms. Dry it before repacking to prevent odor and mildew.
- Earplugs or sleep earbuds: Simple foam earplugs are lighter and cheaper. Products such as Ozlo Sleepbuds add noise-masking audio and a rechargeable system, but they also add cost, charging needs, and another item to protect.
- Pen and passport photos: A pen is useful for forms. Spare photos may help for some visas or permits, but requirements vary, so check the destination rather than assuming they are always needed.
- Document organizer: Carry your passport, required visa or authorization, insurance details, prescriptions, emergency contacts, and copies of important records. Keep copies separate from the originals.
- Small repair and laundry kit: A few safety pins, tape wrapped around a bottle, a needle and thread, detergent, and a laundry bag can solve common problems without taking much space.
For international travel, use the U.S. Department of State international travel checklist to confirm passport validity, entry documents, medication restrictions, and destination-specific requirements. Vaccination records are not universally required; carry them when the destination or your health plan calls for them.
Pre-Trip Final Check
Complete a shakedown before leaving home. This catches fit problems, missing essentials, leaking containers, and airline issues while they are still easy to fix.
- Weigh and measure the packed bag, then compare it with carrier limits.
- Walk with the full load for at least 15–20 minutes.
- Confirm that rain gear, water, treatment, medication, identification, and a headlamp are reachable.
- Check that heavy items are centered and nothing sharp presses into your back.
- Open and close every bottle, reservoir, dry bag, and fuel container.
- Review weather, trail conditions, food-storage rules, entry documents, and emergency contacts.
- Remove duplicate or “just in case” items that do not solve a likely problem.
Frequently Asked Questions
How do I minimize the weight of my packed backpack?
Make a complete list, weigh the largest items, remove duplicates, and choose gear that serves more than one useful purpose. Reduce packaging, plan laundry, and avoid carrying more food or water than the route requires. Do not cut safety essentials simply to reach an arbitrary number.
What snacks should I bring for long trips?
Choose compact foods you already tolerate, such as trail mix, nuts, dried fruit, crackers, nut-butter packets, jerky, or bars. Balance calories with weight, protect food from heat, and follow local wildlife-storage rules for every food item and wrapper.
How can I prevent my clothes from wrinkling?
Pack wrinkle-resistant fabrics, fold along natural seams, and use a packing cube so garments do not shift. Rolling works well for many casual items, while structured shirts often look better folded. Remove clothing and hang it as soon as you arrive.
What documents should I carry for international travel?
Carry a valid passport, any required visa or electronic authorization, insurance details, medication documentation, emergency contacts, and destination-specific records. Keep digital and paper copies separate from the originals, and verify current entry rules before each trip.
How do I handle laundry while traveling?
Use laundromats or lodging services when practical, or wash a few quick-drying items in a sink where permitted. Carry a small laundry bag and detergent, rinse thoroughly, and allow clothing to dry fully before packing it with clean gear.
Should heavy items go at the top or bottom of a backpack?
Neither extreme is ideal. Place heavy, dense items in the core of the pack, close to your spine and centered from side to side. Put soft camp gear at the bottom and items needed during the day near the top.
Can a 40-liter backpack work for a long trip?
Yes, especially for warm-weather travel with regular laundry and little camping gear. It may be too small for bulky sleep systems, winter clothing, long food carries, or specialized equipment. Measure the packed bag because a 40-liter label does not guarantee airline compliance.
Where should a hydration bladder go?
Place a filled and leak-tested reservoir in its dedicated sleeve close to your back, usually before loading the rest of the pack. Route the hose securely and keep hard objects from pressing against the reservoir.
Sources
- REI Co-op: How to Pack and Hoist a Backpack — packing zones, load balance, reservoir placement, and compression.
- Osprey: Exos 48 Specifications — size-dependent capacity, dimensions, load range, and suspension features.
- Federal Aviation Administration: PackSafe Lithium Batteries — carry-on rules for power banks and spare lithium batteries.
- Centers for Disease Control and Prevention: Backcountry Water Treatment — boiling, filtration, disinfection, and chemical-contamination limits.
- National Park Service: Bear Safety and Food Storage — scented-item storage, canisters, food hangs, and park-specific rules.
- U.S. Department of State: International Travel Checklist — passports, visas, medication records, copies, and destination requirements.
Conclusion
A well-packed backpack gives you room to move, quick access to essentials, and fewer surprises on the road or trail. Choose the pack for your body and real load, keep dense gear close to your back, organize by when each item is needed, and test everything before departure. The lighter and more deliberate your system becomes, the easier it is to focus on the journey instead of the bag.

