
Last Updated on July 30, 2026 by Caleb Warren
A backpack lasts longer and works better when you clean it gently, dry it fully, and fix wear before it spreads. The safest method depends on the pack’s care label, fabric, coating, frame, and hardware. Use the steps below for routine backpack maintenance without damaging water-resistant finishes, padding, zippers, or load-bearing seams.
Quick Answer
Maintain a backpack by emptying and inspecting it after trips, spot-cleaning dirt with lukewarm water and mild soap, and deep-cleaning only when the care label allows. Rinse thoroughly, air-dry it open in the shade, store it completely dry, clean the zippers, and repair small damage before it spreads.
Key Takeaways
- Follow the sewn-in care label and the manufacturer’s instructions before washing or reproofing.
- Spot-clean most dirt first; deep-clean only when sweat, salt, odors, or heavy grime remain.
- Do not use bleach, fabric softener, harsh stain removers, a washer, or a dryer unless the care label specifically permits it.
- Dry every pocket, strap, and removable part completely before storage to reduce odor and mildew risk.
- Repair small tears and replace damaged hardware early, but leave load-bearing or structural repairs to the manufacturer or a qualified gear-repair service.
At a Glance
| Time Required | 20–40 minutes of active cleaning, plus enough air-drying time for every part to become completely dry |
| Difficulty | Easy for cleaning; moderate for minor sewing or hardware replacement |
| Tools Needed | Soft brush or toothbrush, sponge or cloth, mild fragrance-free soap or approved technical cleaner, basin, clean towels, and optional zipper lubricant |
| Cost | Usually no extra cost when basic cleaning supplies are already on hand; technical cleaner, reproofing treatment, or repair parts cost extra |
Disclosure: As an Amazon Associate I earn from qualifying purchases. Some links on this page are affiliate links, at no extra cost to you.
Importance of Backpack Maintenance
Dirt, sweat, salt, sunscreen, and grit can collect on fabric, padding, seams, and zipper teeth. Over time, that buildup can create odors, make zippers harder to operate, and place extra wear on coatings and high-stress areas. Routine cleaning and inspection help you catch loose stitching, frayed webbing, damaged buckles, and fabric abrasion before a small problem becomes a failed strap or unusable zipper.
Maintenance does not mean washing the pack after every use. Many manufacturers recommend light cleaning as needed and a deeper hand wash only when the backpack is heavily soiled. The goal is to remove contaminants without overworking the fabric, coating, foam, or hardware.
The best backpack-cleaning rule is simple: use the gentlest method that removes the dirt, then dry the pack completely before storing it.
A Simple Backpack Maintenance Schedule
| When | What to Do |
|---|---|
| After a normal trip | Empty pockets, shake out grit, wipe spills, air out damp padding, and check zippers and straps. |
| After rain or heavy sweat | Open every compartment and let the pack dry fully. Rinse salt from the back panel or straps if the care instructions allow. |
| When stains or odors remain | Spot-clean first. Deep-clean only if spot cleaning does not solve the problem. |
| Before long-term storage | Clean as needed, dry completely, empty all pockets, and inspect load-bearing areas. |
Preparation for Cleaning
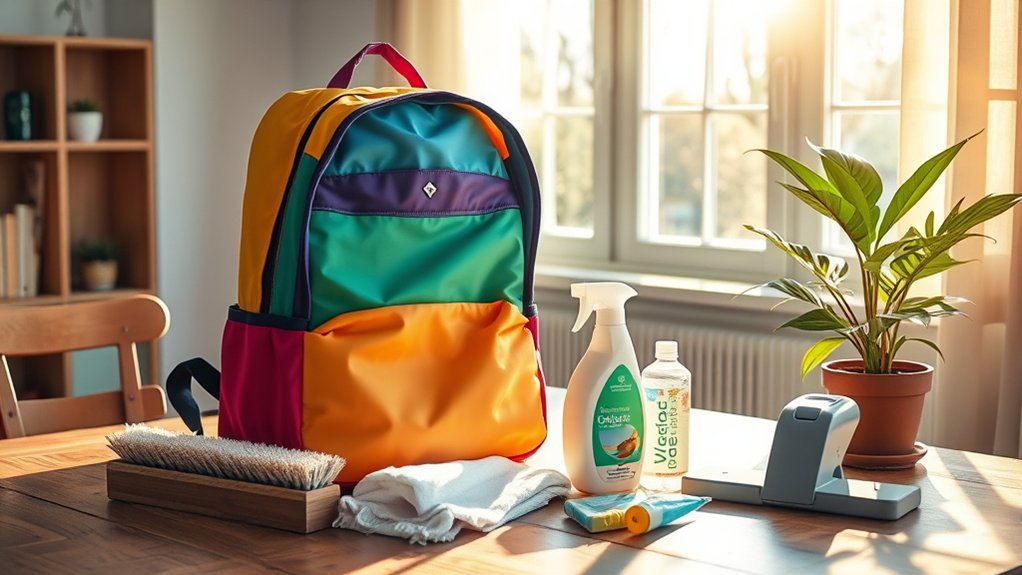
Preparation protects the backpack and anything hidden inside it. Work in a bright area where you can see seams, coatings, zipper tracks, and small pockets. Keep removable parts together so nothing is lost during cleaning.
Empty All Compartments
- Open every zipper and pocket: Remove clothing, food, pens, batteries, power banks, hydration reservoirs, and any loose accessories.
- Shake out loose debris: Turn the pack upside down and gently shake out sand, crumbs, and dirt.
- Vacuum carefully if needed: Use low suction around seams and corners. Keep the nozzle away from loose lining fabric.
- Remove only approved components: Detach the rain cover, hipbelt, harness, frame sheet, or stays only when the owner’s manual says they are removable. Some suspension systems should not be taken apart.
Warning: Remove all electronics and batteries before cleaning. Do not submerge a wheeled travel pack, powered backpack, or pack with a fixed metal chassis unless the manufacturer specifically allows it.
Inspect for Wear
Check the backpack before it gets wet. Water can hide small tears and make damaged coatings harder to judge. Pay special attention to shoulder-strap anchors, hipbelt attachments, grab handles, the bottom panel, zipper ends, compression-strap stitching, and any place where the fabric rubs against a frame or buckle.
| Area of Inspection | What to Look For |
|---|---|
| Stitching and seams | Loose or broken thread, opening seams, pulled bartacks |
| Zippers | Missing teeth, separated coils, bent sliders, grit, peeling water-resistant coating |
| Fabric and coating | Cuts, thinning, delamination, sticky or flaking coating, deep discoloration |
| Straps and webbing | Fraying, cuts, heat damage, slipping adjusters |
| Buckles and frame | Cracks, sharp edges, distortion, loose or exposed frame parts |
Check the Care Label
The care label is more important than any general cleaning guide. It may specify hand washing, machine washing, water temperature, detergent type, drying method, or products to avoid. Some technical hiking packs should never enter a washing machine, while certain travel and lifestyle packs are explicitly labeled machine washable. Follow the instructions for your exact model.
- Washing method: Confirm whether the pack can be submerged, hand washed, or machine washed.
- Water temperature: Use the listed temperature. Lukewarm water is a common recommendation for hand washing.
- Cleaner restrictions: Look for warnings against bleach, fabric softener, solvents, or conventional detergent.
- Drying method: Most structured outdoor packs are air-dried, but a care label may permit low tumble drying for a specific model.
Gather Safe Cleaning Supplies
- A clean sponge or soft cloth
- A soft nylon brush or used soft-bristle toothbrush
- Mild fragrance-free soap, pH-neutral soap, or a technical cleaner approved for the pack
- A large sink, basin, tub, or bucket if immersion is allowed
- Clean towels to blot water and support removable parts
- A zipper lubricant made for outdoor gear, used only after the zipper is clean and dry
Note: Test any cleaner or stain treatment on a hidden area first. Stop if color transfers, the coating becomes tacky, or the fabric changes texture.
Cleaning Techniques
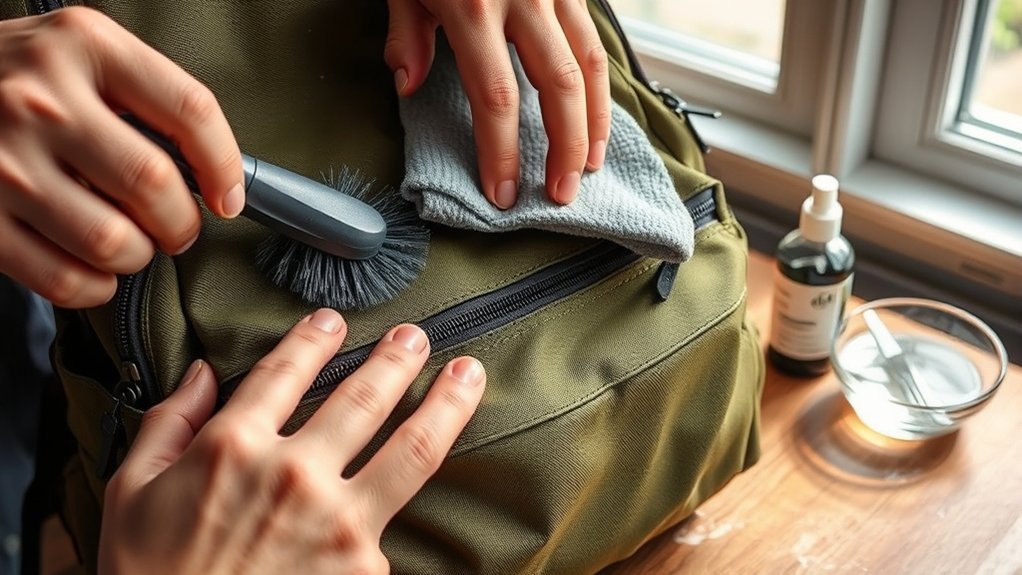
Start with the least aggressive method. A damp cloth is enough for dust and small splashes. Use a full hand wash only for built-up sweat, salt, smoke odor, mud, or grime that remains after spot cleaning.
Light Cleaning Methods
- Brush off dry dirt: Let mud dry, then remove it gently with a soft brush. Scrubbing wet grit can grind it into the fabric.
- Wipe the interior: Use a clean, damp sponge or cloth without soap unless there is a spill or stain.
- Spot-clean marks: Mix a small amount of approved mild soap with lukewarm water. Dab and gently work the area from the outside of the stain toward the center.
- Rinse the spot: Wipe repeatedly with a separate cloth dampened with clean water until no soap remains.
- Air-dry: Open the pack and dry it away from direct sun and heat.
Deep Cleaning Techniques
Use these steps only when the care label or manufacturer permits hand washing or immersion:
- Prepare the pack: Empty it, remove approved detachable parts, loosen straps, and open all zippers.
- Fill a basin: Use lukewarm water and a small amount of mild, pH-neutral soap or technical cleaner.
- Wash gently: Submerge only if allowed. Move water through the fabric and padding by hand. Use a soft brush on stubborn dirt without hard scrubbing.
- Clean sweat zones: Gently squeeze soapy water through shoulder straps, the hipbelt, and the back panel to release sweat and salt.
- Rinse thoroughly: Drain the dirty water and rinse with clean water until it runs clear and no suds remain.
- Remove excess water: Let the pack drain. Press it gently between clean towels; do not twist or wring padded sections.
- Dry completely: Open every compartment and air-dry in a shaded, ventilated place.
Pro Tip: Take a photo of removable straps and hardware before disassembly. It makes correct reassembly easier and helps prevent twisted webbing.
Special Care by Material and Pack Type
- Coated nylon or polyester hiking packs: Hand washing is common. Avoid hot water, harsh detergent, aggressive scrubbing, and machine agitation unless the label allows them.
- Waxed canvas: Do not treat it like ordinary fabric. Brush or spot-clean it and use the maker’s approved rewaxing product.
- Leather or suede: Do not soak it. Use a cleaner and conditioner made for that material, test first, and follow the leather manufacturer’s directions.
- Laptop or camera backpacks: Remove electronics, dividers, rigid inserts, and batteries when possible. Do not saturate glued foam or fixed protective shells unless the care instructions allow it.
- Wheeled travel packs: Wipe the chassis and wheels separately. Do not immerse a fixed wheeled frame.
- Hydration packs: Remove the reservoir and hose, then clean and dry them separately according to the reservoir maker’s instructions.
Proper Drying Methods
Drying is part of cleaning, not an optional final step. A pack that feels dry on the outside may still hold moisture in foam, seams, zipper garages, or hidden pockets.
- Drain first: Hold the pack with openings facing down so trapped water can escape.
- Open everything: Unzip all compartments and separate layers or removable parts so air can circulate.
- Use shade and airflow: Hang the pack by a strong carry loop or lay it on a clean drying rack in a ventilated area.
- Avoid damaging heat: Keep it away from direct sunlight, radiators, heaters, hair dryers, and open flames.
- Check thick padding: Press shoulder straps and the back panel. If they feel cool, heavy, or damp inside, continue drying.
Do not tumble-dry unless the care label specifically allows it. Direct heat can distort foam, damage coatings, weaken adhesives, and deform plastic hardware.
Storage Best Practices
Store the backpack only when it is clean enough for storage and completely dry. Choose a cool, dry, ventilated cupboard or gear room rather than a damp basement, hot attic, car trunk, or sunny window.
- Empty all pockets, including snack pockets and hidden security compartments.
- Store the pack uncompressed so foam, frames, and padding keep their shape.
- Keep zippers relaxed rather than forcing an overfilled pack closed.
- Do not place heavy objects on top of the backpack.
- Store the rain cover and hydration components dry and separate if they trap moisture.
- In a humid storage area, an intact reusable desiccant pack can help manage residual humidity, but it is not a substitute for fully drying the backpack first.
Practical Tips for Extending the Life of Your Backpack
- Use a rain cover or inner dry bags: Many backpacks resist light rain but are not fully waterproof at zippers and seams.
- Stay within the pack’s load rating: Overloading strains seams, zipper tracks, buckles, and shoulder-strap anchors.
- Lift by the haul loop when appropriate: Do not drag the pack or lift a heavy load by one shoulder strap.
- Protect the bottom panel: Set the pack on clean, dry ground instead of sharp rock, hot pavement, mud, or oily surfaces.
- Contain leaks: Put liquids, toiletries, food, and fuel in sealed bags or upright containers.
- Loosen and clean straps after salt exposure: Sweat and sea spray can leave crystals that abrade webbing and padding.
Zipper, Buckle, and Strap Care
Clean Backpack Zippers
Sand and fine dirt can make zipper sliders feel rough. Brush debris away with a soft toothbrush, then wipe the zipper with clean water and let it dry. If the zipper still sticks, apply a small amount of lubricant made for zippers and work the slider gently. Do not force a jammed slider, scrub a coated waterproof zipper aggressively, or use oily household products that can collect dirt.
Check Buckles and Adjusters
Remove grit from buckle channels and inspect for cracks or sharp edges. Replace a broken buckle with the correct size and compatible part. Thread replacement webbing exactly as the original was routed, and test it with a light load before regular use.
Care for Straps and Padding
Rinse sweat and salt from shoulder straps and hipbelts when the manufacturer allows it. Do not cut away frayed load-bearing webbing or melt it near foam and coated fabric. If webbing is deeply cut or the attachment stitching is pulling out, stop using the pack under load until it is professionally repaired.
How to Reproof a Backpack
Cleaning may restore water beading when dirt was masking the existing durable water-repellent finish. After the pack is clean and dry, place a few drops of water on the outer fabric. If the water beads and rolls off, reproofing may not be needed. If it spreads and soaks into the face fabric, check the care label and choose a treatment approved for that material and coating.
- Clean the backpack before applying a water-repellent treatment.
- Confirm that the product is suitable for backpacks, coated fabric, and the pack’s specific material.
- Apply it exactly as directed, with good ventilation and even coverage.
- Avoid saturating shoulder straps, hipbelts, leather trim, or other areas the product label excludes.
- Let the treatment cure or dry completely before loading or wearing the backpack.
Note: Reproofing improves water beading on compatible fabric, but it does not seal open seams, torn coatings, damaged zippers, or holes. Use a rain cover or inner dry bags when dependable water protection is required.
Addressing Minor Damages Promptly
Small repairs can prevent further tearing, but not every problem is a safe do-it-yourself job. Clean and dry the damaged area before patching or sewing it, and check the warranty before making a permanent modification.
| Damage Type | Safe Next Step | Recommended Tool or Service |
|---|---|---|
| Small non-structural fabric puncture | Apply a compatible repair patch to clean, dry fabric | Gear-repair tape or manufacturer-approved patch |
| Loose decorative or pocket seam | Restitch only if it is not load bearing and you can match the original seam | Heavy polyester thread, needle, or repair shop |
| Broken replaceable buckle | Fit a correct-size replacement and test under a light load | Manufacturer part or compatible field-repair buckle |
| Frayed shoulder strap or torn anchor | Stop carrying weight and request professional repair | Manufacturer or qualified gear-repair service |
| Bent frame or widespread coating failure | Ask the manufacturer whether repair or replacement is appropriate | Warranty or repair department |
Warning: Do not rely on a temporary patch for a torn shoulder-strap anchor, hipbelt attachment, climbing-haul point, child-carrier structure, or other safety-critical component.
Troubleshooting Common Backpack Care Problems
The Backpack Still Smells After Cleaning
Soap residue and hidden moisture are common causes. Rinse again with clean water if the care label allows, open every pocket, remove detachable padding or inserts, and extend the drying time. Avoid masking the odor with perfume or fabric softener, which can leave residue and irritate skin.
There Is a Mildew Smell or Visible Mold
Move the pack to a well-ventilated area and avoid breathing disturbed spores. Follow the manufacturer’s cleaning directions using detergent or mild soap, then dry the item completely. Because backpack fabric and foam are porous, established mold can be difficult to remove fully. If growth remains, the odor returns, or the pack was soaked by contaminated floodwater, contact the manufacturer or a professional cleaner and consider replacement.
The Inner Coating Feels Sticky or Flakes
Sticky, peeling, or powdery coating often indicates material breakdown rather than ordinary dirt. Stop aggressive scrubbing and do not add a waterproofer over loose coating. Ask the manufacturer whether the pack can be repaired or whether the affected panel has reached the end of its service life.
Colors Run During Cleaning
Stop washing, drain the colored water, and rinse components separately with cool or lukewarm water as the care label permits. Do not wash a rain cover against the pack if the manufacturer advises separate cleaning. Let everything dry without touching light-colored fabric.
A Zipper Separates or Will Not Close
Clean the teeth or coil first and inspect for a bent slider, missing teeth, or torn zipper tape. Do not pull harder. A repair shop may be able to replace the slider, but damaged teeth or zipper tape often require a full zipper replacement.
Frequently Asked Questions
How often should I clean my backpack?
Empty and air out the backpack after trips, then spot-clean it when dirt or spills appear. Deep-clean only when sweat, salt, odors, or heavy grime remain, or when the manufacturer’s instructions recommend it. A fixed schedule such as every few months is less useful than cleaning based on use and condition.
Can I use bleach on my backpack?
Usually no. Bleach can fade fabric and damage coatings, foam, thread, or hardware. Use it only if the care label or manufacturer explicitly permits it and provides a dilution method. Never mix bleach with ammonia, vinegar, or another cleaner.
What if my backpack has a mildew smell?
Clean it according to the care label, rinse thoroughly, and dry every layer completely in a ventilated area. Do not automatically use vinegar or bleach because either may conflict with the pack’s material or coating. If visible mold remains or the odor returns, ask the manufacturer or a professional cleaner whether the porous fabric can be safely restored.
Is it safe to machine wash all backpack types?
No. Many structured and coated outdoor packs should not be machine washed because agitation can stress fabric, coatings, foam, frames, and hardware. Some specific lifestyle or travel packs are labeled machine washable. The sewn-in care label for the exact model is the deciding instruction.
How do I reproof my backpack effectively?
Clean the pack first, let it dry as directed, and test whether water still beads on the outer fabric. If it wets out, apply a treatment approved for the pack’s fabric and coating. Follow the product directions, avoid excluded areas such as straps or leather, and remember that reproofing does not repair open seams or damaged coatings.
Can I wash a backpack with an internal frame?
Check the manual before removing or immersing any frame parts. Some packs have removable stays or frame sheets, while others have suspension systems that should be serviced only by the manufacturer. Never force a frame out of its sleeve or bend it to fit a sink.
How should I clean a sticky backpack zipper?
Brush away sand and dirt, wipe the zipper with clean water, and let it dry. Then use a small amount of zipper-specific lubricant if needed. Do not force the slider or scrub a coated water-resistant zipper aggressively.
Conclusion
Good backpack maintenance is mostly gentle, timely care: empty the pack, inspect it, spot-clean first, deep-clean only when allowed, rinse out every trace of soap, and air-dry it completely. Store it away from heat, sunlight, and moisture, and deal with damaged zippers, buckles, fabric, or load-bearing seams before the next trip. The care label and manufacturer instructions should always override general advice.
Sources
- Osprey: How to Clean Your Osprey Backpack — preparation, mild hand washing, thorough rinsing, shaded ventilation, wheeled-pack caution, and machine-wash warning
- deuter: How to Clean a Backpack — pH-neutral soap, rain-cover care, drying, storage, zipper care, frame cautions, and water-beading test
- Patagonia: Black Hole Micro MLC Care Instructions — example showing that care-label instructions can permit machine washing for a specific backpack model
- Nikwax: Tech Wash — technical-cleaner guidance, residue concerns, rinsing, and checking whether water repellency needs renewal
- U.S. Environmental Protection Agency: Mold Cleanup in Your Home — complete drying and the difficulty of fully cleaning mold from porous materials
- deuter Repair Service — manufacturer repair as an alternative to premature replacement or unsafe structural do-it-yourself repairs

