
Last Updated on September 10, 2026 by Daniel Globe
A safe hike starts before you reach the trail. Good footwear matters, but so do navigation, weather protection, extra food and water, first aid, emergency shelter, and a realistic plan for getting back on time. The 10 essentials of hiking give you a simple system for preparing for unexpected delays, injuries, changing weather, or navigation problems.
Quick Answer
The 10 essentials of hiking are navigation, sun protection, extra clothing, illumination, first-aid supplies, fire, repair tools, extra nutrition, hydration and water-treatment supplies, and emergency shelter. Carry them on day hikes as well as longer trips, then add route-specific gear for weather, terrain, wildlife, and local hazards.
Key Takeaways
- Carry all 10 essential systems, even when a hike looks short or familiar.
- Choose footwear for the terrain and make sure it fits well with your hiking socks.
- Check weather, trail alerts, closures, daylight, and fire restrictions before leaving.
- Carry a map or other reliable navigation backup and know how to use it before the trip.
- Bring enough water for the route and conditions, plus treatment supplies if you may rely on natural water.
- Tell someone your route and expected return time, especially for remote hikes.
- Follow posted trail-yield rules, stay on durable routes, and keep a safe distance from wildlife.
- Set a turnaround time and be willing to stop when weather, fatigue, injury, route conditions, or daylight make continuing unsafe.
At a Glance
| Preparation Time | About 10–30 minutes for a familiar day hike; longer for remote, technical, or overnight routes |
| Difficulty | Beginner-friendly checklist; gear and skills should increase with route difficulty |
| Tools Needed | The 10 Essentials, suitable footwear, backpack, weather-appropriate clothing, and route-specific safety gear |
| Cost | Varies; many hikers already own basic items, while specialized navigation, shelter, communication, or wildlife gear can add cost |
Disclosure: As an Amazon Associate I earn from qualifying purchases. Some links on this page are affiliate links, at no extra cost to you.
The 10 Essentials of Hiking
The National Park Service recommends the Ten Essentials as basic equipment for handling minor injuries, unexpected delays, weather changes, and other emergencies. Think of them as systems rather than ten individual products, because each category may contain several items.
- Navigation: a map, compass, GPS device or app, plus the knowledge needed to use them. Keep a physical or offline backup when possible.
- Sun protection: sunscreen, sunglasses, a hat, and protective clothing as conditions require.
- Extra clothing: an insulating layer, rain shell, hat, gloves, or other clothing suitable for the worst reasonable conditions you may encounter.
- Illumination: preferably a headlamp, plus spare batteries or another reliable backup power source.
- First-aid supplies: a kit appropriate for the trip, including personal medications and blister care.
- Fire: waterproof matches, a lighter, or another fire-starting method where fires are legal and appropriate.
- Repair kit and tools: a multi-tool or knife, duct tape, scissors, and repair items specific to your equipment.
- Nutrition: enough food for the planned hike plus extra no-cook food for an unexpected delay.
- Hydration: enough water for the route and conditions, plus water-treatment supplies when natural sources may be used.
- Emergency shelter: a lightweight tarp, bivy sack, emergency blanket, or other protection that can help if you are unexpectedly stuck outside.
Note: The Ten Essentials are a baseline, not a complete packing list for every destination. Snow, desert heat, river crossings, high altitude, technical terrain, insects, wildfire conditions, and local wildlife may require additional equipment or skills.
Choose Footwear for the Terrain
Selecting appropriate footwear is one of the most important comfort and safety decisions you can make before a hike. Start by looking at the terrain, distance, weather, pack weight, and your own experience rather than assuming that one type of boot works everywhere.
Rocky, steep, wet, snowy, or uneven routes may call for supportive hiking footwear with durable soles and reliable traction. Boots can also provide useful protection from rocks, mud, and debris. On well-maintained trails and easier terrain, lightweight hiking shoes or trail-running shoes may feel more breathable and flexible.
Fit matters more than the brand name. Shoes that pinch, slide, rub your heel, or crowd your toes can lead to blisters and painful hot spots. Try hiking footwear with the socks you intend to wear, make sure your toes have room when walking downhill, and test the shoes before committing to a long hike.
Pro Tip: Do not make a demanding hike the first long outing for brand-new footwear. Wear it on shorter walks first so you can identify pressure points, adjust lacing, and confirm that your socks and shoes work well together.
Packing the Essential Gear
A well-fitted backpack should hold your safety gear without causing unnecessary strain. Day hikes usually require less capacity than multi-day trips, but even a short hike deserves the Ten Essentials if you could be delayed by weather, injury, darkness, or a navigation mistake.
Keep frequently needed items where you can reach them without emptying your pack. A first-aid kit, headlamp, navigation tools, insulation layer, rain protection, food, water, emergency shelter, and repair supplies should all have a consistent place.
A portable phone battery can be useful, but do not assume a charged phone guarantees communication. Many backcountry areas have little or no cellular coverage. For remote trips, consider whether a satellite messenger or personal locator beacon is appropriate for the route. The NPS also recommends checking that your equipment works and learning how to use it before setting out.
Food should be easy to eat and suitable for the length of the hike. Trail mix, nuts, dried fruit, energy bars, jerky, sandwiches, or similar foods can provide practical trail energy. For longer or overnight trips, choose lightweight meals that fit your cooking setup and food-storage requirements.
If you want to compare pack styles for carrying camera equipment as well as hiking gear, see this guide to the best travel camera backpacks.
Plan the Route Before You Leave
Good preparation includes more than packing gear. Before leaving, check the current weather forecast, trail conditions, closures, wildfire information, permit requirements, daylight hours, and any destination-specific alerts. The National Park Service Hike Smart guidance also recommends knowing your limits and setting a turnaround time.
- Know the planned route, distance, elevation gain, major junctions, and expected difficulty.
- Download offline maps before losing cell service and carry a backup navigation method.
- Tell a reliable person where you are going, your route, where you parked, and when you expect to return.
- Know whom to contact if an emergency occurs and whether emergency services can realistically reach the area quickly.
- Carry permits, identification, or reservation information when the destination requires them.
- Set a turnaround time that leaves enough daylight and energy for the return trip.
Warning: Do not rely on cell service as your only navigation or emergency plan. Coverage can disappear quickly in canyons, mountains, forests, and remote areas.
Dressing for the Weather
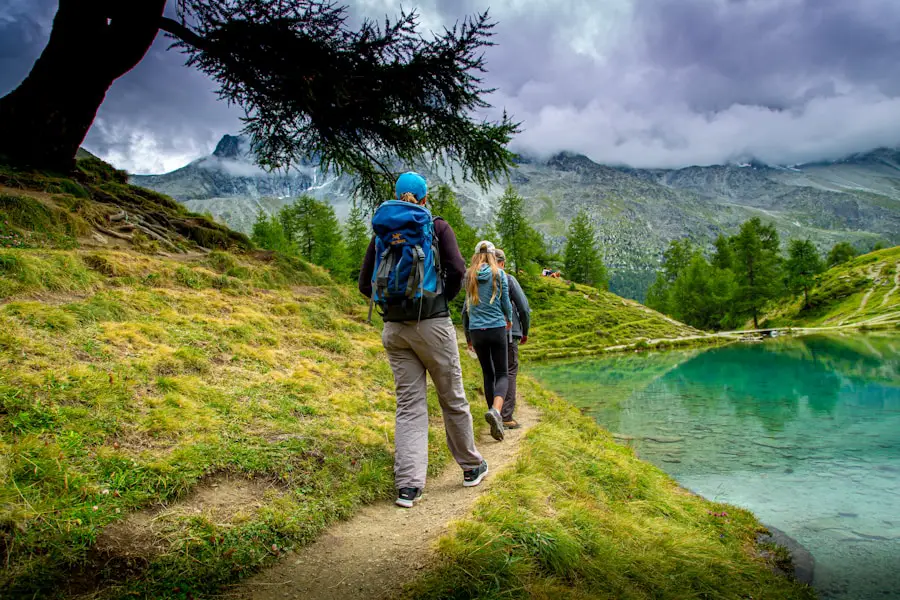
Dressing for changing conditions can make the difference between an uncomfortable hike and a dangerous one. Check the forecast before leaving, but also prepare for conditions that could be colder, wetter, windier, or hotter than expected.
In cool or cold weather, a layering system works well because you can adjust it as your effort level changes. Start with a moisture-managing base layer, add an insulating layer such as fleece or an appropriate insulated jacket, and carry a weather-resistant outer shell when rain or wind is possible.
In warm conditions, choose lightweight, breathable clothing that helps manage sweat and protects your skin. A hat, sunglasses, sunscreen, and sun-protective clothing can reduce exposure. Take extra care in exposed areas where shade is limited.
Weather changes deserve immediate attention. Thunderstorms can be especially dangerous on ridges, summits, open terrain, and other exposed areas. The National Weather Service advises moving to a substantial building or enclosed metal-topped vehicle when thunder is heard. If safe shelter is unavailable in the backcountry, get off high points and exposed terrain as quickly as conditions allow.
Warning: There is no completely safe place outdoors during a thunderstorm. If thunder is audible, treat it as a reason to leave exposed terrain and move toward safer shelter rather than continuing toward a summit or viewpoint.
Navigating with a Map and Compass
| Navigation Technique | Best Use | Skill Needed |
|---|---|---|
| Map and Compass | Reliable backup and off-grid navigation | Practice required |
| GPS or Offline Map App | Position checks and route tracking | Basic device and app knowledge |
GPS devices and smartphone apps are convenient, but a map and compass remain valuable because batteries die, screens break, and electronic devices can fail. A topographic map can show trails, elevation changes, terrain features, water sources, and other landmarks that help you understand the route.
Practice orienting a map to the landscape and identifying your location before you need those skills in an emergency. When traveling by compass bearing, make sure you understand the difference between magnetic north and true north.
Magnetic declination varies by location and changes over time. The U.S. Geological Survey provides map-and-compass guidance explaining how declination affects bearings and how to use it with topographic maps.
Whenever possible, download digital maps before the hike and preserve phone battery by limiting unnecessary screen use. A power bank is useful, but it should complement—not replace—your navigation knowledge and backup plan.
Staying Hydrated and Nourished
Hydration needs vary with temperature, humidity, altitude, effort, body size, route length, and individual physiology. Instead of relying on one fixed water-per-hour rule for every hike, estimate your needs from the conditions and carry a margin for unexpected delays. Hot, exposed routes may require substantially more water than cool, shaded trails.
Drink regularly according to thirst and conditions rather than deliberately forcing extreme quantities of water. On long or very hot outings, heavy sweating may also increase electrolyte needs. Headache, unusual weakness, dizziness, nausea, confusion, or declining coordination can signal that something is wrong and should not be ignored.
If your route depends on lakes, streams, or springs, never assume clear-looking water is safe. The CDC recommends treating water when you are unsure of its safety. Boiling is highly effective against germs; appropriate filtration, disinfection, or combined treatment may also be used depending on the contaminants and product instructions.
Food matters too. Bring enough for your planned hiking time plus additional food that does not require cooking. Nuts, dried fruit, trail mix, bars, and other compact foods are convenient when a hike takes longer than expected.
Note: Some natural water sources may contain chemicals or toxins that ordinary boiling or disinfection cannot remove. Check local advisories instead of assuming every mapped stream is a usable water source.
Using Fire and Repair Tools Safely
The fire and repair-tool categories are easy to overlook on a day hike, but both can help during an unexpected delay. A multi-tool, knife, duct tape, cord, or small gear-specific repair item can temporarily fix a torn pack, damaged strap, broken pole, or other equipment problem.
Fire-starting supplies may provide emergency warmth, light, or signaling capability where fire use is legal. However, carrying a lighter or waterproof matches does not give you permission to build a fire. Check current regulations and fire restrictions first, and never start a fire when conditions or local rules prohibit it.
In many emergencies, extra insulation and emergency shelter are safer and more reliable than depending on a fire. Treat fire as one tool within the broader Ten Essentials system, not as your only cold-weather backup.
Understanding Trail Etiquette
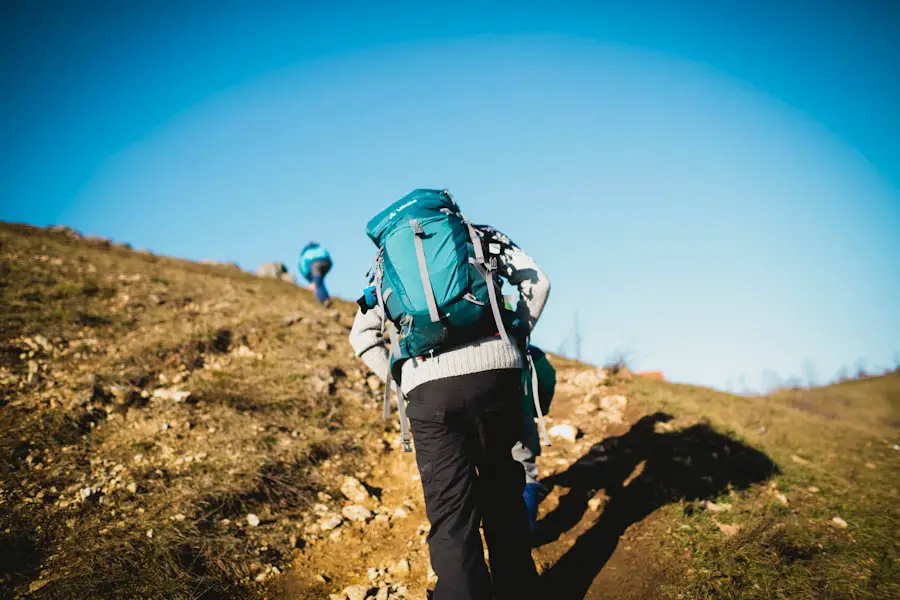
Trail etiquette improves safety and helps protect the places people come to enjoy. Posted signs and local regulations always take priority, but the National Park Service lists several general hiking-etiquette practices.
- Yield appropriately: downhill hikers generally give uphill hikers room to continue their climb. Hikers and cyclists should also follow posted right-of-way rules for horses and other pack stock.
- Communicate when passing: calmly let another trail user know when you are approaching from behind.
- Stay on established routes: cutting switchbacks or walking around muddy areas can damage vegetation and widen trails.
- Give wildlife space: never leave the trail simply to approach an animal for a better photograph.
- Control unnecessary noise: allow other visitors to enjoy natural sounds and avoid disturbing wildlife.
- Pack out your waste: food wrappers, tissues, and other trash should leave with you.
When yielding, avoid trampling fragile vegetation or putting yourself near a cliff or unstable edge. Trail etiquette is about safety as much as courtesy.
Preparing for Wildlife Encounters
Before hiking, learn which animals live in the area and review the land manager’s current guidance. Wildlife behavior differs by species, season, location, and circumstance, so one response does not work for every encounter.
Keep your distance, never feed wildlife, and avoid placing yourself between an animal and its young. If an animal changes its behavior because of your presence, increase your distance.
Bear Country
In bear country, avoid surprising bears. In dense vegetation, around blind corners, or where visibility is poor, periodic talking or other human sounds can help announce your presence. Carry bear spray where it is recommended and legal, keep it immediately accessible rather than buried in your backpack, and know how to use it before the trip.
If you encounter a bear, do not automatically run. Bear behavior and recommended responses vary by species and situation. Follow current guidance for the specific park or region. The National Park Service’s Denali wildlife guidance, for example, tells hikers not to run from bears and provides separate responses for defensive and non-defensive behavior.
Moose
Do not assume bear advice applies to moose. Moose can charge when they feel threatened. Give them a wide buffer, especially cows with calves and bulls during the breeding season. If a moose charges, NPS guidance for Denali advises getting away quickly and placing solid obstacles such as trees between you and the animal.
Snakes and Other Wildlife
Watch where you place your hands and feet in snake habitat, especially around rocks, logs, brush, and warm surfaces. Never try to handle, move, or provoke a wild animal. If local regulations specify minimum viewing distances, follow those distances even when the animal appears calm.
Warning: Wildlife-response advice is species- and situation-specific. Check the current guidance for the park, forest, refuge, or other land manager you are visiting rather than relying on one generic reaction for every animal.
Emergency Shelter and Unexpected Delays
Emergency shelter is one of the Ten Essentials because even a planned day hike can turn into an unplanned night outside. A lightweight bivy sack, emergency blanket, tarp, or other compact shelter can reduce exposure to wind, rain, and cold while you wait for conditions to improve or for help to arrive.
Your shelter choice should match the route. A basic emergency blanket may be reasonable on a short frontcountry trail, while remote alpine, desert, winter, or high-elevation routes may justify more substantial protection.
Carry enough extra clothing to remain safer if you stop moving. Once you are injured, lost, or waiting for help, you may generate far less body heat than you did while hiking.
Knowing When to Turn Back
Turning around is a normal part of good hiking judgment. A summit, waterfall, viewpoint, or mileage goal is never more important than getting home safely.
Consider turning back when weather is worsening, daylight is running short, a trail is closed or damaged, water supplies are becoming inadequate, someone in the group is exhausted or injured, navigation becomes uncertain, a river crossing looks unsafe, or continuing would push you beyond your experience.
If you are lost, stop making the situation worse. Take stock of your location, map, landmarks, time, weather, supplies, and communication options. Retracing your route may be appropriate when you can confidently identify the way back, but blindly walking in an uncertain direction can increase the search area and move you farther from a known route.
The NPS recommends tracking your time and distance and setting a turnaround time if a hike is taking longer than planned. Leave enough time for the return trip rather than treating the destination as the halfway point only after you reach it.
Reaching the destination is optional. Returning safely is the real goal of the hike.
Love travel? Join Our Facebook Community For More Tips.
Frequently Asked Questions
What are the 10 essentials of hiking?
They are ten categories of safety and emergency equipment designed to help hikers handle navigation problems, injuries, weather changes, delays, and unexpected nights outdoors.
Why are the 10 essentials important?
They give you basic tools for responding when a trip does not go as planned. They can help with minor injuries, navigation mistakes, sudden weather, darkness, equipment problems, dehydration, hunger, or an unexpected overnight delay.
What are the 10 essential items for hiking?
The ten systems are navigation, sun protection, extra clothing, illumination, first-aid supplies, fire, repair kit and tools, nutrition, hydration and water treatment, and emergency shelter.
What are navigation tools for hiking?
Navigation tools can include a topographic or trail map, compass, GPS device, and offline mapping app. The important part is knowing how to use your tools and carrying a backup that does not depend entirely on cellular service.
What is included in sun protection for hiking?
Sun protection commonly includes sunscreen, sunglasses, a brimmed hat, and clothing that covers exposed skin. The amount of protection you need depends on exposure, elevation, weather, and trip duration.
What is insulation in the context of hiking?
Insulation means carrying extra clothing that helps you stay warm when temperatures drop or you stop moving. Depending on conditions, that may include a fleece or insulated jacket, hat, gloves, rain shell, or other layers.
What is illumination for hiking?
Illumination means carrying a reliable light source for darkness or emergencies. A headlamp is especially useful because it keeps your hands free. Carry spare batteries or adequate backup power.
What are first-aid supplies for hiking?
A hiking first-aid kit may include bandages, gauze, medical tape, antiseptic supplies, blister treatment, gloves, and personal medications. Adjust the kit to the length, remoteness, group size, and hazards of your trip.
What is a fire starter in the context of hiking?
A fire-starting system may include waterproof matches, a lighter, and suitable tinder. It is intended for emergency capability where fire is legal and safe. Always follow current fire bans, restrictions, and land-manager rules.
What is a repair kit and tools for hiking?
A repair kit can include a multi-tool or knife, duct tape, cord, scissors, zip ties, and items specific to your equipment. The goal is to handle a temporary gear failure well enough to continue safely or return to the trailhead.
What is included in nutrition and hydration for hiking?
Carry enough food and water for the planned trip plus a reasonable emergency margin. Include extra food that can be eaten without cooking and bring water-treatment supplies when your plan depends on untreated natural water sources.
What is emergency shelter for hiking?
Emergency shelter is lightweight protection you can use if an injury, navigation problem, weather event, or other delay keeps you outside longer than expected. Examples include a bivy sack, tarp, emergency blanket, or compact shelter appropriate for the environment.
Do I need the 10 essentials on a short day hike?
Yes. Short hikes can still involve injuries, wrong turns, rapidly changing weather, delayed returns, or unexpected darkness. You can scale the size and quantity of equipment to the route, but the ten safety systems remain useful.
Should I rely on my phone for hiking navigation?
A phone can be an excellent navigation tool when maps are downloaded offline, but it should not be your only plan on remote routes. Batteries drain, devices break, and cellular coverage may disappear. Carry an appropriate backup and know how to use it.
Sources
- National Park Service — Ten Essentials — the ten safety systems and basic emergency-preparedness guidance.
- National Park Service — Hike Smart — trip planning, equipment, turnaround times, trail conditions, food, water, and general hiking safety.
- National Park Service — Hiking Etiquette — yielding, staying on trail, wildlife distance, and trail courtesy.
- Centers for Disease Control and Prevention — Water Treatment When Hiking and Camping — risks from untreated water and treatment options.
- U.S. Geological Survey — Using a Compass With a Topographic Map — map bearings and magnetic declination.
- National Weather Service — Lightning Safety — thunderstorm shelter and outdoor lightning precautions.

