Last Updated on September 10, 2026 by Daniel Globe
A camera backpack is a padded backpack built to carry a camera body, lenses, batteries, memory cards, and related equipment in organized compartments. The best model is not simply the largest one. It should fit your actual kit, sit comfortably on your torso, provide the access style you need, and offer suitable protection for the places where you shoot.
Quick Answer
A camera backpack protects photography gear with padded, adjustable compartments while spreading the load across both shoulders. Choose one by matching its internal dimensions, access points, harness, laptop space, and weather protection to your equipment and shooting style. A rain cover adds protection, but most camera backpacks are not fully waterproof.
Key Takeaways
- Measure your camera body, longest lens, laptop, and other large items instead of choosing by advertised capacity alone.
- A supportive harness, correct torso fit, and useful hip belt matter more as the load becomes heavier or the walk becomes longer.
- Side access is usually fastest while wearing the pack; rear or clamshell access provides a clearer view of the full kit.
- Weather-resistant fabric and a rain cover reduce exposure, but they do not automatically make a backpack submersible or fully waterproof.
- Pack heavier gear near the vertical center and close to your back, balance both sides, and keep frequently used items easy to reach.
Disclosure: As an Amazon Associate I earn from qualifying purchases. Some links on this page are affiliate links, at no extra cost to you.
Understanding Camera Backpacks
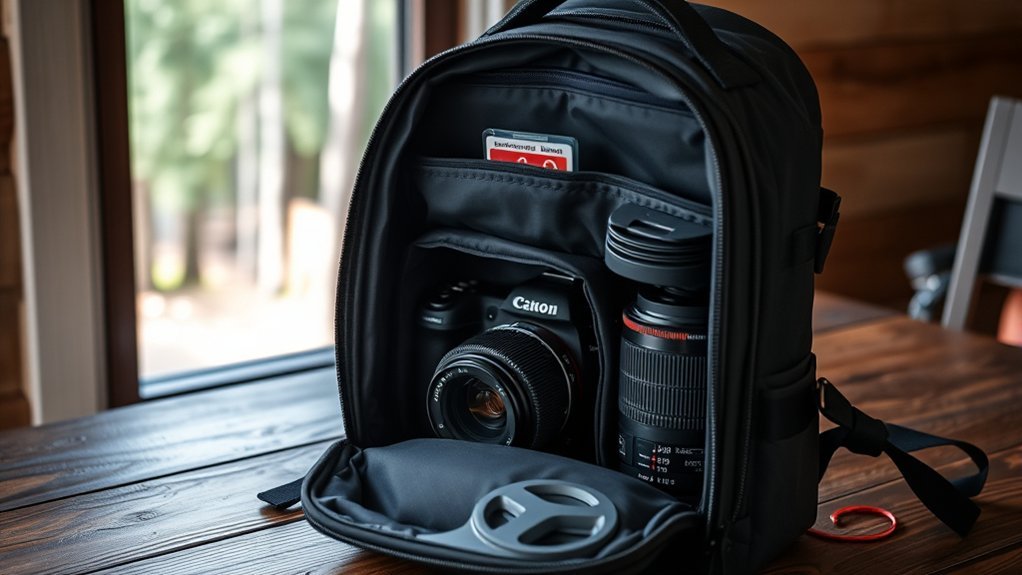
A camera backpack differs from an ordinary daypack because its main compartment is designed around delicate, irregularly shaped equipment. Padded dividers help keep a camera body and lenses from knocking against one another, while small pockets separate batteries, cards, cables, filters, and cleaning supplies.
Most models use two shoulder straps, and larger packs may add a sternum strap, hip belt, structured back panel, or internal frame. These features can improve stability and reduce concentrated pressure during long walks. However, comfort depends on the fit, total load, and harness design; a badly fitted camera backpack can still become uncomfortable.
Camera backpacks range from compact day bags for one body and a few lenses to larger photo-hiking or travel packs with room for clothing, food, a laptop, a tripod, or a drone. Some are dedicated camera bags, while others use a removable camera cube so the backpack can also carry everyday items.
Key Features of Camera Backpacks
The most useful features depend on what you carry and how you work. Evaluate protection, fit, access, and storage as a complete system rather than judging the bag by one feature.
Padding and Gear Protection
Look for firm but adjustable dividers that hold equipment in place without pressing hard against buttons, screens, lens mounts, or control rings. The bottom and sides should have enough structure to protect normal bumps, but no soft backpack can guarantee protection from a severe drop or crushing force.
Warning: Do not overpack the camera compartment. A zipper that requires force to close may place pressure on lenses, screens, or mounts and can also strain the zipper and seams.
Comfort and Weight Distribution
A camera backpack spreads the load across both shoulders instead of concentrating it on one side. For a heavier kit, a supportive hip belt can transfer much of the load toward the hips. Correct torso length and hip-belt placement are important, so try the bag with realistic weight and adjust the straps before buying. REI’s backpack fit guide explains how torso and hip measurements affect fit.
| Feature | Main Benefit | Check Before Buying |
|---|---|---|
| Padded shoulder straps | Spread pressure across the shoulders | No pinching at the neck or arm opening |
| Hip belt | Supports and stabilizes heavier loads | Padding wraps the top of the hip bones |
| Sternum strap | Keeps shoulder straps positioned | Adjusts without restricting breathing |
| Back panel or frame | Adds structure and limits shifting | Matches your torso and does not create pressure points |
Access Styles
Access design changes how quickly and safely you can reach equipment:
- Side access: Often lets you swing the backpack forward and retrieve a camera without setting the bag down.
- Rear-panel access: Opens from the side against your back. It can discourage casual access to the main compartment and keeps the harness away from muddy ground, but the pack usually must come off.
- Front or clamshell access: Exposes most or all of the camera compartment, which is useful when reorganizing gear on a clean surface.
- Top access: Works well for a camera with one lens attached, but equipment deeper in the pack may take longer to reach.
Customizable Storage Options
Adjustable hook-and-loop dividers allow the interior to change as your kit changes. Useful extras may include a padded laptop sleeve, a tripod attachment, a water-bottle pocket, memory-card pockets, a removable camera cube, and a separate area for clothing or food. Check the actual internal dimensions of every compartment because a stated laptop or lens size does not guarantee that every model with that label will fit.
Weather Protection
Terms such as weather-resistant, water-resistant, and waterproof are not interchangeable. Coated fabric, covered zippers, and a rain cover can reduce exposure to rain, snow, dust, and sand. Lowepro describes its All Weather cover as an additional protective layer, not a reason to treat every bag as a dry case. For heavy rain, water crossings, or boating, use a purpose-built waterproof bag or sealed dry-bag system and follow the bag maker’s limits.
Note: A rain cover mainly protects the outside of the backpack. Water can still enter around openings, through prolonged exposure, or when the cover is removed, so keep moisture-sensitive items in additional protective pouches when conditions are severe.
Advantages of Using a Camera Backpack
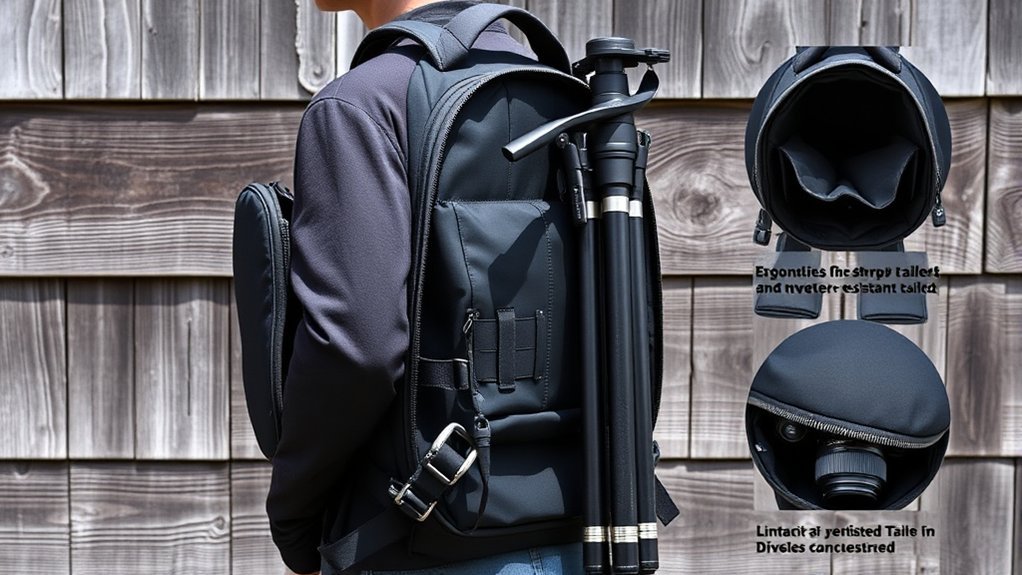
A well-matched camera backpack can make a large or mixed kit easier to transport. Its main advantages include:
- Balanced two-shoulder carry: This is usually more comfortable than carrying the same heavy load on one shoulder.
- Organized protection: Dividers and pockets reduce movement and keep small items from scratching larger equipment.
- Greater capacity: Many backpacks can hold multiple lenses, a laptop, a tripod, personal items, or a compact drone.
- Hands-free movement: Both hands remain available for climbing stairs, checking a map, or using a camera.
- Flexible layouts: Removable or adjustable inserts can support different kits and non-photography uses.
The trade-off is slower access in some designs. A backpack can also tempt you to carry more equipment than you need, which reduces comfort and mobility.
Choosing the Right Camera Backpack
Choose the backpack around your equipment, body, and shooting routine. A bag that works for a city event may be a poor choice for a full-day hike, and a large expedition pack may be unnecessary for one compact camera.
At a Glance
| Time Required | About 15–30 minutes to inventory, measure, load, and test your gear |
| Difficulty | Easy |
| Tools Needed | Your normal camera kit, a tape measure, and the backpack’s size chart |
| Cost | No cost to evaluate; backpack prices vary by size, materials, harness, and protection |
1. Inventory and Measure Your Gear
List the equipment you normally carry, not everything you own. Measure the camera with its most-used lens attached, your longest detached lens, laptop, drone, flash, and other large items. Include lens hoods in the position in which you plan to pack them.
2. Match Capacity to Your Use
Leave a modest amount of room for likely additions, but avoid buying far more capacity than you need. Extra space encourages overpacking and may allow equipment to move unless the dividers are configured carefully. For a hybrid trip, decide how much space must remain for food, a jacket, or clothing.
3. Choose the Access Style
Choose side access for fast camera retrieval, rear or clamshell access for broad visibility, or top access for a simple one-camera setup. Test the zippers with the pack loaded. You should be able to reach the camera without forcing the opening or exposing other items to falling out.
4. Test the Fit With Realistic Weight
Load the backpack with equipment that approximates your normal kit. Adjust the hip belt first, then the shoulder straps, load lifters if present, and sternum strap. Walk, bend, and climb a few steps. The pack should remain stable without sharp pressure points, numbness, or rubbing.
5. Check Travel, Security, and Weather Needs
For airline travel, compare the backpack’s external dimensions and loaded weight with the current limits of every airline on your itinerary. Check whether the laptop is easy to remove at security and whether important documents have a secure pocket. For outdoor use, inspect zipper coverage, base material, rain-cover storage, and whether the tripod mount keeps the load balanced.
Pro Tip: Photograph your normal kit laid out on a table and save its measurements and total weight. This makes it easier to compare internal dimensions and prevents buying a pack that fits on paper but not in your real configuration.
Packing and Organizing Your Gear
Good packing protects equipment, improves balance, and shortens gear changes. Lowepro’s divider and organization guidance recommends considering both weight distribution and access, with heavier items near the vertical center and the load balanced from side to side.
- Start with a clean, empty compartment. Remove grit that could scratch equipment and inspect the dividers for worn hook-and-loop material.
- Place the main camera securely. Support the body and attached lens so the mount is not bearing the full load against a divider.
- Position heavier items close to your back. Keep large lenses near the pack’s center rather than hanging far from your spine or on one side.
- Build snug compartments. Dividers should limit movement without crushing equipment or holding down controls.
- Separate small and loose items. Use closed pockets or pouches for batteries, cards, tools, and cables.
- Keep high-use items accessible. Put the primary camera, spare card, lens cloth, and rain cover where you can reach them quickly.
- Isolate liquids and food. Use sealed containers and keep them outside the camera compartment whenever possible.
- Perform a movement check. Close the pack, lift it carefully, and listen or feel for shifting before leaving.
Warning: Protect spare battery terminals from contact with coins, keys, tools, or other metal objects. Damaged or short-circuited lithium batteries can overheat.
When to Use a Camera Backpack
A camera backpack is especially useful for long walks, outdoor photography, travel days, wildlife shoots, landscape work, and assignments that require several lenses or personal supplies. It is also practical when you need both hands free or must carry a laptop with the camera kit.
A smaller shoulder bag or sling may work better for short urban sessions that require frequent lens changes. A hard case is a better choice when crush protection, shipping, or harsh transport matters more than walking comfort. A hiking backpack with a removable camera cube may be better for trips where clothing, water, and safety equipment take priority over photo gear.
Comparing Camera Backpacks and Camera Bags
The term camera bag includes backpacks, shoulder bags, slings, holsters, rollers, and hard cases. The best format depends on the amount of equipment, walking distance, access speed, and level of protection required.
| Bag Type | Best For | Main Trade-Off |
|---|---|---|
| Camera backpack | Larger kits, longer walks, travel, and hands-free carry | Some access designs require removing the pack |
| Shoulder or messenger bag | Fast access during events or street photography | Load rests mainly on one shoulder |
| Sling bag | Compact kits and quick front access | Limited capacity and one-shoulder loading |
| Roller bag | Airports, studios, and heavy kits on smooth surfaces | Poor on stairs, trails, or rough ground |
| Hard case | Maximum impact, dust, or water protection when properly rated | Heavier and less comfortable to carry far |
Access and Convenience
Shoulder and sling bags usually provide the fastest access because they move directly to the front of the body. A backpack with a well-designed side opening can offer similar access to one camera, while a rear or clamshell opening is better for seeing and reorganizing the full kit. There is no single access design that is fastest for every photographer.
Weight Distribution and Comfort
A two-strap backpack usually handles a heavier load more comfortably than a one-shoulder bag, especially when it includes a fitted hip belt and stable back panel. That advantage decreases if the backpack is overloaded, too long or short for the wearer, or poorly adjusted. For short sessions with a light kit, the convenience of a shoulder bag or sling may outweigh the backpack’s comfort advantage.
Air Travel and Security
Keep valuable camera equipment with you whenever airline rules allow, and confirm the carrier’s current size and weight limits before travel. Do not assume that a bag advertised as “carry-on approved” will meet every airline’s requirements, especially on smaller aircraft.
The FAA requires spare lithium batteries and power banks to remain in carry-on baggage, with terminals protected against short circuits. If a carry-on camera backpack is checked at the gate, remove spare batteries and power banks first. Review the FAA’s current PackSafe lithium-battery rules before flying, particularly for high-capacity video or drone batteries.
- Use battery cases, original packaging, or individual protective pouches.
- Back up memory cards before travel and keep the backup separate from the camera.
- Use lockable zipper pulls only where permitted, but remember that locks do not replace supervision.
- Record serial numbers and photograph the packed kit for insurance documentation.
Maintenance and Care for Camera Backpacks
Empty the backpack after dusty, sandy, wet, or salty conditions. Start with dry cleaning: shake out loose debris, use a soft brush or blower, and clean zipper tracks from the inside toward the outside. Lowepro’s camera-bag cleaning guide recommends using water only when needed and generally relying on a simple wipe with a damp cloth rather than harsh chemicals.
- Follow the manufacturer’s care label before using soap or machine washing.
- Air-dry the bag completely with every pocket open; avoid direct heat.
- Inspect seams, buckles, zipper sliders, strap anchors, and divider attachment points.
- Do not store damp equipment in a closed backpack.
- Store the bag in a cool, dry, ventilated place away from prolonged direct sunlight.
In humid or rapidly changing conditions, moisture control matters. Canon advises using a waterproof kit bag with silica gel in extreme weather and keeping the bag dry. Its extreme-weather photography guidance also supports taking moisture precautions. Replace or regenerate reusable desiccant as directed, and never treat silica gel as a substitute for drying wet equipment.
Frequently Asked Questions
Can a camera backpack fit a laptop or tablet?
Many camera backpacks include a padded laptop or tablet sleeve, but compatibility depends on the sleeve’s internal dimensions, opening, and padding. Measure the device with its case attached and compare those measurements with the manufacturer’s specifications.
Are camera backpacks waterproof or water-resistant?
Most are water-resistant rather than fully waterproof. Coated fabric, covered zippers, and a rain cover can reduce water exposure, but only a bag or case with a specific waterproof construction and rating should be trusted for submersion or severe exposure.
How long do camera backpacks typically last?
There is no reliable universal lifespan. Durability depends on materials, load, weather exposure, cleaning, zipper care, and how often the bag is used. Replace or repair it when the harness, seams, closures, padding, or water protection can no longer secure the equipment.
Can I use a camera backpack for non-photography gear?
Yes. Adjustable or removable dividers can make room for clothing, electronics, art supplies, or everyday items. Avoid using the same compartment for loose, dirty, sharp, or leaking items when camera equipment is also inside.
Do camera backpacks come in different sizes for different gear?
Yes. Compact models may hold one body and a few small lenses, while larger packs can support multiple bodies, long lenses, lighting equipment, a laptop, a tripod, or a drone. Compare internal measurements and divider layouts rather than relying only on liters.
Which camera-backpack access style is best?
Side access is useful for quick retrieval while the pack remains supported on one shoulder. Rear or clamshell access is better for viewing the entire kit. Top access suits a simple setup. The best choice depends on how often you change equipment and where you can safely set the bag down.
Can a camera backpack be used as an airline carry-on?
Often, but approval is not universal. Compare the loaded backpack’s external dimensions and weight with the rules for each airline and aircraft. Keep spare lithium batteries and power banks in the cabin with protected terminals, even if the backpack must be checked at the gate.
Sources
- REI: Backpacks—Fit and Torso Size Guide — torso measurement, hip-belt fit, and strap adjustment.
- Lowepro: Divider and Organization Best Practices — divider setup, access, balance, and equipment placement.
- Lowepro: All Weather Cover — use and limits of an additional weather-protection layer.
- Lowepro: Cleaning Your Bag — dry cleaning, damp wiping, and chemical cautions.
- Federal Aviation Administration: PackSafe Lithium Batteries — carry-on and terminal-protection rules for spare lithium batteries and power banks.
- Canon: Tips for Shooting in Extreme Weather Conditions — moisture, waterproof kit-bag, and silica-gel precautions.
Conclusion
A camera backpack can protect and organize photography gear while making a larger kit easier to carry. The right choice depends on internal fit, access design, harness comfort, weather protection, and travel needs—not on capacity alone. Measure your equipment, test the loaded pack, arrange the dividers carefully, and maintain the bag after harsh conditions. A well-fitted, sensibly packed backpack lets you spend less time managing equipment and more time making photographs.