
Last Updated on July 27, 2026 by Daniel Globe
A hiking backpack should feel secure without hanging heavily from your shoulders, pinching your hips, or pulling you backward. The right fit starts with your torso length, not your overall height. From there, the hipbelt, shoulder straps, load lifters, sternum strap, and the way you pack your gear all work together to keep the load stable and comfortable.
Quick Answer
To fit a hiking backpack, match its torso range to your C7-to-iliac-crest measurement. With the pack loaded, center the hipbelt over your hip bones, snug the shoulder straps so they wrap closely, adjust the load lifters, and lightly tighten the sternum strap. Walk around and fine-tune any pressure points.
Key Takeaways
- Torso length—not your height—is the main measurement used to choose a backpack frame or torso size.
- Measure hip size around the top of your hip bones at the iliac crest, not around the widest part of your hips.
- A supportive hipbelt should carry most of the load while the shoulder straps keep the pack close and stable.
- Load lifters and the sternum strap are fine-tuning adjustments; neither should be cranked excessively tight.
- Pack dense gear near the middle of the pack and close to your spine, then test the loaded pack before a long hike.
At a Glance
| Time Required | About 10–15 minutes for measuring, fitting, and a short loaded test walk |
| Difficulty | Easy |
| Tools Needed | Flexible measuring tape, mirror or helper, and about 10–20 lb of realistic gear or other test weight |
| Cost | $0 if you already own a tape measure and the backpack |
Disclosure: As an Amazon Associate I earn from qualifying purchases. Some links on this page are affiliate links, at no extra cost to you.
How to Measure Your Torso and Hips for a Backpack
The two most useful measurements for hiking-backpack fit are torso length and hip circumference. Shoulder-harness shape and width can affect comfort, but backpack frame sizes are normally chosen primarily from torso length, with hipbelt sizing checked separately.
Measure your torso length
According to REI’s backpack fitting guide, torso length runs from the C7 vertebra at the base of your neck to an imaginary horizontal line connecting the tops of your hip bones.
- Tilt your head forward and feel for the prominent bony bump where your neck meets your shoulders. This is your C7 vertebra.
- Place your hands on top of your hip bones, with your thumbs pointing toward your spine.
- Imagine a horizontal line connecting your thumbs across your lower back.
- Stand upright and have another person measure along your spine from C7 down to that imaginary line.
- Compare that measurement with the torso-size range listed for the specific backpack model you are considering.
Your torso length—not your overall height—is the key measurement for selecting a properly sized hiking backpack.
Measure your hip size
Wrap the measuring tape around the top of your hip bones, following the iliac crest. This line is usually slightly higher than the waistband of your pants. Do not simply measure around the widest part of your hips, because that may not match where the backpack’s hipbelt actually sits.
Check both measurements against the manufacturer’s chart. Size ranges vary between brands and even between models from the same brand. If you fall between torso sizes, trying both packs with a realistic load is more useful than relying on a small/medium/large label alone.
Choose the Right Backpack Size and Capacity
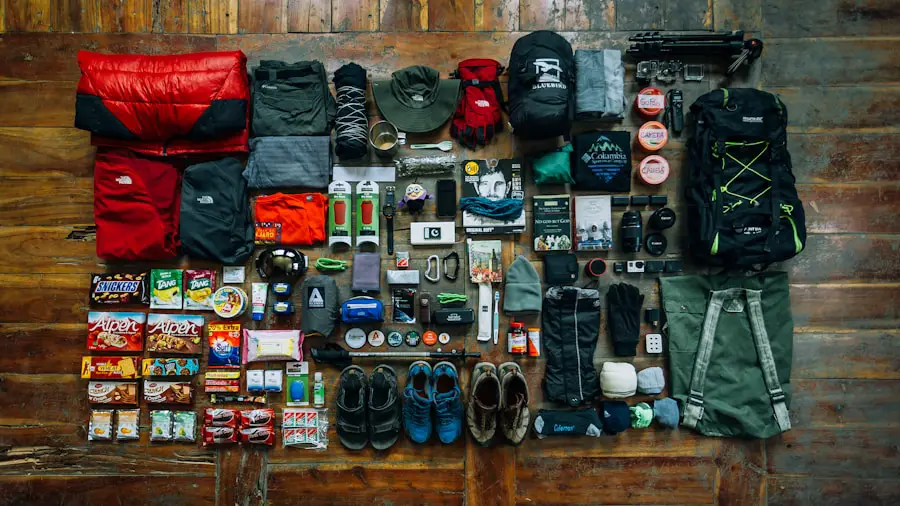
Backpack fit size and backpack capacity are different. A small, medium, or large designation usually describes the torso or harness range, while liters describe how much gear the pack can hold.
Choose torso size from your measurements first. Then choose capacity based on the amount of equipment, food, water, weather protection, and overnight gear your trip requires.
Current REI daypack guidance places many hiking daypacks in these general ranges:
- 10 L or less: very light outings where you carry only a few essentials.
- 11–20 L: compact packs for shorter hikes and light day trips.
- 21–35 L: a common sweet spot for hiking daypacks, with room for food, layers, water, and small extras.
- 36–40 L: useful when a day trip requires bulkier clothing or technical gear and can also work for some minimalist overnights.
For backpacking, REI’s backpack selection guide gives roughly 30–50 L for 1–3 nights, 50–80 L for 3–5 nights, and 70 L or more for extended trips. These are starting points rather than rules. Cold-weather equipment, bear-resistant food storage, children’s gear, and bulky older equipment can all increase the required capacity.
Note: Do not buy a larger torso size just because you need more carrying capacity. Choose the frame or harness size that fits your body, then choose an appropriate liter capacity within that fit range.
Adjust the Hip Belt, Shoulder Straps, Load Lifters, and Sternum Strap
| Adjustment | Correct Fit Check |
| Hip Belt | Padding wraps securely around the top of the hip bones without painful pinching. |
| Shoulder Straps | Straps follow the shoulders closely without a large gap and without carrying most of the pack’s weight. |
| Load Lifters | Snug enough to draw the upper load toward your body, typically forming an upward angle on larger framed packs. |
| Sternum Strap | Keeps the shoulder straps comfortably positioned without restricting breathing or arm movement. |
A good fitting session starts with weight in the backpack. REI recommends about 15 lb for a home fit check, while Gregory and Osprey commonly suggest roughly 10–20 lb. A loaded pack behaves differently from an empty one.
1. Loosen the straps and set the torso length
Loosen the hipbelt, shoulder straps, load lifters, and sternum strap before putting the backpack on. If the suspension has an adjustable torso setting, set it to your measured torso length before fine-tuning the other straps.
2. Position and tighten the hipbelt
Center the padded hipbelt around the top of your hip bones. REI describes the padding as hugging the iliac crest, while Deuter’s fitting guidance recommends positioning the center of its hip fins over the top of the hip bone.
Buckle the belt and tighten it until the pack feels supported and stable. It should be secure without pinching, restricting circulation, or sliding downward.
3. Snug the shoulder straps
Pull the shoulder-strap ends down and back. The straps should follow the contour of your shoulders closely rather than floating one or two inches above them.
REI advises that the shoulder-strap anchor points on a correctly sized conventional backpack generally sit about 1–2 inches below the top of the shoulders, near the top of the shoulder blades. That measurement refers to the anchor position, not a gap between your body and the straps.
The shoulder straps keep the pack close to your torso, but they should not take most of the load away from a supportive hipbelt.
4. Adjust the load lifters
Load lifters connect the upper shoulder harness to the top of many framed backpacks. Tighten them gently until the upper part of the load comes closer to your body.
REI and several pack manufacturers describe an angle around 45 degrees as common on larger packs, though the exact angle depends on the backpack design. Osprey notes that some of its packs may fall within a wider 30–60-degree range. Use the manufacturer’s instructions for your specific model instead of forcing a particular angle.
Do not crank the load lifters until the shoulder straps lift away from your shoulders or create pressure at the shoulder joints.
5. Position the sternum strap
Move the sternum strap to a comfortable position across the upper chest. REI suggests roughly an inch below the collarbones as a starting point. Buckle it and tighten only enough to keep the shoulder straps positioned comfortably while allowing free arm movement and a full breath.
Warning: Do not keep hiking through persistent numbness, tingling, restricted breathing, severe pressure, or increasing pain from the harness. Stop, loosen the pack, check the load and torso setting, and readjust before continuing.
Properly Distribute Weight in Your Backpack
A backpack that fits your body can still feel awkward if the contents are badly arranged. Dense gear should normally stay centered and close to your spine rather than sitting far away from your back or piled excessively high.
The REI backpack-loading guide divides a pack into practical zones:
- Bottom: bulky, relatively light items you will not need while walking, such as a sleeping bag or sleep clothing.
- Core near your back: dense items such as food, a cook kit, water, or a bear canister where applicable.
- Top: gear you may need quickly, such as insulation or rain protection.
- External or easy-access pockets: navigation, snacks, water, sun protection, first aid, and other items needed during the day.
Heavy gear placed too low can make the backpack sag. Heavy gear placed too high can make it feel top-heavy or tippy. Keeping dense items close to the spine generally produces a more stable center of gravity.
Use clothing or other soft items to fill gaps around dense equipment so the load does not shift as you walk. Compression straps can also help keep the contents compact.
If you carry liquid stove fuel, keep the container closed securely, upright, and separated from food. REI recommends placing liquid fuel below food so a leak is less likely to contaminate it.
Pro Tip: Recheck your fit after packing. Moving one dense item from the outside of the pack to the center near your spine can sometimes improve balance more than tightening another strap.
Check Backpack Comfort and Balance
A properly fitted backpack should feel like a stable extension of your body rather than a load swinging behind you. The hipbelt should remain secure around the top of the hip bones, while the shoulder harness keeps the pack close without excessive downward pressure.
Use this checklist after all four adjustments are set:
- The backpack does not sway noticeably when you turn or step sideways.
- The hipbelt does not steadily slide downward.
- The shoulder straps follow your shoulders without obvious gaps or painful pressure points.
- The sternum strap does not restrict a full breath.
- The top of the pack does not pull strongly backward.
- Your arms can swing freely without rubbing against the harness.
Padding can improve comfort, but more padding does not fix an incorrectly sized torso. Likewise, a highly ventilated back panel may feel cooler, but fit and load position still determine how securely the backpack carries.
Small, lightly loaded daypacks are different from large framed backpacking packs. A minimalist daypack may have only a simple webbing waist strap—or no hipbelt at all—so it will not transfer weight to the hips in the same way as a load-hauling backpack.
Test and Readjust Your Backpack Fit
Do not make a long hike the first test of a new backpack. Load it with approximately the gear weight you expect to carry and walk for 10–15 minutes. Include stairs or a gentle hill if possible so you can feel what happens as your body angle changes.
During the test, make small adjustments rather than tightening every strap at once. Fit is dynamic: REI, Gregory, and Deuter all describe adjusting strap tension during longer outings to relieve pressure and change how the load feels.
Common backpack fit problems and fixes
Hipbelt keeps sliding down: Check that it is centered over the iliac crest and tightened securely. If the belt bottoms out before gripping your hips, you may need a smaller hipbelt or a different model.
Too much weight on your shoulders: Recheck hipbelt position and torso length before simply tightening the shoulder straps. A torso setting that is too short or too long can prevent the suspension from transferring load correctly.
Large gap around the top of the shoulders: Check the torso setting and shoulder-harness placement. If the gap appeared after tightening the load lifters, loosen them and reassess.
The backpack pulls backward: Move dense gear closer to your spine and make sure the upper load is not sitting far from your body. Then gently adjust the load lifters if the pack has them.
Sternum strap feels restrictive: Loosen it. The sternum strap is primarily a stabilizer and should not compress your chest.
Harness causes chafing: Check strap position, clothing seams, hipbelt placement, and whether the pack is moving excessively. A strap repeatedly rubbing the same spot is a sign to change the fit rather than simply tolerate the irritation.
Numbness or tingling develops: Stop and remove or loosen the backpack. Recheck the harness and load rather than continuing with restricted or uncomfortable pressure.
Note: Adjustment straps cannot fully compensate for a backpack whose torso length or hipbelt size is fundamentally wrong. If repeated adjustments never produce a stable, comfortable fit, try another torso size or backpack model.
Tips for Maintaining a Properly Fitted Backpack
A backpack fit is not something you set once and forget forever. Clothing thickness, body changes, trip weight, and adjustments to the suspension can all change how the pack sits.
- Inspect the suspension: Check webbing, buckles, stitching, shoulder straps, load lifters, and the hipbelt for wear before major trips.
- Recheck torso adjustments: If the pack has an adjustable suspension, confirm it has not slipped or been changed since your last outing.
- Fit it with seasonal clothing: A thick winter layering system changes harness fit compared with a thin summer shirt.
- Adjust as the load changes: Food and water weight may decrease throughout a trip, so compression and strap tension may need minor changes.
- Take pressure off during breaks: Removing the backpack lets your shoulders, back, and hips rest before the next section of trail.
- Know your limits: The National Park Service advises hikers to consider how much food, water, and equipment they can comfortably carry and for how long before committing to a route.
When lifting a heavily loaded pack, use control rather than jerking it onto one shoulder. Osprey recommends carefully lifting a loaded pack from the knees and getting help when necessary.
If you’re looking to upgrade your hiking gear, you may also want to consider investing in the best solar charger for backpacking. A charger can help keep compatible devices powered on longer trips, but it should complement rather than replace basic navigation, emergency planning, and other hiking essentials.
Frequently Asked Questions
What is a hiking backpack?
A hiking backpack is designed to carry food, water, clothing, emergency supplies, and other trail equipment. Larger backpacking models often include a supportive frame, padded hipbelt, adjustable shoulder harness, load lifters, and compression straps so heavier loads can be carried more securely.
How do I choose the right size hiking backpack?
Choose the torso or frame size from your C7-to-iliac-crest measurement and confirm that the hipbelt fits your hip circumference. Choose capacity separately. Around 21–35 L works well for many day hikes, 30–50 L is common for 1–3-night trips, 50–80 L for many 3–5-night trips, and 70 L or more may suit extended or bulky-gear trips.
What features should I look for in a hiking backpack?
Useful features depend on your load and trip. For heavier backpacking loads, look for a supportive frame, properly sized hipbelt, comfortable shoulder harness, load lifters, sternum strap, compression straps, useful pockets, and hydration compatibility. For light day hikes, a simpler and lighter suspension may be sufficient.
How should a hiking backpack fit?
A supportive hiking backpack should sit close to your back with the hipbelt wrapping the top of your hip bones. Shoulder straps should follow the shoulders closely without carrying most of the weight. Load lifters should stabilize the upper pack, and the sternum strap should keep the harness positioned without restricting breathing.
How do I properly pack a hiking backpack?
Put bulky lightweight equipment near the bottom, dense items in the core close to your spine, and frequently needed gear near the top or in accessible pockets. Fill empty spaces so equipment cannot shift, and use compression straps where available to keep the load compact.
Where should the hip belt sit on a hiking backpack?
The padded hipbelt should wrap around the top of your hip bones at the iliac crest. Exact positioning varies slightly by pack design, so follow the manufacturer’s fitting instructions, but the belt should not simply hang at your pants waist or slide down onto your thighs.
Should there be a gap between backpack shoulder straps and my shoulders?
Generally, no large gap should exist. The shoulder straps should wrap smoothly and closely around your shoulders. On many conventional backpacking packs, the shoulder-strap anchor points sit roughly 1–2 inches below the top of the shoulders, but that measurement does not mean you should have 1–2 inches of empty space beneath the straps.
Why does my hiking backpack hurt my shoulders?
Excess shoulder pressure can come from a poorly positioned hipbelt, incorrect torso length, overtightened shoulder straps or load lifters, or a load packed too far from your back. Recheck the pack from the hipbelt upward rather than simply tightening the shoulder straps more.
Sources
- REI Co-op — Backpacks: Fit & Torso Size Guide — torso and hip measurement, hipbelt placement, shoulder straps, load lifters, and sternum-strap adjustment.
- Gregory — Pack Fit & Sizing Guide — torso measurement, hipbelt placement, shoulder-harness fit, and loaded fitting.
- Osprey — Size & Fit Guide — loaded fitting, hipbelt positioning, shoulder-harness adjustment, and load-lifter guidance.
- Deuter — How to Adjust a Backpack — hip-fin placement, shoulder straps, sternum strap, and stabilizer adjustment.
- REI Co-op — How to Pack a Backpack — stable load placement and positioning of dense gear.
- U.S. National Park Service — Hike Smart — hiking preparation, carrying ability, equipment checks, and general trail safety.

