
Last Updated on July 27, 2026 by Daniel Globe
A hiking backpack should feel like part of your body, not a load that constantly pulls, pinches, or shifts. The right fit starts with choosing the correct torso and hipbelt size, then adjusting the pack in the right order. A few minutes spent measuring and fine-tuning your backpack before a hike can make a major difference in comfort, balance, and control on the trail.
Quick Answer
To fit a hiking backpack, measure your torso from the C7 vertebra at the base of your neck to the line across the tops of your hip bones. Load the pack, position the hipbelt over your iliac crest, tighten the shoulder straps, adjust the load lifters, then set the sternum strap. Walk around and fine-tune until the pack feels stable without pinching or excessive movement.
Key Takeaways
- Choose a backpack by torso length and hipbelt fit rather than overall height or clothing size.
- Fit the backpack with realistic weight inside it so the suspension settles as it will on the trail.
- Position the hipbelt first, then adjust the shoulder straps, load lifters, and sternum strap.
- Shoulder straps should wrap smoothly around your shoulders without obvious gaps or painful pressure.
- Keep heavy gear in the middle of the pack, close to your spine, and balance the load from side to side.
- Re-adjust straps during long hikes if pressure points or fatigue develop.
At a Glance
| Time Required | About 10–20 minutes for measuring and initial adjustment |
| Difficulty | Easy |
| Tools Needed | Flexible measuring tape, realistic hiking load, and ideally a helper or mirror |
| Cost | $0 if you already own the backpack and measuring tape |
Disclosure: As an Amazon Associate I earn from qualifying purchases. Some links on this page are affiliate links, at no extra cost to you.
Measuring Your Torso Length
Torso length is the most important measurement for choosing the basic size of many hiking and backpacking packs. Your overall height is not a reliable substitute because two people of the same height can have very different torso lengths.
The standard measurement runs from the C7 vertebra at the base of your neck to an imaginary horizontal line connecting the tops of your hip bones, or iliac crests. This is also the method described in REI’s backpack fitting guide and current manufacturer fit instructions.
- Tilt your head forward slightly and feel for the prominent bony bump where your neck meets your shoulders. This is your C7 vertebra.
- Place your hands on top of your hip bones with your thumbs pointing toward your back.
- Imagine a horizontal line connecting the tips of your thumbs across your lower back.
- Stand upright while a helper measures along your back from the C7 vertebra to that imaginary line.
- Compare the result with the torso range listed for the specific backpack model you are considering.
Pro Tip: Do not assume that a medium backpack fits because you wear medium shirts. Backpack sizing varies by manufacturer and model, so always compare your actual torso measurement with the pack’s current size chart.
Measure Your Hip Circumference Too
Torso length determines where the suspension should sit, but the hipbelt also has to fit your body. Wrap a flexible tape around the top of your hip bones at the iliac crest rather than around the narrower point where you normally wear pants.
Check this measurement against the manufacturer’s hipbelt range. Osprey’s current fitting guidance, for example, treats torso length and hipbelt sizing as separate parts of pack fit.
Load the Backpack Before You Adjust It
Do not fine-tune an empty backpack. The suspension sits differently after weight is added. Load it with your actual hiking gear or a realistic test load before adjusting the straps.
REI recommends starting with about 15 pounds for a fit test, while backpack manufacturers commonly suggest trying a pack with roughly 10–20 pounds. The exact amount is less important than making the load realistic for the type of hiking you plan to do.
Before putting the pack on, loosen the hipbelt, shoulder straps, load lifters, and sternum strap. This lets you build the fit from the correct starting position instead of compensating for one overtightened strap with another.
Warning: If a loaded backpack is difficult to lift safely, set it on a bench or other raised surface before shouldering it, or ask someone for help. Avoid twisting your back while swinging a heavy pack onto one shoulder.
Adjusting the Shoulder Straps and Hip Belt
The hipbelt and shoulder straps form the foundation of the backpack’s fit. Adjust the hipbelt first because a properly fitted backpacking pack should transfer much of its load through the hips rather than leaving the shoulders to carry everything.
1. Position and Tighten the Hip Belt
Put the backpack on and position the padded portion of the hipbelt over the top of your hip bones. Different manufacturers describe the exact position slightly differently, so follow the instructions for your specific pack, but the padding should generally cup or cover the iliac crest rather than hanging down around your thighs or riding up around your waist.
Buckle the belt and tighten it evenly. It should feel secure enough to support the pack without pinching your abdomen or restricting movement.
2. Tighten the Shoulder Straps
Pull the shoulder-strap ends down and back until the straps follow the shape of your shoulders.
The straps should wrap smoothly over your shoulders without an obvious gap. They should feel snug but should not dig into your neck or carry so much weight that your shoulders quickly become sore.
If the hipbelt is correctly positioned but the shoulder harness still floats above your shoulders or wraps too far down your back, recheck the pack’s torso setting. Strap tension cannot fully correct a backpack that is the wrong length.
Note: Daypacks with light loads may use simpler waist belts or no structural hipbelt at all. The strong emphasis on hip load transfer applies especially to larger hiking and backpacking packs with framed suspension systems.
Adjusting the Sternum Strap and Load Lifters
Once the hipbelt and shoulder harness are sitting correctly, fine-tune the pack with the load lifters and sternum strap.
3. Set the Load Lifters
Load lifters connect the upper shoulder harness to the top of the pack. Tightening them brings the upper part of the load closer to your body and can improve control.
On many full-size hiking and backpacking packs, the straps angle upward from the shoulders toward the pack. REI describes roughly 45 degrees as a common target, while Osprey gives a broader 30–60-degree range for correctly adjusted packs. The correct angle depends on the pack’s geometry, so treat these figures as guidance rather than a universal rule.
Tighten the load lifters until the pack feels stable. Do not crank them down so hard that the shoulder straps lift away from your shoulders or create pressure around the shoulder joints.
4. Adjust the Sternum Strap
Move the sternum strap to a comfortable position across the upper chest. Many fit guides place it roughly an inch or two below the collarbones, although body shape and pack design vary.
Buckle it and tighten only enough to keep the shoulder straps from spreading outward. Your arms should move freely and you should be able to take a full breath without restriction.
Warning: Stop and readjust the pack if a strap causes numbness, tingling, restricted breathing, sharp pain, or persistent pressure. A backpack should feel secure, but it should not compress your body enough to create neurological or breathing symptoms.
Testing the Weight Distribution
Once the main straps are adjusted, test the backpack with the weight you expect to carry. Stand naturally, walk across level ground, turn in both directions, and climb a few stairs if possible.
There is no useful universal 60/40 or 55/45 backpack weight-distribution ratio. What matters is how the pack behaves on your body.
| Fit Check | What You Want to Feel |
| Front to back | The pack stays close to your back without strongly pulling you backward. |
| Side to side | The pack remains centered instead of leaning or swinging toward one side. |
| Hipbelt | The belt stays on the iliac crest without sliding noticeably down or pinching. |
| Shoulders | The harness stays in smooth contact without gaps, concentrated pressure, or excessive load. |
| Walking | Your stride and arm movement remain natural, and the pack does not sway excessively. |
A properly balanced pack should not force you into a dramatic backward or sideways lean. A small natural forward lean can occur with a backpacking load, especially on inclines, and is not automatically a sign of poor fit.
A backpack fits well when the load stays close to your center of gravity, the hipbelt remains secure, and the harness supports the pack without creating obvious gaps or concentrated pressure.
Ensuring Proper Load Balance
Backpack fit and backpack loading work together. Even a correctly sized pack can feel uncomfortable when heavy items are placed in the wrong part of the bag.
For most hiking and backpacking packs, a useful approach is to divide the load into zones:
- Bottom zone: Pack bulky, relatively light items you will not need while walking, such as a sleeping bag or sleep clothing.
- Core zone: Place dense, heavy equipment close to your spine and roughly in the middle of the pack. Food, water, a cook kit, or a bear canister often belongs here.
- Top zone: Keep items you may need during the day, such as an insulating layer or rain jacket, within easier reach.
- Exterior pockets: Use them for frequently accessed essentials while maintaining reasonable left-to-right balance.
REI’s backpack-loading guidance similarly recommends putting dense gear in the core zone and balancing the load evenly from side to side.
Do not simply stack every heavy item high between your shoulder blades. Excess weight too high can make the pack feel unstable, while heavy gear packed too low can make it sag and pull away from the body.
Fill empty spaces with softer items and use compression straps to reduce movement. Gear that shifts every time you step can change your center of gravity and make rough terrain more tiring.
Pro Tip: After packing, set the backpack upright and look at it from behind. If one side is visibly heavier or more swollen than the other, move gear before adjusting your straps. Strap tension cannot fully compensate for a badly unbalanced load.
Checking for Proper Ventilation
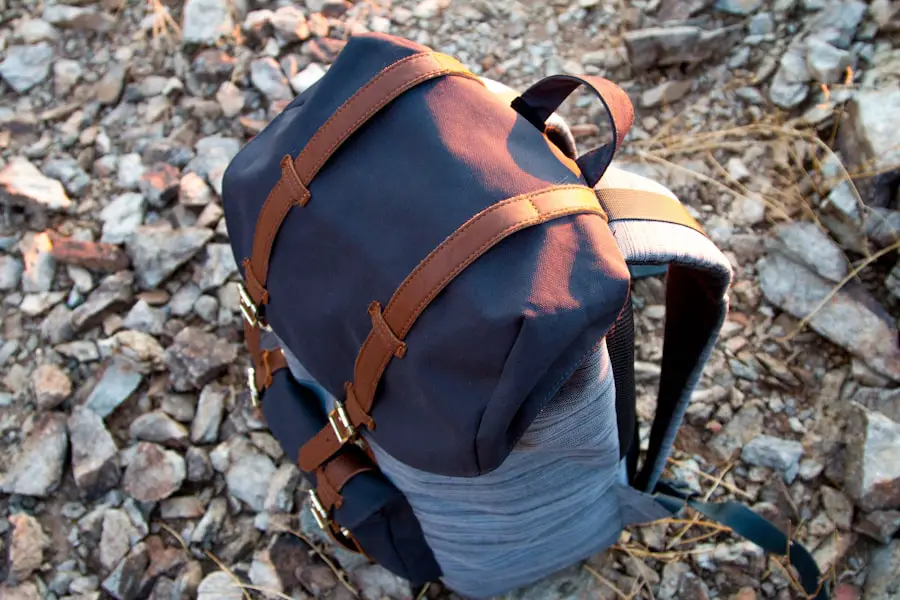
Ventilation is not a sizing measurement, but it can affect comfort, especially in warm weather. Some hiking backpacks use channelled foam, mesh panels, or suspended back panels to create airflow between the pack and your back.
When trying on a backpack, make sure the ventilation system does not compromise the fit. A highly suspended mesh panel may keep the pack body farther from your back, while a close-fitting back panel may feel more stable under certain loads. The best choice depends on the pack design, climate, load, and your preference.
No backpack will completely prevent sweating during strenuous hiking. Ventilated designs can improve airflow, but fit and load control should remain the priorities.
How to Tell if the Backpack Is the Wrong Size
Sometimes repeated strap adjustments fail because the backpack itself is too long, too short, or paired with the wrong hipbelt size.
Signs the Torso Setting May Be Too Long
- The shoulder harness leaves a noticeable gap behind or above your shoulders.
- The hipbelt has to sit unusually low to make the shoulder straps contact your body.
- The pack repeatedly pulls backward even after the load is packed correctly.
- The load lifters sit at an abnormal angle for the pack’s design.
Signs the Torso Setting May Be Too Short
- The shoulder straps wrap excessively far down your back before reaching their attachment points.
- The hipbelt rides too high when the shoulder straps are comfortable.
- The shoulder harness feels cramped despite reasonable strap tension.
Signs the Hipbelt May Be the Wrong Size
- You run out of adjustment before the belt feels secure.
- The padded sections do not adequately wrap the hips.
- The belt slips downward even after the torso length and load are corrected.
- The buckle or webbing reaches its adjustment limit while the belt still pinches or remains loose.
Manufacturer-specific fit rules matter here. Gregory, Osprey, and other brands publish model-specific measurements and harness recommendations. Check those instructions before deciding that a strap or suspension component is defective.
Common Backpack Fit Problems and Fixes
| Problem | What to Check |
| Sore shoulders | Check that the hipbelt is carrying the load, then reduce excessive shoulder-strap or load-lifter tension. |
| Hipbelt keeps sliding | Recheck belt position, torso length, hipbelt sizing, and whether the pack is overloaded. |
| Pack pulls backward | Move heavy gear closer to your spine and adjust the load lifters without overtightening them. |
| Pack sways side to side | Balance left and right, tighten compression straps, and check the hipbelt and sternum strap. |
| Gap over shoulders | Recheck the torso-length setting before tightening the shoulder straps further. |
| Restricted breathing | Loosen the sternum strap and shoulder harness immediately. |
Final Tips for a Comfortable Fit
A backpack fit is not necessarily a one-time adjustment. Your posture, clothing, terrain, water supply, and food load can change during a hike, so small on-trail adjustments are normal.
Deuter’s fitting guidance specifically recommends changing stabilizer-strap tension during longer outings to shift pressure and adapt the pack to different terrain.
- Make small adjustments rather than radically tightening one strap.
- Take the backpack off during longer breaks when practical.
- Recheck the load after consuming food or water because its balance may change.
- Use moisture-managing hiking clothing to reduce dampness and friction beneath the harness.
- Keep loose items compressed so they cannot swing as you walk.
- Test a new pack on stairs or a short local walk before relying on it for a long hike.
Every hiker’s body shape is different, so there is no single strap position that fits everyone. The goal is consistent: the hipbelt should stay secure, the shoulder harness should follow your body smoothly, the load should remain close and balanced, and no strap should create persistent pain, numbness, or breathing restriction.
If you’re looking to enhance your hiking experience, it’s also worth thinking about how you will keep essential electronics powered on longer trips. The TakeTravelInfo guide to the best solar charger for backpacking covers portable charging options for time on the trail.
Frequently Asked Questions
Why is proper backpack fit important for hiking?
A properly fitted hiking backpack keeps the load close to your body, helps transfer weight through the hipbelt, reduces unwanted pack movement, and limits concentrated pressure on the shoulders and back. Good fit can make a loaded pack easier to control over uneven terrain.
How do I measure my torso length for a backpack?
Find the C7 vertebra, the prominent bone at the base of your neck. Then locate the tops of your hip bones and imagine a horizontal line between them across your lower back. Have someone measure from the C7 vertebra down your back to that line with a flexible tape measure.
Where should the hip belt sit on a hiking backpack?
The padded hipbelt should generally wrap around the top of your hip bones, or iliac crest. It should feel secure without pinching and should not hang down around the thighs or ride so high that it restricts your waist.
Should hiking backpack shoulder straps have a gap?
No obvious gap should normally appear between the shoulder harness and the back or top of your shoulders. The straps should follow your shoulder contours smoothly. A persistent gap can indicate an incorrect torso setting or pack size.
What angle should backpack load lifters be?
Many full-size backpacking packs place the load lifters at roughly a 30–60-degree upward angle, with about 45 degrees being a common reference point. The ideal angle varies by pack size and suspension design, so follow the manufacturer’s fitting instructions for your model.
How tight should the sternum strap be?
Tighten it only enough to stabilize the shoulder straps and keep them in a comfortable position. It should not pull the harness inward so aggressively that it restricts your breathing or arm movement.
Where should heavy items go in a hiking backpack?
Dense, heavy gear usually works best in the middle or core of the pack, close to your spine and centered from left to right. Bulky lightweight gear can go lower, while frequently needed items can stay near the top or in accessible pockets.
What are common mistakes when fitting a hiking backpack?
Common mistakes include choosing a pack by height instead of torso length, fitting an empty backpack, placing the hipbelt too high or low, overtightening the sternum strap, using shoulder straps to carry too much of the load, ignoring an obvious shoulder gap, and trying to correct a badly packed load with strap tension alone.
Sources
- REI Co-op — How to Size and Fit a Backpack — torso and hip measurement, hipbelt position, shoulder-harness fit, load lifters, sternum strap, and on-trail adjustment.
- Osprey — Backpack Size & Fit Guide — torso sizing, hipbelt sizing, harness contact, and load-lifter guidance.
- Deuter — How to Adjust a Backpack — hip-fin placement, shoulder straps, sternum strap, and stabilizer adjustments.
- Gregory — Pack Fit & Sizing Guide — torso measurement, weighted fitting, hipbelt placement, and shoulder-harness fit.
- REI Co-op — How to Pack and Hoist a Backpack — bottom, core, and top packing zones and side-to-side load balance.

