
Last Updated on September 10, 2026 by Daniel Globe
Training for a long-distance hike is about more than walking farther each weekend. Your body must handle repeated hours on your feet, hills, uneven ground, descents, changing weather, and the weight of your pack. A gradual plan that combines hiking, cardio, strength, recovery, and trail skills will help you arrive prepared instead of exhausted before the trip begins.
Quick Answer
Train for long-distance hiking for at least eight weeks by combining three cardio or hiking sessions, two strength sessions, and two recovery days each week. Gradually add distance, elevation, and pack weight. Complete several trail-specific hikes, test your gear and food, then reduce training during the final week.
Key Takeaways
- Match your training to the route’s daily distance, elevation gain, terrain, climate, and expected pack weight.
- Build gradually with hiking, aerobic exercise, leg and core strength, balance work, and planned recovery.
- Practice climbing and controlled downhill movement because descents can be as demanding as ascents.
- Test your footwear, socks, pack, food, hydration plan, navigation tools, and water treatment before departure.
- Use the final week as a taper so you begin the hike rested rather than carrying training fatigue.
At a Glance
| Time Required | At least 8 weeks; allow 12 weeks or more if you are inactive, carrying camping gear, or preparing for steep terrain. |
| Difficulty | Moderate and progressive; the plan must be adjusted to your starting fitness and target route. |
| Tools Needed | Hiking footwear, socks, backpack, water, route information, stable step or stairs, and optional resistance bands or weights. |
| Cost | Low if you already own your hiking gear; a gym membership is optional. |
Warning: Stop training and seek medical advice for chest pain, fainting, unusual shortness of breath, severe swelling, sudden weakness, or pain that changes your walking pattern. People with chronic health conditions, recent injuries, or a long period of inactivity should ask a qualified healthcare professional what level of exercise is appropriate.
Disclosure: As an Amazon Associate I earn from qualifying purchases. Some links on this page are affiliate links, at no extra cost to you.
Understand the Demands of Long-Distance Hiking
Long-distance hiking, backpacking, and trekking can involve hours of repeated walking over several days. Trails range from smooth paths to steep, rocky, muddy, snowy, or poorly marked routes. Distance alone does not determine difficulty. Elevation gain, elevation loss, altitude, weather, pack weight, footing, water availability, and recovery time all affect how hard a route feels.
The Appalachian Trail, for example, has an official 2026 length of 2,197.9 miles from Georgia to Maine. The Pacific Crest Trail spans about 2,650 miles from Mexico to Canada. Most hikers do not need to complete an entire trail. Both routes have shorter sections that can be used for day hikes, weekend trips, or longer section hikes.
Before writing your training plan, collect the following information about your target route:
- Daily distance: Estimate the longest and average mileage you expect to cover.
- Elevation: Record both climbing and descending, not just the highest point.
- Terrain: Note rocks, roots, sand, mud, snow, river crossings, and off-trail travel.
- Pack weight: Include food, water, fuel, and equipment, not only your base gear.
- Altitude: Determine whether the route rises much higher than your home environment.
- Climate: Consider heat, cold, humidity, rain, wind, and sun exposure.
- Trip format: A single long day requires different preparation from seven consecutive hiking days.
The most useful training is specific: walk on terrain similar to your route while carrying the gear and weight you expect to use.
Assess Your Starting Point
Your plan should begin with what you can do comfortably now, not what you hope to do later. During the first week, complete an easy test walk or hike at a conversational pace. Record the distance, time, elevation, pack weight, foot comfort, energy level, and how you feel the next morning.
You should finish a baseline session feeling that you could have continued a little farther. If you are extremely sore for several days, develop joint pain, or struggle to maintain normal walking form, reduce the next session’s distance or load.
For general health, the Centers for Disease Control and Prevention recommends that adults work toward at least 150 minutes of moderate aerobic activity per week and complete muscle-strengthening activity on at least two days. A long-distance hiking plan usually adds longer trail-specific sessions on top of that foundation.
Pro Tip: Track time on your feet, elevation gain, pack weight, and next-day soreness. Mileage by itself can hide how demanding a steep or technical session was.
Select the Right Gear and Equipment
The right gear improves comfort and lets you practice under realistic conditions. Start with a backpack that fits your torso and allows most of the load to sit comfortably around your hips. Adjust the hip belt, shoulder straps, load lifters, and sternum strap before adding more weight.
Choose hiking shoes or boots according to fit, terrain, expected load, weather, and personal comfort. Some hikers prefer flexible trail shoes, while others feel better in more structured boots. Waterproof footwear can help in wet or cold conditions, but it may feel warmer and can dry slowly after water enters from above.
Wear the exact footwear and sock system you plan to use on the trip during several long training hikes. Check for heel lift, toe pressure on descents, rubbing, numbness, and hot spots. Do not assume a painful shoe will become comfortable during the trip.
Use a simple clothing-layer system:
- Base layer: Moves moisture away from the skin.
- Insulating layer: Holds warmth in cool conditions.
- Outer layer: Helps block wind and rain.
Your training hikes are also the place to test trekking poles, rain gear, sun protection, water containers, water treatment, food storage, navigation tools, and any camping equipment you will carry.
Build Endurance and Strength
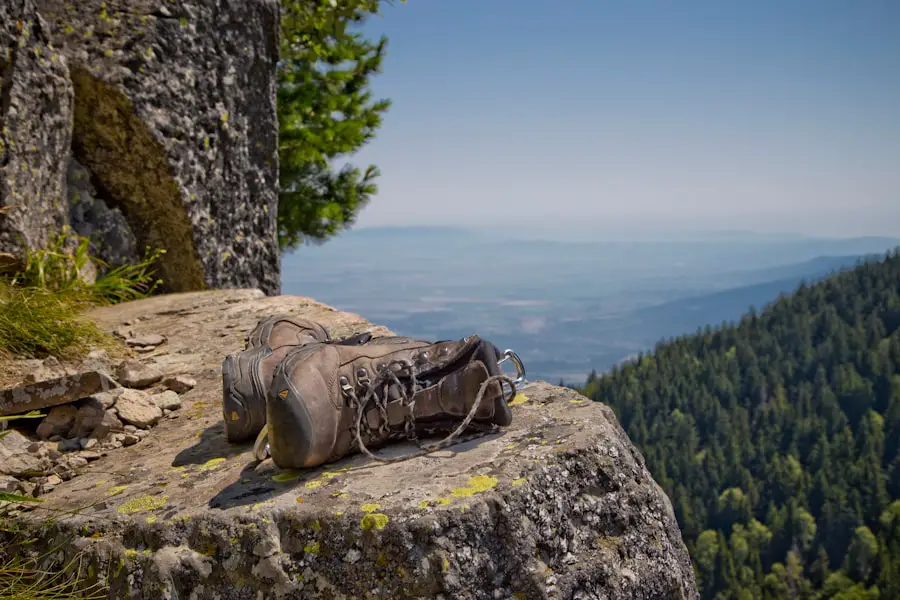
Endurance training helps you walk for several hours without a sharp drop in pace or energy. Hiking is the most specific form of training, but brisk walking, cycling, swimming, running, rowing, and elliptical exercise can also improve aerobic fitness.
Most sessions should feel controlled rather than exhausting. At a moderate effort, you should be able to speak in short sentences. Save very hard workouts for occasional use, because repeated all-out sessions can interfere with hiking volume and recovery.
Resistance exercise can support muscle and bone health, while hiking-specific strength work helps prepare the legs, hips, calves, back, shoulders, and core for uneven ground and a loaded pack.
Useful Strength Exercises for Hikers
- Squats or sit-to-stands: Build general leg and hip strength.
- Step-ups: Train the repeated climbing motion used on hills and stairs.
- Controlled step-downs: Prepare the quadriceps and hips to control descents.
- Reverse lunges: Build single-leg strength and balance.
- Hip hinges or deadlifts: Strengthen the glutes, hamstrings, and back.
- Calf raises: Prepare the lower legs for climbing and long hours of walking.
- Rows or loaded carries: Improve upper-back and shoulder endurance for pack carrying.
- Planks and side planks: Improve trunk stability.
- Single-leg balance: Helps with uneven ground and careful foot placement.
Begin with one or two sets of controlled repetitions. Add repetitions or resistance only when you can maintain good form and recover before the next session. Strength training should feel challenging, but it should not cause sharp joint pain.
Do Not Ignore Downhill Training
Climbing develops fitness, but long descents can cause heavy leg fatigue because your muscles repeatedly control your body and pack as you lower each step. Practice controlled step-downs, descending stairs, and downhill hiking. Begin with short descents and increase them gradually.
Follow an 8-Week Long-Distance Hiking Training Plan
This plan is a general starting point for a healthy adult who can already walk for about 45 to 60 minutes. Add more preparation time if you are inactive, recovering from an injury, carrying a heavy overnight pack, or facing a demanding route.
| Week | Main Goal | Training Focus |
|---|---|---|
| 1 | Assess your base | Two easy cardio sessions, two basic strength sessions, and one comfortable 60- to 90-minute hike with a light pack. |
| 2 | Build consistency | Three cardio or walking sessions, two strength sessions, and one longer hike. Add gentle hills if available. |
| 3 | Add elevation | Use hills, stairs, or an inclined treadmill. Extend the long hike and practice controlled descents. |
| 4 | Add realistic load | Carry roughly 50 to 60 percent of your expected trip pack weight during the long hike. Test pack fit, footwear, and snacks. |
| 5 | Build trail endurance | Complete a longer hilly hike, maintain two strength sessions, and carry about 60 to 75 percent of expected pack weight. |
| 6 | Practice consecutive days | Do a longer hike followed by an easier hike or loaded walk the next day. Test recovery, food, hydration, and foot care. |
| 7 | Complete a dress rehearsal | Use your planned footwear, clothing, equipment, food, and near-full pack weight on terrain that resembles the trip. |
| 8 | Taper and recover | Reduce distance, pack weight, and strength volume. Keep a few short easy walks and arrive rested. |
Example Weekly Schedule
- Monday: Rest or gentle mobility.
- Tuesday: Strength training.
- Wednesday: Moderate cardio or brisk hill walking.
- Thursday: Strength training and balance work.
- Friday: Rest or an easy walk.
- Saturday: Long trail-specific hike.
- Sunday: Easy recovery walk or a shorter second hike during back-to-back training weeks.
Do not increase distance, elevation, pack weight, and workout intensity all at once. Change one main variable at a time, then observe how your body responds. Rest days are part of the plan, not missed training.
Note: The eight-week schedule is not a medical prescription. Extend or repeat a week when soreness, fatigue, illness, schedule changes, or poor sleep make progression unwise.
Progress Pack Weight Safely
Start loaded training with a light pack that does not change your walking posture. Add weight in small steps over several weeks until you can comfortably carry the amount expected on the trip.
Your final training load should reflect your real equipment, food, and water requirements. There is no universal pack-weight percentage that is correct for every hiker. Body size, fitness, pack design, terrain, trip length, water availability, and medical history all matter.
Pack heavy items close to your back and near the middle of the pack. If added weight causes numbness, shoulder pain, major hip rubbing, leaning, or unstable steps, adjust the fit or reduce the load.
Pro Tip: Use water bottles as adjustable training weight. You can pour out water if the load becomes uncomfortable instead of being forced to carry it home.
Incorporate Cross-Training and Conditioning
Cross-training can improve fitness while reducing repeated stress from hiking every day. Cycling, swimming, rowing, elliptical exercise, and yoga can support cardiovascular fitness, mobility, balance, and recovery.
Cross-training should support hiking rather than replace every trail-specific session. A strong cyclist may have excellent aerobic fitness but still need time to adapt the feet, calves, shoulders, and joints to several hours of walking with a pack.
If you live in a flat area, use:
- Stairs or stadium steps
- An inclined treadmill
- A stair-climbing machine
- Repeated step-ups and controlled step-downs
- Parking garages where pedestrian access is permitted and safe
- Bridges or short hills completed in repeated loops
- Long loaded walks to build time on your feet
Balance exercises such as single-leg stands, heel-to-toe walking, and controlled reaches can improve stability. Perform them near a wall or stable support when needed.
Practice Warm-Ups, Mobility, and Recovery
Begin demanding sessions with five to ten minutes of easy walking. Add gentle ankle movements, calf raises, hip movements, and a few controlled bodyweight squats or step-ups before increasing pace.
After training, walk slowly for several minutes instead of stopping suddenly. Gentle mobility may help you feel less stiff, but aggressive stretching is not required and should never be forced through pain.
Sleep, food, hydration, and easy days allow your body to adapt. Warning signs that you may need additional recovery include declining performance, poor sleep, unusual irritability, persistent heavy legs, an elevated resting heart rate, repeated illness, or soreness that grows worse from one session to the next.
Plan Nutrition and Hydration
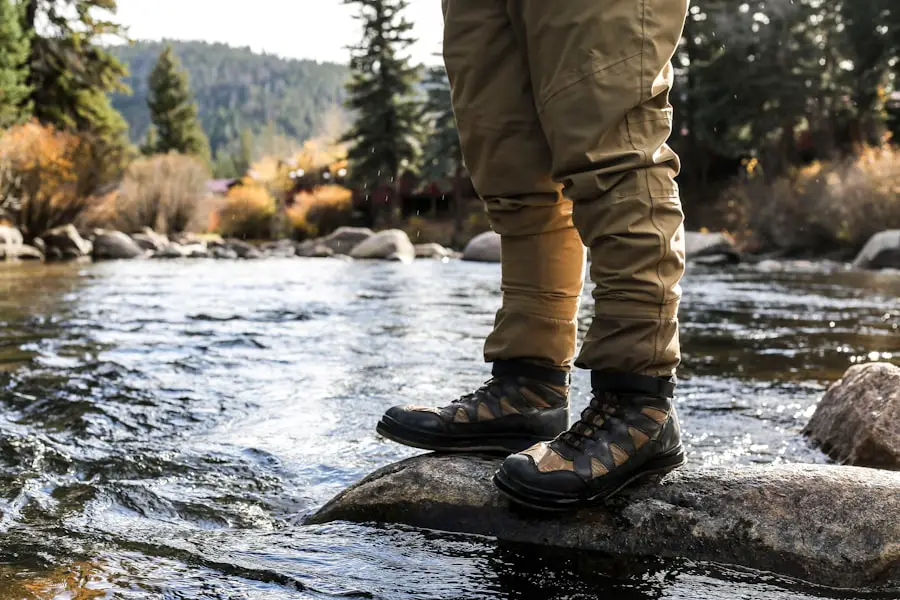
Long hikes require enough food to support steady movement and recovery. Carbohydrates provide useful energy during prolonged activity, while protein supports muscle repair. Fats add concentrated energy and can help increase calories without greatly increasing food volume.
During training, test foods that are easy to carry, open, chew, and digest. Examples include sandwiches, tortillas, dried fruit, nuts, nut butter, trail mix, crackers, bars, cheese, and other foods that match your dietary needs. Do not introduce an entirely new food plan on the first day of a major hike.
Use a Personal Hydration Plan
Begin a hike normally hydrated and carry enough water for the route, weather, and available sources. Drink according to thirst or use an individualized intake plan that you have tested during similar training conditions. Do not force large amounts of water simply because a schedule says it is time to drink.
Fluid needs can change greatly with temperature, humidity, pace, altitude, clothing, and sweat rate. Drinking far more than you lose can contribute to dangerously low blood sodium. Electrolyte foods or drinks may help replace losses during prolonged, hot, or high-sweat activity, but electrolytes do not make excessive water intake safe.
Identify reliable water sources before departure and carry a suitable treatment method when natural water will be used. Never assume clear-looking backcountry water is safe to drink untreated.
A bottle or hydration reservoir should be easy to reach so you can drink when needed. For additional container options, see this guide to portable water bottles for outdoor adventures.
Warning: Confusion, severe headache, repeated vomiting, loss of coordination, collapse, or unusual behavior during a hike can signal a medical emergency. Stop, seek help, and do not assume the person only needs more water.
Prepare for Heat, Cold, and Altitude
Fitness alone does not guarantee that your body is adapted to a different environment. When possible, train during conditions similar to those expected on the trip, but do so gradually and without taking unnecessary risks.
For hot conditions, begin with shorter and easier sessions, choose cooler parts of the day, wear sun protection, and learn how your body responds. For cold or wet routes, practice adjusting layers without allowing sweat to soak your clothing.
Physical fitness does not prevent altitude illness. If the route climbs much higher than your normal environment, plan a gradual ascent when possible and avoid pushing through worsening headache, nausea, dizziness, unusual fatigue, confusion, or coordination problems. Descending and obtaining medical help may be necessary when symptoms worsen.
Build Mental Preparation and Trail Judgment
Long hikes can involve fatigue, discomfort, slow progress, bad weather, and unexpected changes. Mental preparation should focus on flexible decision-making rather than simply forcing yourself to continue.
Break a long day into smaller goals, such as reaching the next water source, trail junction, shelter, or planned break. Practice eating, changing layers, checking your feet, and reading your route before a problem becomes urgent.
Visualization, controlled breathing, and mindfulness may help you remain calm, but good judgment is more important than determination. Turning around because of weather, injury, fire, flooding, darkness, or unsafe trail conditions is a successful safety decision.
Prevent and Manage Common Hiking Injuries
Common hiking problems include blisters, hot spots, ankle sprains, muscle strains, knee pain, tendon irritation, and overuse injuries. Many begin with a small warning that is ignored.
Blister Prevention
- Wear tested footwear and socks.
- Keep feet as clean and dry as conditions allow.
- Stop when you first feel rubbing or a hot spot.
- Adjust laces, socks, or insoles before the skin breaks.
- Carry blister dressings that you have practiced using.
Pain During Training
Mild muscle fatigue can be normal. Sharp pain, increasing joint pain, swelling, numbness, weakness, or pain that changes your stride is a reason to stop and assess the problem. Continuing with altered walking mechanics can create a second injury.
Carry a first aid kit suited to your trip, group size, medical needs, and remoteness. Useful items may include adhesive dressings, blister supplies, gauze, tape, antiseptic wipes, gloves, an elastic wrap, and personal medications. Training or wilderness first aid education is more valuable than carrying supplies you do not know how to use.
If a person cannot bear weight, has a suspected fracture, has a head or spine injury, shows signs of severe heat or cold illness, has uncontrolled bleeding, or develops serious medical symptoms, seek emergency assistance rather than relying on basic self-care.
Develop Navigation and Trail Skills
GPS devices and smartphone apps are useful, but batteries can fail, devices can break, and downloaded maps can be incomplete. Learn how to read a topographic map, identify contour lines, understand scale, follow trail signs, and use a compass before entering an unfamiliar backcountry route.
Download maps for offline use and carry a backup appropriate to the route. Keep electronics protected from water and cold, and conserve battery power. Check your position regularly instead of waiting until you suspect that you are lost.
Trail skills also include environmental responsibility. Follow the official Leave No Trace principles: plan ahead, travel and camp on durable surfaces, dispose of waste correctly, leave natural objects in place, minimize fire impacts, respect wildlife, and consider other visitors.
Prepare for Safety and Emergencies
Before every major training hike and the final trip, check the current forecast, trail alerts, closures, wildfire conditions, river levels, permit rules, and water availability. Conditions found in an old guidebook or trip report may no longer be accurate.
Give a trusted person your route, trailhead, expected camps, vehicle information, communication plan, and the time when they should contact emergency services if you have not checked in. Do not make last-minute route changes without updating that person when communication is available.
Carry the Ten Essentials
The National Park Service recommends carrying systems for:
- Navigation
- Sun protection
- Insulation
- Illumination
- First aid
- Fire
- Repair tools
- Nutrition
- Hydration and water treatment
- Emergency shelter
Adjust the contents for the season, route, remoteness, and group. A remote multi-day hike may also justify a satellite communicator or personal locator beacon, but owning a device does not replace route planning and sound judgment.
Avoid Common Training Mistakes
- Increasing everything together: Adding mileage, hills, speed, and pack weight in the same week can overload the body.
- Training only indoors: Gym fitness does not fully prepare your feet, balance, clothing, and gear for trail conditions.
- Ignoring descents: Strong climbing fitness does not guarantee comfortable downhill movement.
- Skipping rest: Fitness improves during recovery, not only during workouts.
- Using an untested full pack: Begin light and progress toward the real load.
- Saving gear tests for the trip: Small fit problems can become painful after several hours.
- Copying another person’s hydration plan: Sweat rate and fluid needs vary widely.
- Training through changing pain: Altered movement and persistent pain require assessment, not extra determination.
- Skipping the taper: A final week of hard training is more likely to create fatigue than new fitness.
Know When You Are Ready
No single test guarantees success, but you should be able to complete a representative training hike without severe pain, major foot problems, unsafe fatigue, or a multi-day recovery.
Before departure, aim to confirm that you can:
- Carry your expected pack with stable posture.
- Complete a substantial portion of the target daily distance on similar terrain.
- Handle meaningful climbing and controlled descending.
- Repeat an easier hike the following day when preparing for a multi-day trip.
- Eat and drink comfortably during several hours of movement.
- Use your navigation and water-treatment systems.
- Adjust clothing and rain protection efficiently.
- Recognize hot spots, fatigue, weather changes, and turnaround conditions early.
- Recover well enough to resume normal easy activity within a reasonable period.
If the dress rehearsal exposes a problem, adjust the route, daily mileage, equipment, pack weight, or schedule. A safer plan is better than depending on motivation to overcome a predictable limitation.
Use Post-Hike Recovery and Review
After a demanding hike, continue with easy walking for a few minutes and change out of wet clothing. Replace fluids according to thirst and normal hydration needs. Eat a balanced meal or snack containing carbohydrates and protein during the next few hours, especially when another training session or hiking day is planned.
Protein supports muscle repair, but there is no universal rule requiring every hiker to consume it within exactly 30 minutes. Your total food intake, the size and timing of your previous meal, hike duration, and next activity all affect recovery needs.
Review the session while details are fresh:
- Did the pack remain comfortable?
- Did your feet develop hot spots?
- Did you carry too much or too little water?
- Were your snacks easy to eat?
- Did your clothing control heat, cold, rain, and sweat?
- Did your pace remain steady?
- Did pain appear during climbs, descents, or the following morning?
- What should change before the next hike?
Frequently Asked Questions
What are the benefits of training for hiking long distances?
Training improves aerobic endurance, leg and core strength, balance, pack-carrying comfort, foot tolerance, and confidence. It also gives you time to test footwear, food, hydration, clothing, and navigation before mistakes have serious consequences.
How often should I train for hiking long distances?
A practical week can include three cardio or hiking sessions, two nonconsecutive strength sessions, and two easier recovery or rest days. The exact schedule should match your fitness, health, available time, and target hike.
What cardio exercises help with long-distance hiking?
Brisk walking, hill hiking, stair climbing, cycling, running, rowing, swimming, and elliptical exercise can build aerobic fitness. Hiking remains the most specific option because it also conditions your feet, balance, and pack-carrying muscles.
Which strength exercises are best for hiking?
Useful exercises include squats, step-ups, controlled step-downs, reverse lunges, hip hinges, calf raises, rows, loaded carries, planks, and single-leg balance. Choose versions that you can perform with controlled form and without sharp pain.
Should I train with a weighted backpack?
Yes, but begin with a light load and increase it gradually. Work toward the pack weight you expect to carry on the trip. Reduce the weight if it changes your posture, causes numbness, creates joint pain, or makes your steps unstable.
How should I progress my long-distance hiking training?
Increase one major demand at a time, such as duration, elevation, or pack weight. Include easier weeks or extra recovery when needed. Add back-to-back hiking days later in the plan and reduce training during the final week.
How long should I train before a multi-day hike?
Eight weeks can be enough for an already active person preparing for a moderate route. Allow 12 weeks or more if you are starting from a low fitness level, carrying camping equipment, hiking at altitude, or expecting steep and technical terrain.
How can I train for hills if I live in a flat area?
Use stairs, an inclined treadmill, a stair-climbing machine, repeated step-ups, controlled step-downs, bridge approaches, or short hill loops. Combine these with long loaded walks to develop time on your feet.
Should I keep training when my knees or feet hurt?
Do not continue through sharp, worsening, or movement-changing pain. Stop, reduce the load, and assess the cause. Persistent pain, swelling, numbness, weakness, or inability to walk normally should be evaluated by a qualified healthcare professional.
Sources
- Centers for Disease Control and Prevention: Adult Physical Activity Guidelines — aerobic and muscle-strengthening activity guidance.
- U.S. National Park Service: Hike Smart — route planning, weather, pacing, food, water, alerts, and hiking safety.
- U.S. National Park Service: Ten Essentials — emergency and trip-preparation equipment.
- Wilderness Medical Society: Exercise-Associated Hyponatremia Guideline — thirst-guided hydration and avoidance of overdrinking.
- Appalachian Trail Conservancy: 2026 Official Mileage — current Appalachian Trail length.
- Pacific Crest Trail Association: Discover the Trail — Pacific Crest Trail length and route.

