Last Updated on September 10, 2026 by Daniel Globe
Wearing a hiking backpack correctly makes a noticeable difference once you start climbing, descending, or spending several hours on the trail. The goal is not simply to tighten every strap. A good fit keeps the pack close to your body, places most of the support around your hips, lets your shoulders move freely, and keeps the load balanced from side to side.
Quick Answer
To wear a hiking backpack correctly, position the hip belt around the top of your hip bones, tighten the shoulder straps until they wrap comfortably around your shoulders, snug the load lifters to bring the pack closer, and fasten the sternum strap without restricting breathing. Recheck the fit after walking a few minutes.
Key Takeaways
- Choose a pack by torso length and hip-belt fit rather than height alone.
- Adjust a loaded pack in this order: hip belt, shoulder straps, load lifters, then sternum strap.
- Keep dense, heavy gear close to your back and balance the load from left to right.
- Use a higher heavy zone on ordinary trails and consider a slightly lower center of gravity on difficult terrain.
- Readjust the pack during the hike when pressure points, bouncing, slipping, or fatigue develop.
At a Glance
| Time Required | About 5–10 minutes for the initial fit, plus a short walking test |
| Difficulty | Easy |
| Tools Needed | Loaded backpack, flexible measuring tape, and ideally a mirror or helper |
| Cost | $0 if you already own the backpack |
Disclosure: As an Amazon Associate I earn from qualifying purchases. Some links on this page are affiliate links, at no extra cost to you.
Choosing the Right Backpack for Your Body Type
Selecting a backpack that matches your body is the foundation of a comfortable fit. Overall height is not the main measurement. REI’s backpack-fitting guidance identifies torso length as the key measurement for choosing pack size.
Measure Your Torso Length
You will get the most accurate measurement with a flexible tape and another person.
- Tilt your head slightly forward and find the prominent bone at the base of your neck. This is the C7 vertebra.
- Place your hands on top of your hip bones, also called the iliac crest.
- Imagine a horizontal line connecting the highest points of your hip bones across your lower back.
- Measure along your spine from C7 down to that line. Compare the result with the backpack manufacturer’s torso-size chart.
Osprey’s current sizing guidance uses the same C7-to-iliac-crest approach and also recommends measuring the hips at the iliac crest rather than relying on pant-waist size.
Check the Hip-Belt Fit
The hip belt needs enough padded coverage to wrap securely around your hips without running out of adjustment. The padding should sit around the top of the hip bones rather than hanging low around the stomach or squeezing the rib cage.
Women’s-specific, men’s, unisex, youth, and extended-fit packs may use different harness shapes, strap spacing, and hip-belt designs. However, the label alone does not determine whether a backpack will fit. Use your torso and hip measurements, then try the pack with realistic weight whenever possible.
Pro Tip: Fit the backpack while it contains real weight. An empty pack can feel perfect even when its torso length, hip belt, or shoulder harness becomes uncomfortable under a trail load.
Adjusting Straps and Hip Belt for Comfort
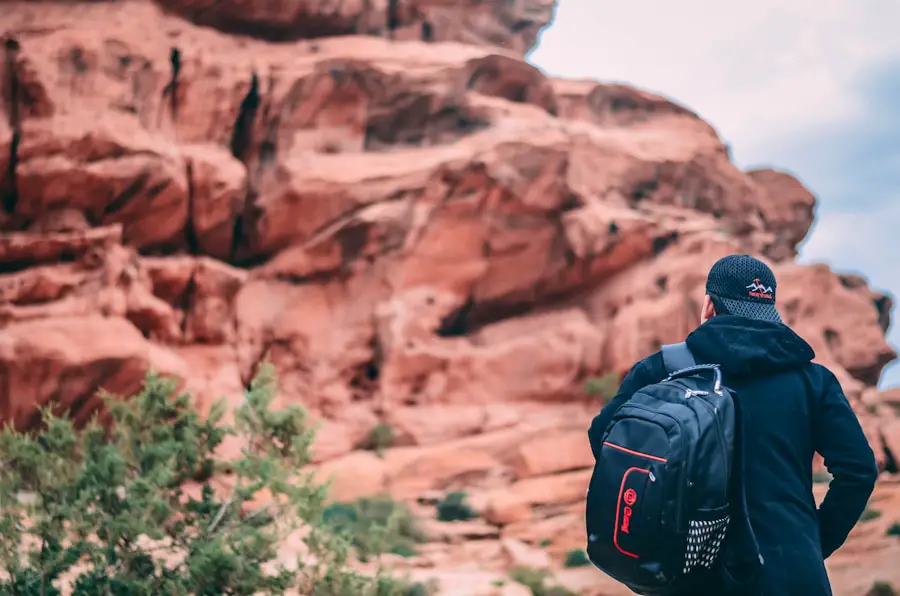
A hiking backpack should be adjusted while you are wearing it with weight inside. Before starting, loosen the hip belt, shoulder straps, load lifters, and sternum strap enough that the pack can settle naturally into position.
1. Position and Tighten the Hip Belt
Put the backpack on and position the padded hip belt around the top of your hip bones. The belt should feel snug and secure without pinching. This is the main load-support area on a framed backpack, so do not begin by cranking down the shoulder straps.
2. Snug the Shoulder Straps
Pull the shoulder-strap ends down and back until the harness wraps smoothly over your shoulders. The straps should hold the pack close without digging into your neck or carrying an excessive share of the load.
On many properly fitted backpacking packs, the shoulder straps continue around the shoulder and connect to the pack slightly below the top of the shoulder blades. A large gap over the shoulder or an unusually low attachment point can indicate that the torso adjustment or pack size is wrong.
3. Adjust the Load Lifters
Load lifters are the small straps running from the upper shoulder harness toward the top of the backpack. Tighten them just enough to bring the upper part of the load closer to your body.
REI describes an angle of roughly 45 degrees as typical, while Osprey notes that approximately 30–60 degrees can be normal when the torso is fitted correctly. Exact geometry varies with backpack design.
Do not use the load lifters like handles and pull them as tight as possible. Excess tension can create shoulder pressure or lift the shoulder harness away from your body.
4. Fasten the Sternum Strap
Clip the sternum strap across your upper chest and tighten it only enough to keep the shoulder straps comfortably positioned. Your arms should move freely, and you should be able to take a full breath without feeling restricted.
Warning: Loosen and readjust the pack if any strap causes numbness, tingling, severe pain, restricted breathing, or loss of normal arm movement. Do not try to hike through a badly pinched or clearly painful fit.
5. Walk and Recheck the Fit
Walk for several minutes, climb a few steps if available, and gently move your upper body from side to side. The backpack should remain close to your body without excessive bouncing, sliding, or pulling you backward.
If the fit changes as soon as you walk, correct the hip-belt position first and then work upward through the other adjustments again.
Signs Your Backpack Fits Correctly
- The hip belt stays securely around the upper hip bones.
- The shoulder harness follows the shape of your shoulders without a large gap.
- You can move your arms and breathe normally.
- The upper pack stays close instead of hanging backward.
- The load feels centered rather than heavier on one side.
- The pack does not repeatedly slide down or force you into an exaggerated forward bend.
Packing Your Backpack for Balance and Stability
Packing matters almost as much as strap adjustment. Dense items generally belong close to your back so the load’s center of gravity does not sit far behind you. A balanced load also reduces the amount of side-to-side correction you have to make while walking.
| Item | Practical Packing Position |
|---|---|
| Sleeping bag | Usually near the bottom because it is bulky but relatively light |
| Tent | Dense components close to the back; keep the load balanced left to right |
| Clothing | Use softer clothing to fill gaps around denser equipment |
| Food and water | Close to the back when heavy; balance bottles or side-pocket weight evenly |
| Cooking equipment | Close to the back if dense, with sharp or hard edges padded from your body |
| First aid kit | Easy-access upper or outer compartment |
| Navigation tools | Top, hip-belt, or outer pocket where they are immediately accessible |
| Personal items | Small pockets or organized compartments based on how often you need them |
Deuter’s backpack-packing guidance recommends keeping heavy equipment close to the body and balancing side pockets so one side does not become noticeably heavier than the other.
Frequently used items such as snacks, navigation tools, rain gear, sunscreen, and first-aid supplies should remain accessible. Avoid burying something you may need quickly beneath an entire day’s equipment.
Keep dense gear close to your body. A 2023 study in young adults found that standing postural stability became worse as a fixed backpack load was positioned progressively farther behind the body.
Distributing Weight Properly for Safety
An unbalanced backpack can increase fatigue and make awkward terrain harder to manage. Pack both sides as evenly as practical and secure loose contents so they do not shift every time you step over a rock, log, or drainage channel.
Where Should the Heaviest Gear Go?
For ordinary walking on relatively easy terrain, heavy items normally work well in the middle-to-upper portion of the pack, close to the back. This keeps the load from hanging far behind you.
More difficult terrain requires additional judgment. Deuter recommends placing the heavier part of the load somewhat lower for challenging alpine terrain or climbing, which lowers the center of gravity and can improve balance. The key principle is therefore not simply “heavy items always go high.” It is heavy items stay close to your body, with their vertical position adjusted for the terrain.
How Heavy Should a Hiking Backpack Be?
There is no single backpack-to-body-weight percentage that is ideal for every adult, trip, fitness level, pack design, and terrain type. The National Park Service advises hikers to consider how much equipment, food, and water they can comfortably carry when choosing an appropriate hike.
Research also shows that backpack load changes how the body responds. A 2026 observational study of long-distance hikers found progressively greater plantar loading as backpack weight increased. That does not establish one universal maximum for every hiker, but it supports a practical rule: carry the essentials while removing equipment you genuinely do not need.
Note: Water, food, cold-weather insulation, emergency equipment, and required safety gear should not be removed simply to reach an arbitrary pack-weight percentage. Trip conditions determine what is essential.
Tips for Maintaining Proper Posture While Hiking
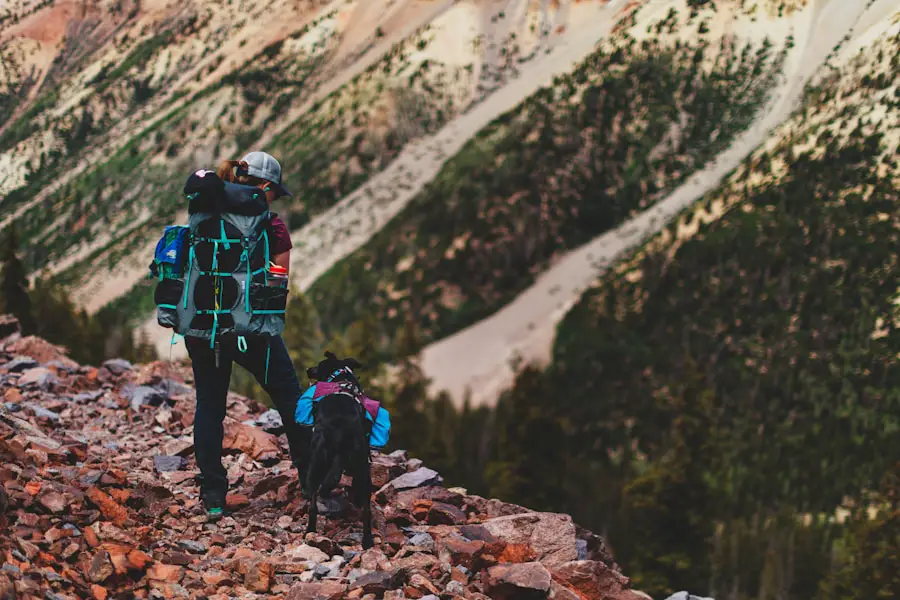
Good backpack posture does not mean holding your spine unnaturally rigid. Walk in a relaxed, balanced position and let your body make small adjustments to the load. A slight forward lean can be normal with a backpack and may help keep the combined center of gravity balanced.
Avoid a persistent exaggerated hunch caused by a backpack that is hanging too far behind you. If you have to bend dramatically forward just to stop the pack pulling you backward, first check the packing arrangement, hip belt, torso adjustment, and load lifters.
Keep your shoulders relaxed rather than shrugged upward. Engage your trunk naturally as you step over uneven terrain, but do not try to maintain a stiff “perfect posture” for hours.
Your eyes should scan the trail ahead while also checking your immediate foot placement. Looking only at the horizon can cause you to miss rocks and roots; staring only at your boots reduces your awareness of upcoming terrain.
Using Additional Features for Comfort and Safety
Modern hiking backpacks include features that can make carrying and organizing gear easier. Use them according to the trip rather than assuming every strap or pocket must be filled.
- Hydration sleeve or bottle pockets: Keep drinking water accessible so you do not need to unpack the bag whenever you stop.
- Compression straps: Reduce movement when the main compartment is not completely full.
- Hip-belt pockets: Useful for snacks, sunscreen, or other items you want without removing the pack.
- Rain cover: Helps shield the exterior in wet conditions, although waterproof liners or dry bags can provide additional protection for critical equipment.
- Trekking-pole attachments: Secure poles when they are not being used.
- Gear loops and external attachment points: Use sparingly; bulky objects swinging outside the pack can catch on branches or affect balance.
Staying prepared also means carrying the right safety equipment. The National Park Service Ten Essentials include navigation, sun protection, insulation, illumination, first aid, fire, repair tools, food, hydration, and emergency shelter.
Checking and Adjusting Your Backpack Throughout the Hike
A backpack that feels perfect in the parking area may feel different after several miles. Your clothing can compress, your food and water load changes, and your body becomes fatigued. Periodically make small adjustments rather than waiting until a minor pressure point becomes painful.
If something feels wrong, stop somewhere safe and identify the cause. Check whether the hip belt has slipped, one side of the pack has become heavier, the shoulder straps are too tight, or the load lifters are pulling excessively.
You can also vary strap tension slightly during the hike to relieve pressure. When stopping for a longer break, taking the backpack off gives your shoulders and back time away from the load.
Pro Tip: Memorize what your best-fitting strap setup looks and feels like before a long trip. It is much easier to return to a known good position after making adjustments on the trail.
Common Backpack Fit Problems and How to Fix Them
The Backpack Pulls You Backward
Move dense gear closer to your back, tighten loose compression straps, and gently snug the load lifters. If the pack still hangs far behind you, verify the torso setting and overall pack size.
Your Shoulders Hurt Quickly
Check the hip belt first. If it has slipped below your hip bones, the shoulders may be carrying too much of the load. Reposition and tighten the belt, then reduce excessive shoulder-strap tension.
The Hip Belt Keeps Sliding Down
The belt may be too loose, the padding may be positioned incorrectly, or the hip belt may simply be too large for your body. Recheck the manufacturer’s hip-size range rather than trying to compensate by overtightening the shoulder straps.
The Pack Bounces While Walking
Snug the shoulder straps and load lifters, use the sternum strap, and compress loose contents. Also check for a heavy item that is moving inside the main compartment.
The Shoulder Straps Leave a Large Gap
Recheck the adjustable torso length. A persistent gap despite normal strap tension can indicate that the suspension is set incorrectly or the pack size is not suitable for your torso.
The Sternum Strap Makes Breathing Uncomfortable
Loosen it. The sternum strap is intended to stabilize the shoulder harness, not clamp your chest. Move it to a more comfortable height if the backpack allows vertical adjustment.
Prepare the Backpack Before You Reach the Trail
Fit is only one part of hiking safety. Before leaving, choose a route appropriate for your abilities, check conditions, tell someone where you plan to go, and carry equipment suitable for the weather and duration of the hike.
The National Park Service’s Hike Smart guidance recommends knowing your limits, planning the route, carrying the Ten Essentials, and bringing appropriate food and water. Requirements vary significantly between a short local walk and a remote backcountry trip.
By combining the correct backpack size, a properly positioned hip belt, comfortable shoulder straps, balanced packing, and regular on-trail adjustments, you can make the load easier to control and reduce avoidable pressure points while navigating changing terrain.
If you’re planning a hiking trip to Oregon, seasonal conditions can also affect the clothing, water, and equipment you need to carry. Review this seasonal guide to visiting Oregon before deciding what belongs in your backpack.
Frequently Asked Questions
What is the proper way to wear a hiking backpack?
Position the hip belt around the top of your hip bones and tighten it first. Next, snug the shoulder straps, adjust the load lifters to bring the upper pack closer, and fasten the sternum strap without restricting breathing. Walk for several minutes and fine-tune the fit.
How should the weight be distributed in a hiking backpack?
Keep dense, heavy equipment close to your back and distribute weight evenly between the left and right sides. Light, bulky items such as a sleeping bag usually work well near the bottom. On easy terrain, heavier gear can sit somewhat higher; on difficult terrain, a slightly lower center of gravity can improve balance.
Should the hiking backpack be adjusted while wearing it?
Yes. The final hip-belt, shoulder-strap, load-lifter, and sternum-strap adjustments should be made while you are wearing a loaded backpack. You should also make small corrections during the hike as the load and your comfort change.
What are some tips for wearing a hiking backpack comfortably?
Start with the correct torso size, keep the hip belt around the upper hip bones, avoid overtightening the shoulder and sternum straps, place heavy equipment close to your back, and stop to correct pressure points before they become painful.
How should the shoulder straps be adjusted on a hiking backpack?
Tighten them until they follow the shape of your shoulders and hold the pack close without digging in. They should stabilize the backpack rather than carrying nearly all of its weight. If there is a persistent gap above your shoulders, check the torso adjustment.
What angle should backpack load lifters be?
The exact angle varies by backpack design. Many fitted backpacking packs place the load lifters roughly 30–60 degrees above horizontal, with about 45 degrees commonly used as a reference. The more important test is that they draw the upper load closer without painfully compressing or lifting the shoulder harness.
How do I know if my hiking backpack is the wrong size?
Warning signs include a hip belt that cannot stay on your hip bones, a large gap between the shoulder harness and your shoulders, shoulder attachment points that sit far too low, load lifters that cannot function normally, or a fit that remains uncomfortable after normal adjustments. Recheck your torso and hip measurements against the manufacturer’s sizing chart.
Sources
- REI Co-op — How to Size and Fit a Backpack — torso measurement, hip-belt position, shoulder straps, load lifters, sternum strap, and on-trail adjustment.
- Osprey — Backpack Size and Fit Guide — torso sizing, hip-belt sizing, fitting sequence, and load-lifter guidance.
- Deuter — How to Pack a Backpack — load placement, side-to-side balance, and terrain-specific center-of-gravity guidance.
- U.S. National Park Service — Hike Smart — trip planning, personal limits, essential equipment, food, and water.
- U.S. National Park Service — Ten Essentials — essential hiking and emergency-equipment categories.
- Moya-Cuenca et al., Journal of Functional Morphology and Kinesiology, 2026 — backpack load and plantar-pressure responses in long-distance hikers.