
Last Updated on September 10, 2026 by Daniel Globe
A hiking backpack should feel stable and close to your body without pinching your hips, pulling hard on your shoulders, or restricting your breathing. Getting that fit starts with the right pack size, but the way you load and adjust the hip belt, shoulder straps, load lifters, and sternum strap matters just as much.
Quick Answer
To wear a hiking backpack correctly, fit it to your torso, center the hip belt over your hip bones, snug the shoulder straps, gently tighten the load lifters, and position the sternum strap about 1–2 inches below your collarbones. Keep dense gear close to your spine and readjust the straps as you hike.
Key Takeaways
- Choose backpack capacity for the trip and size the suspension to your torso length, not simply your height.
- Set the hip belt first so a framed hiking pack can transfer most of its load away from your shoulders.
- Keep dense items in the pack’s core, close to your spine, rather than stacking the heaviest gear at the very top.
- Snug the shoulder straps, load lifters, sternum strap, and compression straps without overtightening them.
- Walk with the loaded backpack before a long hike and make small adjustments whenever pressure points develop.
At a Glance
| Time Required | About 10–15 minutes for the initial fitting and test walk |
| Difficulty | Easy |
| Tools Needed | Flexible tape measure, loaded backpack, and ideally a friend or mirror |
| Cost | $0 if you already own the backpack |
Disclosure: As an Amazon Associate I earn from qualifying purchases. Some links on this page are affiliate links, at no extra cost to you.
Choose the Right Backpack Size and Fit
Backpack capacity is usually measured in liters. There is no perfect volume for every hiker because compact gear, weather, water availability, and trip style can change how much space you need. As a general starting point, many hiking daypacks fall around 21–35 liters. Efficient packers may use roughly 30–50 liters for a 1–3-night trip, while 50–80 liters is common for multiday backpacking. Packs of 70 liters or more are often used for longer trips, winter equipment, or other bulky loads. See REI’s backpack sizing guide for additional capacity examples.
Capacity is only one part of backpack sizing. A pack that matches your body will normally be more comfortable than a larger or more feature-rich model that does not. Torso length—not overall height—is the key measurement for most fitted backpacking packs. Hip-belt sizing also matters because the belt needs enough padding and adjustment range to wrap securely around your hips.
Measure Your Torso Length
To measure your torso, tilt your head slightly forward and find the C7 vertebra, the prominent bump where your neck meets your shoulders. Next, place your hands on top of your hip bones, known as the iliac crest. Imagine a horizontal line between your thumbs across your lower back. Have someone measure along your spine from C7 to that line.
Compare this measurement with the manufacturer’s sizing chart because small, medium, and large torso ranges are not standardized across every brand or model. REI’s backpack fit guide and the Osprey Size & Fit guide both use the C7-to-iliac-crest method.
Check Hip-Belt Size
Your hip measurement is taken around the top of your hip bones, which is generally higher than the waistband of your pants. Make sure the backpack’s hip belt can wrap comfortably around this area without running out of adjustment or bottoming out before it becomes secure.
Fit the Backpack With Weight Inside
An empty backpack can feel fine even when its suspension is poorly adjusted. Put a representative load inside before fitting it. Osprey recommends roughly 10–20 pounds for its fitting process, while the best test for your own pack is a load similar to what you actually plan to carry.
Pro Tip: Before making any fit adjustments, loosen the hip belt, shoulder straps, load lifters, and sternum strap. Starting loose makes it much easier to see which adjustment actually improves the fit.
Put On a Loaded Hiking Backpack Safely
A heavy backpack is easier to control when you lift it using the haul loop rather than pulling on a shoulder strap. Stand beside the upright pack with your knees bent, lift it by the haul loop onto your thigh, slide one arm into a shoulder strap, lean forward, bring the pack onto your back, and then insert your other arm.
This method reduces strain on the harness and gives you better control over a loaded pack. REI provides a similar step-by-step method in its backpack packing and hoisting guide.
Adjust the Shoulder Straps and Hip Belt
1. Position and Tighten the Hip Belt
Set the hip belt so its padding is centered over the top of your hip bones. On many backpacking packs, the belt will sit partly above and partly below the iliac crest rather than hanging around the soft part of your waist.
Buckle the belt and tighten it until it feels secure. It should grip your hips firmly enough to support the pack without pinching, creating sharp pressure points, or restricting normal movement.
A properly fitted hip belt transfers a large portion of a framed backpack’s load to the pelvis and legs. Lightweight daypacks with thin webbing belts may provide stability without transferring as much weight, so follow the design and fitting instructions for your particular pack.
2. Adjust the Shoulder Straps
Pull the shoulder-strap webbing down and back until the straps wrap smoothly around your shoulders. They should be snug enough to keep the pack close, but they should not be doing all the work of supporting a backpacking load.
Look for continuous contact between the padded shoulder straps and your shoulders. A large gap can indicate that the torso setting or pack size is wrong. If the straps pull hard downward even after the hip belt is positioned correctly, recheck the torso length before simply tightening everything further.
3. Check the Overall Harness Fit
Stand naturally and look at the pack from the side in a mirror or ask another person to check it. The backpack should sit close to your back without leaning dramatically away from your body. The hip belt should remain on the hip bones and the shoulder harness should wrap smoothly over the shoulders.
Warning: Do not solve a poor fit by tightening every strap as hard as possible. Loosen or reposition the pack if you develop numbness, tingling, painful pressure points, restricted arm movement, or difficulty breathing.
A good backpack fit begins with torso length and hip-belt placement—not with tightening the shoulder straps until the pack stops moving.
Distribute Weight Properly
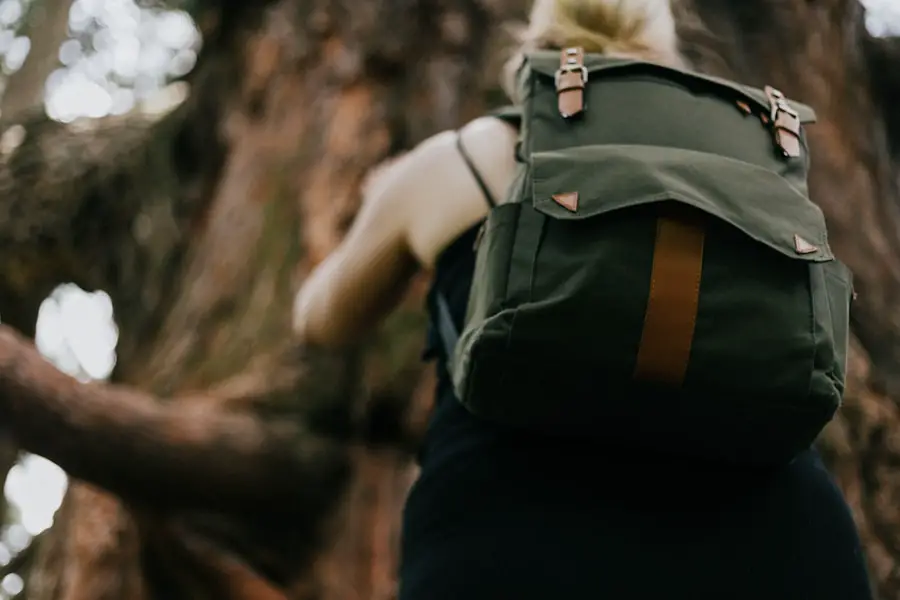
How you load a backpack affects balance almost as much as strap adjustment. Dense, heavy gear should generally sit in the pack’s core close to your back and near your spine. Food, a cook kit, a water reservoir, or a bear canister are common examples.
Avoid putting the heaviest equipment at the extreme bottom, where it can make the pack sag, or at the extreme top, where it can make the load feel unstable. REI’s packing guidance recommends a central core for dense gear, with softer and lighter items filling the areas around it.
Keep the load balanced from left to right. A heavy water bottle on one side, for example, can cause the pack to pull unevenly as you walk. Fill empty spaces with clothing or other soft items so dense equipment cannot shift.
Note: Pack geometry and terrain can change the ideal position slightly. The useful rule is to keep dense weight close to your body’s center rather than simply putting every heavy item as high as possible.
Pack the Backpack for Comfort and Efficiency
| Pack Zone | Good Items to Pack There | Why |
|---|---|---|
| Bottom | Sleeping bag, sleep clothing, other bulky lightweight gear | Creates a soft base for items you normally will not need until camp |
| Core, close to back | Food, cook kit, water reservoir, bear canister, other dense gear | Keeps dense weight close to your center of gravity |
| Top | Rain shell, insulation, first-aid kit, water treatment | Makes trail essentials easier to reach |
| Exterior pockets | Water bottles, snacks, map, sunscreen, sunglasses | Provides quick access without unpacking the main compartment |
Lay out your gear before loading the backpack. This makes unnecessary items easier to spot and lets you organize equipment by how often you will need it.
Start with bulky, lightweight camp gear at the bottom. Place the densest equipment in the core close to your back. Use clothing or other soft gear to fill gaps and stop hard objects from pressing directly against your back.
Items you may need while hiking—such as a rain shell, insulating layer, first-aid supplies, water treatment, snacks, navigation equipment, or sunscreen—should remain accessible. The Leave No Trace Ten Essentials guide is a useful reminder of the safety systems to consider before heading outdoors.
Packing cubes and compression sacks can help organize smaller equipment, but avoid compressing everything so tightly that frequently needed items become difficult to reach. If you attach gear outside the backpack, use the pack’s intended tool loops, lash points, or compression straps and secure the item so it cannot swing or snag easily.
Pro Tip: Fill a hydration reservoir before loading the rest of the backpack. Sliding a full reservoir into its sleeve after the main compartment is packed is much harder.
Properly Fit and Adjust the Sternum Strap
The sternum strap connects the shoulder straps across your chest and helps keep the harness stable as you move. Slide it to a comfortable position roughly 1–2 inches below your collarbones, depending on the pack and your body shape.
Buckle the strap and tighten it only enough to keep the shoulder straps positioned comfortably. Your arms should move freely and you should be able to take a full breath without feeling chest compression.
If tightening the sternum strap noticeably changes your breathing or pulls the shoulder straps into an uncomfortable position, loosen it. Its job is stabilization, not holding the backpack tightly against your chest.
Adjust the Load Lifters for Proper Weight Distribution
Load lifters are small straps that connect the upper shoulder harness to an anchor point higher on the pack. Not every daypack has them, but they are common on framed backpacking packs.
After setting the hip belt and shoulder straps, gently tighten the load lifters so the upper part of the backpack moves closer to your body. Do not crank them down as tightly as possible.
A load-lifter angle near 45 degrees is common. Osprey’s current fitting guidance gives a broader range of roughly 30–60 degrees when the torso length is correctly adjusted, so the exact appearance depends on the backpack’s frame and attachment points.
If the load lifters become nearly horizontal, point downward, or pull the shoulder harness painfully into your shoulders, recheck the pack’s torso setting and consult the manufacturer’s instructions rather than forcing the straps tighter.
Use Compression Straps to Secure the Load
Compression straps are usually found along the sides or front of a hiking backpack. Tightening them after packing reduces empty space and limits internal movement, which helps the load feel more stable on uneven terrain.
Tighten them enough to control the load without crushing delicate gear or distorting the backpack. If the pack is only partly full, compression straps are especially useful for pulling the load closer to the frame.
Some packs also let you secure trekking poles, a sleeping pad, or other equipment beneath designated compression straps. Make sure anything carried outside the pack is firmly attached and cannot swing, fall out, or catch easily on branches and rocks.
Ensure Proper Ventilation and Airflow
Back-panel ventilation can improve comfort in warm weather, but no backpack can completely eliminate sweat during hard hiking. Many packs use mesh, channels, foam patterns, or suspended back panels to create some airflow between the pack and your body.
Choose a suspension design that fits correctly before prioritizing ventilation alone. A highly ventilated backpack that is the wrong torso size will still be uncomfortable.
Moisture-wicking clothing can also help move sweat away from your skin. On long hikes, loosen or fine-tune the straps briefly when safe to do so, especially when you begin to notice a pressure point.
Troubleshoot Common Backpack Fit Problems
| Problem | What to Check |
|---|---|
| Shoulders hurt quickly | Check that the hip belt is centered over the hip bones and supporting the load. Recheck torso length before tightening shoulder straps further. |
| Hip belt keeps sliding down | Check belt position, belt size, torso adjustment, and whether the belt can tighten enough without bottoming out. |
| Pack sways side to side | Balance the load left to right, snug the compression straps, and confirm that the hip belt and sternum strap are secure. |
| Gap above or behind shoulders | Recheck torso length and shoulder-harness position. An adjustment strap cannot always compensate for the wrong frame size. |
| Chest feels restricted | Loosen and reposition the sternum strap. It should stabilize the harness without limiting a full breath. |
| Top of pack pulls backward | Check load-lifter tension, move dense gear closer to the spine, and tighten compression straps. |
Do a Final Fit Check Before the Hike
Once every strap is adjusted, walk around for several minutes with the backpack loaded. Climb stairs or step over a low obstacle if possible. The pack should remain stable without swinging, and you should be able to move your arms and breathe normally.
Fit is dynamic. As you drink water, eat food, add or remove layers, and hike over changing terrain, the load changes. Small adjustments to shoulder-strap, load-lifter, hip-belt, and sternum-strap tension can relieve pressure points during the day.
If your trip is headed to the Grand Canyon, you can also use this Grand Canyon seasonal travel guide to plan for temperature and seasonal conditions before deciding what clothing and equipment to carry.
Frequently Asked Questions
What should I consider when choosing a hiking backpack?
Consider capacity, torso fit, hip-belt fit, suspension, access, hydration compatibility, weather protection, and the gear you actually carry. A typical day hike often fits in a 21–35 L pack, while overnight and multiday trips usually require more room. Always compare your torso and hip measurements with the manufacturer’s size chart.
How should I pack a hiking backpack?
Put bulky, lightweight camp gear near the bottom, dense items in the core close to your spine, and frequently needed items near the top or in accessible pockets. Keep the load balanced from side to side and use compression straps to stop gear from shifting.
What are some tips for wearing a hiking backpack?
Start with a pack sized to your torso. Center the hip belt over your hip bones, snug the shoulder straps, gently adjust the load lifters, and set the sternum strap about 1–2 inches below the collarbones. Keep the backpack close to your body and make small adjustments as you hike.
How do I adjust the straps on a hiking backpack?
Loosen the straps before putting on the loaded pack. Position and tighten the hip belt first, then snug the shoulder straps. Next, gently tension the load lifters to bring the upper pack closer to you. Finish with the sternum strap, tightening it only enough to stabilize the shoulder harness.
What are common mistakes to avoid when wearing a hiking backpack?
Common mistakes include buying by height instead of torso length, wearing the hip belt around the waist instead of over the hip bones, putting dense gear too far from the back, overtightening straps, carrying unnecessary equipment, and failing to test the loaded pack before a long hike.
Should a hiking backpack’s weight be on my shoulders or hips?
On a framed backpacking pack with a supportive hip belt, much of the load should be transferred to your hips while the shoulder straps stabilize the pack. Small daypacks and packs without weight-bearing hip belts work differently, so follow the manufacturer’s fit instructions.
How tight should a hiking backpack’s sternum strap be?
It should be just tight enough to keep the shoulder straps in a comfortable position. You should still be able to breathe deeply and move your arms normally. If the strap compresses your chest or distorts the shoulder harness, loosen it.
Sources
- Osprey Size & Fit Guide — torso fit, hip-belt position, shoulder harness, load lifters, and sternum-strap adjustment.
- REI: How to Size and Fit a Backpack — torso measurement and backpack adjustment sequence.
- REI: How to Choose a Backpack — backpack-capacity ranges and sizing considerations.
- REI: How to Pack and Hoist a Backpack — packing zones, load distribution, external gear, and safe hoisting.
- Leave No Trace: The Ten Essentials — essential systems for outdoor preparedness.

