
Last Updated on July 26, 2026 by Daniel Globe
Hiking poles, also called trekking poles, can add stability, help you manage steep terrain, and share some of the work with your arms. The benefits depend on correct length, relaxed grip, good timing, and secure pole placement. Poorly adjusted poles can instead cause sore wrists, raised shoulders, or unreliable support.
Quick Answer
Set each hiking pole so your elbow bends about 90 degrees on level ground. Put your hand up through the wrist strap, rest your palm over it, and grip lightly. Walk with the opposite pole and foot moving together. Shorten the poles uphill and lengthen them downhill.
Key Takeaways
- Start with a pole length that creates roughly a 90-degree elbow bend on level ground.
- Insert each hand through the bottom of the strap so the strap supports the heel of your hand.
- Use a natural alternating rhythm: right foot with left pole, then left foot with right pole.
- Shorten poles for sustained climbs and lengthen them for sustained descents.
- Plant poles securely before loading them, but never treat them as a guarantee against slipping or falling.
At a Glance
| Time Required | About 5–10 minutes for setup and basic practice |
| Difficulty | Beginner; terrain-specific techniques require practice |
| Tools Needed | A pair of trekking poles; optional baskets and rubber walking tips |
| Cost | $0 beyond the poles and accessories you already own |
Disclosure: As an Amazon Associate I earn from qualifying purchases. Some links on this page are affiliate links, at no extra cost to you.
What Hiking Poles Can and Cannot Do
Trekking poles provide extra contact points with the ground. They can improve stability on loose, rocky, muddy, or uneven trails and give you a way to test uncertain footing before stepping onto it. Two poles generally provide more support than one, especially when carrying a backpack.
Poles may also reduce certain forces and moments around the lower limbs during downhill walking. In a small laboratory study involving eight men on a steep ramp, several measured knee loads were 12% to 25% lower with poles. However, a separate study of level walking found no reduction in knee compression. The benefit therefore depends on terrain, posture, pole force, and technique.
A small downhill study found reductions of 12% to 25% in several measured knee forces and moments, but that result should not be treated as a universal 25% reduction for every hiker or trail.
Using poles also engages the arms, shoulders, upper back, and core. That can spread the workload across more muscles, but it does not always reduce total energy use. Some hikers feel less local leg fatigue, while others use more oxygen because more of the body is working.
Note: Trekking poles are trail equipment, not a substitute for a medically prescribed cane, walker, brace, or rehabilitation plan. Seek medical advice if you have persistent joint pain, recent surgery, repeated falls, numbness, or an injury that changes how you walk.
Choosing the Right Hiking Poles for You
Select poles that fit your height, terrain, pack weight, and preferred hiking style. A pair of trekking poles offers the most balanced support. A single hiking staff can be convenient on flatter trails, but it does not provide the same two-sided stability on steep or uneven ground.
Aluminum Versus Carbon Shafts
- Aluminum: Usually more economical and tolerant of hard impacts. It may bend under severe stress rather than snapping immediately.
- Carbon composite: Usually lighter and effective at reducing vibration. It can be more vulnerable to cracking, splintering, or breaking when sharply loaded or trapped between rocks.
Neither material is automatically best. Aluminum is often a practical choice for rugged terrain and heavy use. Carbon can suit hikers who value low swing weight and careful handling.
Adjustable, Folding, and Fixed-Length Poles
- Telescoping poles allow quick length changes for climbs, descents, and traverses.
- Folding poles pack down compactly and are popular with fast hikers and travelers.
- Fixed-length poles have fewer moving parts and may be lighter, but they cannot be adjusted for terrain.
Grip Materials
- Cork resists moisture, reduces vibration, and can conform to the hand over time.
- Foam feels soft and absorbs moisture from sweaty hands.
- Rubber insulates well in cold weather but may cause rubbing or hot spots on warm hikes.
Locking Mechanisms
External lever locks are fast to inspect and adjust, including while wearing gloves. Twist locks are compact and can be dependable when clean and tightened correctly. Any locking system can loosen or become contaminated, so test each pole before relying on it.
Pro Tip: Before buying, hold the grips, adjust the straps, operate the locks, and wear the gloves you normally hike in. A pole that looks ideal on paper may not feel comfortable in your hands.
How to Adjust Hiking Poles Properly
Set the Baseline Length
- Stand upright on level ground in your hiking footwear.
- Place the pole tip beside your foot.
- Hold the grip with your shoulders relaxed.
- Adjust the shaft until your elbow forms roughly a 90-degree bend.
- Lock every section and press down firmly to test it.
The 90-degree position is a starting point, not a rigid rule. Small changes may improve comfort depending on arm length, grip design, pack fit, and trail conditions. Your shoulders should remain low rather than being pushed upward.
Adjust for Different Terrain
- Long uphill sections: Shorten each pole by approximately 5–10 cm. Steeper climbs may require a slightly greater reduction.
- Long downhill sections: Lengthen each pole by approximately 5–10 cm so you can reach downhill without bending excessively at the waist.
- Side slopes and traverses: Shorten the uphill-side pole and lengthen the downhill-side pole.
- Rolling terrain: Keep the baseline setting unless repeated adjustments provide a clear comfort benefit.
Do not extend a pole beyond the manufacturer’s maximum-length mark. Excessive extension reduces overlap between shaft sections and may weaken the pole.
Proper Grip and Wrist-Strap Position
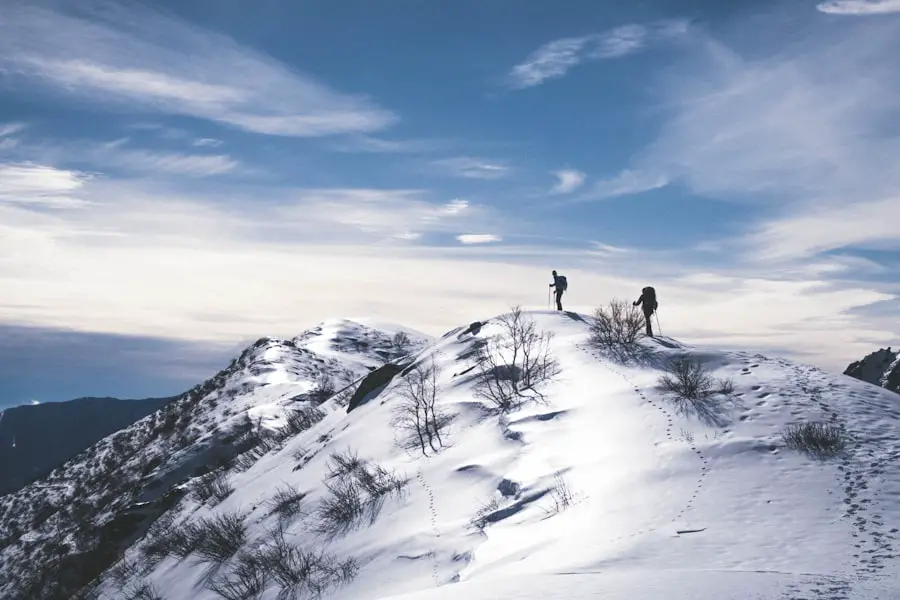
A correct strap setup lets the heel of your hand press against the strap so your fingers do not have to squeeze the grip constantly.
How to Put Your Hand Through the Strap
- Hold the pole upright with the strap hanging open.
- Insert your hand upward through the bottom of the strap loop.
- Bring your hand down over the strap.
- Wrap your fingers lightly around the grip.
- Adjust the strap until it supports the heel of your hand without restricting circulation.
Keep your wrists neutral and your grip relaxed. A tight “death grip” wastes energy and may lead to hand, forearm, or wrist discomfort. Your fingers should mainly guide the pole rather than carry your full body weight.
Warning: Release the straps when a trapped pole could pull or twist your wrist, such as during scrambling, near dense brush, on ladders or stairs, or in a hazardous water crossing. Use judgment based on the terrain and your ability to let go quickly.
Basic Walking Technique on Level Ground
Start on an easy trail or open path where you can focus on rhythm without obstacles.
- Stand tall with relaxed shoulders and slightly bent elbows.
- Let your arms swing naturally.
- Plant the left pole as the right foot moves forward.
- Plant the right pole as the left foot moves forward.
- Place each tip near the side of your foot rather than far out to the side.
- Angle the pole slightly behind you as you press backward and continue walking.
The motion should feel similar to a normal arm swing. Do not stab the ground or reach far ahead on ordinary level terrain. A hard downward strike sends unnecessary shock into the hands, elbows, and shoulders.
If your timing becomes confused, lift both pole tips and walk normally for several steps. Once your natural arm swing returns, lower the poles and resume the opposite-arm/opposite-leg pattern.
When to Double-Plant
On very steep, awkward, or slippery ground, plant both poles together and then take one or two controlled steps. Double-planting provides a wider support base, but reaching too far or pulling aggressively can strain your shoulders.
Techniques for Uphill Hiking With Poles
| Technique | How to Use It |
|---|---|
| Planting poles | Plant beside or slightly ahead of your feet, then press down and back as you step upward. |
| Engaging the core | Keep your torso stable and avoid hanging your full weight from your shoulders. |
| Shortening the stride | Take shorter, steady steps to control effort and maintain traction. |
| Using arm swing | Continue the opposite-arm/opposite-leg rhythm unless the slope is steep enough to require double-planting. |
Shorten the poles before a sustained climb so your shoulders remain relaxed. Lean slightly forward from the ankles rather than rounding your back. Keep the pole plants close enough that you can press down and backward without reaching.
On moderate slopes, alternate the poles with the opposite feet. On steep steps or ledges, place both poles securely on higher ground, step upward, and use the poles for support without attempting to pull your entire body up with your arms.
Short steps are usually more efficient than long lunges. Keep a pace that allows you to maintain traction and steady breathing.
Techniques for Downhill Hiking With Poles
Downhill walking often places greater demands on the knees and requires careful control of speed. Lengthen the poles slightly before a sustained descent so you can reach downhill while keeping your torso reasonably upright.
- Keep your knees soft rather than locked.
- Take shorter steps and reduce speed before the slope becomes difficult.
- Plant a pole securely ahead and downhill.
- Confirm that the tip will not skid or become trapped.
- Transfer only part of your weight onto the pole as you step down.
- Continue alternating poles, or double-plant before large steps.
Do not place both poles far behind you while descending. That position cannot provide useful braking support ahead of the next step. Avoid reaching so far forward that your shoulders are forced backward or your torso folds at the waist.
Pro Tip: On loose descents, shorten your stride before increasing pressure on the poles. Reducing step length can lower lower-limb loading more reliably than trying to brake a fast descent with your arms alone.
Using Hiking Poles on Uneven Terrain
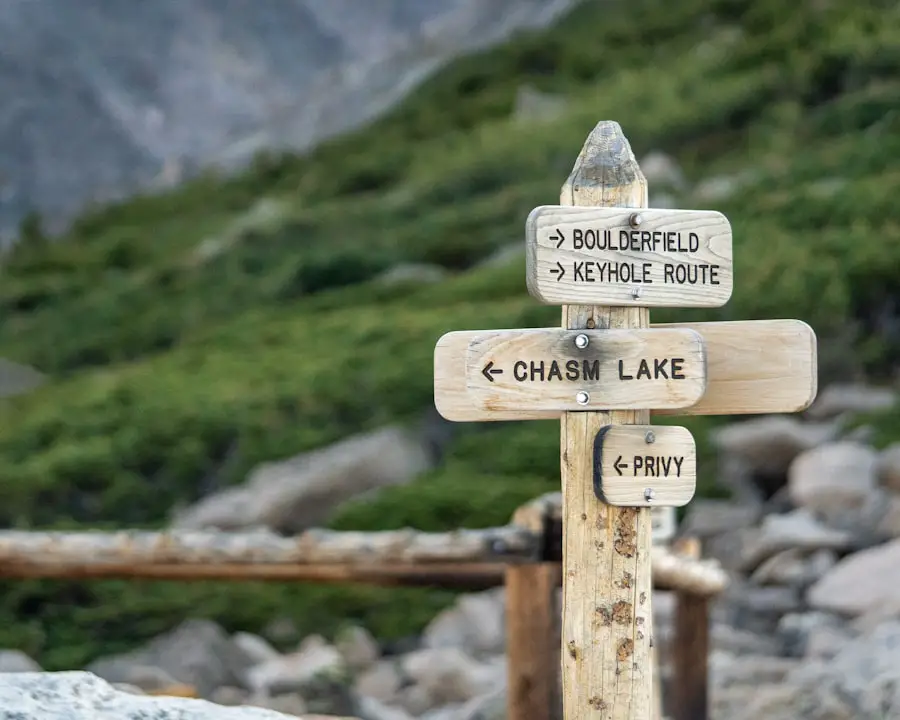
Rock, mud, roots, and loose gravel require deliberate pole placement. Look at the surface where each tip will land rather than planting blindly.
- Loose rock: Place the tip on stable ground between rocks when possible. Avoid narrow gaps that can trap or bend a shaft.
- Mud: Use the correct baskets so the poles do not sink too deeply. Test the ground before transferring weight.
- Roots: Avoid placing a carbide tip on a smooth, angled root where it may slide.
- Narrow trail: Keep the poles close to your body so the tips do not catch vegetation or strike another hiker.
- Uncertain footing: Plant one or both poles first, confirm stability, and then move one foot at a time.
Stepping Over Logs
Plant the poles on stable ground beyond or beside the log before lifting your foot. Keep one or more secure contact points while stepping over. Do not place a pole where the shaft can become trapped between the log and the ground.
Climbing Onto a Large Rock or Step
Plant both poles beside or above the step, check the locks, and press down as you step up. On the way down, place the poles below the step before lowering your body. Sit or use your hands when that is safer than forcing a pole-assisted move.
Puddles and Small Gaps
Walk around when possible. A two-pole hop may work across a very small, predictable gap, but it should not be used where the landing is slippery, hidden, or far away.
Crossing Streams With Hiking Poles
Warning: A trekking pole does not make deep, cold, fast, flooded, or white water safe. Turn around, wait, or find another route when the current, depth, entry, or exit is uncertain. No itinerary is worth a dangerous crossing.
Before entering the water:
- Look for a wider, shallower section with a safe exit and no rapids, falls, strainers, or dangerous debris downstream.
- Keep secure footwear on. Bare feet and open-toed sandals provide poor protection.
- Unfasten the backpack waist belt and sternum strap so the pack can be released if you fall.
- Consider removing your pole wrist straps so your hands are not trapped.
- Place electronics, insulation, and essential emergency items in waterproof bags.
Face upstream or partly upstream and use a pole as an additional contact point. Place it securely on the bottom before moving a foot. Shuffle sideways and move only one contact point at a time. Keep at least two stable contact points whenever possible.
If the pole tip is swept away, the bottom cannot be felt, or the current disrupts your stance, retreat while you still can. Never depend on a flexible trekking pole as an anchor against powerful water.
Using Baskets and Pole Tips Correctly
Small Trekking Baskets
Small baskets help keep tips from entering narrow cracks or sinking deeply into soft ground. They suit most ordinary trails.
Snow or Mud Baskets
Larger baskets spread the load over a wider area. Use them for snow, deep mud, or other soft surfaces when they are compatible with your poles.
Carbide or Steel Tips
Exposed hard tips provide grip on soil, ice, and many natural surfaces. They can be noisy and may slip on smooth rock if planted at a poor angle.
Rubber Tip Covers
Rubber covers protect carbide tips during storage and reduce noise or surface damage on pavement. Remove ordinary storage caps before using the poles on loose trail surfaces unless the manufacturer identifies them as walking tips.
Note: Use the accessory size and attachment method specified for your poles. A loose basket or rubber tip can detach during the hike.
Using Hiking Poles to Reduce Impact on Joints
Poles can redirect part of the support force through the arms and reduce some measured lower-limb forces during downhill hiking. Research has also found lower joint moments and power absorption during loaded descents when poles were used.
However, the result is not identical for every person or type of walking. Level-walking studies have not consistently shown reduced knee compression. Technique, slope, speed, backpack weight, pole placement, strength, and existing joint conditions all affect the outcome.
For more comfortable descents:
- Reduce speed before pain or fatigue changes your gait.
- Use short steps instead of long braking strides.
- Keep knees slightly bent.
- Place poles ahead before stepping down.
- Avoid leaning heavily on a pole that has not been tested.
Stop and reassess if pole use increases pain in the wrists, elbows, shoulders, neck, back, hips, knees, or ankles.
Incorporating Hiking Poles Into a Fitness Routine
Walking with poles can involve more upper-body muscle than ordinary walking. Nordic walking uses a more forceful, exercise-focused pole technique designed to increase whole-body involvement. It is related to trekking-pole use but is not identical to relaxed trail hiking.
For a simple pole-walking workout:
- Warm up with five to ten minutes of easy walking.
- Use a natural alternating rhythm and relaxed grip.
- Increase pace gradually while maintaining good posture.
- Alternate short brisk intervals with comfortable recovery periods.
- Finish with easy walking and check for hand, wrist, or shoulder irritation.
Pole-assisted squats or lunges may provide balance support, but the poles should not be used to compensate for unsafe exercise form. Choose stable ground and keep the tips from sliding.
Note: Using more muscle can increase the workout’s energy demand. Pole walking may feel easier in the legs without using less total energy.
Common Hiking-Pole Mistakes
- Gripping too tightly: Leads to tired hands and forearms. Let the straps support the heel of the hands.
- Setting poles too long: Raises the shoulders and makes uphill plants awkward.
- Setting poles too short: Encourages bending at the waist and reduces useful support downhill.
- Planting too far ahead on level ground: Interrupts natural rhythm and creates braking forces.
- Planting behind the body on descents: Provides little support for the next downhill step.
- Looking only at the tips: Reduces awareness of upcoming terrain and other hikers.
- Loading a pole before testing it: Can cause a fall if the tip skids, sinks, or lands on loose rock.
- Ignoring locking tension: Allows an adjustable pole to shorten unexpectedly.
- Using straps in every situation: Can trap the hand when a pole becomes caught.
- Using poles to maintain an unsafe pace: Poles are support tools, not permission to rush steep terrain.
Troubleshooting Hiking-Pole Problems
The Pole Shortens While Walking
Stop using it as support. Clean dirt from the adjustment area, inspect the mechanism, and reset the tension according to the manufacturer’s instructions. Replace damaged locks or shafts rather than overtightening them beyond their design.
Your Wrists or Hands Hurt
Check that the hands enter from the bottom of the straps, loosen your grip, and adjust strap length. Confirm that the poles are not too long and that your wrists remain neutral.
Your Shoulders Feel Raised or Tired
Shorten the poles slightly and keep the plants closer to your feet. Do not pull your body upward using only the shoulders.
The Tips Keep Slipping
Match the tip to the surface, reduce the planting angle, and avoid smooth wet roots or polished rock. Clean worn rubber tips and replace accessories that have lost their tread.
The Poles Keep Getting Trapped
Use baskets where appropriate, avoid narrow cracks, and lift the pole before stepping past it. Release the straps in terrain where a trapped shaft could twist the wrist or cause a fall.
Safety Tips for Using Hiking Poles
- Inspect shafts, grips, straps, locks, baskets, and tips before every hike.
- Press down on each pole after adjusting it.
- Keep sharp tips pointed down and away from other people when carrying the poles.
- Leave extra space between hikers so a rearward pole swing does not strike anyone.
- Carry both poles in one hand and use a handrail where appropriate on stairs.
- Do not use a visibly cracked carbon shaft or severely bent aluminum shaft.
- Do not depend on poles as fall protection near cliffs, exposed traverses, waterfalls, or swift water.
- Slow down when fatigue affects pole timing or foot placement.
- Pack the poles securely when they are not in use so the tips cannot injure someone or damage equipment.
Advanced Hiking-Pole Techniques
Dynamic Double-Planting
On steep climbs or descents, plant both poles at once and take one or two steps before resetting them. Keep the poles within a comfortable reach and avoid hanging from your shoulders.
Rapid Terrain Changes
When the trail alternates quickly between short rises and drops, constant length changes may be impractical. Slide your hands lower on extended foam grips for brief climbs and return to the main grips afterward.
Technical Footwork
On a difficult step, choose foot placement first and then select pole placements that support that movement. A pole should complement stable footwork rather than replace it. Maintain three points of contact when the terrain requires slow, deliberate movement.
Heavy Backpack Use
A loaded pack changes balance and increases the consequences of a poor plant. Keep the poles close, use shorter steps, and avoid sudden body-weight transfers. Two poles generally provide more lateral stability than one staff when carrying a load.
Care and Maintenance
- Wipe mud and grit from the shafts, locks, baskets, and tips after the hike.
- Separate adjustable sections when the manufacturer permits it.
- Allow shafts and wrist straps to dry fully before storage.
- Inspect carbon shafts for cracks or splintering and aluminum shafts for sharp bends.
- Check lever-lock tension and clean twist-lock expanders as directed by the manufacturer.
- Replace worn tips, damaged straps, loose baskets, and unreliable locks.
- Store poles dry and unlocked or lightly tensioned according to the manufacturer’s instructions.
Regular inspection is especially important after a pole has been trapped between rocks, bent under body weight, or struck against a hard surface.
Note: Trekking poles support balance and movement, but hydration, footwear, pacing, navigation, and weather preparation still matter. This guide to portable water bottles for outdoor adventures covers additional hydration gear considerations.
Frequently Asked Questions
What are hiking poles?
Hiking poles, also called trekking poles, are lightweight poles used in pairs to add contact points, improve stability, test footing, and assist movement on trails. A hiking staff is a single-pole alternative that is commonly used on flatter terrain.
How do hiking poles help during a hike?
They can improve stability, provide support on steep or uneven ground, help test uncertain surfaces, and distribute some work through the arms. Research suggests they may reduce some lower-limb loads during downhill hiking, although the effect varies by terrain and technique.
How do you use hiking poles properly?
Set the poles so your elbows bend about 90 degrees on level ground. Insert your hands upward through the straps, grip lightly, and alternate the opposite pole and foot. Shorten the poles uphill, lengthen them downhill, and test every plant before loading it.
Should trekking poles go in front or behind you?
On level ground, plant near your feet with the shafts angled slightly behind so you can push backward. On descents, plant ahead and downhill before stepping. On climbs, plant beside or slightly ahead and press down and back.
How much should I adjust poles for hills?
A practical starting point is to shorten each pole by about 5–10 cm for long climbs and lengthen each pole by about 5–10 cm for long descents. Adjust further only when necessary to keep your shoulders relaxed and posture controlled.
Do hiking poles reduce knee strain?
They may reduce some forces and moments during downhill walking. One small laboratory study found reductions of 12% to 25% in several measured knee loads. This does not mean every hiker receives a 25% reduction, and level-walking evidence is less supportive.
Should I always use the wrist straps?
No. Straps are useful on ordinary walking terrain, but releasing them may be safer during scrambling, in dense vegetation, on stairs, or where a trapped pole could twist your wrist. They may also be released during hazardous water crossings.
Can anyone use hiking poles?
Most hikers can learn to use them, but the correct equipment and technique depend on mobility, strength, coordination, and medical needs. Trekking poles should not replace a prescribed cane, walker, brace, or individualized rehabilitation advice.
Sources
- REI Co-op: How to Choose Trekking Poles and Hiking Staffs — pole length, terrain adjustments, materials, grips, locks, baskets, and tips
- REI Co-op: How to Use Trekking Poles and Hiking Staffs — wrist straps, walking rhythm, double-planting, and obstacle techniques
- Schwameder et al., Knee Joint Forces During Downhill Walking With Hiking Poles — the study reporting 12%–25% reductions in several measured downhill knee loads
- Jensen et al., Knee Compression During Level Walking With Hiking Poles — limitations of applying downhill findings to level walking
- Bohne and Abendroth-Smith, Downhill Hiking With External Loads — lower-extremity forces, moments, and power during loaded descents
- U.S. National Park Service: Stream Crossing Safety — water assessment, pack preparation, footwear, contact points, and turnaround guidance

