
Last Updated on July 27, 2026 by Daniel Globe
Getting the right hiking boot fit matters more than choosing the stiffest, most expensive, or most heavily padded pair. A good boot should hold your heel securely without pinching, leave space for your toes, match the width and volume of your foot, and stay comfortable when you walk uphill and downhill. The best test is not the size printed on the box—it is how the boot fits your foot in the socks and insoles you will actually use on the trail.
Quick Answer
Hiking boots should feel snug around the heel and midfoot but never painfully tight. Your toes need room to wiggle, and roughly a thumb’s width beyond the longest toe is a useful starting check. Your heel should have minimal lift, and your toes should not hit the front when walking downhill.
Key Takeaways
- Fit hiking boots with the same socks, insoles, and orthotics you plan to use on the trail.
- Aim for secure heel and midfoot hold without squeezing your toes or creating pressure points.
- Test the boots on an incline so you can check for heel lift uphill and toe impact downhill.
- Break new boots in gradually, but do not expect break-in to correct the wrong size or shape.
- Use lacing to fine-tune an already good fit, and maintain the boots according to the manufacturer’s material-specific instructions.
At a Glance
| Time Required | About 20–30 minutes for a careful in-store fit test; break-in may take several short walks or longer for stiff leather boots. |
| Difficulty | Easy |
| Tools Needed | Hiking socks, your normal insoles or orthotics, and ideally an incline or test ramp |
| Cost | No extra cost for fitting; optional socks, insoles, or orthotics vary in price |
Disclosure: As an Amazon Associate I earn from qualifying purchases. Some links on this page are affiliate links, at no extra cost to you.
How Should Hiking Boots Fit?
A hiking boot should feel secure enough that your foot does not slide around inside it, but it should not squeeze, pinch, or force your toes together. REI’s current hiking boot fitting guidance describes the goal as snug everywhere without being tight anywhere, with enough room to wiggle your toes.
Do not choose a boot only from your normal street-shoe size. Footwear brands use different lasts, shapes, widths, and internal volumes, so two boots marked with the same size can fit very differently.
1. Fit Both Feet
Feet are not always exactly the same length or width. Try on both boots and judge the fit using the larger or more difficult-to-fit foot. When possible, have both feet measured for length and width rather than relying on an old shoe size.
Trying boots later in the day can also be useful because feet may be somewhat larger after several hours of standing and walking. This better represents the fit you may experience after spending time on a trail.
2. Wear Your Real Hiking Socks and Insoles
Wear the same type and thickness of socks you expect to hike in. If you use aftermarket insoles or custom orthotics, bring those as well. Changing from a thin fitting sock to a thick hiking sock later can reduce toe space and make a boot that initially felt comfortable too tight.
Moisture-wicking hiking socks are usually a better choice than slow-drying cotton because managing moisture can help reduce friction against the skin.
Pro Tip: Do not automatically choose the thickest sock available. Match sock thickness to the boot fit and conditions. A well-fitted boot with a medium sock is usually better than an overly tight boot created by adding extra-thick cushioning.
3. Check Toe Length and Toe-Box Space
Your toes should lie naturally rather than being curled, compressed, or pushed against one another. A useful starting check is roughly a thumb’s width between your longest toe and the end of the boot. One easy way to evaluate this is to remove the insole, stand on it with your heel positioned correctly, and look at the remaining length.
The thumb-width check is only a starting point. The real test is whether your toes stay clear of the front of the boot when walking downhill. A boot can look long enough on an insole but still allow your foot to slide forward if its overall shape or heel hold is wrong.
4. Check Width and Foot Volume
Correct length does not guarantee correct fit. The widest part of your forefoot should sit naturally in the widest part of the boot. You should not feel strong squeezing at the sides, pressure over a bunion, or an obvious bulge over the edge of the sole platform.
Foot volume matters too. If you tighten the laces firmly but still have a large empty space over the top of your foot, the boot may have too much internal volume. If the tongue and laces create painful pressure before the boot feels secure, the model may be too shallow or narrow for your foot.
Many manufacturers offer standard and wide versions, but changing to a different boot shape can work better than simply going longer.
5. Check Heel Hold
Your heel should stay mostly planted in the heel cup as you walk. A small amount of movement may occur in some new boots, but repeated lifting, rubbing, or obvious sliding is a warning sign because it can create friction and blisters.
Before rejecting an otherwise good boot, make sure the heel and instep are laced correctly. If the boot still allows excessive heel lift after reasonable lacing adjustments, try a different size, width, or model rather than assuming break-in will solve it.
6. Check the Flex Point
Walk normally and notice where the boot bends. Ideally, the main flex point of the boot should work with the natural bend of your forefoot rather than fighting it. If the boot repeatedly creases into your toes or presses hard across the top of your foot, its shape may not match yours.
7. Test Uphill and Downhill
Walk on an incline, stairs, or a store test ramp when one is available. Going uphill helps reveal heel lift. Going downhill is especially important because your foot shifts forward under load.
Your toes should not repeatedly strike the front of the boot on a descent. If they do, first check the lacing. Persistent toe impact usually means the size, volume, heel hold, or boot shape is wrong.
Warning: Do not buy a boot that already causes sharp pressure, numbness, toe impact, or painful rubbing because you expect it to “break in.” Materials can soften, but break-in does not reliably correct the wrong length, width, or foot shape.
A good hiking boot may feel firm when new, but it should not need to hurt before it becomes comfortable.
Understanding Different Types of Hiking Boots
Hiking footwear can be grouped in several ways, and labels such as lightweight, midweight, and heavy-duty are useful descriptions rather than universal industry standards. It is often more helpful to compare footwear by cut height, stiffness, protection, traction, weather resistance, terrain, and the load you plan to carry.
| Type | Best Suited To | Typical Trade-Off |
| Low-cut hiking shoes | Day hiking, maintained trails, warm conditions, hikers who value flexibility | Less coverage around the ankle and usually less protection than burlier boots |
| Mid-cut hiking boots | General hiking, mixed terrain, light backpacking | More structure and coverage with somewhat more weight and warmth |
| High-cut or stiffer backpacking boots | Rough terrain, heavier packs, colder or more demanding conditions | More weight, stiffness, and break-in time |
Lightweight footwear often uses flexible synthetic or textile construction and can feel comfortable quickly. Stiffer boots may use heavier synthetic materials, leather, substantial midsoles, protective rands, and deeper outsoles.
Higher-cut footwear can feel more supportive around the ankle and may mechanically limit some ankle motion. However, no hiking boot guarantees that you will not roll or sprain an ankle. Terrain, traction, fatigue, balance, previous injuries, and footwear construction all play a role. Laboratory research has found that high-top footwear can reduce inversion in some simulated situations, but that should not be interpreted as guaranteed injury prevention.
Note: Choose the lightest footwear that still gives you the fit, protection, traction, weather resistance, and underfoot support you need for the terrain and load. More boot is not automatically better.
Breaking in Your Hiking Boots
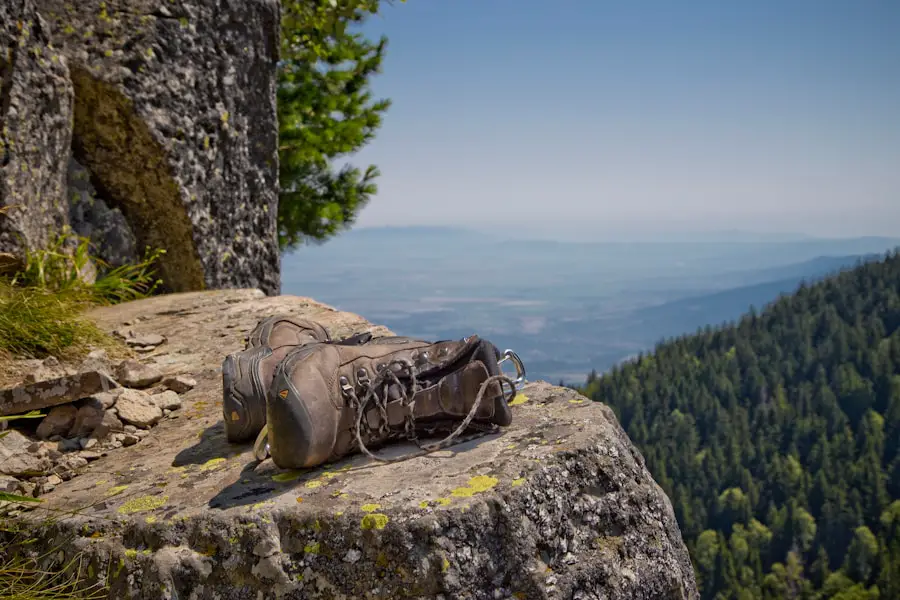
Once you have selected the right pair of hiking boots, give them enough time to prove themselves before a long trip. Flexible hiking shoes may require little formal break-in, while stiffer backpacking or leather boots can need more gradual use.
Start by wearing the boots indoors with your normal hiking socks and insoles. Then take a short walk close to home. If that goes well, gradually increase the time, distance, terrain difficulty, and pack weight.
- Wear them indoors: Confirm that there is no sharp pressure, toe impact, numbness, or obvious rubbing.
- Walk around your neighborhood: Test normal walking and small hills while staying close enough to change footwear if needed.
- Take a short trail walk: Add uneven terrain and mild elevation.
- Increase mileage gradually: Only move to longer outings after shorter walks remain comfortable.
- Add your normal pack: Extra load can change how your feet move inside the boots, especially on descents.
Wear the same socks you intend to use during your hikes throughout this process. Check your feet after each test for redness, pressure points, or tender areas that may develop into hotspots.
Breaking in allows stiff materials and padding to become more accommodating, but it does not change the fundamental length or shape of the boot. If a boot consistently pinches, makes your toes hit the end, causes numbness, or allows major heel movement, exchange it when possible rather than trying to force the fit.
Proper Lacing Techniques
Lacing can fine-tune a boot that already fits reasonably well. It can adjust tension between the forefoot, instep, and ankle so you do not have to make every section equally tight.
| Lacing Technique | Best Use | Limitation |
| Standard criss-cross | General-purpose even tension | May not control heel movement enough for every foot |
| Surgeon’s knot | Holding heel-zone tension and reducing excessive heel lift | Cannot fix a boot with fundamentally too much volume |
| Window or box lacing | Relieving a localized pressure point on top of the foot | Not a substitute for a boot that is too shallow or narrow |
| Toe-relief lacing | Temporarily reducing pressure at the front of the boot | Persistent toe pain indicates a fit problem that lacing cannot solve |
Surgeon’s Knot for Heel Lift
If your heel rises excessively, snug the lower laces comfortably over the foot. Near the point where the boot begins to transition toward the ankle, wrap the two lace ends around each other twice before moving to the next hooks. This extra friction helps hold tension in the heel zone while allowing the upper section to be adjusted separately.
Window Lacing for Top-of-Foot Pressure
If one area over the top of your foot feels compressed, unlace the boot below that point. Run each lace more vertically past the pressure area instead of crossing directly over it, then resume normal crossing above it. This creates a small “window” with less pressure over the tender spot.
Toe-Relief Lacing
If the front of your foot becomes sore during a hike, loosening or skipping the lowest crossing can temporarily reduce pressure and help you reach the trailhead more comfortably. Repeated toe pain, however, is a reason to reassess the boot itself.
Maintaining Your Hiking Boots
Proper maintenance helps preserve the upper, outsole, waterproof treatment, stitching, and interior of hiking footwear. The safest rule is to follow the boot manufacturer’s care instructions because leather, textile, suede, synthetic materials, adhesives, and waterproof membranes can require different products.
Clean Off Dirt and Mud
After muddy hikes, remove loose dirt with a soft brush or damp cloth. Take out the insoles when practical and shake gravel or debris from the inside. GORE-TEX recommends lukewarm water and gentle cleaning rather than machine washing its footwear.
Dry Boots Gently
Let wet boots dry naturally at moderate temperatures with good airflow. Avoid radiators, fires, hair dryers, and other intense direct heat because high heat can damage leather, adhesives, foams, and other footwear materials.
Removing the insoles and loosening the laces can improve airflow. Do not store boots wet in an enclosed bag or car trunk.
Condition Leather Only With Compatible Products
Leather may need periodic conditioning to reduce drying and cracking, but use a product that the footwear manufacturer approves. Some treatments can darken leather or affect breathability and water repellency.
Store clean, dry boots in a ventilated location away from prolonged heat and direct sunlight.
Dealing with Hotspots and Blisters
A hotspot is an early warning that repeated friction is irritating the skin. Do not wait until it becomes a full blister. Stop, remove the boot and sock, and identify what is rubbing.
Possible fixes include adjusting the laces, smoothing a wrinkled sock, removing debris, changing damp socks, or protecting the area with moleskin, soft padding, or an appropriate blister dressing. Moisture-wicking socks can also help keep the foot drier and reduce conditions that contribute to chafing.
If a blister has already formed, the American Academy of Dermatology recommends protecting it and generally leaving an intact blister roof in place. A pressure-area blister can be surrounded with donut-shaped padding so direct pressure is reduced. If a blister drains, keep the area clean and covered while the skin heals.
Warning: Stop the activity causing the friction when possible. Seek medical care if a blister develops increasing redness, swelling, pus, or worsening pain, which can be signs of infection.
Waterproofing and Weatherproofing
Waterproof hiking footwear can be useful in wet grass, mud, shallow puddles, snow, and prolonged rain. Many waterproof boots use breathable membranes designed to resist liquid water while allowing some water vapor to move outward. The trade-off is that waterproof footwear can generally feel warmer and less ventilated than a comparable non-waterproof design.
Even membrane-equipped footwear needs care. The outer material can eventually stop beading water even though the waterproof membrane itself remains intact.
Clean the boots before applying any restorative treatment. Then use a product that is explicitly compatible with the footwear material and membrane. For GORE-TEX footwear, the company recommends a water-based durable water repellent treatment when water no longer beads effectively and advises against waterproofing waxes or greases because they can affect breathability.
Conventional leather footwear may have different requirements. For example, some manufacturers approve specific creams or water-based wax treatments for particular leather products. This is why the boot maker’s instructions should take priority over a universal waterproofing recipe.
Note: “Waterproof” does not mean water can never enter the boot. Water can still enter over the collar, through damage, or after components have worn or failed.
Knowing When to Replace Your Hiking Boots
There is no single mileage number that tells every hiker when to replace a boot. Wear depends on body weight, terrain, gait, pack weight, outsole compound, midsole material, construction, maintenance, and how often the footwear gets wet or dirty.
Inspect your boots regularly for these signs:
- Worn traction: lugs have become noticeably shallow, rounded, torn, or smooth in important contact areas.
- Outsole separation: the rubber sole is peeling away from the upper or midsole.
- Damaged upper: cracks, holes, torn stitching, or failed seams compromise protection or weather resistance.
- Collapsed cushioning or support: the footwear feels substantially less stable or comfortable than it once did.
- Persistent leakage: water enters through damage that cleaning and compatible DWR restoration cannot address.
- Fit has changed: worn padding or structure now allows excessive movement or creates discomfort.
Not every worn boot must be discarded. Some traditionally constructed hiking and mountaineering boots can be professionally resoled if the upper and supporting structure remain in good condition. Check whether the manufacturer or an experienced footwear repair shop considers your model resoleable before replacing it.
Common Hiking Boot Fitting Mistakes
Buying by Size Number Alone
A familiar shoe size is only a starting point. Brand shape, width, toe-box design, and internal volume can change how a boot fits.
Automatically Sizing Up Half a Size
Some hikers do end up in a larger hiking size than their casual shoes, but “always go half a size up” is not a universal rule. Fit the actual boot to the actual foot and confirm the result on an incline.
Testing With the Wrong Socks
A boot fitted with thin dress socks can become too tight once thick hiking socks are added. Bring the socks you intend to wear.
Ignoring Width
Buying a longer boot to solve a width problem can create excessive length and heel movement. Try a wide version or a differently shaped model instead.
Assuming Tight Means Supportive
A secure fit should not require numbness, crushed toes, or excessive lace pressure. Support and painful compression are not the same thing.
Expecting Break-In to Fix Everything
Leather and padding can soften, but a boot that is fundamentally too short, too narrow, or the wrong shape is unlikely to become the right boot through mileage alone.
Once your footwear fit is dialed in, the rest of your carrying system matters too. The original article also recommends this guide to 5 Must-Have Minimalist Travel Backpacks for Spring Adventures for readers considering their wider travel setup.
Frequently Asked Questions
What are the important factors to consider when fitting hiking boots?
Check length, width, foot volume, heel hold, toe-box space, the boot’s flex point, and how the footwear behaves on an incline. Also fit the boots with your normal hiking socks, insoles, and any orthotics you use.
How should hiking boots fit?
They should feel snug around the heel and midfoot without painful pressure. Your toes should have room to wiggle, your heel should have minimal lift, and your toes should not repeatedly hit the front when walking downhill.
How much room should I have in front of my toes?
Roughly a thumb’s width beyond your longest toe is a useful starting check. The more important test is whether your toes remain clear of the front when you walk down an incline.
Should I wear hiking socks when trying on hiking boots?
Yes. Wear the same sock type and thickness you expect to use while hiking. Also bring your regular hiking insoles or orthotics because they can noticeably change internal space and heel position.
When is the best time to try on hiking boots?
Later in the day is useful because your feet may be somewhat larger after normal daily activity. It can provide a better indication of how the boots will feel after you have been walking for several hours.
Should hiking boots be one size bigger?
Not automatically. Some people need a different hiking size from their casual shoes, but there is no universal rule to go up one size or even half a size. Choose the size and boot shape that provide the correct toe room, width, heel hold, and downhill fit.
What should I look for in terms of ankle support when fitting hiking boots?
The collar should feel comfortable and secure without digging into your ankle or restricting normal walking. Higher and stiffer collars can alter ankle motion and may feel more supportive, but no boot can guarantee protection from ankle rolling or sprains.
How do I break in new hiking boots?
Wear them first at home, then on short local walks, followed by short trail outings. Increase distance, terrain difficulty, and pack weight gradually. Stop and reassess the fit if you develop repeated pressure, numbness, toe impact, or significant heel rubbing.
Sources
- REI Co-op — How to Choose Hiking Boots and Hiking Shoes — boot sizing, toe room, socks, end-of-day fitting, and general fit checks.
- REI Co-op — How to Break in Your Hiking Boots — gradual break-in and why break-in cannot correct poor fit.
- GORE-TEX — Footwear Care Instructions — cleaning, drying, DWR restoration, and treatment compatibility.
- American Academy of Dermatology — How to Prevent and Treat Blisters — friction prevention, padding, blister protection, and infection warning signs.
- Salomon — Low vs. Mid vs. High Hiking Footwear — current footwear-height terminology and intended use.
- PubMed — High-Top Shoes and Ankle Inversion Study — evidence on how high-top footwear can alter inversion mechanics without implying guaranteed injury prevention.

