
Last Updated on September 10, 2026 by Daniel Globe
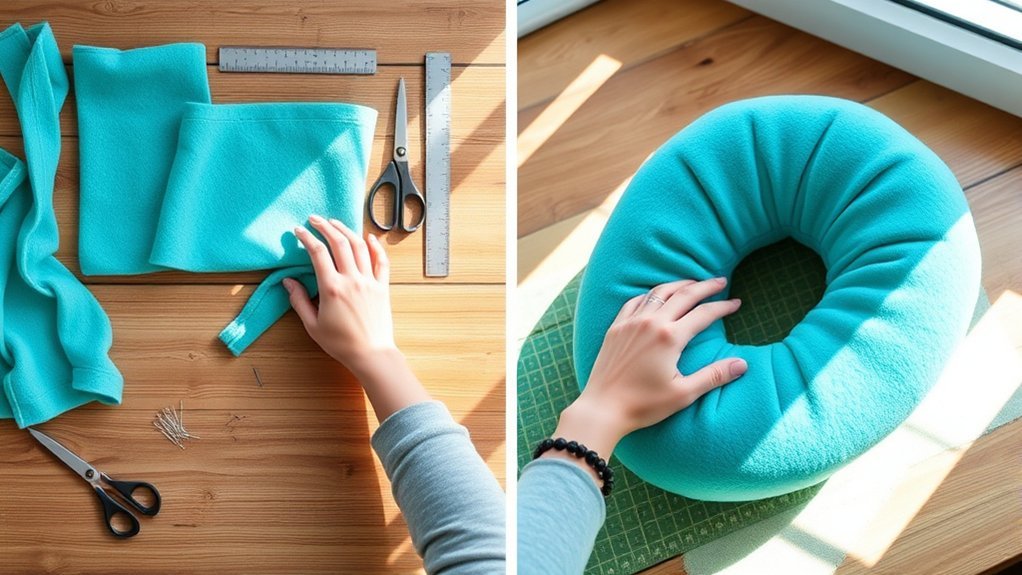
Making a no-sew travel pillow is simple when you follow one clear method from start to finish. This guide uses two matching fleece panels, knotted fringe, and soft polyester fiberfill to make a slim rectangular pillow for supporting your neck, lower back, or arm while traveling. You do not need a sewing machine, crochet hook, or advanced craft skills.
Quick Answer
Cut two 12-by-26-inch fleece panels, layer them with the finished sides facing out, and cut 3-inch fringe around the edges. Double-knot three sides, add polyester fiberfill a little at a time, and knot the final side. The project usually takes about one to two hours.
Key Takeaways
- Fleece works well because its cut edges usually do not unravel like woven cotton.
- Cut matching corner squares and evenly spaced fringe before tying any knots.
- Tie three sides first, fill the pillow gradually, and close the final side last.
- Keep the pillow and any storage strap away from vehicle or aircraft seat-belt buckles and belt paths.
At a Glance
| Time Required | About 1 to 2 hours, excluding washing or adhesive cure time |
| Difficulty | Beginner |
| Tools Needed | Fabric scissors, ruler or measuring tape, washable marker or tailor’s chalk |
| Cost | Varies by fleece and filling; fabric remnants can reduce the cost |
Disclosure: As an Amazon Associate I earn from qualifying purchases. Some links on this page are affiliate links, at no extra cost to you.
What Is a No-Sew Travel Pillow?

A no-sew travel pillow is a soft support pillow made without a needle or sewing machine. In this version, two layers of fleece are joined with hand-tied fringe knots. The center is filled with polyester fiberfill to create a slim rectangular pillow that can support your neck, lower back, arm, or head.
The 12-by-26-inch panels in this guide create a narrow bolster-style pillow after the 3-inch fringe is cut. They do not create a U-shaped neck pillow. A U-shaped version requires a separate curved template and carefully matched inner and outer curves.
Benefits of a No-Sew Method for Crafting Your Pillow
A tied-fleece method is useful for beginners because it requires only a few materials and lets you adjust the stuffing before closing the final edge. It also makes the pillow easy to personalize with contrasting fabrics or printed fleece.
Quick and Easy Method
You do not need to thread a needle, operate a sewing machine, or understand crochet stitches. The main tasks are measuring, cutting, tying, and filling. A standard no-sew fleece pillow method also uses layered fleece and tied sections to hold a pillow form or filling in place.
Work slowly during the measuring stage. Even fringe strips make the knots easier to pair and give the finished pillow a cleaner edge.
Minimal Tools Required
The basic project requires only:
- Fabric scissors: Sharp fabric scissors create cleaner fringe than dull household scissors.
- Ruler or measuring tape: Use it to keep the two panels and fringe strips even.
- Washable marker or tailor’s chalk: Mark the corner squares and fringe lines before cutting.
- Flat work surface: A table or clean floor gives you enough room to align both fleece layers.
Optional clips can keep the layers from shifting, but pins are usually unnecessary because fleece grips against itself.
What You’ll Need to Make Your Travel Pillow
Gather and inspect all materials before cutting. Check the care label on the fleece and filling, especially if you want the finished pillow to be washable.
Essential Materials Required
- Two fleece panels: Cut each panel to 12 inches by 26 inches. Use two colors, two prints, or one print and one solid.
- Polyester fiberfill: Use enough to fill the center evenly without making it hard or overpacked.
- Optional fabric decorations: Washable fabric paint, fabric markers, or securely bonded fabric patches.
- Optional fabric-specific hook-and-loop tape: Use it only for a storage wrap around the pillow itself, never around a seat belt.
Polyester fiberfill is practical for this project because it is lightweight and easy to add gradually. Fairfield states that its Poly-Fil polyester fiberfill can be machine washed on a gentle setting, although the finished project’s other materials must also be washable.
Recommended Yarn Type
Yarn is not required to make this pillow. The fleece fringe forms the structural knots. If you want to add a small tassel or decorative tie, use a washable medium-weight acrylic yarn and keep it away from the pillow’s main closure.
| Use | Recommendation |
|---|---|
| Main pillow construction | No yarn needed; tie matching fleece fringe strips together. |
| Optional decoration | A small amount of washable acrylic yarn is enough for a tassel or decorative wrap. |
| Child use | Avoid long loops, loose tassels, or detachable decorations. |
Tools for Assembly
Place these tools within reach before you begin:
- Sharp fabric scissors
- Ruler, yardstick, or measuring tape
- Washable fabric marker or tailor’s chalk
- Four optional clips for holding the fleece layers together
- A small ruler or cardboard guide measuring 3 inches by 3 inches
Warning: An adult should handle sharp scissors and supervise children using fabric adhesive or paint. Avoid buttons, beads, and other detachable small decorations on a pillow intended for a child under three. Do not attach the pillow or any strap to a vehicle or aircraft seat belt. The belt must remain unobstructed, properly fastened, and positioned as instructed by the carrier or vehicle manufacturer.
Step-by-Step Instructions for Your Pillow
- Prepare the fleece. If the fabric’s care label recommends prewashing, wash and dry it before cutting. Do not use fabric softener when the fleece manufacturer advises against it.
- Cut two matching panels. Measure and cut two rectangles, each 12 inches by 26 inches.
- Align the layers. Place the panels directly on top of each other. If the fleece has a clear finished side, position both finished sides facing outward.
- Cut the corner squares. Measure and cut a 3-inch square from all four corners through both layers.
- Cut the fringe. Cut 3-inch-deep strips around every edge. Make each strip approximately 1 inch wide and cut through both fleece layers together.
- Tie three sides. Pair each upper fringe strip with the strip directly below it. Tie a firm double knot. Complete three sides and leave the fourth side open.
- Add the filling. Pull apart small amounts of fiberfill and place them in the corners and along the far edge first. Continue until the pillow feels supportive but still compresses easily.
- Close the final side. Pair and double-knot the remaining fringe strips. Check that no fiberfill is trapped in the knots.
- Shape and inspect. Massage the filling into thin or empty areas. Retie loose knots and trim only clearly uneven fringe ends.
Pro Tip: Before cutting all the fringe, make a 3-inch-deep test cut near one edge. Confirm that the remaining center will be wide enough for the amount of neck or lumbar support you want.
| Stage | Quality Check |
|---|---|
| After cutting | Both layers match, corner squares are removed, and paired fringe strips line up. |
| Before filling | Three sides are fully knotted and no large gaps remain. |
| After filling | The pillow compresses comfortably and the filling is evenly distributed. |
| Final inspection | Every fringe pair is tied twice and no filling is escaping. |
Measuring and Cutting Fabric: Essential Techniques for Success
Accurate cutting gives the fringe a consistent appearance and prevents the two layers from pulling against each other. Smooth both fleece panels flat without stretching them before marking the measurements.
- Measure each panel at 12 inches by 26 inches.
- Cut a 3-inch square from every corner.
- Mark a line 3 inches inward from each edge as a cutting boundary.
- Mark fringe strips at approximately 1-inch intervals.
- Cut through both layers at the same time so each upper strip has a matching lower strip.
Fleece can stretch while you cut it. Keep the fabric relaxed and move the scissors rather than pulling the material toward you. Small differences are usually harmless, but badly mismatched strips can make the edge pucker.
How to Secure the Pillow Without Sewing
Double knots provide the main closure. Hold one upper strip and the matching lower strip, tie them once, and then tie them again in the opposite direction. The knots should be firm enough to contain the filling but not so tight that they stretch the fleece into thin cords.
You do not need fabric glue along the structural edges. If you use a washable fabric adhesive for a decorative patch, test it on a scrap and follow the manufacturer’s curing and washing instructions. For example, Aleene’s Fabric Fusion instructs users to test the product, allow it to cure, and wait before washing.
Note: A fabric-specific hook-and-loop strip may be used to make a removable storage wrap around the pillow. Never wrap it around a seat belt, cover a buckle, or change how a restraint fits across your body. The FAA advises that aircraft seat belts be worn low and tight and fastened whenever required.
Best Practices for Filling Your No-Sew Travel Pillow
Add filling in small sections instead of pushing in one large clump. Pull the fiberfill apart with your fingers first. This helps it spread through the narrow center of the pillow.
- Fill the far corners first. These areas become harder to reach after the center is full.
- Work from one end to the other. Add a small amount, shape it, and then add more.
- Check firmness often. The pillow should compress when you press it with your palm.
- Avoid overfilling. Excess pressure can pull on the fringe knots and make the pillow feel hard.
- Keep fiberfill out of the closure. Stray fibers trapped in a knot can prevent it from tightening correctly.
For a softer pillow, use less fiberfill and spread it evenly. For firmer lumbar or arm support, add more in thin layers. The best firmness depends on how you plan to use the pillow and your preferred sleeping position.
Customizing Your Pillow for Comfort and Style
Customization should not weaken the knots, make the pillow difficult to wash, or add hard pieces where your face or neck will rest.
Fabric Choices for Style
Medium-weight fleece is the easiest fabric for this project because the cut edges generally stay intact without hemming. You can combine a printed front with a solid back or use two contrasting colors.
- Standard fleece: Easy to cut and tie for a first project.
- Plush fleece: Softer but sometimes thicker and harder to knot evenly.
- Anti-pill fleece: A practical option for a pillow that will be handled often.
- Woven cotton: Not ideal for this exact method because its cut edges can fray.
Choose fabrics with compatible care instructions. Polartec recommends washing its fleece in cold water with mild detergent, avoiding fabric softener, and drying on low heat or hanging it to dry. Always follow the label attached to your specific fabric.
Personalizing With Colors and Patterns
Use decorations that remain flexible and comfortable:
- Write a name or initials with washable fabric markers.
- Add a simple design with flexible fabric paint.
- Bond a flat fabric patch with a washable fabric adhesive.
- Use a solid panel on one side and a printed panel on the other.
- Alternate fringe colors around the edge.
Avoid hard decorations near the center of the pillow. Buttons, beads, metal studs, thick patches, and plastic gems can press against your skin or come loose during travel.
Troubleshooting Common Issues When Making Your Travel Pillow
| Problem | Likely Cause | Fix |
|---|---|---|
| The pillow looks lumpy | Large clumps of filling were inserted at once. | Open several knots, remove the clumps, pull the fiberfill apart, and refill in thin sections. |
| The edge puckers | Some knots are much tighter than others. | Loosen the tight knots and retie the fringe using consistent tension. |
| Fringe strips do not match | The layers shifted while cutting. | Pair each strip with the closest strip on the opposite layer. Trim only severe length differences. |
| Filling escapes | A knot is loose or a fringe pair was missed. | Push the filling back inside and secure every pair with a double knot. |
| The pillow feels too hard | It contains too much filling. | Open the final few knots and remove small amounts until the pillow compresses comfortably. |
| The pillow feels flat | The filling is insufficient or has shifted. | Redistribute the existing filling and add more in small, separated pieces. |
Decorative Ideas to Personalize Your No-Sew Travel Pillow
Decorations work best when they stay flat, flexible, and washable. Complete painted or bonded decorations before filling the pillow so the fabric can lie flat while you work.
| Idea | How to Use It |
|---|---|
| Fabric paint | Add a simple name, symbol, or travel-themed design and let it cure fully. |
| Fabric markers | Draw directly on a light-colored panel before assembling the pillow. |
| Flat fabric patch | Bond it with an adhesive approved for the fleece and follow the cure time. |
| Contrasting fringe | Use different colors for the upper and lower fleece panels. |
| Small storage pocket | Bond a flat fleece rectangle on three sides before assembly. Store only lightweight, soft items. |
Frequently Asked Questions
Can I use different yarn types for this project?
Yarn is optional and should not hold the pillow together. The fleece fringe provides the structural closure. For a small decorative tassel, use a washable yarn that feels soft against the skin. Avoid loose loops or detachable yarn decorations on a pillow for a young child.
How long does it take to complete the pillow?
Most beginners can measure, cut, knot, fill, and inspect the pillow in about one to two hours. Prewashing the fleece or waiting for fabric paint or adhesive to cure will add more time.
What is the best filling material for comfort?
Polyester fiberfill is the easiest option for this tied-fleece design because it is lightweight, adjustable, and easy to distribute. Add it gradually until the pillow supports you without feeling hard. Solid memory foam requires a correctly sized insert and is less adjustable through the small opening.
Can children help make this travel pillow?
Children can help choose fabric, match fringe strips, add filling, and tie knots. An adult should perform or directly supervise all cutting and adhesive use. The U.S. Consumer Product Safety Commission warns that detachable small parts can present choking hazards for children under three, so avoid beads, buttons, and similar decorations.
Is this pillow machine washable after making it?
It may be machine washable if the fleece, filling, paint, adhesive, and decorations are all washable. Spot-cleaning is the safest first choice. Before machine washing, inspect every knot and place the pillow in a large mesh laundry bag or tied pillowcase. Use the gentlest cycle allowed by the material labels, then air dry or tumble dry on low if permitted. Reshape the filling after drying.
Can I make the pillow U-shaped?
Yes, but the rectangular measurements in this guide will not produce a U-shape. You need a symmetrical U-shaped paper template and two larger fleece pieces. Curves reduce the space available for fringe, so cut and test a small section before completing the entire edge.
What should I do if a knot loosens?
Push any exposed filling back into the pillow, match the upper and lower fringe strips, and retie them with a firm double knot. Inspect the surrounding knots because uneven tension can cause nearby strips to loosen.
Conclusion
A successful no-sew travel pillow does not require glue-filled seams, crochet stitches, or complicated tools. Keep the method simple: align two fleece panels, cut matching fringe, knot three sides, add the filling gradually, and close the final side. Check every knot before traveling and keep the pillow clear of all seat-belt hardware. With even cuts and balanced filling, you will have a soft, personalized pillow that is easy to carry and adjust.
Sources
- JOANN: No-Sew Fleece Pillows — supports the use of layered fleece and tied sections for no-sew pillow construction.
- Polartec: Fleece Series and Care Guidance — supports cold-water washing, mild detergent, avoiding fabric softener, and low-heat or air drying for its fleece.
- Fairfield World: Poly-Fil Premium Fiber Fill — supports polyester fiberfill use and its basic care guidance.
- Aleene’s Fabric Fusion Instructions — supports testing, curing, and washing precautions for optional bonded decorations.
- Federal Aviation Administration: Passenger Seat-Belt Guidance — supports keeping the belt properly fastened and following crew instructions.
- U.S. Consumer Product Safety Commission: Small Parts Guidance — supports the warning about detachable small decorations for children under three.
