
Last Updated on July 27, 2026 by Daniel Globe
Hiking sticks, usually called trekking poles when they are used as a pair, can give you extra stability on rocky trails, steep climbs, descents, mud, snow, and stream crossings. People have used walking staffs for thousands of years, and modern poles improve on that simple idea with adjustable aluminum or carbon-composite shafts, comfortable grips, wrist straps, baskets, and replaceable tips.
Quick Answer
To use hiking sticks correctly, start with the grips at a height that gives your elbows about a 90-degree bend. Walk naturally, planting the opposite pole with each foot. Shorten adjustable poles for long climbs, lengthen them for long descents, keep your grip relaxed, and check the locks before every hike.
Key Takeaways
- A pair of trekking poles usually gives more stability than a single hiking staff, especially on uneven terrain or while carrying a backpack.
- For general hiking, adjust pole length so your elbow bends about 90 degrees with the tip beside your foot.
- Use a natural opposite-arm rhythm: left foot with right pole, then right foot with left pole.
- For long climbs, shorten adjustable poles about 5–10 cm; for long descents, lengthen them about 5–10 cm.
- Poles can improve stability and reduce some lower-limb loading, but benefits depend on terrain, technique, load, and the individual hiker.
- Inspect the locks, shafts, straps, baskets, and tips regularly so the poles do not slip or collapse when you need them.
At a Glance
| Time Required | About 5–10 minutes for the first fit; trail adjustments take only a few seconds |
| Difficulty | Beginner |
| Tools Needed | One hiking staff or a pair of trekking poles; optional rubber tips and terrain-specific baskets |
| Cost | No extra cost if you already own suitable poles; replacement tips and baskets are optional accessories |
Disclosure: As an Amazon Associate I earn from qualifying purchases. Some links on this page are affiliate links, at no extra cost to you.
Choosing the Right Hiking Sticks for You
The best hiking sticks are the ones that fit your body, terrain, pack weight, and hiking style. Weight matters, but so do the grips, locking system, usable length, and type of tip.
One Hiking Staff or Two Trekking Poles?
A hiking staff is a single pole. It can add one extra point of contact and leaves your other hand free. It can work well on relatively easy terrain or for hikers who simply want occasional support.
Trekking poles are normally used as a pair. Two poles give you more contact points and can be particularly useful on rough trails, steep descents, slippery terrain, or while carrying a backpack. A small balance study also found that two sticks provided more benefit than one while participants carried a load.
Aluminum vs. Carbon-Composite Poles
Aluminum is a common choice because it is durable, comparatively affordable, and more likely to bend than fail abruptly when overloaded. It is usually heavier than carbon-composite construction.
Carbon-composite poles are popular with hikers who place a high value on low weight. They can also transmit less vibration through the shaft, but they tend to cost more and can crack or break when subjected to severe sideways loading.
Neither material is automatically best for everyone. Aluminum is a practical choice for rough use and first-time buyers, while carbon-composite poles appeal to hikers who want to reduce carried weight.
Choose a Secure Locking System
Adjustable poles use locking mechanisms to stop the shaft sections from sliding while you hike. Common designs include external lever locks, twist locks, push-button systems, and combinations of these designs.
Whatever system you choose, learn how to adjust its tension and inspect it before each outing. A pole that shortens unexpectedly under load can cause a loss of balance.
Pro Tip: Before leaving the trailhead, extend both poles, lock every section, and press down firmly on each grip. If a section slips, correct the lock tension before hiking.
Pick a Comfortable Grip
Cork, foam, and rubber are the most common grip materials. Cork handles moisture well and can gradually conform to your hand. Foam feels soft and provides a comfortable grip but can absorb moisture. Rubber can insulate well in cold conditions but may feel less comfortable against sweaty bare hands.
Grip shape matters just as much as material. Hold the pole before buying when possible, and make sure the handle does not create pressure points in your palm.
Set the Correct Hiking Stick Height
For general hiking, a good starting position is a roughly 90-degree bend at your elbow while you hold the grip and the pole tip rests on the ground beside your foot. This is also the basic fitting method recommended in REI’s current trekking-pole guidance.
Fixed-length poles should be chosen using the manufacturer’s sizing chart. With adjustable poles, use the 90-degree position as your baseline and fine-tune it for comfort.
Note: A pole that is too long can push your shoulders upward. A pole that is too short can make you reach down or lean forward more than necessary. Comfort and a natural posture are more important than matching a number exactly.
Match Baskets and Tips to the Terrain
Small baskets near the bottom of a trekking pole help keep it from sinking too deeply into soft ground. Wider snow baskets are useful in soft snow, while smaller trekking baskets work well on ordinary trails and muddy ground.
Carbide or steel tips can grip dirt, ice, and rough rock. Rubber tip protectors reduce noise, protect hard surfaces, and can be useful on pavement or other firm terrain. Check the manufacturer’s instructions because tip and basket compatibility varies by model.
Proper Technique for Using Hiking Sticks
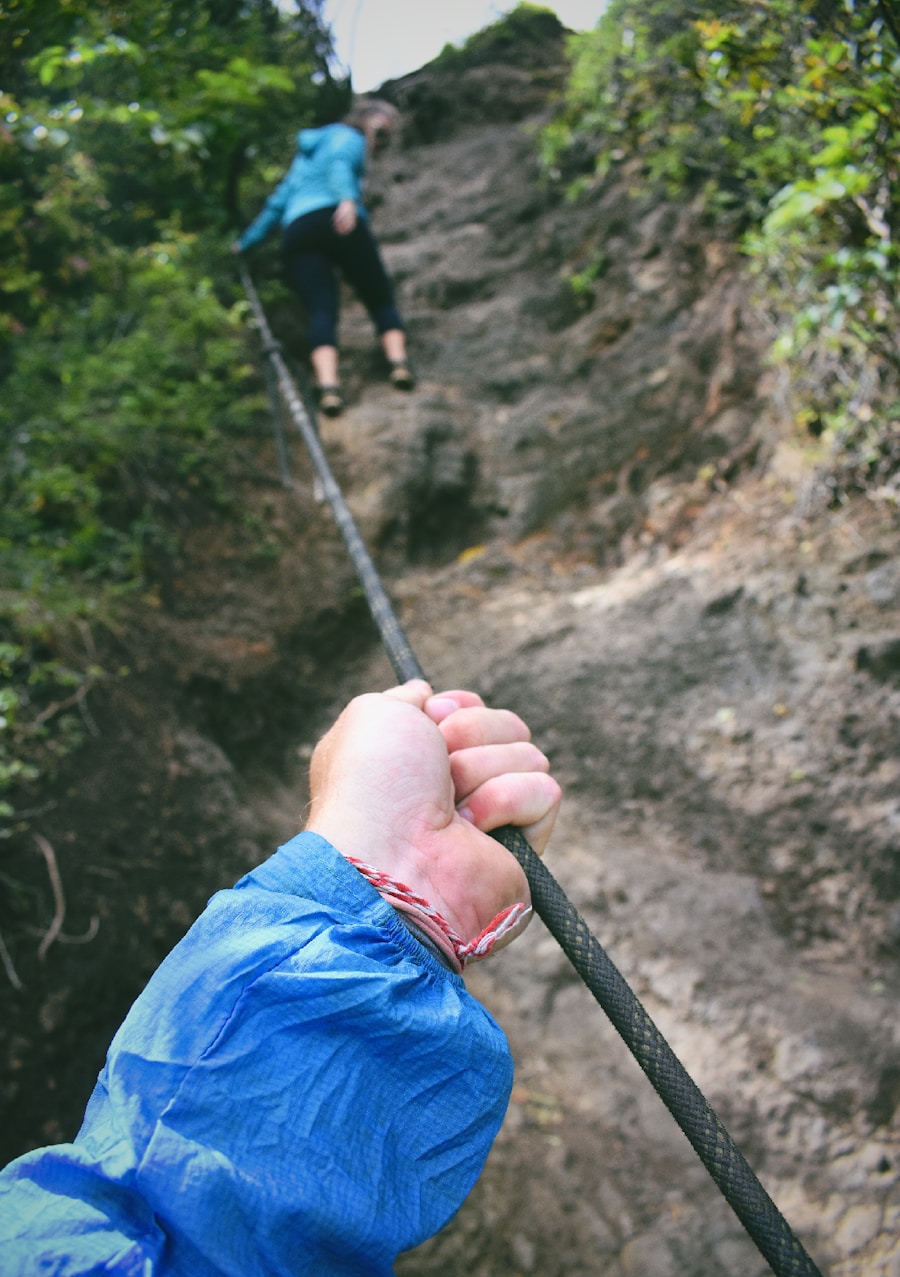
Good technique should feel close to normal walking. You should not have to march stiffly, squeeze the handles, or drive the tips hard into the ground.
Use the Wrist Straps Correctly
For a conventional trekking-pole strap, bring your hand up through the bottom of the strap and then lower your hand onto the grip. Adjust the strap so it supports the heel of your hand without squeezing your wrist.
This setup lets the strap carry part of the load and allows you to keep your fingers more relaxed. Avoid gripping the handle as hard as possible throughout the hike, which can tire your hands and forearms.
Find a Natural Walking Rhythm
On ordinary terrain, plant the opposite pole and foot together: right pole with left foot, then left pole with right foot. Let your arms swing naturally.
Plant the pole close enough to your body that you do not have to reach far forward. On relatively level terrain, the shaft can angle slightly behind you as you push past it.
If your rhythm gets confused, lift both poles for a few steps and continue walking normally. Then begin planting them again once the opposite-arm pattern feels natural.
Double-Plant When You Need Extra Stability
You do not have to use an alternating rhythm every second of the hike. On a steep step, large rock, or awkward descent, planting both poles before moving can give you a wider support base. After the difficult step, return to your normal rhythm.
Benefits of Using Hiking Sticks
| Potential Benefit | What It Means on the Trail |
|---|---|
| Improved Stability | Extra contact points can help you steady yourself on uneven or loose terrain. |
| Reduced Lower-Limb Loading in Some Conditions | Biomechanics research has found lower knee-related forces during downhill walking with poles. |
| Effort Shared With the Upper Body | Your arms and shoulders contribute to movement instead of leaving all of the work to your legs. |
| Enhanced Balance | Two poles can provide additional stability, including when carrying a backpack. |
| More Upright Position on Descents | Correctly lengthened poles can help you avoid reaching excessively downhill. |
| Upper-Body Involvement | Pole use increases arm and shoulder involvement and can change the overall effort of hiking. |
One of the strongest reasons to use trekking poles is stability. Additional contact with the ground can help when footing is rocky, loose, wet, or uneven. That does not make falls impossible, but it gives you more ways to steady yourself.
Trekking poles can also change the forces placed on the lower body. In a small 1999 laboratory study of eight men walking down a 25-degree ramp, researchers found approximately 12–25% reductions in several measured ground-reaction, knee-joint, compressive, and shear forces while participants used hiking poles. That is useful evidence for downhill hiking, but it should not be interpreted as a guaranteed 25% reduction for every hiker or trail. The study is available through PubMed.
Trekking poles can redistribute some of the work of hiking, but they do not make the work disappear. Their biggest advantages are usually stability, support, and reduced lower-limb loading in certain conditions.
Research also shows why “increased endurance” is too simple a description. A 2008 field study found that hikers using poles had higher oxygen consumption and heart rate at a matched walking speed, even though their perceived effort was not higher. A separate mountain-walking study found less muscle soreness and lower markers of muscle damage after a demanding ascent and descent among participants using poles.
Warning: Trekking poles are hiking equipment, not a substitute for a medically prescribed cane, walker, or other mobility aid. If pain, balance problems, or a medical condition are the main reason you need support, ask an appropriate healthcare professional or physical therapist which aid is suitable for you.
Adjusting and Maintaining Your Hiking Sticks
Correct adjustment is only useful if the poles stay securely locked. Before each hike, inspect the shafts and make sure every locking mechanism closes firmly.
For normal walking on relatively level ground, begin with both poles at the same length. Do not extend an adjustable section beyond its marked safe limit. If a lever lock repeatedly slips even after correct adjustment, clean it and follow the manufacturer’s maintenance instructions rather than relying on a failing lock.
Clean and Dry the Poles
After muddy or wet hikes, wipe dirt from the shafts, locks, grips, and baskets. If your model’s instructions allow the shaft sections to be separated, remove trapped dirt and moisture before long-term storage.
Let wet wrist straps dry fully before storing the poles. This helps prevent odor and mildew.
Inspect Tips, Baskets, and Shafts
Replace heavily worn tips or damaged baskets. Look for dents, cracks, bends, loose hardware, or shaft sections that no longer slide and lock normally.
A damaged pole should not be treated as reliable weight-bearing support simply because it can still be extended.
Using Hiking Sticks for Uphill and Downhill Hiking
The best pole length changes when the trail stays steep for a long time. Small adjustments help keep your shoulders and torso in a more natural position.
Going Uphill
For a sustained climb, shorten adjustable poles by about 5–10 cm from your normal setting. A steeper climb may call for a little more shortening, but your shoulders should still feel relaxed rather than pushed upward.
Plant the poles where they can support your next steps and push down through the straps and grips without trying to haul your entire body uphill with your arms. On very steep steps, you can double-plant both poles and then step upward.
Going Downhill
For a long descent, lengthen the poles about 5–10 cm from your normal setting. This makes it easier to plant the tips downhill without bending excessively at the waist.
Place each pole securely before loading it. Keep your elbows slightly bent so your arms can absorb movement instead of locking straight. Take controlled steps rather than leaning heavily onto the poles and assuming they cannot slip.
Crossing a Side Slope
On a long traverse across a hillside, the ground is higher on one side of your body than the other. You can shorten the uphill pole and lengthen the downhill pole until your shoulders feel level and relaxed.
Pro Tip: If your poles have several telescoping sections, set them up so your normal trail length leaves room for quick adjustment. That makes it easier to shorten or lengthen them without rebuilding the entire pole every time the slope changes.
Using Hiking Sticks on Rocks, Mud, Snow, and Stream Crossings
Rocks and Trail Obstacles
Before stepping onto a large rock or over a log, place the poles where the tips cannot roll or slide. For a high step, double-planting can give you extra stability while you move one foot at a time.
If a section turns into scrambling and you need your hands to climb safely, stow the poles rather than trying to hold them while using the rock for hand support.
Mud and Soft Snow
Use appropriate baskets to keep pole tips from sinking too deeply. A wider basket spreads the load over a larger area, which is especially useful in soft snow.
Trekking poles improve support but are not substitutes for suitable footwear or traction equipment when the trail is icy.
Streams and Rivers
A hiking staff or trekking pole can provide another contact point during a stream crossing, but a pole cannot tell you by itself that a crossing is safe.
Warning: Never assume a stream is safe because you can touch the bottom with a pole. Fast current, cold water, submerged rocks, unstable footing, and downstream hazards can make even apparently shallow water dangerous. The National Park Service advises hikers to turn back, wait, or find another route when water is too high, cold, swift, or otherwise beyond their ability.
If conditions have already been judged reasonable for a crossing, plant the pole securely before moving the next foot. Move one contact point at a time and keep checking that each pole plant has solid footing. Review the National Park Service stream-crossing guidance before routes where unbridged crossings are expected.
Safety Tips for Using Hiking Sticks
Hiking sticks are support tools, not a guarantee against falls. Keep watching the trail rather than focusing only on where you plant the pole tips.
- Give other hikers room: On crowded or narrow trails, keep pole tips close to your own path so you do not trip or jab someone behind you.
- Check every lock: Test adjustable poles before putting substantial weight on them.
- Do not overreach: A pole planted too far ahead can pull you off balance rather than help you.
- Use suitable footwear: Poles add stability, but your feet still provide your main contact with the ground.
- Stow poles when your hands are more useful: Technical scrambling, ladders, handrails, and similar obstacles may be safer with both hands free.
- Do not rely on poles as wildlife-defense equipment: Follow the official guidance for the animals and location where you are hiking instead.
The National Park Service also recommends planning your route, knowing your limits, checking conditions, carrying suitable gear, and making sure equipment is in working condition before you enter the backcountry. Trekking poles are only one part of a safe hiking system.
Common Hiking Stick Mistakes and Troubleshooting
The Pole Keeps Getting Shorter
A pole that slowly collapses usually has a locking problem. Stop and correct it rather than continuing to lean on the pole. Clean dirt from the lock, adjust its tension according to the manufacturer’s instructions, and replace damaged parts when necessary.
Your Shoulders or Neck Feel Sore
Recheck pole height. If your shoulders lift every time you plant the poles, shorten them. Also make sure you are not reaching too far ahead or squeezing the grips constantly.
Your Hands and Forearms Tire Quickly
Relax your fingers and check the strap position. With a properly fitted conventional strap, some pressure transfers through the heel of your hand instead of requiring a tight grip for every step.
The Tips Sink Into Mud or Snow
Install baskets suited to the conditions. Small trekking baskets help in mud and loose surfaces, while wider snow baskets provide more flotation in soft snow.
The Tips Slide or Make Too Much Noise on Hard Surfaces
Compatible rubber walking tips or tip protectors may work better on pavement and other firm surfaces. Inspect them regularly because worn rubber can lose traction.
Your Walking Rhythm Feels Awkward
Stop trying to place every pole perfectly. Lift the poles for several steps and walk naturally. Then bring them back into an opposite-arm rhythm without changing your normal stride.
Alternative Uses for Hiking Sticks
Trekking poles can be useful beyond normal walking, but only when the equipment is suited to the job.
Some ultralight tents and tarps are specifically designed to use trekking poles instead of dedicated tent poles. Before relying on this setup in the backcountry, confirm the required pole length and attachment method at home. An adjustable pole can also help tension a compatible shelter on uneven ground.
Some hiking staffs include a threaded camera mount and can double as a monopod. Do not assume an ordinary trekking-pole handle has this feature unless the manufacturer says it does.
During an otherwise safe stream crossing, a pole can probe the next foot placement and provide an extra contact point. It should not be used to declare deep or fast-moving water safe simply because the pole reaches the bottom.
Although a sturdy hiking stick may feel reassuring in a remote area, standard trekking poles are not purpose-built wildlife or self-defense equipment. For wildlife encounters, use the current guidance for the species and park or land-management area you are visiting.
Used correctly, hiking sticks can make difficult terrain feel more controlled, spread some work to the upper body, and provide valuable support on climbs and descents. The key is to fit them correctly, adjust them as the terrain changes, and remember that they supplement good footing and judgment rather than replacing them.
For other hiking gear, compact binoculars can make wildlife viewing easier from an appropriate distance. A travel fishing rod can add another activity to trips where fishing is permitted, while odor-resistant merino wool travel socks can help keep your feet comfortable on long days outdoors.
Frequently Asked Questions
What are hiking sticks?
Hiking sticks are poles used to add stability and support while walking. A single pole is often called a hiking staff, while trekking poles are usually sold and used as a pair. Modern poles may be adjustable or fixed-length and commonly use aluminum or carbon-composite shafts.
How do you use hiking sticks correctly?
Set the poles so your elbows bend about 90 degrees on normal terrain. Walk naturally and plant the opposite pole with each foot. Keep your grip relaxed, use the wrist straps correctly, and adjust the pole length for sustained climbs, descents, and side slopes.
What are the benefits of using hiking sticks?
Trekking poles can add stability, involve the upper body, and reduce some lower-limb forces in certain conditions. Research has found reduced knee-related forces during downhill walking and lower markers of muscle damage after a demanding mountain walk, but the size of the benefit varies by hiker, terrain, and technique.
How do you choose the right hiking sticks?
Compare usable length, shaft material, weight, locking system, grip comfort, packed size, basket compatibility, and replacement tips. Aluminum is generally economical and durable, while carbon-composite poles are lighter but can cost more and may fail more abruptly when severely damaged.
Are there any tips for using hiking sticks?
Keep a natural arm swing, avoid gripping too tightly, test the locks before hiking, and let the terrain guide your adjustments. Shorten the poles for long climbs, lengthen them for long descents, and change the two sides independently on a long traverse.
Should I use one hiking stick or two trekking poles?
Two trekking poles generally provide more stability and more evenly distributed support, especially on rough terrain or with a backpack. A single hiking staff can be convenient on easier terrain when you want to keep one hand free.
How tall should trekking poles be?
For general hiking, start at a length that gives your elbow about a 90-degree bend with the pole tip beside your foot. For long climbs, shorten adjustable poles about 5–10 cm. For long descents, lengthen them about 5–10 cm. Follow the manufacturer’s size chart for fixed-length poles.
Should I use the wrist straps on trekking poles?
For normal hiking with conventional straps, insert your hand upward through the bottom of the strap and then lower it onto the grip. Adjust the strap so it supports the heel of your hand comfortably. Follow the pole manufacturer’s instructions because strap systems can differ.
Sources
- REI Co-op — How to Use Trekking Poles and Hiking Staffs — pole sizing, uphill/downhill adjustment, straps, baskets, tips, walking rhythm, and obstacle technique.
- REI Co-op — How to Choose Trekking Poles and Hiking Staffs — one vs. two poles, materials, grips, sizing, features, and locking systems.
- PubMed — Knee Joint Forces During Downhill Walking With Hiking Poles — biomechanics evidence for reduced knee-related forces during a controlled downhill test.
- PubMed — Trekking Poles Reduce Exercise-Induced Muscle Injury During Mountain Walking — evidence on perceived effort, muscle soreness, and markers of muscle damage.
- National Park Service — Stream Crossing Safety — conservative guidance for evaluating and crossing streams and rivers.
- National Park Service — Staying Safe on Trails — general hiking preparation and safety guidance.

