
Last Updated on July 26, 2026 by Daniel Globe
Hiking can look like a leisurely walk, but long distances, steep grades, uneven ground, heat, altitude, and a loaded backpack can make it physically demanding. A focused hiking training plan helps your body handle those demands and gives you time to test your pace, footwear, pack, food, and hydration before the real trip.
Training can improve endurance, leg and core strength, balance, and confidence. It may also help you tolerate trail demands more comfortably, although no program can guarantee that you will avoid injury. The best plan matches the route you intend to hike and progresses gradually from your current fitness level.
Quick Answer
Hiking training should combine aerobic exercise, two weekly strength sessions, hills or stairs, balance practice, and progressively longer hikes with the footwear and pack you will use. Begin about four to eight weeks before a moderate day hike, increase difficulty gradually, and ease back during the final one or two days.
Key Takeaways
- Train for the actual route: distance, elevation gain, terrain, weather, altitude, and pack weight all matter.
- Build a base with regular walking or other aerobic exercise, then add hills, stairs, and longer trail sessions.
- Strengthen the legs, hips, calves, core, back, and shoulders at least twice per week when your schedule and recovery allow.
- Practice in your intended footwear and gradually carry the gear you expect to use.
- Prioritize food, hydration, sleep, rest days, and early attention to pain or excessive fatigue.
- Fitness improves hiking performance, but gradual acclimatization—not fitness alone—reduces altitude-illness risk.
At a Glance
| Time Required | About 4–8 weeks for a moderate day hike; longer for strenuous, high-altitude, or multi-day trips |
| Difficulty | Beginner to intermediate; scale each session to your current ability |
| Tools Needed | Supportive footwear, backpack, stairs or hills, and optional resistance bands or weights |
| Cost | $0 with existing gear and public routes; optional equipment or gym access can add cost |
Warning: Stop training and seek medical care for chest pain, fainting, severe shortness of breath, confusion, sudden weakness, or a suspected serious injury. People who have been inactive for a long time, are pregnant, or have heart, lung, joint, balance, or other chronic health concerns should discuss a demanding hiking plan with a qualified healthcare professional.
Disclosure: As an Amazon Associate I earn from qualifying purchases. Some links on this page are affiliate links, at no extra cost to you.
Start With the Trail and Your Current Fitness
A useful hiking plan starts with two questions: what does the trail demand, and what can you comfortably do now? Training for a flat coastal path is different from preparing for a rocky mountain route with thousands of feet of climbing. Review the route distance, elevation gain and loss, surface, expected weather, altitude, water availability, remoteness, and whether you will carry a day pack or overnight load.
Understanding Trail Terrain
Trail terrain can range from flat, well-maintained paths to steep slopes covered with loose rocks, roots, mud, snow, or sand. These differences affect difficulty, pace, balance demands, footwear, and training. A hiker preparing for the Rocky Mountains, for example, should spend more time on hills, stairs, uneven surfaces, and sustained climbs than someone preparing for a level urban or coastal route.
If the route has major elevation changes, include hill workouts and controlled step-down exercises. If it is rocky or root-covered, add balance work and practice on safe uneven ground. If the hike is long, train time on your feet as well as speed. If it is remote, your plan should also include navigation, emergency equipment, and conservative pacing.
Do a Simple Baseline Check
Before the first week, complete an easy walk on terrain similar to your normal environment. Record the time, distance, how hard it felt, any pain, and how you felt the next day. Also check whether you can perform a controlled chair squat, step onto a low stair with each leg, balance on one foot near a support, and carry a light backpack without discomfort.
Your baseline is not a test to pass or fail. It is a starting point. If a 20-minute walk leaves you unusually sore for several days, begin with shorter sessions. If you already hike regularly, use longer outings and more route-specific elevation while keeping enough recovery between hard days.
A Practical 6-Week Hiking Training Plan
The schedule below is a general example for a healthy adult preparing for a moderate day hike. It is not a medical prescription. Move sessions to fit your week, avoid placing two demanding leg days back to back, and repeat a week instead of progressing when soreness, fatigue, or pain has not settled.
| Week | Aerobic and Hill Work | Strength and Skills | Weekend Practice |
|---|---|---|---|
| 1 | Three easy walks of 20–30 minutes | Two short strength sessions; balance practice | Easy 45–60 minute walk |
| 2 | Two 30-minute walks plus one brisk or cycling/swimming session | Two strength sessions; add controlled step-downs | 60–75 minutes on varied ground |
| 3 | One hill or stair session plus two easy aerobic sessions | Two strength sessions; practice foot placement and balance | 75–90 minutes with a light pack |
| 4 | One longer hill session, one easy walk, and one cross-training session | Two strength sessions; use your normal hiking pack if pain-free | 90–120 minutes in intended footwear |
| 5 | One hill session and two easy-to-moderate aerobic sessions | One or two strength sessions; avoid chasing fatigue | Longest practice hike, still shorter or easier than the goal route |
| 6 | Two or three short, easy sessions; no last-minute hard workout | One light strength or mobility session early in the week | Rest or take an easy walk during the final one or two days |
The CDC’s general adult activity guidance recommends at least 150 minutes of moderate aerobic activity per week and muscle-strengthening work on at least two days. A hiking plan may build beyond that baseline depending on the route, but more is not automatically better if recovery is poor.
Pro Tip: Keep a simple training log with duration, terrain, pack load, effort, pain, and next-day recovery. Increase only one main challenge at a time, such as time, elevation, pace, or pack load.
Building Endurance and Strength
Endurance allows hikers to sustain activity for longer periods, while strength helps with climbs, descents, stepping over obstacles, carrying a pack, and maintaining control when tired. A well-rounded program combines both rather than relying on cardio or weight training alone.
Cardiovascular Training
Walking and hiking are the most specific aerobic choices, but running, cycling, rowing, and swimming can also build fitness. Regular aerobic exercise can improve stamina and reduce fatigue over time. Choose activities you can perform consistently without aggravating joints or old injuries.
Most aerobic sessions should feel steady rather than all-out. Add duration before adding a large amount of speed. As the trip approaches, include at least one weekly session that resembles the target hike in terrain, elevation, footwear, and time on your feet.
Strength Exercises for Hiking
Focus on the legs, hips, core, back, and shoulders. Start with one or two sets and progress to two or three sets when your form remains controlled. A practical routine includes:
- Chair squats or goblet squats: 8–12 controlled repetitions.
- Step-ups: 8–12 repetitions per leg on a stable step.
- Reverse lunges or supported split squats: 6–10 repetitions per leg.
- Calf raises: 12–20 repetitions.
- Hip hinges or light deadlifts: 8–12 repetitions with a neutral spine.
- Rows or band rows: 8–12 repetitions for the upper back.
- Planks, side planks, or dead bugs: short, controlled sets that do not strain the lower back.
Squats, lunges, step-ups, and deadlift patterns target major muscle groups used in hiking. Resistance can come from body weight, dumbbells, bands, or a carefully loaded backpack. Stop a set when technique breaks down rather than forcing extra repetitions.
Train for Descents, Balance, and Uneven Ground
Downhill hiking requires control as the quadriceps slow the body on each step. Prepare with low step-downs, slow split squats, and gradual downhill practice. Keep the movement controlled and use a railing or stable support when needed.
Balance work can include standing on one foot near a wall, heel-to-toe walking, lateral steps, and stepping around small obstacles. Practice on uneven ground only where a stumble will not cause a serious fall. Fatigue makes balance harder, so include a little skill practice near the end of an easy session without turning it into a risky challenge.
Incorporating Hills and Inclines in Training
Hills and inclines prepare the heart, lungs, calves, glutes, and thighs for elevation gain. Begin with a gentle slope or a few flights of stairs. Walk uphill at a controlled pace, recover on flat ground or during the descent, and repeat only while your movement remains steady.
Hill repeats can improve route-specific fitness, but they should not be maximal sprints. Longer continuous climbs teach pacing, while shorter repeats make it easier to accumulate elevation near home. On the descent, shorten your stride, stay controlled, and avoid rushing.
If you live in a flat area, use stairs, a treadmill incline, stadium steps, repeated step-ups, parking-garage ramps where pedestrian access is permitted, or cycling with resistance. A stair machine can help cardiovascular fitness, but outdoor practice is still useful for balance, footing, weather, and gear testing.
Practice Hiking With Your Backpack
A loaded pack changes posture, balance, pace, and foot pressure. Start with the pack itself and normal day-hike essentials rather than adding random heavy objects. Adjust the shoulder straps, hip belt, sternum strap, and load placement so the pack feels stable and does not pull you backward.
Increase carried weight only after you can complete the current session without pain during the walk or unusual soreness afterward. Train with the approximate gear you expect to carry, but do not deliberately exceed a safe, comfortable load simply to make the hike feel easier. Multi-day backpackers need more pack-specific practice than day hikers.
Note: Pack training should build familiarity, not prove toughness. Sharp shoulder, back, hip, knee, or foot pain is a reason to stop and reassess fit, load, terrain, and progression.
Cross Training for Hiking
Cross-training improves overall fitness while changing the stress placed on the body. Swimming offers low-impact aerobic work. Cycling strengthens the legs and supports cardiovascular fitness. Rowing trains the legs, back, and trunk. Yoga or mobility work can improve body awareness and comfortable range of motion, although flexibility alone does not replace strength or trail practice.
Use cross-training to support hiking, not crowd out all hiking-specific work. During a busy week, a bike ride or swim can replace an easy aerobic session. During the final weeks, prioritize walking, hills, pack practice, and terrain similar to the planned route.
Choosing the Right Gear
| Gear Type | Advantages | Limitations |
|---|---|---|
| Trail-running or lightweight hiking shoes | Light, flexible, and comfortable for many maintained trails | May offer less protection, durability, or support for rough terrain and heavy loads |
| Backpack | Carries water, food, layers, navigation, and emergency gear hands-free | Poor fit, excess weight, or unstable packing can cause discomfort and affect balance |
| Moisture-wicking clothing | Moves moisture away from the skin and dries faster than many everyday fabrics | Still requires weather-appropriate layers and may retain odor depending on the fabric |
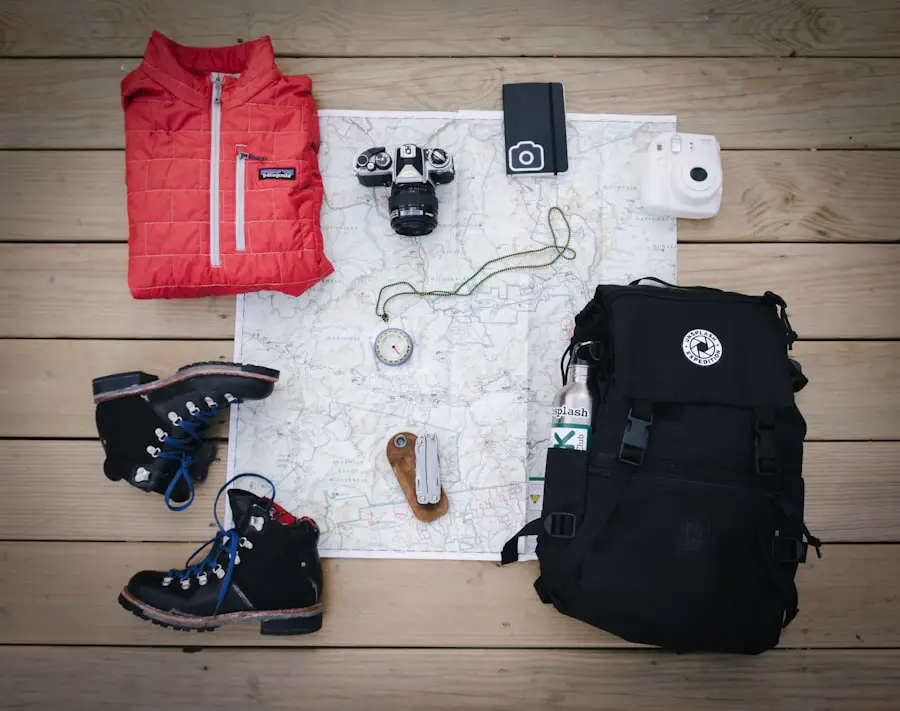
Select gear for the route, season, weather, and trip length. Essential equipment commonly includes a well-fitted backpack, weather-appropriate layers, navigation tools, sun protection, illumination, first aid, food, water, emergency shelter, and basic repair or fire-starting supplies where appropriate. The National Park Service Ten Essentials provides a useful system for planning.
A pack should hold the load close and distribute weight comfortably across the shoulders and hips. Clothing should support layering: a moisture-managing base layer, insulation when needed, and wind or rain protection suited to the forecast. Navigation tools are useful only when you know how to use them and have backups for battery-dependent devices.
Comfortable, functional traveler pants may suit some hikes when their fabric, fit, weather protection, and pocket design match the conditions. If a travel trailer serves as your base camp, check its power system before departure; travel trailer batteries are separate from the hiking equipment carried on the trail.
Proper Footwear and Socks
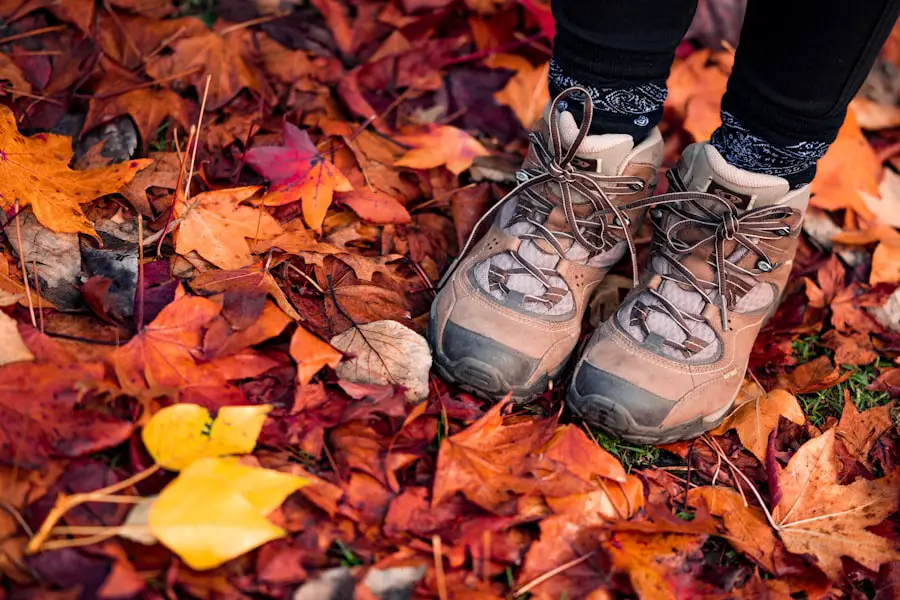
Footwear directly affects comfort, traction, and foot protection. Lightweight shoes can work well on maintained trails with light loads, while more protective hiking shoes or boots may suit rough ground, mud, snow, cold, or heavier packs. The best choice is the one that fits your feet and matches the route rather than the heaviest boot available.
Try footwear with the socks you intend to wear. The heel should feel secure, the midfoot should not be pinched, and the toes need room without sliding excessively. Test the shoes on inclines and declines before the trip. Break them in through several shorter sessions instead of wearing them for the first time on a long hike.
Moisture-wicking synthetic or merino-blend socks can help manage sweat. Sock thickness should work with the footwear’s existing fit; do not automatically buy a larger shoe merely because you chose thicker socks. Change wet socks when practical, address hot spots early, and carry blister supplies on longer outings. Well-fitting shoes and gradual use are central to friction-blister prevention.
Nutrition and Hydration for Hiking
A varied diet that supplies enough energy, carbohydrates, protein, fats, vitamins, and minerals supports training and recovery. Carbohydrate-rich foods such as oats, rice, potatoes, bread, fruit, and other grains can help fuel longer activity. Protein from foods such as eggs, dairy, fish, meat, beans, lentils, soy, nuts, or seeds supports tissue repair. Healthy fats add energy and can be useful in compact trail foods.
Before a training hike, choose familiar food that is easy for you to digest. During longer outings, eat small portions regularly rather than waiting until you feel depleted. Test trail snacks during training so you know what tastes good and sits well while moving. The joint position statement from the Academy of Nutrition and Dietetics, Dietitians of Canada, and the American College of Sports Medicine supports matching food and fluid strategies to the activity and the individual.
Start sessions reasonably hydrated and carry enough water for the route, temperature, effort, and available refill points. Drink regularly in hot weather and pay attention to thirst, urine color, fatigue, headache, dizziness, and unusually heavy sweating. Individual sweat rates vary, so a fixed amount is not appropriate for every hiker.
Water is usually enough for shorter, easier sessions. Electrolyte- and carbohydrate-containing drinks may help during long, hot, or high-sweat outings, especially when food intake is limited. More is not always safer: excessive fluid intake can also be harmful, so avoid forcing large volumes beyond your needs. The CDC advises athletes to pace activity, drink more water than usual in heat, and stop if they feel faint or weak.
Warning: Confusion, fainting, severe weakness, loss of coordination, vomiting that prevents drinking, or worsening heat symptoms require immediate action. Stop, move to a safer environment, cool the person when heat is involved, and seek emergency help.
Mental Preparation for Hiking
Hiking can become mentally demanding when fatigue, exposure, weather, navigation uncertainty, or fear of heights appears. Training helps by making effort and equipment more familiar. Practice pacing, calm breathing, route review, and decision-making during ordinary sessions rather than relying on motivation alone on the trip day.
Set realistic goals that match your current ability and the group’s slowest member. Break a long route into checkpoints, but keep a turnaround time and a backup plan. Reaching a summit is optional; returning safely is not. Small training achievements, such as completing a hill without rushing or solving a footwear problem early, build useful confidence.
Trail Safety and First Aid
Training does not replace trip planning. Before leaving, check the current weather, trail alerts, closures, wildfire or flood risks, daylight, water availability, and local wildlife guidance. Choose a route everyone in the group can complete, leave a trip plan with a trusted person, and set a turnaround time.
The National Park Service Hike Smart guidance recommends matching the trail to the group, checking conditions, carrying the Ten Essentials, staying together, and accounting for the return trip. A phone is helpful but should not be your only navigation or emergency plan because service and battery life can fail.
Carry a first aid kit appropriate to the route and know how to use it. Basic skills include cleaning and covering minor wounds, protecting a blister, supporting a mild sprain, recognizing heat illness, and knowing when an injury requires evacuation. A wilderness first aid course is especially useful for remote trips where professional help may be delayed.
In an emergency, first protect the group from immediate hazards such as traffic, falling rocks, lightning exposure, extreme heat, cold, or moving water. Call local emergency services when possible, provide the location and condition clearly, and avoid moving a seriously injured person unless the location itself is unsafe.
Preparing for High-Altitude Hiking
Cardiovascular training can make climbing feel more manageable, but it does not prevent acute mountain sickness. The CDC Yellow Book states that training and physical fitness do not affect altitude-illness risk. The main protections are a gradual ascent, time to acclimatize, conservative effort, and a plan to stop ascending or descend when symptoms worsen.
Unacclimatized travelers sleeping at about 8,000 feet (2,450 meters) or higher can be at risk. When possible, avoid a rapid jump to a high sleeping altitude, add acclimatization days, and keep exercise mild during the first 48 hours at altitude. People with heart, lung, sleep, blood, or other relevant medical conditions should seek advice from a clinician familiar with high-altitude travel.
Early acute mountain sickness often includes headache with one or more symptoms such as nausea, dizziness, unusual fatigue, or poor appetite after ascent. Do not continue to a higher sleeping altitude while symptoms are present. Worsening symptoms, confusion, trouble walking straight, shortness of breath at rest, or chest congestion are urgent warning signs; descent and medical help may be necessary.
Fitness helps you perform the work of hiking, but acclimatization determines how your body responds to reduced oxygen at altitude.
Recovery and Rest for Hiking Training
Recovery allows muscles and connective tissues to adapt between workouts. Schedule at least one easier or rest day after demanding hill, strength, or long-hike sessions. Gentle walking, easy cycling, and comfortable mobility work can support recovery when they leave you feeling better rather than more tired.
Sleep, food, hydration, and stress all affect recovery. A single hard session does not create fitness by itself; consistent training followed by enough recovery does. During the final week, reduce demanding work rather than trying to gain last-minute fitness. Arriving rested is more useful than arriving sore.
Know the Difference Between Soreness and a Warning Sign
Mild, even muscle soreness that appears after unfamiliar exercise and improves over a few days can be normal. Sharp pain, swelling, limping, joint instability, numbness, pain that worsens as you continue, or symptoms that repeatedly return are reasons to stop and seek qualified assessment. Persistent fatigue, poor sleep, irritability, declining performance, or an unusually high effort during easy sessions can also signal that the plan needs more recovery.
Frequently Asked Questions
What is hiking training?
Hiking training prepares your body and skills for the demands of a specific trail. It usually combines aerobic exercise, leg and core strength, hills or stairs, balance work, longer walks, pack practice, gear testing, nutrition, hydration, and recovery.
Why is hiking training important?
Training improves the fitness and familiarity needed to handle distance, elevation, uneven ground, and a backpack. It can make hiking more comfortable and reveal gear or pacing problems before the trip, but it cannot guarantee injury prevention or replace sound trail planning.
What are the key components of hiking training?
The main components are aerobic endurance, lower-body and core strength, uphill and downhill practice, balance, mobility, progressively longer hikes, pack carrying, footwear testing, nutrition, hydration, mental preparation, and rest.
How often should I train for hiking?
Many people do well with three to five activity days per week, including two strength sessions and one longer walk or hike, but the right frequency depends on your current fitness, route, schedule, and recovery. Beginners may start with fewer or shorter sessions.
What exercises are best for hiking training?
Useful exercises include walking, incline walking, stair climbing, step-ups, squats, reverse lunges, split squats, calf raises, hip hinges, rows, planks, side planks, step-downs, and single-leg balance. Choose pain-free versions and use controlled form.
How can I train for hills if I live somewhere flat?
Use stairs, treadmill incline, a stair machine, repeated step-ups, cycling resistance, or safe ramps. Combine these with outdoor walks so you still practice footing, weather, pace, footwear, and backpack comfort.
How should I prepare for hiking at higher altitudes?
Build general hiking fitness, but do not assume fitness prevents altitude illness. Plan a gradual ascent, allow acclimatization time, keep effort mild during the first 48 hours at altitude, recognize symptoms, avoid ascending while symptomatic, and descend if symptoms worsen.
What should I consider when training for long-distance hiking?
Gradually increase time on your feet, practice back-to-back walking days when the trip requires them, test food and hydration, carry the intended pack, train on similar terrain, protect sleep and recovery, and resolve footwear problems well before departure.
Should I train with trekking poles?
Yes, when you intend to use them on the hike. Practice adjusting their length, planting them without tripping, climbing, descending, crossing uneven ground, and stowing them safely. Poles are a skill and should not be introduced for the first time on the goal hike.
When should I stop or reduce training?
Reduce training when easy sessions feel unusually hard, soreness is not resolving, sleep or mood declines, or performance keeps worsening. Stop and seek care for chest pain, fainting, severe shortness of breath, confusion, major swelling, inability to bear weight, or other serious symptoms.
Sources
- Centers for Disease Control and Prevention: Adult Activity Guidelines — supports the aerobic and strength-training baseline.
- U.S. National Park Service: Hike Smart — supports route selection, trip planning, pacing, conditions, and group safety.
- U.S. National Park Service: Ten Essentials — supports the equipment and emergency-preparedness checklist.
- CDC Yellow Book: High-Altitude Travel and Altitude Illness — supports acclimatization, altitude risk, symptoms, and descent guidance.
- American College of Sports Medicine Joint Position Statement: Nutrition and Athletic Performance — supports food, fluid, and recovery nutrition principles.
- Centers for Disease Control and Prevention: Heat and Athletes — supports hot-weather pacing, hydration, and warning signs.

