Last Updated on July 30, 2026 by Caleb Warren
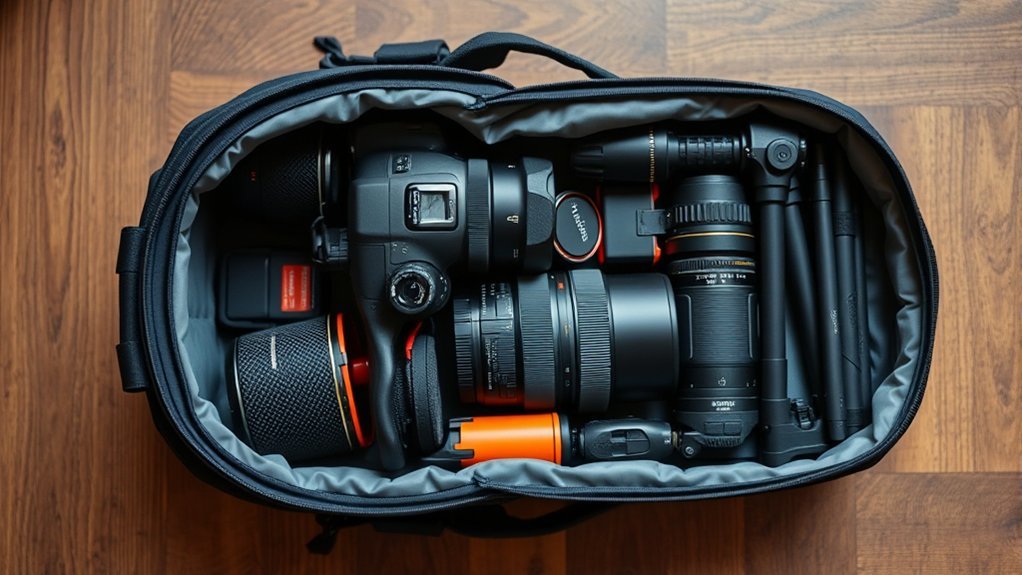
Packing camera gear in a backpack is easiest when every item has a clear purpose and a protected place. Start with the shots you expect to make, choose the smallest lens kit that covers them, separate fragile items with padded dividers, and keep batteries, memory cards, and weather protection easy to reach. A careful layout protects your equipment without turning the bag into an uncomfortable, overstuffed load.
Quick Answer
Pack camera gear by placing padded camera bodies and heavier lenses near the center of the bag and close to your back. Use snug dividers, keep batteries and cards in separate cases, put frequently used items near an access panel, secure the tripod, and carry rain protection. Bring only gear tied to your planned shots.
Key Takeaways
- Build your kit around the itinerary and expected subjects instead of packing every lens you own.
- Use padded dividers so bodies, lenses, and hard accessories cannot strike or rub against one another.
- Keep dense gear close to your back and adjust the shoulder, sternum, and waist straps for a stable fit.
- Carry spare lithium batteries in protected cases, especially when flying.
- Use a rain cover or waterproof liner, and manage condensation when moving between hot and cold environments.
At a Glance
| Time Required | 15–30 minutes |
| Difficulty | Easy |
| Tools Needed | Padded camera backpack or insert, dividers, lens and body caps, battery cases, memory-card case, microfiber cloth, blower, and rain cover or waterproof liner |
| Cost | Usually $0 with existing gear; about $10–$50 for optional organizers, battery cases, or rain protection |
Disclosure: As an Amazon Associate I earn from qualifying purchases. Some links on this page are affiliate links, at no extra cost to you.
Assessing Your Gear and Needs
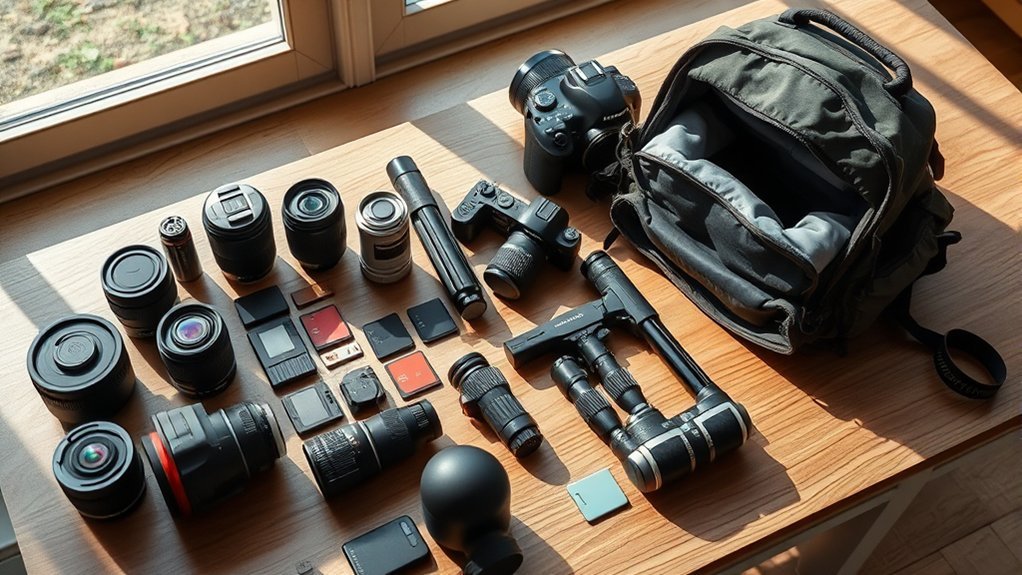
Before packing, lay all your camera gear on a clean, dry surface. This visual inventory makes it easier to spot duplicates and match each item to a real shooting need. Review your itinerary, expected subjects, weather, transportation, and how far you will carry the bag.
Choose gear by assignment. A city trip may need one standard zoom and a small prime, while wildlife photography may justify a telephoto lens and extra support. Video work may require a microphone, headphones, filters, or a compact stabilizer. A second camera body makes sense for paid work or a once-in-a-lifetime shoot, but it may be unnecessary for a casual day trip.
Camera Gear Packing Checklist
- Camera body or bodies with body caps
- Only the lenses required for planned subjects
- Charged batteries in protective cases
- Formatted memory cards in a dedicated card wallet
- Charger, cable, and travel adapter when needed
- Lens caps, hood, cleaning cloth, and hand-squeezed blower
- Filters, microphone, flash, remote, or tripod only when the shoot requires them
- Rain cover, waterproof liner, or dry bag for wet conditions
- Contact card, serial-number record, and a simple backup plan for images
Pro Tip: After each trip, note which items you used and which stayed in the bag. That record makes the next packing list lighter and more accurate.
Choosing the Right Lenses
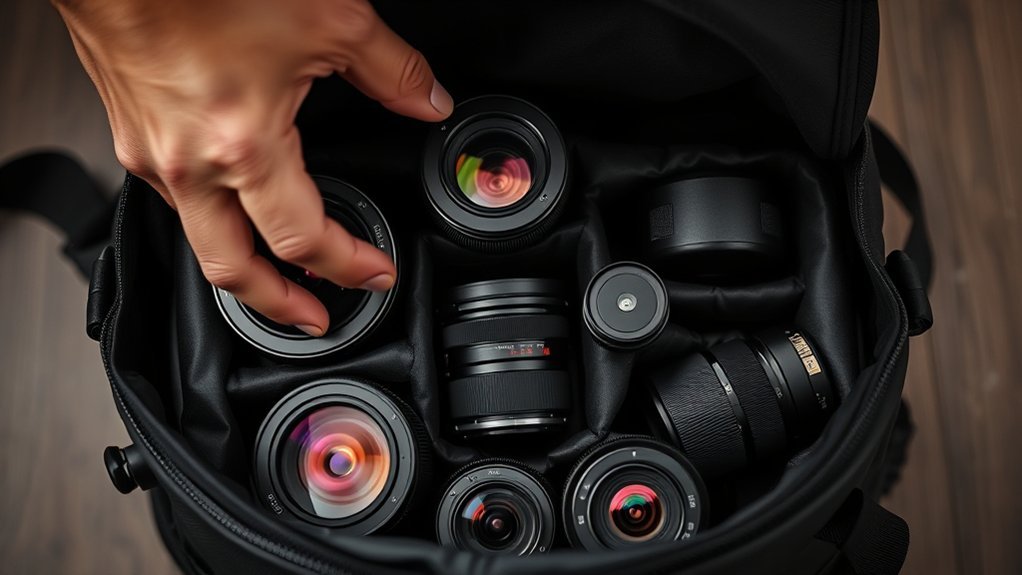
A versatile zoom can replace several lenses when low weight and quick lens changes matter. For compatible Sony E-mount cameras, examples include the Sony FE 20-70mm F4 G and the Sony FE 24-105mm F4 G OSS. The first reaches wider for interiors and landscapes, while the second extends farther into short-telephoto range. The Tamron 17-50mm F/4 Di III VXD is another full-frame Sony E-mount option that covers ultra-wide through standard focal lengths.
Those models are examples, not universal recommendations. Confirm the lens mount, sensor format, weight, stabilization needs, filter size, and minimum focus distance before choosing a lens. A 16-35mm-class zoom can be useful for architecture and broad landscapes, while a standard zoom often works better as a one-lens travel kit. Wildlife and field sports usually require a longer telephoto lens.
Quality matters, but the best travel lens is the one that covers your intended shots without forcing you to carry unused glass. Consider whether a fast prime adds enough low-light or portrait value to justify its space. Pack a specialty lens only when the itinerary includes a clear use for it.
Organizing Your Camera Bodies and Accessories
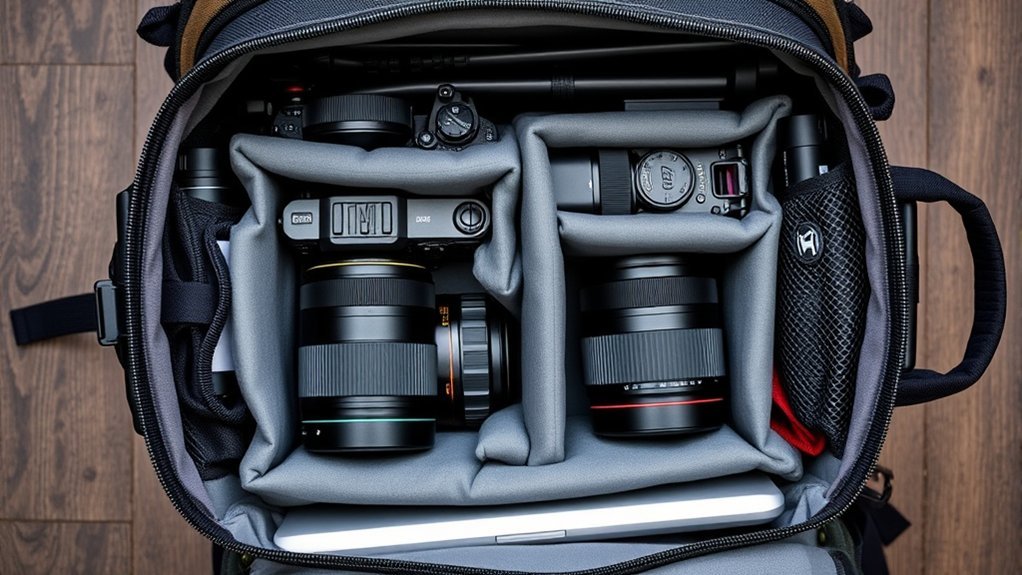
Use firm, padded dividers to create a snug compartment for every fragile item. The bag should prevent movement without pressing hard on buttons, screens, lens barrels, or mounts. Keep lens and body caps installed on separated equipment, tuck loose straps away, and switch the camera off before packing it.
Build a Protected Camera Core
Place camera bodies and larger lenses in the bag’s padded core. An assembled camera and lens can travel safely when the compartment supports both pieces and does not place leverage on the lens mount. If the combination is long, heavy, or loosely supported, separate the lens and body and cap both ends.
Remove grips, cages, large brackets, and other add-ons only when you will not use them. A stock camera body often packs more efficiently, but professional video or event work may justify keeping a tested rig partly assembled.
Organize Small Accessories
Keep small items from becoming loose hazards. Put batteries in individual cases or sleeves, memory cards in a card wallet, filters in padded cases, and cables in a small pouch. Store cleaning liquid, drinks, and toiletries outside the camera compartment so a leak cannot soak the equipment.
| Item | Best Location | Packing Note |
|---|---|---|
| Camera body | Padded center compartment | Protect the screen, controls, and lens mount |
| Extra lens | Snug divider slot near the body | Install both caps and prevent barrel movement |
| Batteries | Protective case in an accessible pocket | Cover terminals and separate charged from depleted batteries |
| Memory cards | Card wallet in a zippered pocket | Keep used cards separate from blank cards |
| Tripod or monopod | Inside the bag or secured at two exterior points | Do not let it swing, snag, or unbalance the pack |
How to Pack Camera Gear Step by Step
- Empty and inspect the backpack. Remove grit, check zippers and straps, and set the padded dividers for your current kit rather than the last trip.
- Cap and power down the equipment. Install lens and body caps where needed, turn cameras off, and secure loose straps or cables.
- Build the padded center. Place camera bodies and heavier lenses in supported compartments near the middle of the bag and close to your back.
- Add smaller protected items. Put batteries, cards, filters, and cables in their own cases or pouches.
- Create a quick-access zone. Reserve an upper, side, or rear-access compartment for the camera, lens, cloth, or battery you will use first.
- Secure long items. Fasten a tripod at two points or place it inside the pack. Confirm that it does not pull the bag to one side.
- Add weather protection. Pack the rain cover, waterproof liner, and a clean resealable bag where you can reach them before the weather changes.
- Test the load. Close every zipper, lift and gently move the pack, then adjust dividers if anything shifts, knocks, or presses against a fragile surface.
Managing Space and Weight Effectively
There is no single body-weight percentage that fits every adult, camera kit, route, or backpack. Instead of treating 10–15% of body weight as a universal target, use the bag manufacturer’s fit guidance, your airline’s limits, and your own comfort. Stop and repack if the load causes numbness, sharp pain, poor balance, or a strong backward pull.
Balance the Load
Keep dense items such as camera bodies and large lenses close to your back and near the bag’s vertical center. Place lighter items farther outward and use both sides evenly. Tighten shoulder straps enough to stabilize the bag, then use the sternum strap and a properly positioned waist belt when the backpack includes them.
Do not pack every compartment simply because space remains. A little open space makes it easier to change the layout, add a layer, or store a lens after a quick swap. It also reduces pressure on zippers and dividers.
Secure a Tripod Without Unbalancing the Bag
A compact tripod can go inside the backpack if it is clean and separated from the camera gear. When carried outside, attach it at both the top and bottom. A single loose strap allows the tripod to swing and can make the bag feel heavier. Center mounting usually balances better than loading one side, but use the attachment system designed for your bag.
Note: Airline carry-on dimensions and weight limits vary. Measure and weigh the loaded backpack before leaving home, and check the operating carrier’s current rules.
Avoiding Overpacking and Planning Backup Essentials
The best backup is one that protects the assignment from a likely failure. Extra batteries and memory cards are usually more valuable than a third lens with no planned purpose. For video, a spare microphone cable or compact backup microphone may be critical. For paid work, a second body may be justified. For casual travel, it may only add weight.
Create a written packing checklist from the itinerary, then challenge every “just in case” item. Ask what failure it covers, how likely that failure is, and whether another item already solves the same problem. This keeps essential redundancy without turning the backpack into storage for unused equipment.
Protect Images and Identify Gear
- Use dual-card recording when your camera supports it and the shoot is important.
- Back up images to a laptop, portable drive, or secure cloud service when practical.
- Keep a full memory card separate from the camera so one loss does not remove both copies.
- Record serial numbers and photograph the equipment before travel.
- Place contact information inside the bag rather than advertising valuable gear on the outside.
- Use lockable zipper pulls when available, but never treat a zipper lock as a substitute for keeping the bag with you.
Air Travel With Camera Gear
The Transportation Security Administration allows digital cameras in carry-on and checked baggage, but fragile and valuable camera equipment is usually safer in your carry-on when it fits the airline’s size and weight limits. Keep the bag organized so security staff can inspect it without loose batteries or small accessories spilling out.
Under current Federal Aviation Administration guidance, spare lithium batteries and power banks must travel in carry-on baggage only. Protect their terminals from short circuits with retail packaging, tape, a battery case, a sleeve, or a snug individual bag. Most consumer camera batteries are within the 100 Wh limit. Batteries from 101–160 Wh require airline approval, and no more than two spares in that larger range are allowed.
Spare lithium batteries and power banks belong in carry-on baggage, with their terminals protected from short circuit.
Warning: If your carry-on is gate-checked, remove spare lithium batteries and power banks first. Do not travel with a damaged, swollen, leaking, or recalled battery.
TSA lists tripods as permitted in carry-on and checked bags, but the final checkpoint decision rests with the TSA officer, and the airline may apply separate size rules. If you use film, keep undeveloped film and cameras containing film in your carry-on and follow TSA’s film-screening guidance.
Enhancing Quick Access to Your Gear
Quick access works best when it is planned around a shooting scenario. Put the camera and lens you expect to use first near the bag’s intended access panel. Keep a clean cloth, spare battery, and memory-card wallet in the same predictable pockets every time.
- Organize by use: Separate the active shooting kit from chargers, backup items, and equipment needed only at the hotel.
- Use visible zipper pulls: Large or textured pulls are easier to find with gloves or in low light.
- Choose the safest access style: Side access is fast, while rear access can add security in crowded places. Close the panel fully before moving.
- Limit loose pockets: Too many unassigned pockets make small items harder to find. Give each pocket one clear job.
- Support assembled gear: Pair a lens with a camera body only when the compartment supports the full combination without stressing the mount.
Practice opening the bag and changing a battery or lens at home. A simple dry run shows whether the layout is truly quick or only looks organized.
Preparing for Different Weather Conditions and Environments
Weather-resistant equipment still needs protection. Some manufacturers state clearly that dust- and moisture-resistant construction is not fully waterproof. Use a fitted rain cover or waterproof liner, close every access panel, and avoid changing lenses during heavy rain, blowing sand, or snow.
| Condition | Packing and Handling Tips |
|---|---|
| Rain or high moisture | Use a rain cover plus a waterproof liner or dry bag. Keep a dry microfiber cloth accessible, and store liquids outside the camera compartment. |
| Cold-to-warm transition | Seal the camera in a resealable bag before entering the warm area and let it reach room temperature before opening the bag. |
| Dust or blowing sand | Avoid lens changes, cover open ports, use capped lens cases, and clean the outside of the bag before opening it indoors. |
| Heat and direct sun | Keep the bag shaded, do not leave gear in a hot vehicle, and allow an overheated camera or battery to cool before use or charging. |
| Bright light | Pack the correct lens hood and, when the shooting plan calls for it, a polarizing or neutral-density filter in a protective case. |
Before setting down the backpack, check for water, mud, sand, insects, and unstable ground. After a wet shoot, wipe the exterior, unpack the gear in a dry place, and let the bag and rain cover dry fully before storage. Silica gel packets can help control small amounts of moisture inside a closed bag, but they do not make a backpack waterproof and must be replaced or reactivated when saturated.
Rapid temperature changes can cause condensation inside and outside the camera. Canon’s extreme-weather guidance recommends allowing gear to warm gradually and using a plastic bag when moving directly between temperature zones.
Cleaning and Testing Before Packing
Clean only what needs cleaning. Start with a hand-squeezed blower to remove loose dust from lenses, caps, and the camera exterior. Then use a clean microfiber lens cloth for fingerprints or smudges. Follow the camera manual before exposing or cleaning the image sensor.
Use the camera’s built-in sensor-cleaning function first when available. If the manual permits blower cleaning, hold the camera as directed and use only a clean hand blower. Canon warns against canned or pressurized air for sensor cleaning because the force or propellant can damage or contaminate the sensor. Seek qualified service for stubborn spots or smears.
Charge the batteries, confirm the charger works, insert each memory card, take test photos, and verify that files can be read. Back up existing images before formatting a card. Finally, inspect tripod locks, quick-release plates, straps, zipper pulls, and rain covers.
Note: Do not use a sensor swab, cleaning fluid, or other wet-cleaning method unless it is approved for your camera and you know the correct procedure. Manufacturer service is safer when you are uncertain.
Frequently Asked Questions
How do I clean my camera gear before packing?
Use a hand-squeezed blower to remove loose dust, then wipe lens glass with a clean microfiber lens cloth. Run the camera’s built-in sensor-cleaning cycle when available. Never use canned or pressurized air on the sensor, and use professional service for stubborn contamination.
Can I pack a tripod in my backpack?
Yes. Put a compact tripod inside the bag or secure it at two exterior attachment points so it cannot swing. TSA permits tripods in carry-on and checked bags, but the final checkpoint decision and the airline’s size limits still apply.
What is the best way to protect camera gear from moisture?
Use a fitted rain cover and a waterproof liner or dry bag, keep liquids outside the camera compartment, and dry the bag after use. For cold-to-warm transitions, seal the camera in a resealable bag and let it reach the new temperature before opening it.
Should I remove batteries when packing a camera?
Not for ordinary short-term transport when the camera is switched off and protected from accidental activation. For air travel, spare lithium batteries and power banks must remain in carry-on baggage with protected terminals. Follow the camera manual for long-term storage.
How can I label camera gear for easy identification?
Use discreet color dots or numbered tags on caps, batteries, pouches, and chargers. Put contact information inside the bag, keep a serial-number record, and photograph the kit before travel. Avoid large exterior labels that advertise expensive equipment.
Should camera gear go in checked luggage?
Carry delicate and valuable camera gear with you when possible and when it meets airline limits. If an item must be checked, use a protective hard case and remove all spare lithium batteries and power banks for carry-on transport.
Can I leave a lens attached to the camera in the backpack?
Yes, when the padded compartment supports the camera and lens as one unit and prevents movement. Separate a long or heavy lens if the bag leaves it unsupported or places leverage on the lens mount.
Conclusion
A well-packed camera backpack should feel balanced, open predictably, and protect every fragile surface. Choose gear for the shots you expect, support bodies and lenses with padded dividers, keep batteries and cards organized, and prepare for rain, dust, temperature changes, and airline rules. When every item earns its place, you can move more comfortably and spend less time searching for gear when the photograph appears.
Sources
- Federal Aviation Administration: PackSafe — Lithium Batteries — carry-on, watt-hour, terminal-protection, and damaged-battery rules.
- Transportation Security Administration: Digital Cameras — camera screening and baggage eligibility.
- Transportation Security Administration: Tripods — carry-on and checked-bag screening guidance.
- Sony: FE 20-70mm F4 G — official focal-range and product information.
- Sony: FE 24-105mm F4 G OSS — official focal-range, stabilization, and compatibility information.
- Tamron: 17-50mm F/4 Di III VXD Specifications — official mount, dimensions, weight, and focal-range details.