
Last Updated on September 10, 2026 by Daniel Globe
Making a DIY travel pillow is a manageable beginner sewing project when you use a clear pattern, leave enough room for turning, and choose a filling that matches your preferred firmness. The most important details are cutting two truly matching pieces, sewing a smooth curved seam, clipping the seam allowance correctly, and testing the fit before you permanently close the pillow.
Quick Answer
Cut two matching U-shaped fabric pieces, sew them with the right sides together and leave a 4- to 5-inch opening. Clip the curved seam allowance, turn and press the pillow, add filling in small amounts, test the firmness, and close the opening with a ladder stitch.
Key Takeaways
- Use a tested neck-pillow pattern or trace a pillow that already fits you.
- A 3/8-inch seam allowance and a 4- to 5-inch turning opening work well for many basic patterns.
- Clip curved seam allowances carefully without cutting through the stitching.
- Choose filling based on firmness, weight, washability, noise, and adjustability.
- Test the pillow around your neck before permanently closing the opening.
At a Glance
| Time Required | About 45 to 90 minutes, depending on your sewing experience and closure method |
| Difficulty | Beginner |
| Tools Needed | Pattern, fabric scissors, pins or clips, sewing machine or hand needle, thread, iron, and a blunt turning tool |
| Cost | Low to moderate, depending on the fabric and filling you choose; fabric remnants can reduce the cost |
Disclosure: As an Amazon Associate I earn from qualifying purchases. Some links on this page are affiliate links, at no extra cost to you.
Gather What You Need for Your DIY Travel Pillow
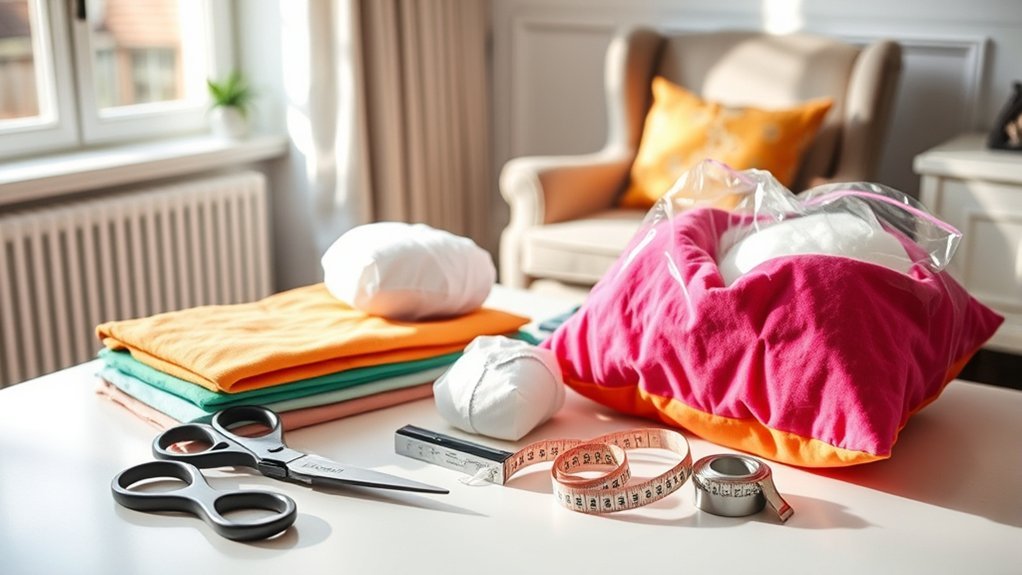
You need only basic sewing supplies, but choosing compatible materials now will make the finished pillow easier to use and clean.
- Fabric: About 1/2 yard is enough for many adult travel-pillow patterns. Cotton woven fabric is easy for beginners. Fleece feels soft and hides minor sewing imperfections, while plush or minky fabric can slip and may have a directional nap.
- Pattern: Use a printed neck-pillow pattern, trace a travel pillow that already fits you, or draw one half of a symmetrical U shape on folded paper. The Huntsman Cancer Institute neck-pillow pattern provides a real adult and child template with construction directions.
- Filling: Polyester fiberfill is the easiest beginner option. Shredded memory foam, buckwheat hulls, and down-alternative fill have different weight, firmness, and cleaning requirements.
- Thread: Choose an all-purpose thread that matches the fabric.
- Cutting tools: Use sharp fabric scissors or a rotary cutter with a cutting mat.
- Sewing tools: Gather straight pins or sewing clips, a sewing machine or hand-sewing needle, and a separate hand needle for the final closure.
- Finishing tools: Keep an iron, ironing surface, and blunt turning tool nearby.
- Optional items: Add a zipper, snap, carry loop, removable cover, or zippered inner liner if those features suit your travel style.
Warning: Keep scissors, rotary cutters, pins, hot irons, and moving sewing-machine needles away from children. Remove each pin before it reaches the machine needle because sewing over pins can damage the needle or send broken pieces outward.
Choose a Pattern and Check the Fit
A travel pillow pattern should fit around the back and sides of your neck without pressing tightly against your throat. Printed patterns are convenient, but you can also trace a pillow that already feels comfortable.
Using a Printed Pattern
- Print the pattern at 100% or “actual size.” Do not select “fit to page” unless the pattern instructions tell you to do so.
- Check any printed measurement square or scale line before cutting the paper.
- Join multi-page pattern sections carefully and tape them without leaving gaps.
- Confirm whether the seam allowance is included. The instructions below use a 3/8-inch allowance unless your pattern states otherwise.
Tracing an Existing Pillow
Place a travel pillow that fits you on a large sheet of paper and trace around it. Smooth the curve without compressing the pillow. Add a 3/8-inch seam allowance around the traced outline, mark the center line, and cut out the paper pattern.
Making a Symmetrical Paper Pattern
Fold a large sheet of paper in half and draw one side of the U-shaped pillow. Keep the inner curve wide enough for your neck and round the outer curve smoothly. Cut through both paper layers, unfold the pattern, and hold it around your neck before using it on fabric.
Pro Tip: Make a quick test version from inexpensive fabric before cutting costly fleece, velvet, or printed material. You can adjust the inner curve or overall width after checking the test fit.
Preparing Fabric for Your DIY Travel Pillow
Prepare the fabric before cutting so the finished pillow keeps its shape and remains easier to clean.
- Check the care instructions. Choose a fabric that can be cleaned in a way that also suits your filling and thread.
- Prewash washable fabric. Wash and dry it using the method you expect to use later. This helps reveal shrinkage or color bleeding before you sew.
- Press the fabric. Use the setting recommended for the fabric and test a scrap first.
- Identify the right side. The right side is the surface that will face outward on the finished pillow.
- Check the grain or nap. If you use fleece, velvet, minky, or another directional fabric, arrange both pillow pieces so the pile runs in the same direction.
- Layer the fabric. Place two fabric layers together as directed by your pattern. For most full patterns, this lets you cut both matching pillow panels at the same time.
- Pin or weight the pattern. Keep the paper flat so it cannot shift while you cut.
- Cut slowly. Use long, smooth cuts and avoid lifting the fabric from the table.
- Mark the opening. Mark a 4- to 5-inch section along the back outer curve for turning and stuffing.
Note: Some patterns are placed on a fabric fold, while others require two separate full pieces. Follow the pattern markings instead of assuming every neck-pillow template is cut the same way.
Step-by-Step Sewing Instructions for Your Pillow
1. Place the Pieces Right Sides Together
Align the two fabric panels with their right sides facing each other. Match the inner and outer curves, then pin or clip around the edge. Place pins at right angles to the raw edge so you can remove them easily while sewing.
2. Set Up the Sewing Machine
Install a needle suitable for your fabric and thread the machine with all-purpose thread. A straight stitch around 2.5 millimeters works for many woven fabrics. Slightly longer stitches may feed thick fleece or plush fabric more smoothly, but test the setting on a scrap first.
3. Sew the Curved Seam
Start at one marked end of the turning opening. Backstitch for several stitches, then sew around the pillow with a consistent 3/8-inch seam allowance or the allowance specified by your pattern.
Sew slowly around the inner curve. Stop with the needle down when you need to reposition the fabric. Remove pins before they reach the presser foot. Stop at the second opening mark and backstitch again, leaving the opening unsewn.
| Step | Action | Key Detail |
|---|---|---|
| 1 | Cut the fabric | Create two matching pieces with the same grain or nap direction |
| 2 | Pin and sew | Use a consistent seam allowance and leave a 4- to 5-inch opening |
| 3 | Clip the curves | Cut close to the seam without cutting the stitches |
| 4 | Turn and press | Use a blunt tool and a fabric-safe iron setting |
| 5 | Stuff and close | Test the firmness before sewing the opening shut |
4. Clip and Notch the Curves
Curved seam allowances need room to spread or compress when the pillow is turned. Make small straight clips along the concave inner curve. Remove small triangular notches from bulky convex areas if needed. Keep every cut short of the stitching line.
Warning: Do not cut through the seam. If a clip reaches the stitches, reinforce that area before turning the pillow.
Best Practices for Turning and Pressing Your Travel Pillow
Turn the Pillow Carefully
Reach through the opening and pull the fabric right side out a little at a time. Do not tug hard on one point because that can strain the backstitched ends of the opening.
Run your fingers around the inner and outer curves. Use a blunt turning tool, chopstick, or capped pen to ease out stubborn areas. Do not push a sharp tool directly against the seam.
Press Without Damaging the Fabric
Check the fabric’s care information and test the iron on a scrap. Cotton may tolerate more heat than fleece, polyester, minky, or other synthetic fabrics. Synthetic pile fabrics can flatten, shine, melt, or distort under excessive heat.
Press by lifting and lowering the iron rather than sliding it forcefully back and forth. A press cloth can protect delicate surfaces. Shape the curved seam with your fingers and press only as much as the fabric safely allows.
Prepare the Turning Opening
Fold the raw edges of the opening inward so they follow the sewn seam line. Press or finger-press the folds. This creates a clean edge for the final ladder stitch.
Choosing the Right Stuffing for Your Pillow
The best filling depends on how firm, light, quiet, washable, and adjustable you want the pillow to be. No single filling provides the best comfort for everyone.
| Filling | Advantages | Tradeoffs and Care |
|---|---|---|
| Polyester fiberfill | Light, inexpensive, easy to add or remove, and beginner-friendly | Can flatten, clump, or shift during washing; follow the exact product label |
| Shredded memory foam | Dense, moldable, and more supportive than loose fiberfill for some users | Heavier and harder to distribute evenly; keep the insert dry unless its manufacturer says it is washable |
| Solid memory foam | Keeps a consistent molded shape | Requires a fitted removable cover rather than a small stuffing opening; most foam inserts should not be submerged |
| Buckwheat hulls | Firm, adjustable, and able to shift into a custom shape | Heavy and noisy; place the hulls in a tightly woven zippered liner and keep them dry |
| Down or down-alternative fill | Soft, light, and compressible | Provides less structure and may need frequent fluffing; check allergy and care information |
Rice, dried beans, and similar food fillings are not ideal for a regular travel pillow. They are heavy, cannot be washed with the cover, can absorb moisture, and may develop odor or attract pests during storage.
Note: A filling labeled washable does not automatically make the entire pillow washable. The fabric, thread, zipper, trim, and every other component must also tolerate the same cleaning method.
Stuff and Test the Pillow
- Pull polyester fiberfill into small, loose tufts instead of inserting large compact lumps.
- Fill the ends of the U shape first, then work toward the center.
- Massage the outside of the pillow to distribute the filling evenly.
- Add filling gradually. Overstuffing creates a rigid pillow, while too little filling allows it to collapse.
- Pin or clip the opening temporarily.
- Place the pillow around your neck while sitting upright.
- Check whether both sides feel balanced and whether the inner curve feels too tight or too loose.
- Add, remove, or redistribute filling before closing the opening.
The easiest time to correct firmness and balance is while the turning opening is still accessible.
Close Your Pillow With Final Stitches
Thread a hand-sewing needle with matching thread and knot the end. A ladder stitch, also called an invisible stitch, gives the opening a neat finish.
- Insert the needle from inside the folded edge so the knot remains hidden.
- Take a short horizontal stitch inside one folded edge.
- Move directly across the opening and take a matching stitch inside the opposite fold.
- Continue alternating sides while keeping the stitches small and even.
- Pull the thread gently every few stitches to draw the two folds together.
- Knot the thread securely when the opening is fully closed.
- Pass the needle through the pillow and bring it out a short distance away, then trim the thread so the end disappears inside.
Fluff the pillow and inspect the closing seam. If you used loose hulls, pellets, or shredded foam, confirm that the inner liner and outer seam cannot leak.
Make the Pillow Easier to Clean
A removable outer cover is the most practical choice when you expect to use the pillow often. Make a separate filled insert, then sew a fitted cover with a zipper or overlapping envelope opening.
Polyester Fiberfill Care
Check the specific fiberfill and fabric labels. Fairfield recommends spot cleaning many filled projects to reduce shifting or bunching. Some polyester-filled projects may be washed when necessary, but the filling can move and may need to be redistributed after the pillow dries completely.
Memory Foam Care
Do not assume a memory-foam insert can be washed. Tempur-Pedic advises users not to wash or submerge its foam pillows and recommends washing only the removable cover. Follow the instructions supplied with your specific foam.
Buckwheat Hull Care
Keep buckwheat hulls in a separate zippered liner. Remove the liner before washing the outer cover, and keep the hulls dry. Inspect the liner regularly for weak seams or small openings.
Drying the Pillow
Do not store or use a pillow while the fabric or filling remains damp. Moisture trapped inside can cause odor and material damage. Follow the component labels and dry the pillow completely before packing it.
Troubleshooting Common Travel Pillow Problems
The Curves Look Puckered
The seam allowance may not have enough clips, the clips may be too far from the stitching, or the stitch length may be unsuitable for the curve. Turn the pillow inside out if possible, add careful clips without cutting the seam, and press again.
The Filling Feels Lumpy
Remove some filling through the opening, separate compressed clumps into smaller tufts, and refill the ends before the center. Massage the pillow from the outside as you work.
One Side Feels Firmer
Place the pillow on a flat surface and compare both arms of the U shape. Move filling from the firmer side to the softer side before closing the seam.
The Pillow Feels Too Tight
First remove some filling from the inner curve. If the fabric shape itself is too narrow, enlarge the inner curve on the paper pattern before making another version.
The Pillow Collapses During Use
Add a small amount of filling at a time. Concentrate it in the areas that flatten first, but avoid packing the pillow so tightly that it becomes rigid.
The Closing Seam Is Visible
Make sure both raw edges are folded inward to match the original seam allowance. Use matching thread, take smaller ladder stitches, and avoid pulling so tightly that the fabric puckers.
The Fabric Was Damaged by Ironing
Heat damage is usually permanent. Test the iron on a hidden scrap before pressing the main project, use a press cloth, and lower the heat for synthetic or pile fabrics.
Warning: This homemade travel pillow is not an infant sleep or positioning product. Keep pillows and other soft bedding out of an infant’s sleep area, following current CDC safe-sleep guidance.
Enjoy Your Custom DIY Travel Pillow
Your finished pillow should feel balanced, fit comfortably around your neck, and pack without placing too much strain on the seams. Use it while riding as a passenger on planes, trains, buses, or road trips. Keep it clear of seat belts and stop using it if it restricts your movement or causes discomfort.
After each trip, inspect the closing seam and any zipper or liner. Air the pillow before storing it, and clean the cover according to the materials you selected. These small maintenance steps will help the pillow keep its shape and remain pleasant to use.
Frequently Asked Questions
What type of fabric is best for a travel pillow?
Cotton woven fabric is usually easiest for a beginner because it stays stable while cutting and sewing. Fleece is softer and forgiving but creates more bulk. Plush and minky fabrics feel comfortable but can stretch, slip, and require careful nap alignment.
How do I wash my DIY travel pillow?
Follow the care instructions for every component. A removable cover is easiest to wash. Some polyester-filled pillows may tolerate gentle washing, though the fill can shift. Do not submerge memory foam unless its manufacturer specifically says it is washable. Remove buckwheat hulls before washing the cover.
Can I use a sewing machine for this project?
Yes. A sewing machine makes the curved seam faster and more consistent. Sew slowly, keep the seam allowance even, stop with the needle down when repositioning the fabric, and remove pins before they reach the needle. You can also sew the entire pillow by hand with small backstitches.
What are alternative fillings for my travel pillow?
Options include polyester fiberfill, shredded memory foam, buckwheat hulls, down, and down-alternative fill. Compare their firmness, weight, noise, washability, and adjustability. Rice and dried beans are not recommended for a regular travel pillow because they are heavy, moisture-sensitive, and difficult to clean.
How long does it take to make a travel pillow?
Plan for about 45 to 90 minutes if you already have a pattern and materials. A beginner may need longer to print and join the pattern, test stitches, clip the curves, adjust the filling, and hand-sew the opening.
How much fabric do I need?
Many adult travel-pillow patterns can be cut from about 1/2 yard of standard-width fabric. Large patterns, directional prints, matching designs, or removable covers may require more. Arrange the paper pieces before purchasing or cutting the fabric.
How firm should a travel pillow be?
It should hold its shape without feeling rigid. Add filling gradually, temporarily pin the opening, and test the pillow while sitting upright. Remove filling if it feels too tight, or add small amounts where it collapses.
Can I make a removable washable cover?
Yes. Make the filled pillow as a separate insert, then use the same general shape to create a slightly larger cover with a zipper or overlapping envelope opening. A removable cover is especially useful with memory foam or buckwheat hulls.
Conclusion
A successful DIY travel pillow depends on a well-fitting pattern, accurate curved seams, careful clipping, and filling that matches your preferred firmness. Take time to test the pillow before closing it, and choose a removable cover when the insert cannot be washed. Once the final seam is secure, you will have a compact travel accessory made for your own comfort and style.
Sources
- Huntsman Cancer Institute Neck Pillow Pattern — pattern layout, fabric quantity, seam allowance, turning opening, stuffing, and hand closure
- Utah State University Extension: Machine Appliqué Techniques — clipping curved seam allowances and turning shaped pieces
- Utah State University Extension: Four Square Pillow — pressing seams and removing pins before sewing over them
- Fairfield World Fiberfill Care FAQ — washing, spot cleaning, bunching, and removable-cover guidance for polyester-filled projects
- Tempur-Pedic Pillow Care Guidance — care restrictions for memory-foam pillow inserts
- CDC Safe Sleep Guidance — keeping pillows and other soft bedding out of infant sleep areas
