
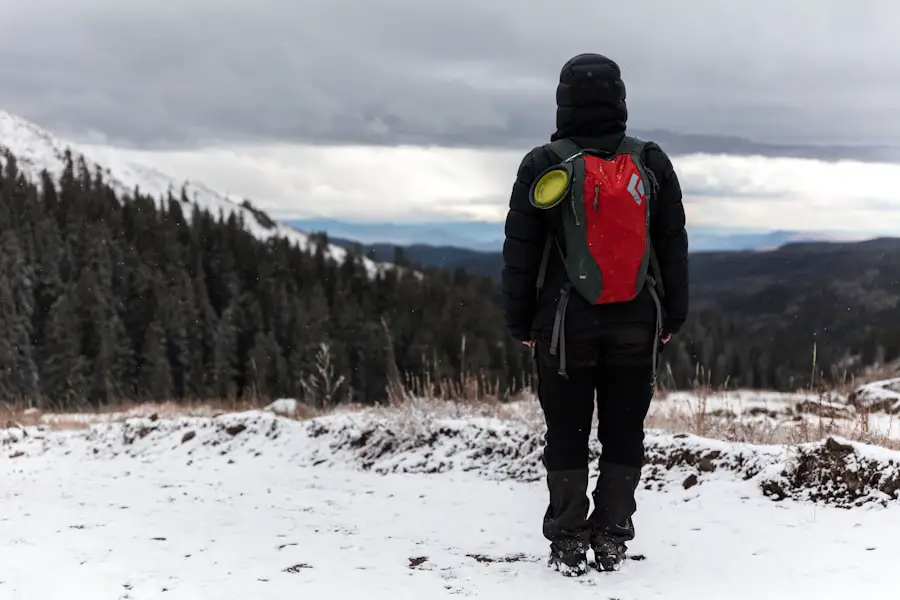
Last Updated on September 10, 2026 by Daniel Globe
Cold-weather hiking can be comfortable and rewarding when your clothing keeps you warm without trapping too much sweat. The best system combines moisture-managing base layers, adjustable insulation, protection from wind and precipitation, warm footwear, and accessories for exposed skin. Winter hiking also requires more than warm clothes: traction, navigation, emergency supplies, and awareness of frostbite and hypothermia are part of dressing and packing safely.
Quick Answer
For cold-weather hiking, wear a moisture-wicking wool or synthetic base layer, an adjustable fleece or insulated midlayer, and a wind- and water-resistant shell. Add warm socks, waterproof boots, gloves or mittens, a hat, and face protection as needed. Carry extra dry layers, traction, water, food, navigation, and emergency gear.
Key Takeaways
- Dress in adjustable layers so you can add insulation when you stop and vent or remove layers before you become sweaty.
- Choose wool or synthetic clothing instead of cotton for layers likely to become wet from snow, rain, or perspiration.
- Wear waterproof or weather-resistant winter boots with enough room for warm socks without compressing your feet.
- Mittens generally provide more warmth than gloves, while gloves provide better dexterity.
- Warm clothing is only part of winter safety. Carry traction, navigation, a headlamp, extra clothing, food, water, first aid, and emergency shelter.
How to Layer Clothing for Cold-Weather Hiking
Layering clothing is one of the most effective ways to stay comfortable in changing winter conditions. Current CDC/NIOSH cold-stress guidance recommends several loose layers rather than one tight layer. A good hiking system usually has three main parts: a base layer, an insulating layer, and an outer shell.
Products Worth Considering

100% MERINO WOOL — 18.5-micron merino wool; Itch-Free and super soft. Available in 190 GSM (lightweight) and 260 GSM (midweight)

Midweight: Womens Merino Base Layer Set Available in: Lightweight = 165 g/m², Midweight = 250 g/m², Heavyweight = 320 g/m². Merino Wool Hiking Socks ($21 Value): Package includes Midweight Merino wool base layer top, Merino Leggings 250 g/m² + Merino Wool Hiking Socks. Cool Packaging. Makes A Great Gift!
Base Layer: Manage Moisture
Your base layer sits next to your skin. Merino wool and synthetic fabrics such as polyester or polypropylene are useful because they manage moisture better than ordinary cotton. The goal is not simply to feel hot; it is to keep your skin as dry as practical while you move.
A base layer should fit close enough to move moisture away from the skin without restricting movement or circulation. On very cold days, thermal leggings can serve the same purpose beneath hiking pants.
Middle Layer: Hold Warm Air
The middle layer provides most of your adjustable insulation. Fleece jackets, synthetic insulated jackets, and down jackets can all work, but the best choice depends on temperature, precipitation, and activity level.
During a steep climb you may need little or no midlayer because your body generates considerable heat. When you stop for a break, adding an insulated jacket before you become chilled can help preserve that warmth.
Outer Layer: Block Wind and Precipitation
Your outer shell protects the insulating layers from wind, rain, sleet, and wet snow. A waterproof-breathable shell is useful in wet conditions, while a highly breathable wind-resistant layer may feel more comfortable during dry, active hikes.
Waterproof-breathable technologies such as GORE-TEX are designed to block liquid water while allowing water vapor to escape. Regardless of brand, use ventilation zippers, cuffs, or the front zipper when needed to reduce sweat buildup.
Pro Tip: Start a strenuous winter hike feeling slightly cool rather than bundled to the point of sweating. Vent or remove insulation early on climbs, then put it back on as soon as you stop or the temperature drops.
Warning: Avoid cotton as your main cold-weather layer when wet conditions are possible. Cotton absorbs moisture and dries slowly, which can leave you chilled when your activity level drops. Carry a dry spare layer in a waterproof bag.
Cold-Weather Hiking Pants and Lower-Body Layers
Your legs need the same moisture, insulation, and weather management as your upper body. For many hikes, a synthetic or merino base layer beneath breathable hiking or softshell pants provides enough warmth while moving.
Add wind pants or waterproof shell pants when the forecast calls for strong wind, wet snow, rain, or prolonged contact with snow. Fully insulated snow pants can be useful in very cold or low-activity conditions, but they may be too warm for strenuous hiking. Avoid cotton jeans in wet winter conditions because they retain moisture and dry slowly.
Insulated Waterproof Boots
Cold-weather hiking boots should match the temperature, snow depth, trail surface, and length of the trip. In snowy or wet conditions, waterproof construction helps keep outside moisture away from your socks, while insulation slows heat loss from your feet. CDC/NIOSH specifically recommends insulated, waterproof footwear for cold environments.
Fit matters just as much as insulation. Your boots should have enough room for your chosen socks and some toe movement. Packing an overly thick sock into a tight boot can compress the foot, reduce circulation, and make the system feel colder rather than warmer.
A higher boot shaft can help keep snow out, while gaiters add another barrier around the boot opening and lower leg. The outsole should provide solid winter traction, but remember that an aggressive tread does not replace a traction device when the trail becomes hard-packed or icy.
The current SOREL Caribou, for example, uses seam-sealed waterproof construction, insulation, a removable felt inner boot, and a rubber shell. That illustrates the type of construction used in heavy-snow footwear, but hikers should choose boots according to terrain, fit, expected temperature, and walking comfort rather than brand alone.
Note: There is no single boot insulation level that is right for every winter hike. Temperature, wind, circulation, activity level, socks, trip duration, and whether you are moving or standing still all affect how warm your feet feel.
Products Worth Considering
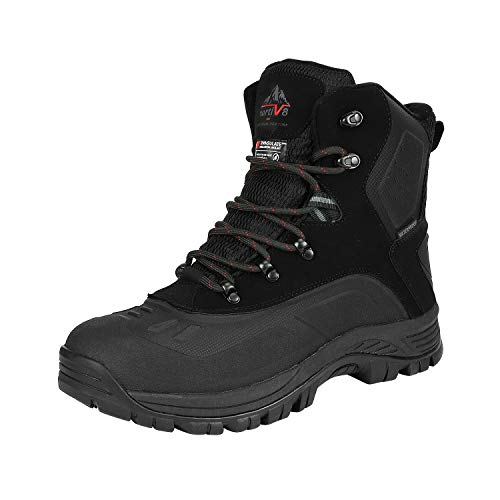
Waterproof material: Men's snow boots feature waterproof construction and windproof synthetic toe caps for anti-collision.
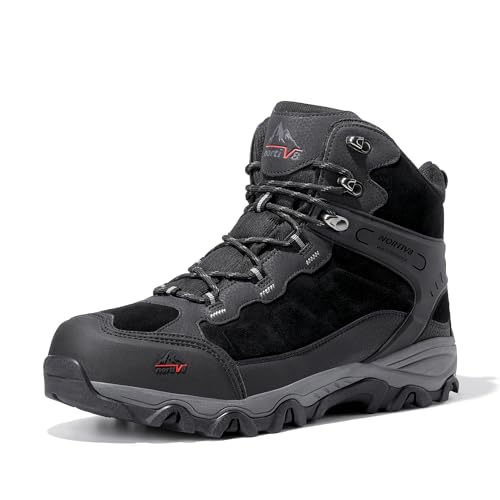
Waterproof Build: These men’s hiking boots feature a waterproof membrane construction that keeps your feet dry when trudging through any mud or water.
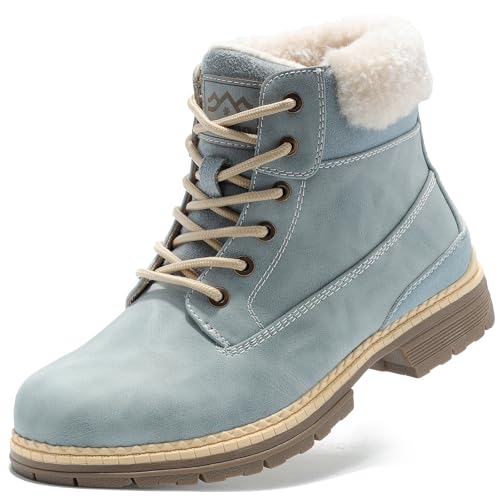
CLASSIC DESIGN: Premium synthetic leather with fashion plaid pattern fabric, classic double color lace with antique brass metal eyelet, padded collar lets this boots never out of time.
Thermal Socks
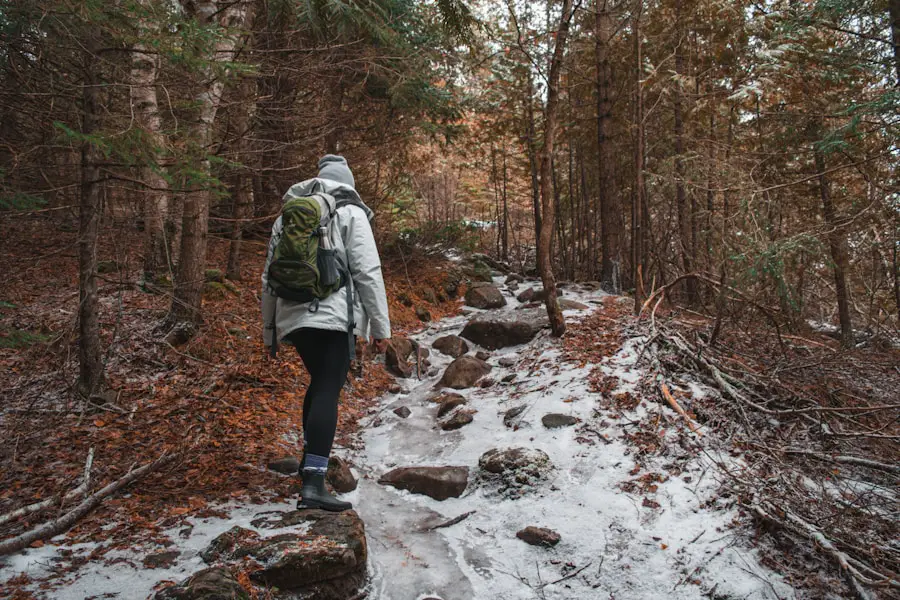
Thermal socks can make a major difference in foot comfort, but thicker is not automatically better. Merino wool and synthetic hiking socks are popular because they provide insulation while managing moisture more effectively than ordinary cotton socks.
Choose a sock thickness that works with the volume of your boot. Your toes should not feel squeezed, numb, or compressed. A medium-weight sock in a properly fitted insulated boot can be warmer than two thick socks stuffed into a boot that is too tight.
Carry at least one dry spare pair on longer winter outings. If your socks become soaked from snow, a creek crossing, or heavy perspiration, changing into dry socks can help protect your feet and restore comfort.
Gloves and Mittens
| Feature | Gloves | Mittens |
|---|---|---|
| Dexterity | Better for buckles, zippers, trekking poles, and equipment | More limited finger movement |
| Warmth | Good with appropriate insulation | Usually warmer because fingers share a larger warm air space |
| Best Use | Active hiking and tasks requiring finger control | Colder conditions, long breaks, and hikers with cold hands |
Keeping your hands warm is important for both comfort and function. Gloves allow each finger to move independently, which makes it easier to adjust packs, operate zippers, handle trekking poles, or use equipment. Mittens sacrifice some dexterity but are generally warmer; CDC cold-weather guidance specifically notes that mittens are warmer than gloves.
A useful winter system is a thin liner glove combined with an insulated glove or mitten and a weather-resistant outer shell. This allows you to remove the bulky layer briefly without exposing bare skin.
Whatever style you choose, avoid a fit so tight that it compresses your fingers. Adjustable cuffs can help keep blowing snow out, while a spare dry pair is valuable if your primary gloves become wet.
Warm Hat and Face Protection
A warm hat remains an important part of cold-weather hiking, especially because the ears and scalp may otherwise be exposed. However, the common idea that a fixed large percentage of all body heat is inherently lost through the head is misleading. Heat escapes from exposed, poorly insulated parts of the body, so covering your head is one part of keeping your entire body protected.
Choose a wool, fleece, or synthetic hat that covers your ears and fits comfortably beneath a hood when necessary. In stronger wind or very low temperatures, a balaclava, neck gaiter, or face covering can protect the cheeks, nose, chin, and neck.
Remember sun protection as well. Snow can reflect intense sunlight, so sunglasses or suitable eye protection and sunscreen remain useful even when the air temperature is below freezing. The National Park Service Ten Essentials includes sunglasses, sunscreen, and a hat under sun protection.
Insulated Water Bottle
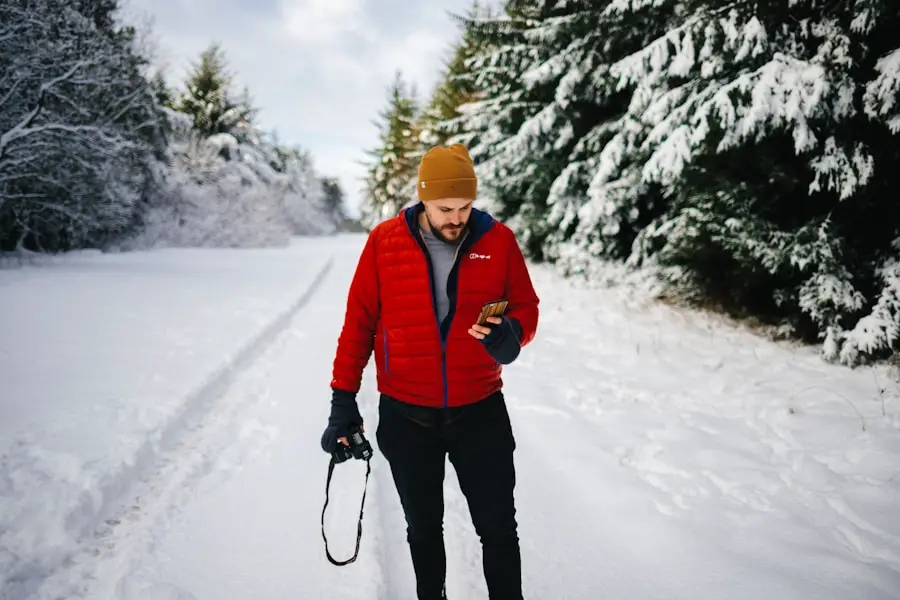
Key Features to Look For
Stainless steel vacuum-insulated bottles are useful in winter because they slow heat transfer and can help prevent liquids from cooling or freezing as quickly. Look for a dependable leak-resistant lid and an opening that is easy to use while wearing gloves.
Wide-mouth bottles can also be easier to fill and clean. In freezing weather, keep the bottle accessible rather than buried where you may forget to drink.
Popular Brands for Outdoor Enthusiasts
Brands such as Hydro Flask and YETI are well known for vacuum-insulated bottles, but the logo matters less than reliable insulation, a secure lid, suitable capacity, and ease of handling with cold hands. Check the manufacturer’s care instructions and temperature limitations for the specific bottle you use.
Stay Warm and Hydrated
Cold weather can make thirst less noticeable, but hiking still requires water. The National Park Service includes hydration among its Ten Essentials and recommends carrying enough water for the outing plus a way to treat additional water when appropriate.
A warm non-alcoholic drink can be comforting during a cold break, but it should complement rather than replace normal hydration. Do not rely on snow as an immediate drinking-water source without an appropriate plan to melt and treat it.
Hand Warmers
Hand warmers can provide extra comfort during breaks or in conditions where your hands cool quickly. Disposable chemical warmers generate heat through a controlled reaction after their packaging is opened, while rechargeable electric warmers use a battery-powered heating element.
Some rechargeable models also function as power banks, although cold temperatures can reduce battery performance. Keep essential electronics protected and do not treat a hand warmer as your only backup power source.
Hand warmers are an addition to proper gloves or mittens, not a substitute for them. Follow the manufacturer’s directions and avoid prolonged direct contact with bare or numb skin, where excessive heat may be harder to notice.
Traction, Gaiters, and Trekking Poles
Warm boots do not guarantee secure footing. Snow that has been walked on repeatedly may become hard and icy, and ordinary hiking tread may not provide enough grip.
The National Park Service winter hiking guidance recommends over-the-shoe traction devices for ice and snow. Choose the device for the conditions and terrain:
- Ice grippers or hiking traction devices: Useful on many packed-snow and icy trails.
- Snowshoes: Better for deep, soft snow where hikers would otherwise sink or “post-hole.”
- Mountaineering crampons: Intended for more demanding terrain and require appropriate footwear, technique, and judgment.
Gaiters help prevent snow from entering the tops of your boots and protect your lower legs from wet snow. Trekking poles can improve balance and provide additional points of contact on slippery or uneven terrain.
Pro Tip: Carry traction even when the trailhead looks clear. Shaded slopes, bridges, higher elevations, and packed sections can remain icy long after exposed ground has melted.
Products Worth Considering
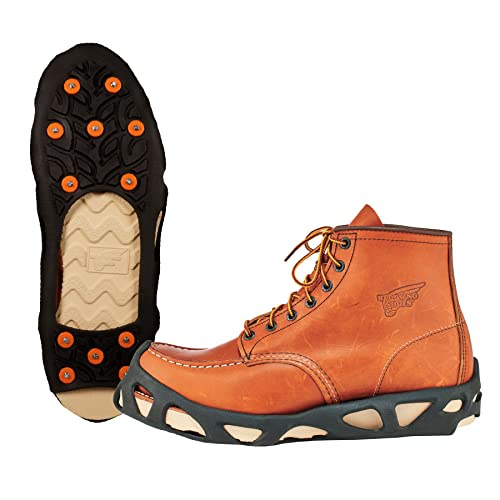
Reduce risk of falls and injury 12-rugged carbon steel cleats studs on ball and heel of foot grip slippery terrain and increase stability while walking, hiking, or running on snow and ice.
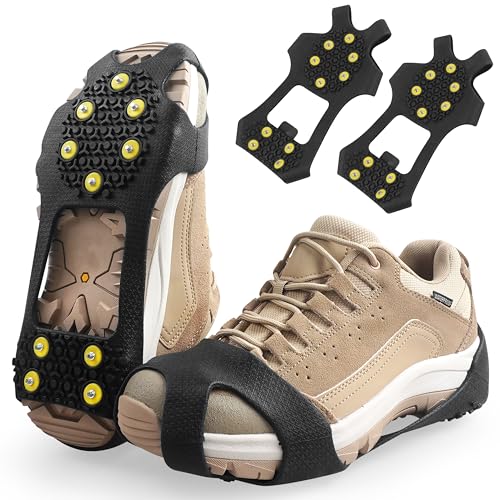
SIZE: S【Women(4-5.5)/Men(2.5-4)】,M【Women(6-8)/Men(4.5-6.5)】, L【Women(8.5-11)/Men(7-9.5)】, XL【Women(11.5-14)/Men(10-12.5)】, XXL【Women(14.5-17)/Men(13-15.5)】
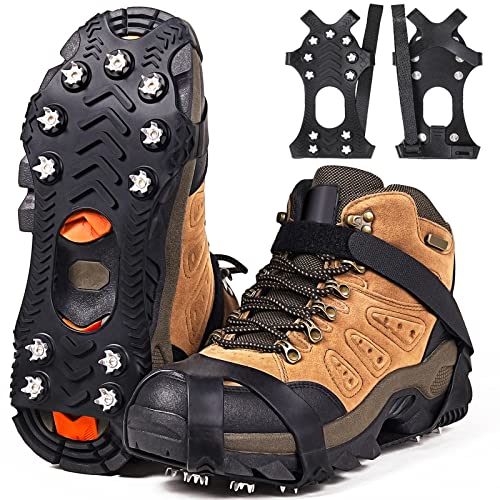
Strong Resistant Silicone: Made from stretchy thermoplastic elastomer, more durable than TPE material. The minimum side width of Crampons is 2cm and thicker than ordinary rubber, till strong performance under -49℉/-45°C. Won't tear or snap! The newly added Velcro sticks firmly to your various types of shoes boots, ensures long lasting comfort and durability.
Emergency Supplies
Cold-weather hiking requires preparation for delays, wrong turns, injuries, sudden weather changes, and early darkness. A well-stocked emergency kit should support navigation, warmth, signaling, hydration, and basic first aid rather than focusing on only one or two items.
The National Park Service recommends the Ten Essentials for outdoor trips. For a winter day hike, your pack should generally account for:
- Navigation: Map, compass, GPS, or downloaded offline mapping, plus the knowledge to use them.
- Sun protection: Sunglasses, sunscreen, and suitable clothing.
- Extra insulation: Spare warm layer, hat, gloves or mittens, socks, and weather protection.
- Illumination: A headlamp or flashlight with spare power.
- First aid: A trip-appropriate kit plus personal medication.
- Fire: A lighter or matches and suitable fire starter where fires are legal and practical.
- Repair tools: A knife or multi-tool and basic repair materials.
- Food: Extra high-energy food that can be eaten without cooking.
- Hydration: Water plus treatment capability when your route depends on natural water sources.
- Emergency shelter: A bivy, tarp, emergency blanket, or another shelter appropriate to the conditions.
A whistle or signal mirror can also help attract attention. Keep critical dry clothing protected inside a waterproof bag.
Optional items should come after the safety essentials. For example, compact binoculars for hiking can make wildlife viewing more enjoyable, but they should not displace navigation, insulation, food, water, or emergency gear. A suitable sleeping bag becomes important for planned overnight trips and may be valuable in some winter backcountry emergency systems. A universal travel adapter can be useful during a broader trip, but it belongs with lodging and travel electronics rather than your core trail-safety kit.
Check Conditions Before You Hike
Winter conditions can change much faster than your clothing can compensate for them. Check the weather forecast, wind, trail conditions, snowfall, road access, and expected daylight before leaving. Tell someone where you are going, the route you expect to take, and when you plan to return.
Do not depend exclusively on a mobile phone. Cold temperatures can shorten battery life, and remote areas may have no service. Carry an offline or physical navigation backup and a dedicated headlamp.
Wind deserves special attention because it increases heat loss from exposed skin. According to the National Weather Service wind-chill guidance, an air temperature of 5°F combined with a 30 mph wind produces a wind chill of about -19°F, a range where exposed skin can develop frostbite in roughly 30 minutes.
At a wind chill near -19°F, exposed skin can be at risk of frostbite in about 30 minutes. Cover exposed skin and use the forecast—not just the thermometer—to plan a winter hike.
If your route enters avalanche terrain, clothing and normal hiking equipment are not enough. Check the local avalanche forecast before the trip and avoid terrain you are not trained and equipped to assess. Avalanche.org emphasizes that the forecast is a starting point and that travelers control risk through terrain and travel choices.
Warning: Be willing to turn around. Increasing wind, soaking clothing, worsening ice, deep snow, navigation problems, unexpected fatigue, numb extremities, or a slower-than-planned pace are all reasons to reassess the hike rather than push toward a destination.
Recognize Hypothermia and Frostbite
Proper clothing reduces risk, but every cold-weather hiker should know the warning signs of cold injury.
Hypothermia Warning Signs
Hypothermia occurs when the body loses heat faster than it can produce it. Warning signs can include persistent shivering, exhaustion, confusion, fumbling hands, memory problems, slurred speech, and drowsiness. A person becoming confused or uncoordinated may not recognize how serious the situation has become.
Move the person into shelter, remove wet clothing, replace it with dry insulation, and seek medical assistance. CDC hypothermia guidance says a body temperature below 95°F requires immediate medical attention.
Frostbite Warning Signs
Frostbite most often affects exposed or poorly protected areas such as fingers, toes, ears, cheeks, nose, and chin. Warning signs include redness or pain at first, followed by numbness, unusually firm or waxy skin, or white to grayish-yellow discoloration.
If frostbite is suspected, get out of the cold and seek medical care. CDC advises against rubbing or massaging frostbitten tissue. If immediate medical care is unavailable and there is no hypothermia, affected tissue may be warmed in warm—not hot—water. Do not use a stove, heating pad, radiator, or other intense direct heat source on numb skin because burns can occur.
Warning: Hypothermia is a medical emergency, and frostbite can permanently damage tissue. This guide provides general outdoor-safety information and is not a substitute for professional medical evaluation or emergency care.
Frequently Asked Questions
What should I wear for hiking in cold weather?
Start with a wool or synthetic moisture-managing base layer, add a fleece or insulated midlayer, and carry a wind- and weather-resistant outer shell. Wear suitable hiking pants, warm socks, waterproof boots, gloves or mittens, a hat, and face protection when conditions require it.
What materials are best for cold-weather hiking?
Merino wool and synthetic fabrics such as polyester or polypropylene work well for base and insulating layers because they manage moisture and dry more effectively than cotton. Fleece, synthetic insulation, and down can provide warmth, while an outer shell protects against wind and precipitation.
What type of pants are suitable for hiking in cold weather?
For active hiking, synthetic or wool base-layer leggings under breathable hiking or softshell pants work well in many conditions. Add windproof or waterproof shell pants when wind, rain, wet snow, or prolonged snow contact makes them necessary. Fully insulated pants are more useful in very cold or less-active conditions.
What footwear is recommended for cold-weather hiking?
Choose boots that provide enough weather protection and insulation for the conditions while leaving room for warm hiking socks without squeezing your feet. Waterproof boots are valuable in snow and slush. Carry an appropriate traction device when packed snow or ice is possible.
What accessories should I bring for hiking in cold weather?
Bring a warm hat, gloves or mittens, neck or face protection, sunglasses, sunscreen, spare socks, extra dry clothing, a headlamp, food, water, navigation, first aid, emergency shelter, and traction appropriate to the trail. Gaiters and trekking poles are also useful in many snowy conditions.
Should I wear cotton while winter hiking?
Avoid relying on cotton for layers that may become wet. Cotton absorbs moisture and dries slowly, which can leave you chilled when your activity level drops. Wool and many synthetic fabrics are better choices for cold, wet, or snowy hiking conditions.
Do I need microspikes or other traction for winter hiking?
Carry traction whenever packed snow or ice may be present. Hiking traction devices or ice grippers work on many icy trails, while deep unconsolidated snow may require snowshoes. Technical crampons are intended for more demanding terrain and require appropriate equipment and skills.
Sources
- National Park Service — Winter Hiking Tips — winter clothing, traction, route finding, water, emergency equipment, and avalanche awareness.
- National Park Service — Ten Essentials — navigation, sun protection, insulation, illumination, first aid, food, water, and emergency shelter.
- CDC/NIOSH — Cold and Work: Types, Causes, Preparation — layering, waterproof insulated boots, spare clothing, and cold-stress prevention.
- CDC — Preventing Frostbite — frostbite symptoms and safe first-response guidance.
- National Weather Service — Wind Chill Chart — wind-chill and frostbite-risk guidance.
- Avalanche.org — Get the Forecast — avalanche-forecast and terrain-risk planning.
